Secure Private Access onboarding and set up
The Secure Private Access™ service offers a streamlined admin experience that simplifies the process of configuring Zero Trust Network Access. This enhanced feature provides a step-by-step guide to set up access for a range of apps, including SaaS apps, internal web apps, and TCP apps. The admin console allows administrators to configure device posture scans, create apps, and access policies all within a single, unified interface.
Note:
Citrix Secure Private Access is integrated with Google Chrome Enterprise Premium, which allows customers to securely access private web and SaaS applications using Google Chrome Enterprise Premium as their enterprise browser.
The high-level steps to onboard and setup Secure Private Access include the following:
- Setup Google Chrome integration.
- Create Device Posture scans.
- Add apps for your users.
- Assigns permissions for app access by creating the required access policies.
- Review the app configuration.
Important:
You can set Google Chrome as your enterprise browser. For details, see the following topics.
Access the Secure Private Access admin-guided workflow wizard
Perform the following steps to access the wizard.
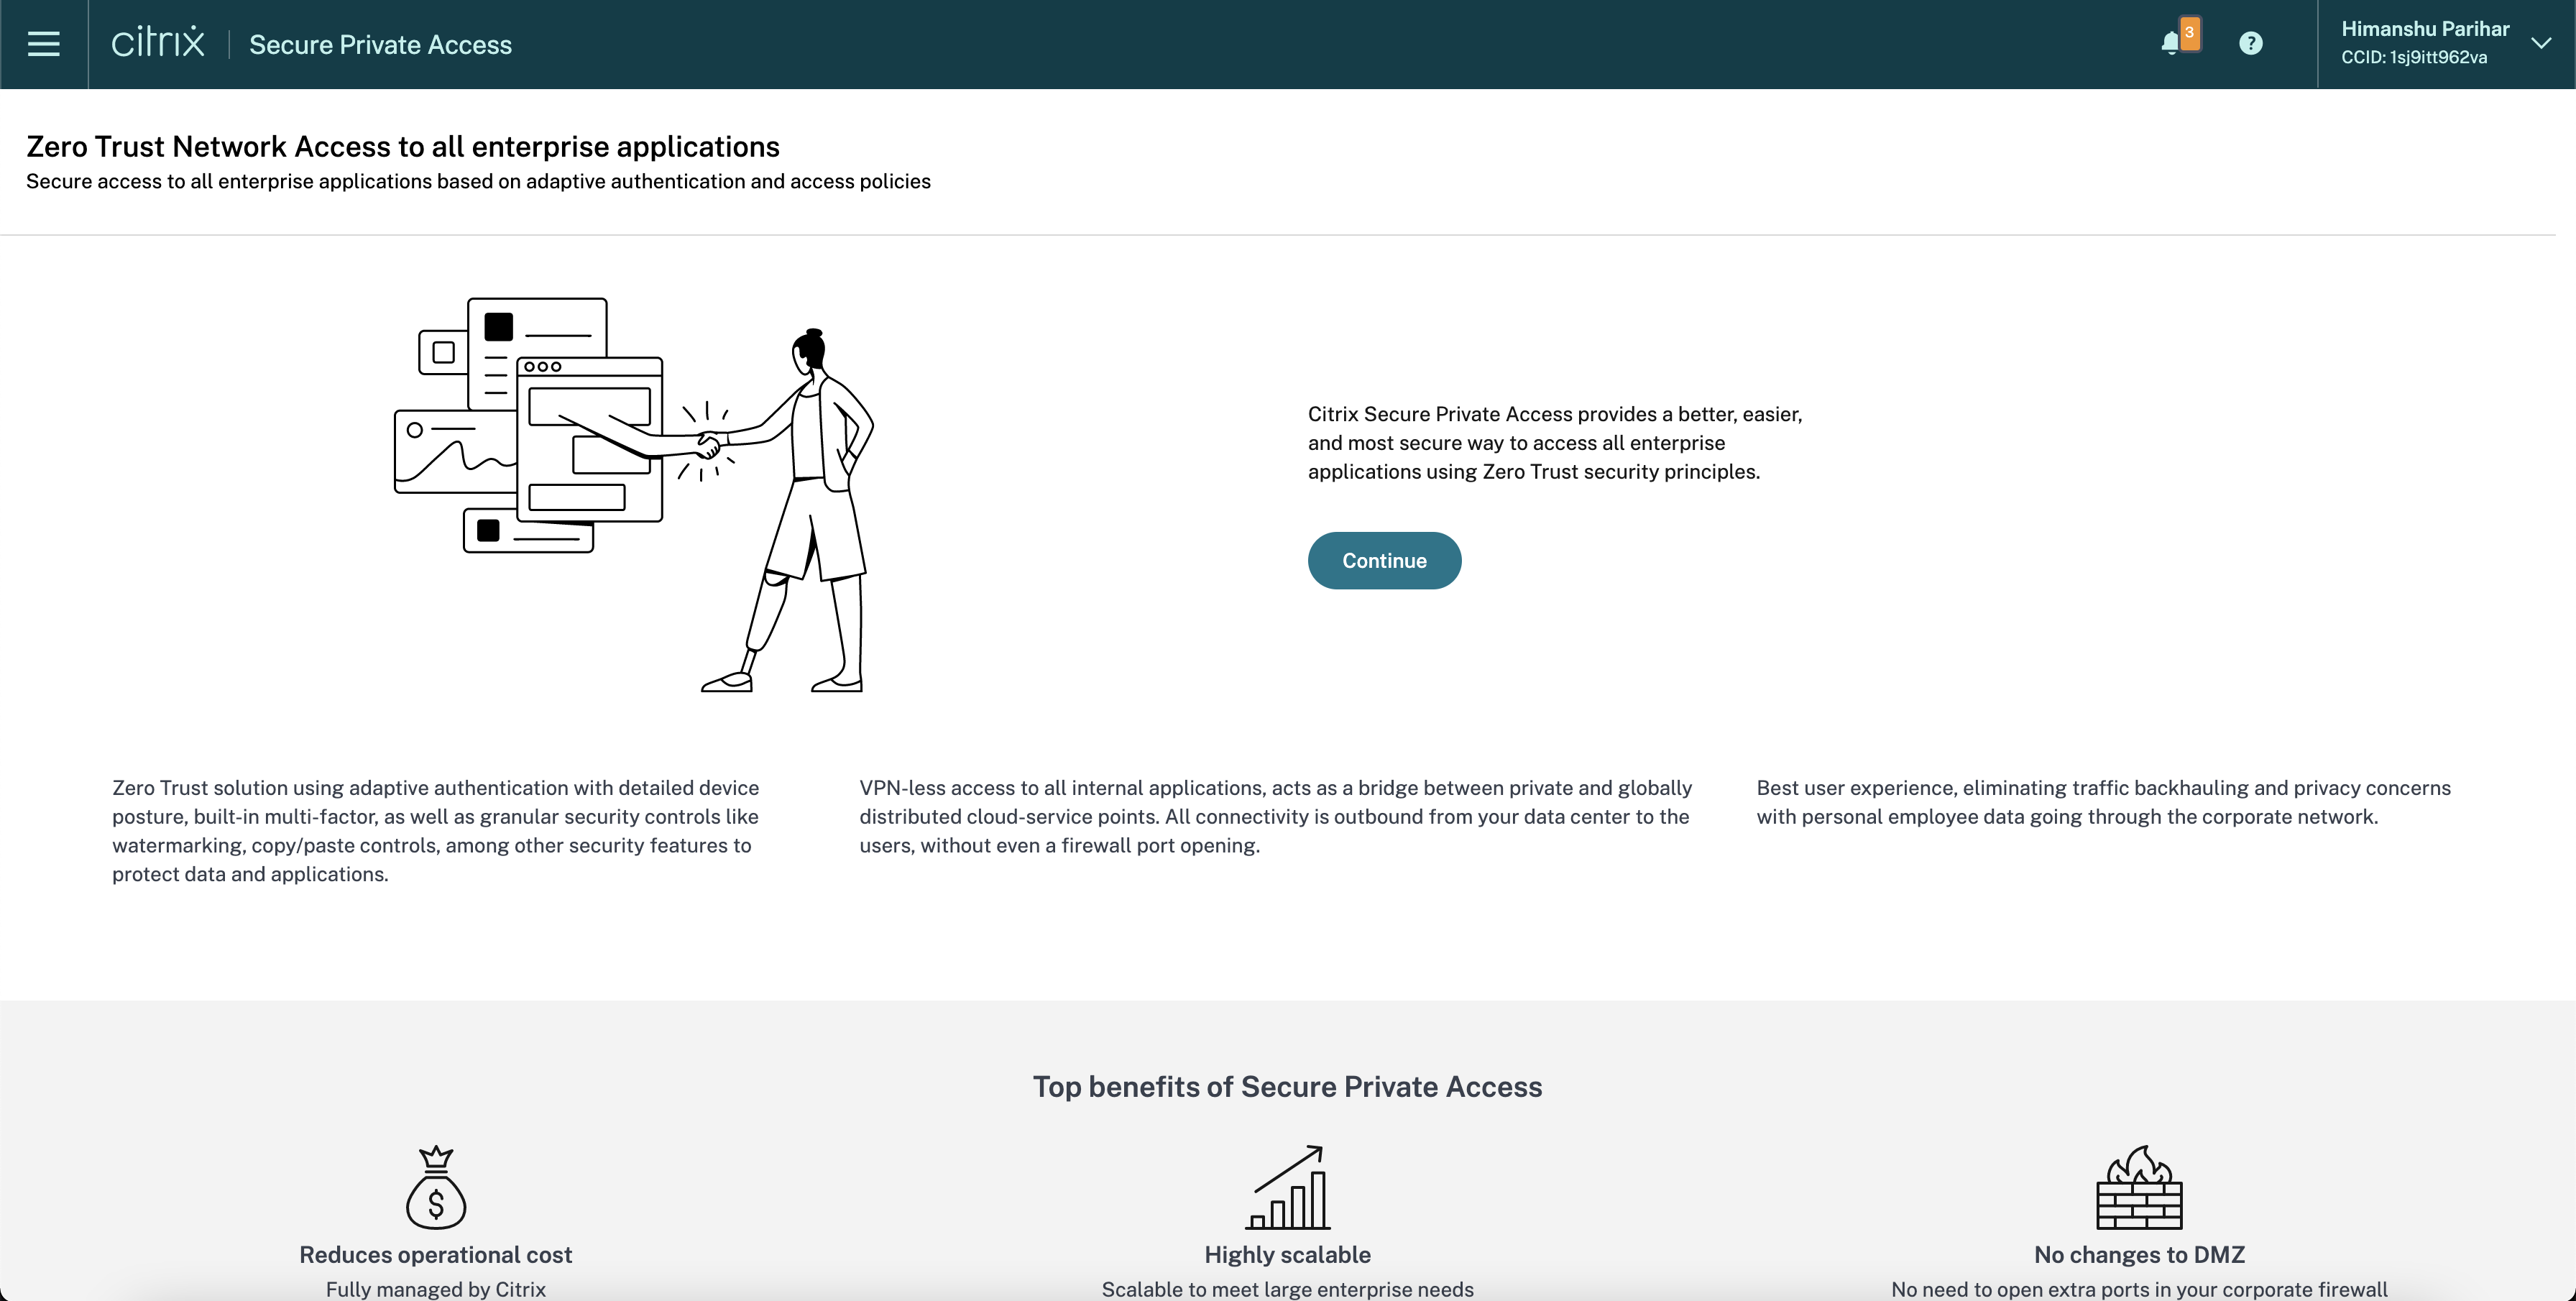
- Log in to Citrix Cloud™ and then click Secure Private Access.
- Select Setup for cloud and then click Continue.
Setup Google Chrome integration
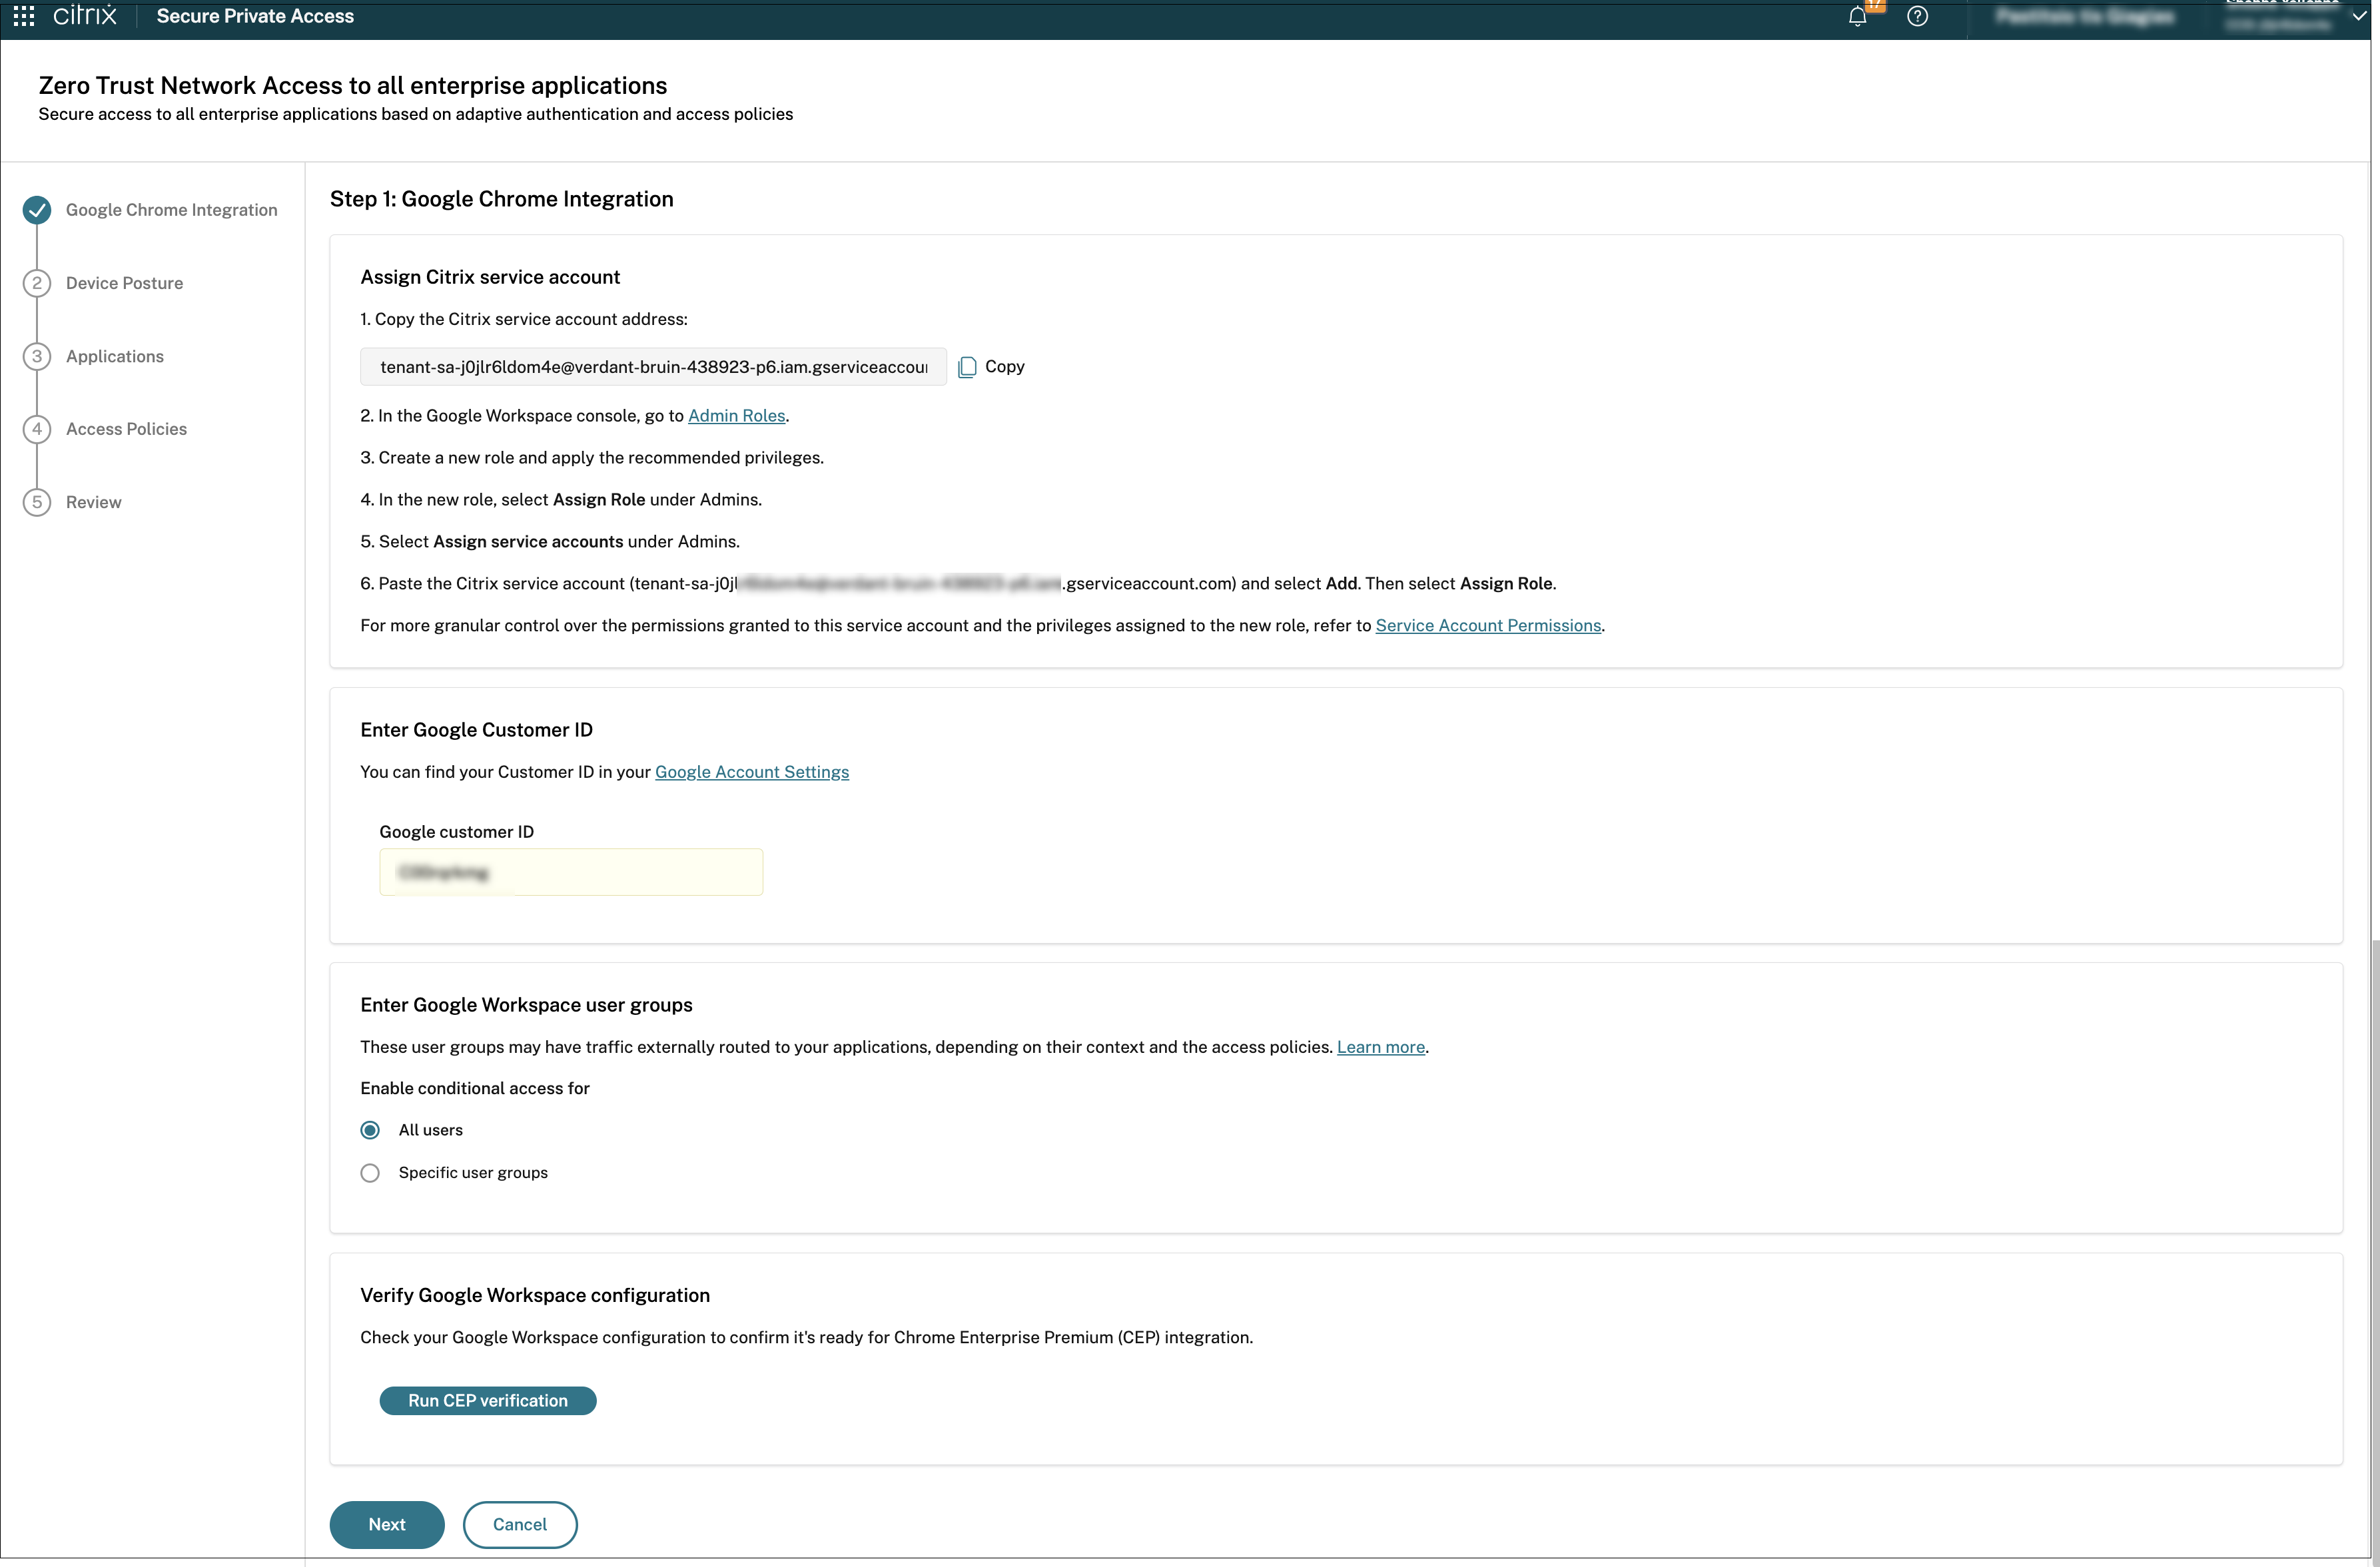
In the Google Chrome Integration page, perform the following steps:
-
Copy the autogenerated service account email and paste it into the appropriate field in the Google Admin console.
- In the Google Admin console, go to Admin Roles.
- Select the role that is created for the Secure Private Access service and apply the recommended privileges. For the list of privileges, see Admin roles and privileges.
- Under Admins, select Assign service accounts.
-
Paste the Citrix service account (
tenant-sa-<random-string>.iam.gserviceaccount.com) and select Add. Then select Assign Role.For details about roles, see About administrator roles.
- Copy the Google Customer ID that is available in Google Account Settings within the Google Admin console into the Google Customer ID field in the Google Chrome Integration page.
-
Specify the users or user groups (available in Google Admin console > Directory) to which the Google Chrome integration must be enabled.
- All users - Policies are enforced universally for all users within the Google Workspace domain.
-
Specific user groups - Policies are enforced on the specific user groups thus enabling granular control. Ensure that the user groups are formatted correctly as email addresses. For example,
marketing@company.com,it-department@company.com.
- Ensure that the Proxy Mode is set to Allow user to configure in the Google Admin console (Devices > Chrome > Settings > User & browser settings > Network > Proxy mode). Using a different proxy mode configuration can interfere with Secure Private Access application routing.
-
Click Run CEP verification to verify your Google Workspace configuration to ensure that it is ready for Chrome Enterprise Premium integration before proceeding with the next step.
- Once the CEP verification is successful, the Secure Private Access service successfully connects to the Google customer ID and a Secure Gateway is created.
- Upon successful creation of the Secure Gateway, the system displays the egress IP addresses assigned to it.
- When a user attempts to access a SaaS application, the request does not go directly to the SaaS provider. Instead, the traffic is first routed through the Secure Gateway, which functions as a partner connector. This gateway acts as an intermediary, inspecting and securing all traffic before it reaches the destination application.
-
Click Next.
Important:
- You can also update the integration details after the customer is onboarded to CEP. For details, see Update Google integration details post onboarding.
- For more details about Secure Private Access integration with Google Chrome Enterprise Premium, see Integration with Google Chrome Enterprise Premium.
Create device posture scans
Note:
Configuring device posture is optional for onboarding and can be completed later, during the post-deployment phase.
The device posture scans ensure that only compliant subscriber devices can access your Workspace services. The Device Posture checks determine if devices are compliant or non-compliant and then use this information to provide adaptive access to all types of apps and desktops.
- (Optional) Connect to any third-party solutions integrated with the Device Posture service. For details, see Third-party integration with device posture.
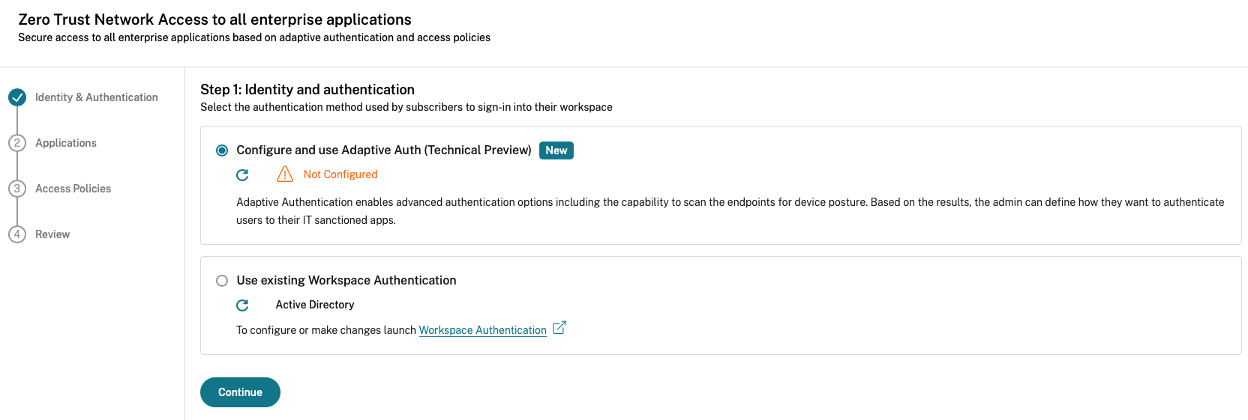
- Click Next and then click Create device policy. For details, see Configure Device Posture policies.
- Click Next.

Note:
The authentication mechanism for Secure Private Access is inherited from the identity provider that is connected in the Workspace configuration > Authentication tab.
Add and manage apps
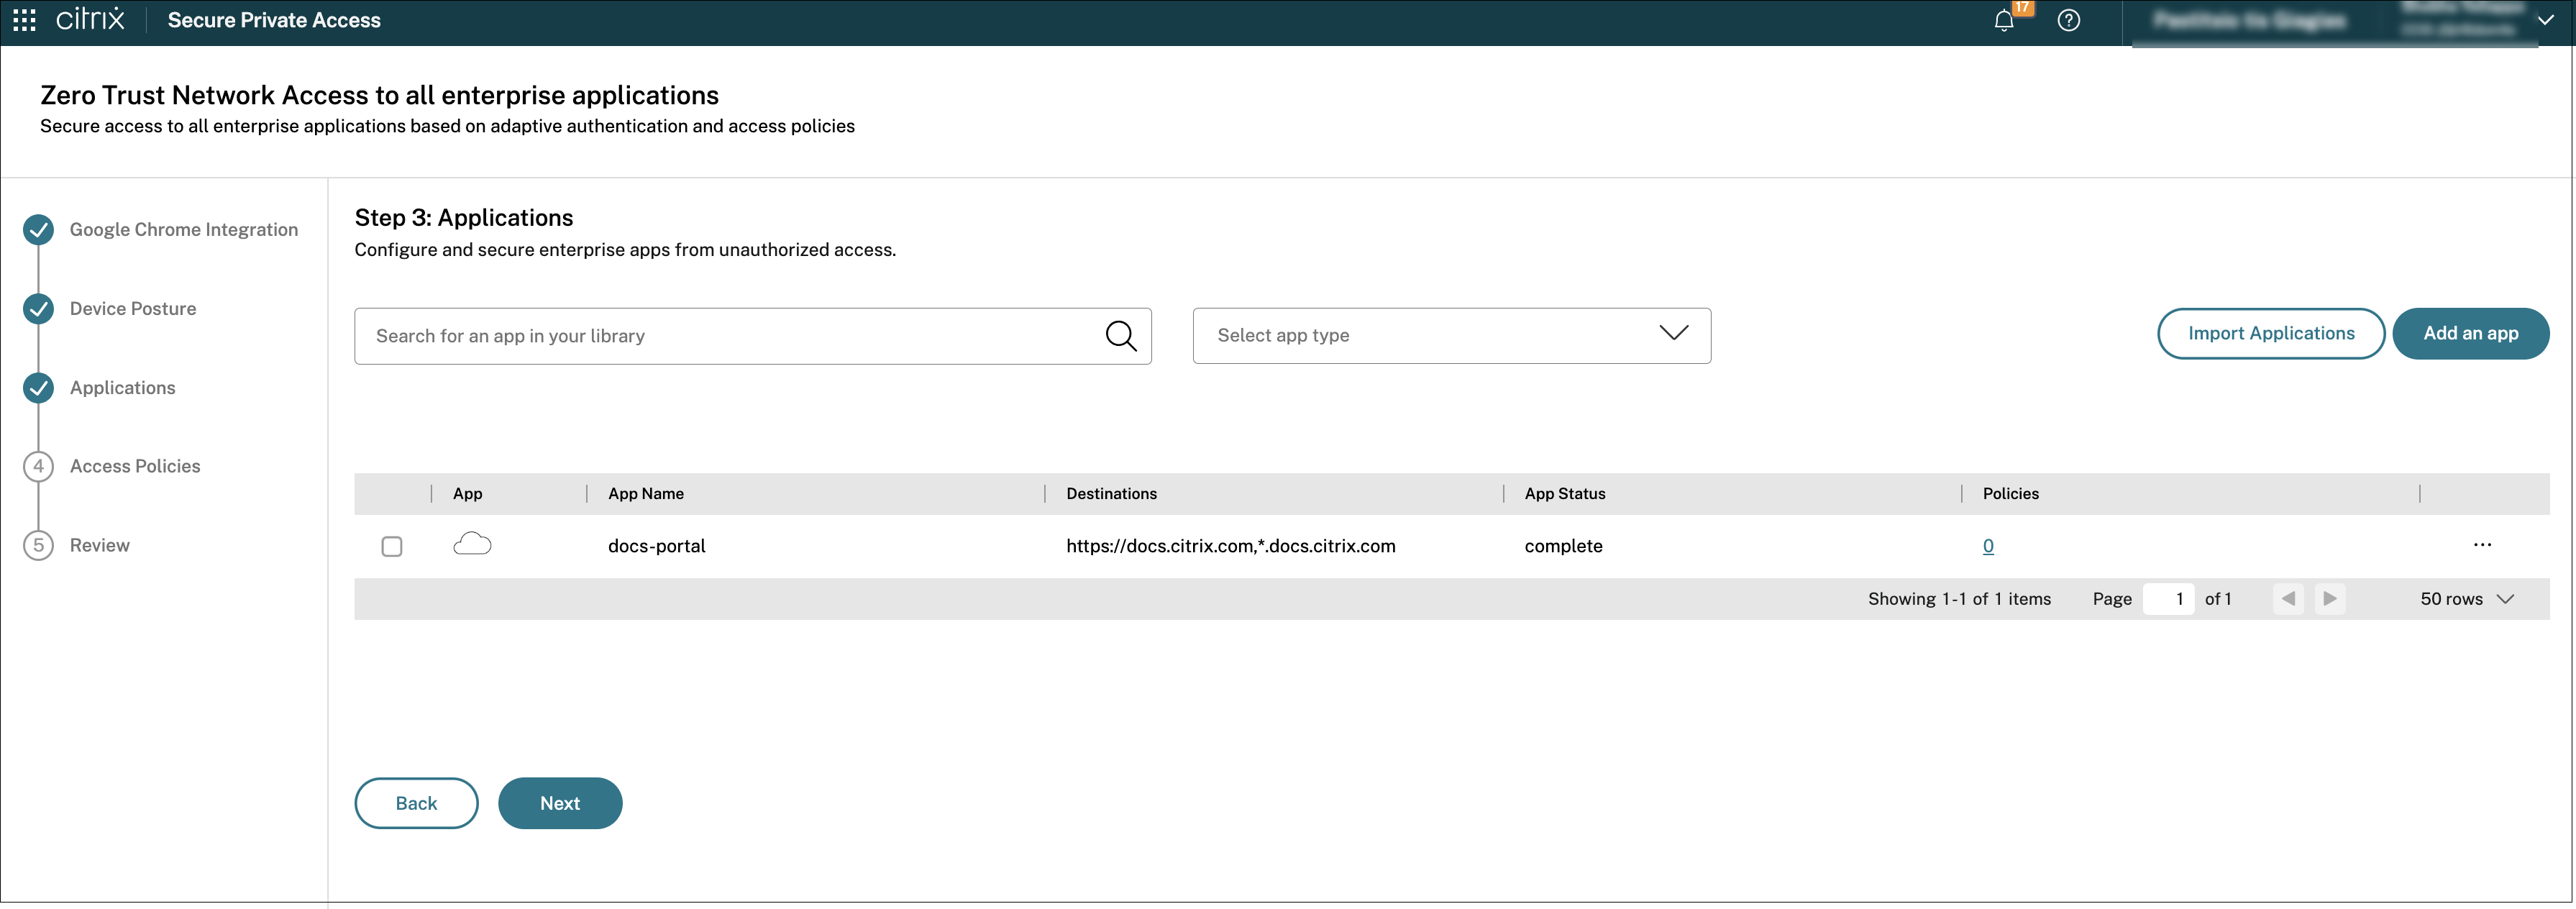
For the first-time users, the Applications landing page does not display any apps. Add an app by clicking Add an app. You can add SaaS apps, Web apps, and TCP/UDP apps from this page. To add an app, click Add an app.
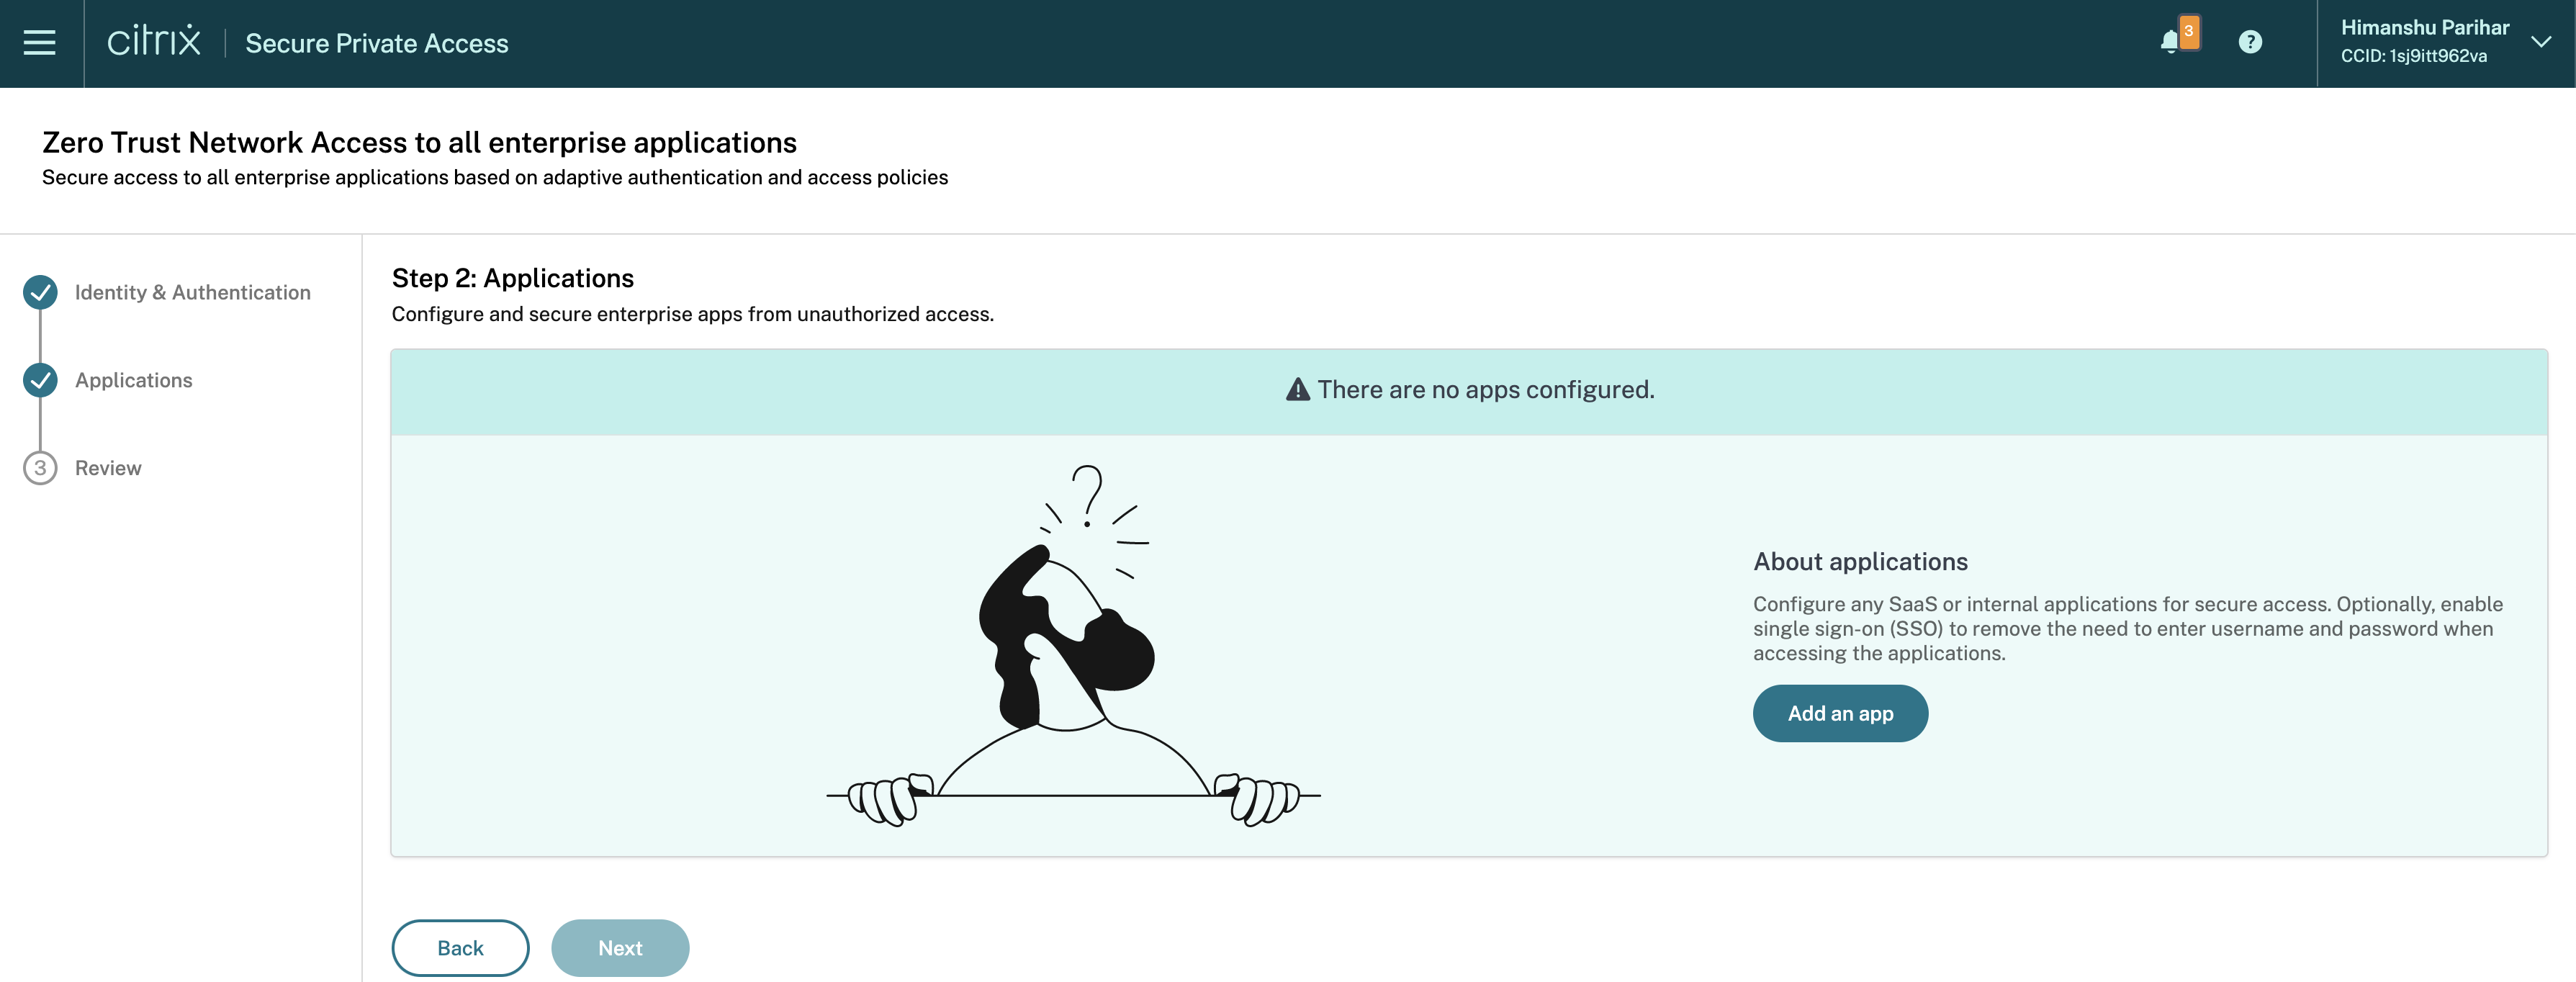
For details on adding apps, see the following topics.
- Add an Enterprise Web app
- Add a SaaS app
- Configure client-server apps
- Launch an app
- Role-based access to admins
After you create applications, they appear on the Applications page.
Configure access policies
Note:
Setting up access policies is not necessary to complete the onboarding process and can be defined later.
Access policies within Secure Private Access allow you to enable or disable access to the apps based on the context of the user or user’s device. You can create multiple access rules and configure different access conditions for different users or user groups within a single policy. These rules can be applied separately for both HTTP/HTTPS and TCP/UDP apps, all within a single policy.
Access restrictions must be configured through the Google Admin console rather than within the Secure Private Access interface.
Rules are configured in the Google Admin console > Rules. These rules are advanced settings related to DLP, such as adding a watermark, blocking the download of files with social security numbers, and URL filtering.
For details on creating policies and rules for Google Chrome in the Google Admin console, see the following topics:
For the first-time users, the Access Policies landing page does not display any policies. Once you create a policy, you can see it listed here.
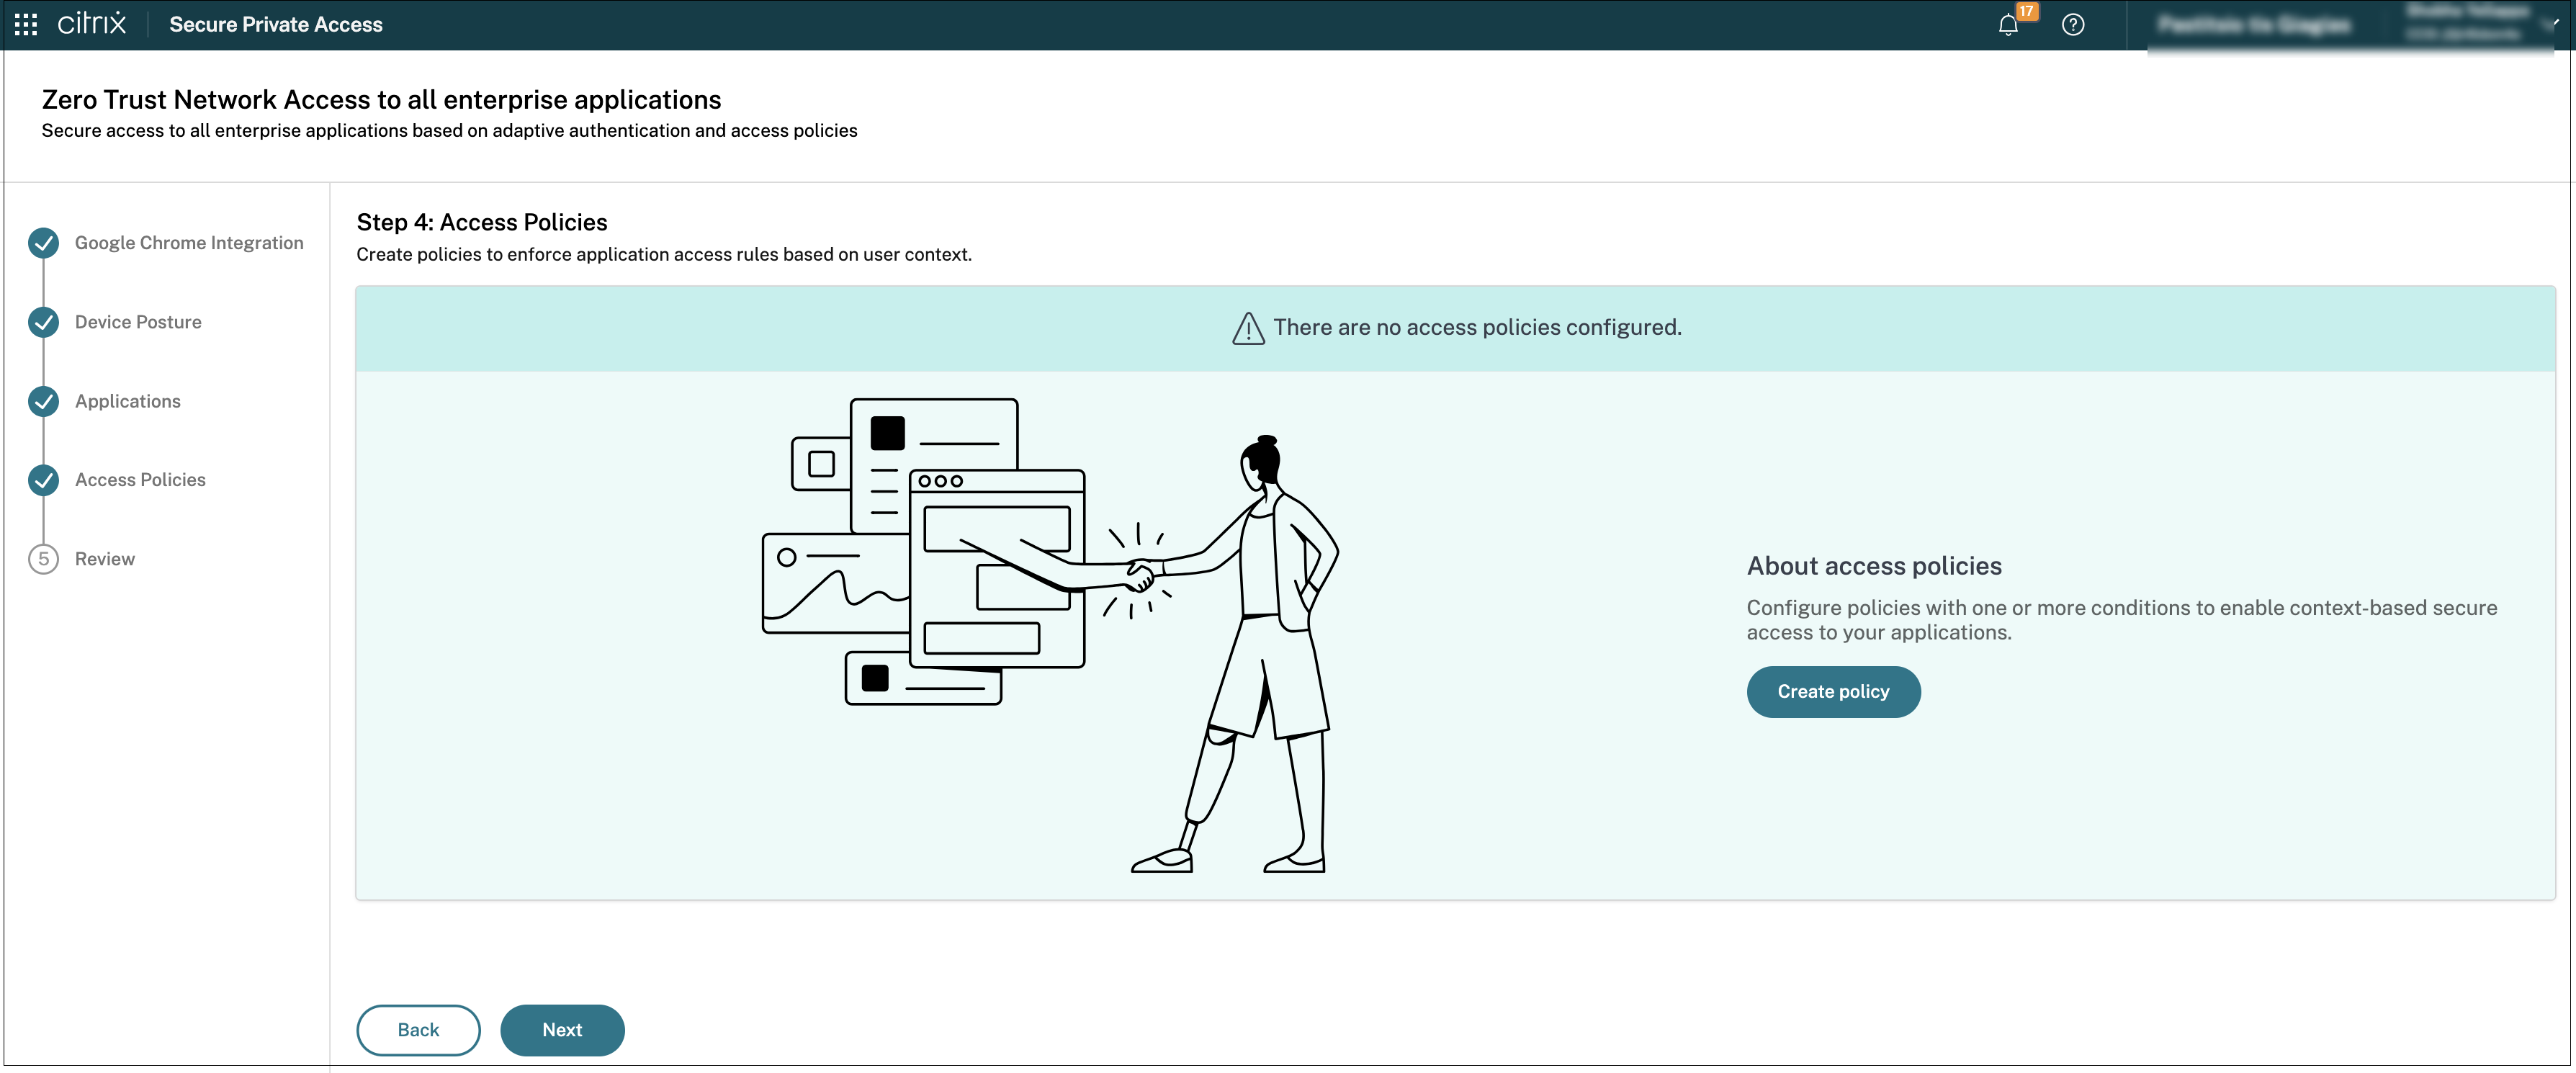
- Click Create policy.
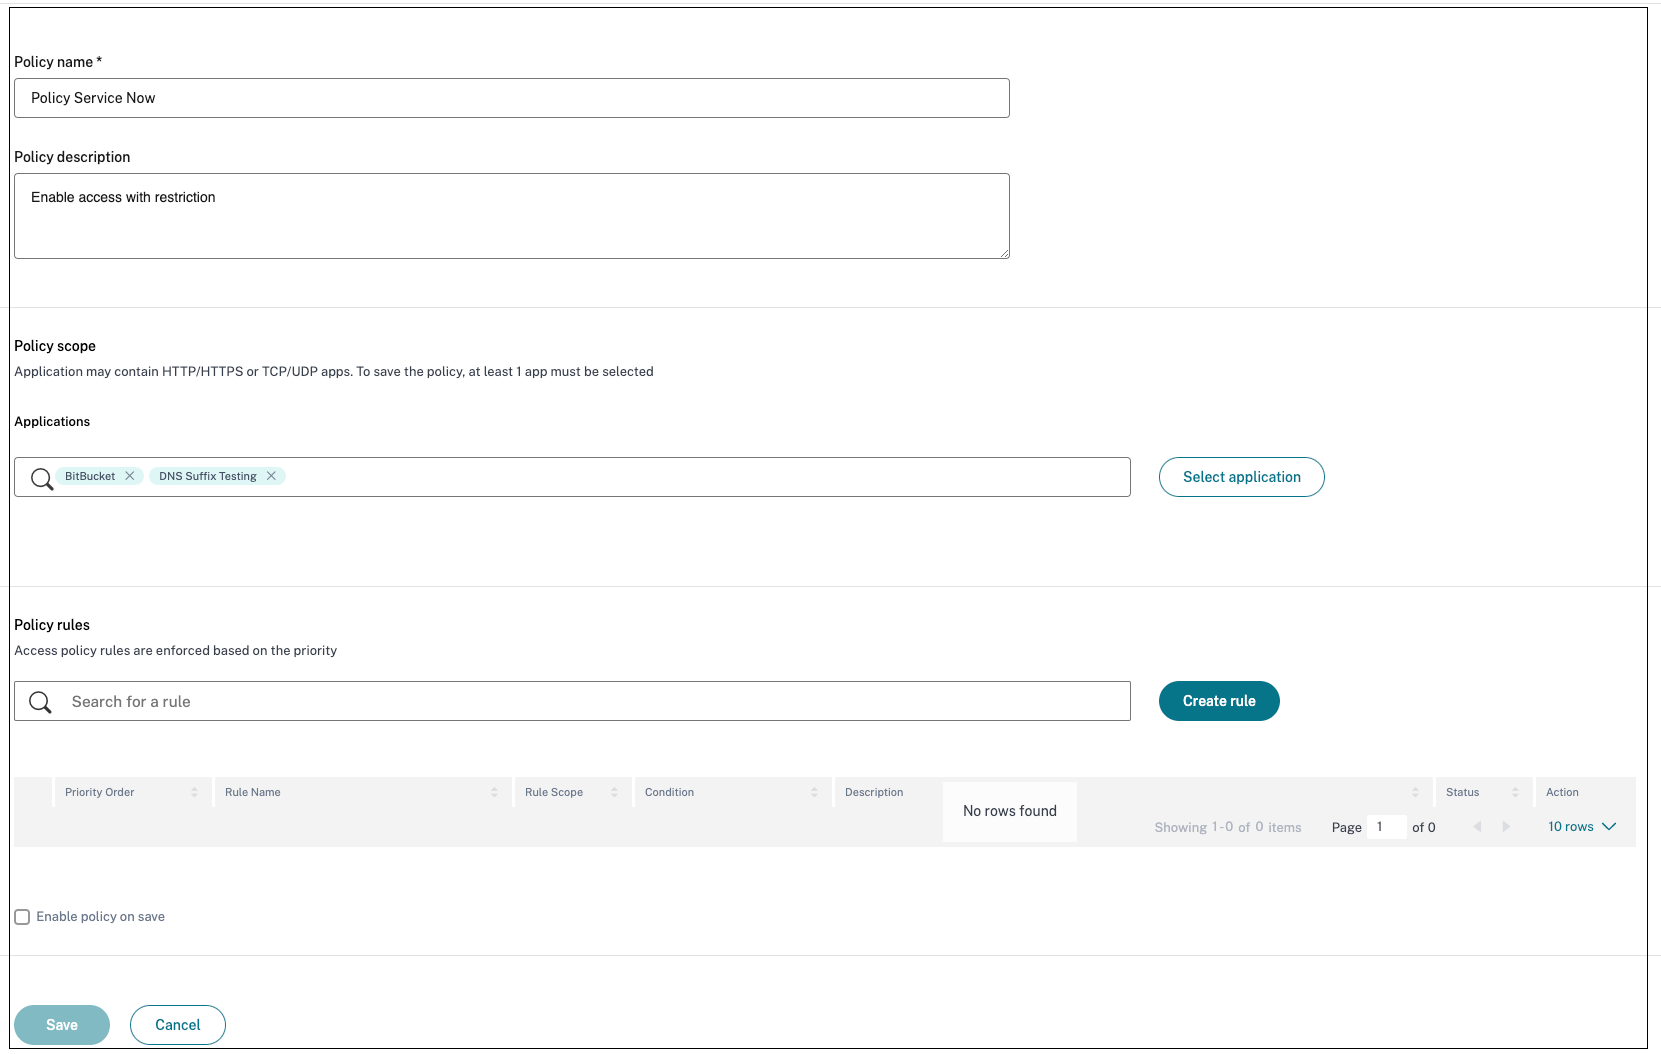
- Enter the policy name and description of the policy.
- In Applications, select the app or set of apps on which this policy must be enforced.
-
Click Create Rule to create rules for the policy.
-
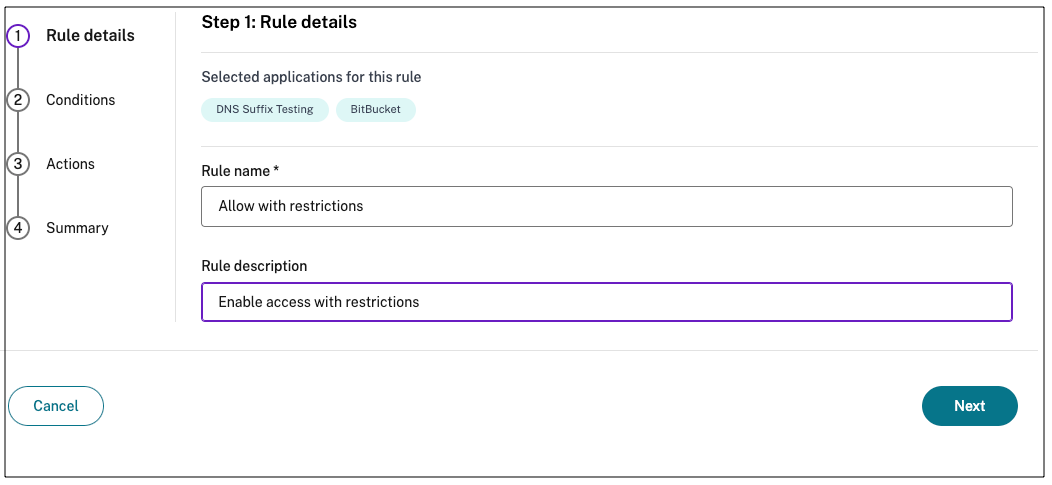
Enter the rule name and a brief description of the rule, and then click Next.
-
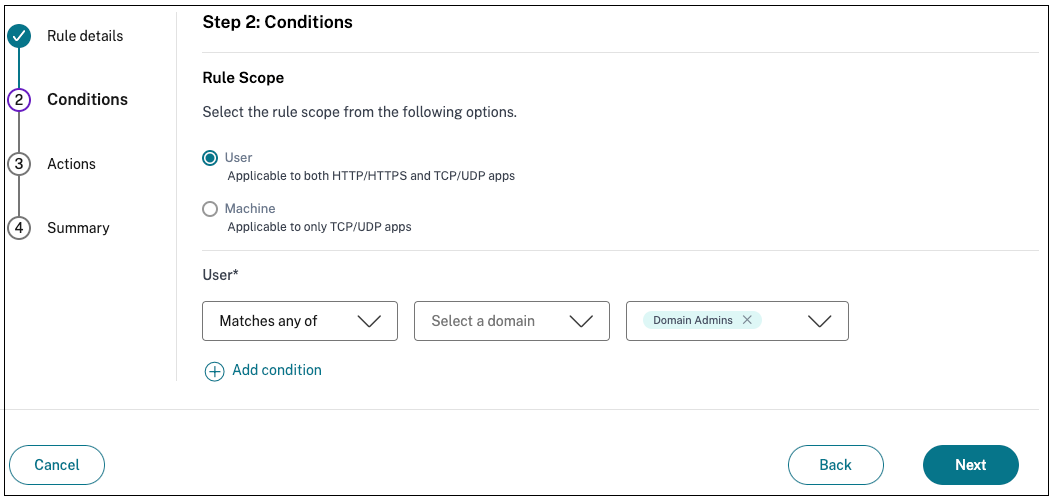
Select the users’ conditions. The Users condition is a mandatory condition to be met to grant access to the apps for the users.You can select the condition, followed by the domain, and then users.
Select one of the following:
- Matches any of – Only the users or groups that match any of the names listed in the field and belonging to the selected domain are allowed access.
-
Does not match any - All users or groups except those listed in the field and belonging to the selected domain are allowed access.
Note:
You can search for users by display name, email ID, or user principal name. This search option allows admins to accurately identify and grant access to the correct user, even if they have multiple accounts.
-
(Optional) Click + to add multiple conditions based on the context.
When you add conditions based on a context, an AND operation is applied on the conditions and the policy is evaluated only if the Users and the optional contextual based conditions are met. You can apply the following conditions based on context.
-
Geo location – Select the condition and the geographic location from where the users are accessing the apps.
- Matches any of: Only users or user groups accessing the apps from any of the geographic locations listed are enabled for access to the apps.
- Does not match any: All users or user groups other than those from the listed geographic locations are enabled for access.
-
Network location – Select the condition and the network using which the users access the apps.
- Matches any of: Only users or user groups accessing the apps from any of the network locations listed are enabled for access to the apps.
- Does not match any: All users or user groups other than those from the listed network locations are enabled for access.
- Device posture check – Select the conditions that the user device must fulfill to access the apps.
-
Geo location – Select the condition and the geographic location from where the users are accessing the apps.
- Click Next.
-
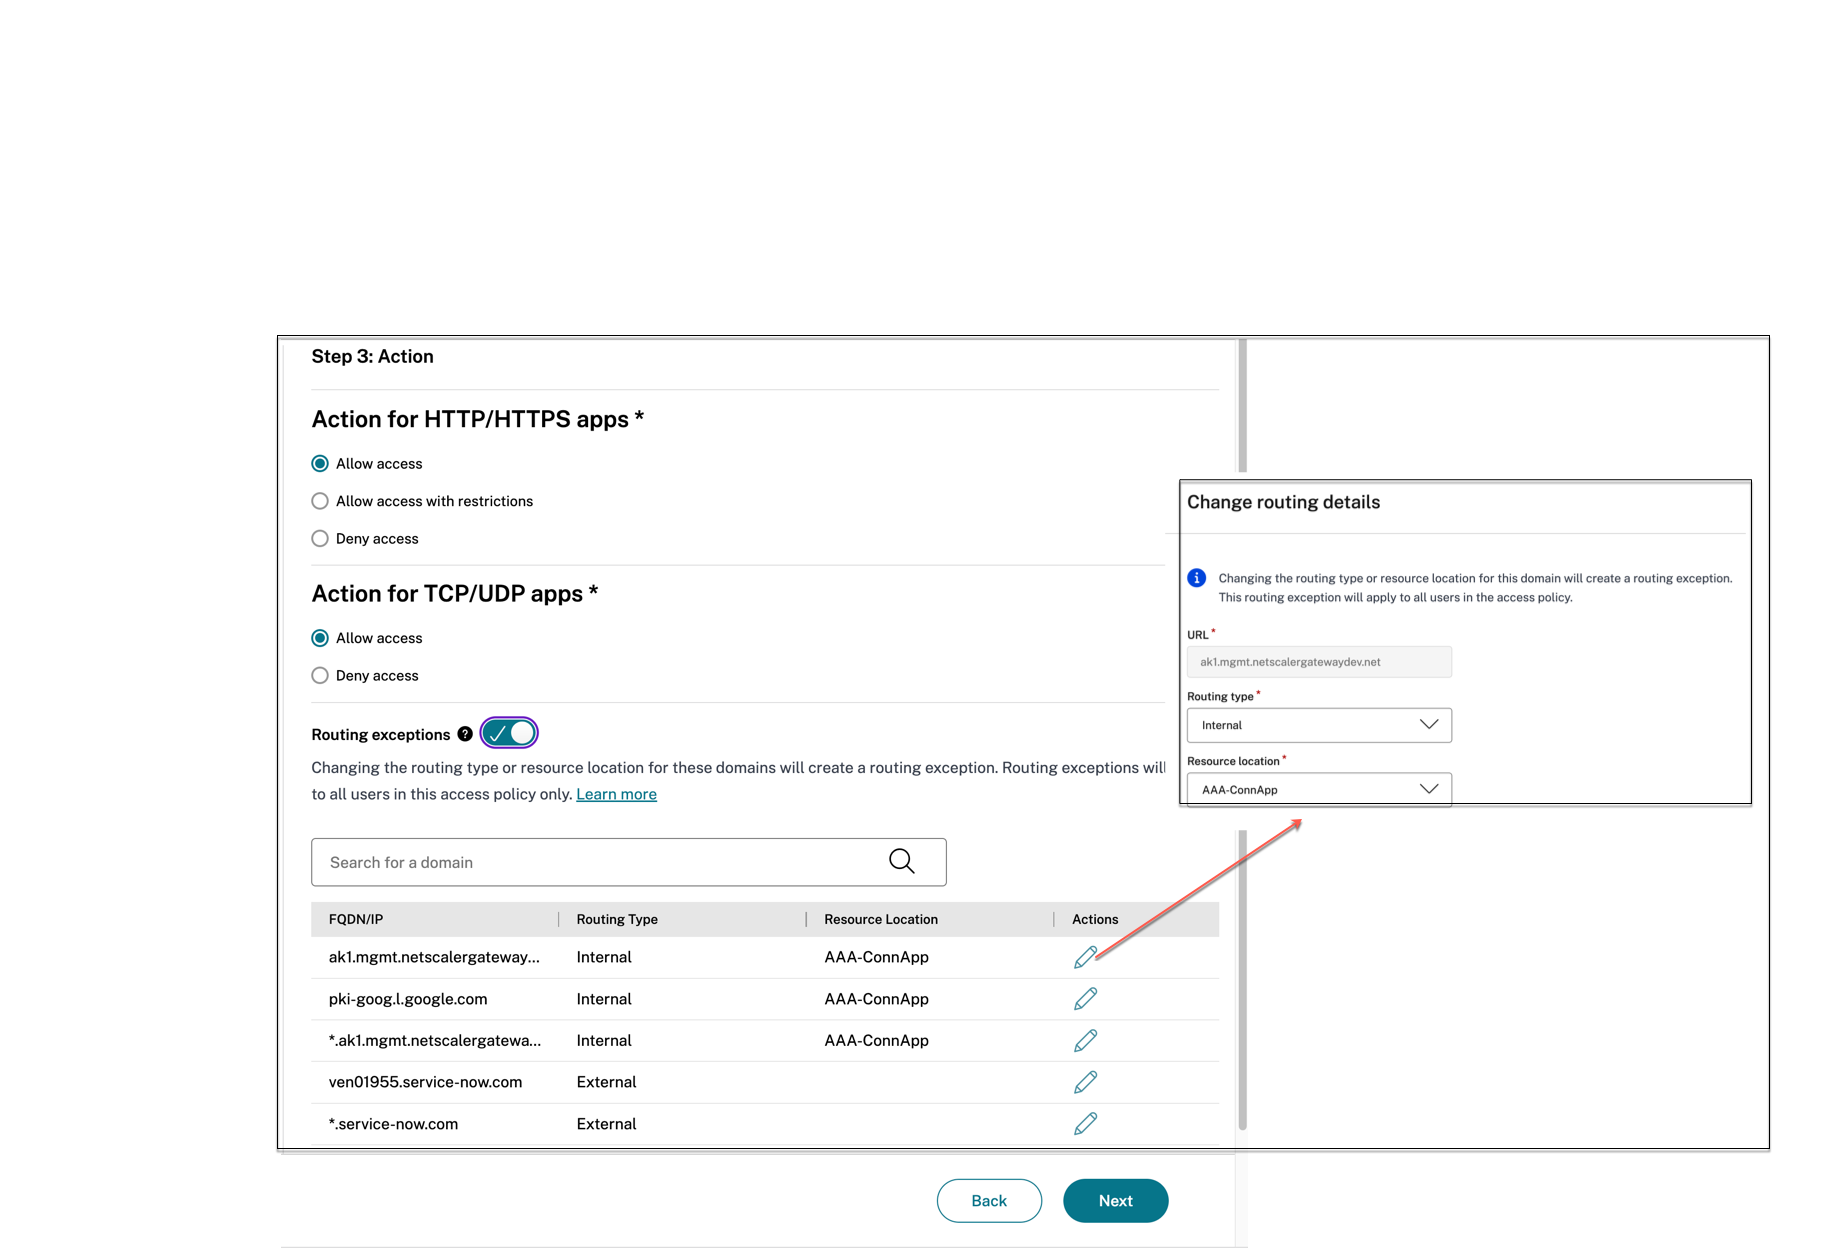
Select the actions that must be applied based on the condition evaluation.
- Allow access
- Deny access
-
(Optional) Modify the routing type or resource location for a specific domain, if required. The Routing exceptions toggle allows you to edit the resource locations and routing information for domains of the apps added in the access policy.
-
In Routing type, modify the routing type:
- Internal: The traffic flows through the Connector Appliance. For a web app, the traffic flows within the data center. For a SaaS app, the traffic is routed outside the network through the Connector Appliance.
- Internal - Bypass Proxy: The domain traffic is routed through Citrix Cloud Connector™ appliances, bypassing the customer’s web proxy configured on the Connector Appliance.
- External: The traffic flows directly to the internet.
-
In Resource location, modify the resource location, if necessary. This option is applicable only for the internally routed domains.
For more information about contextual routing, see Context-based app routing and resource locations selection.
After you create the policies, they appear on the Access policies page.

-
- Click Next. The Review page displays the policy details.
- You can verify the details and click Finish.
Review the configuration
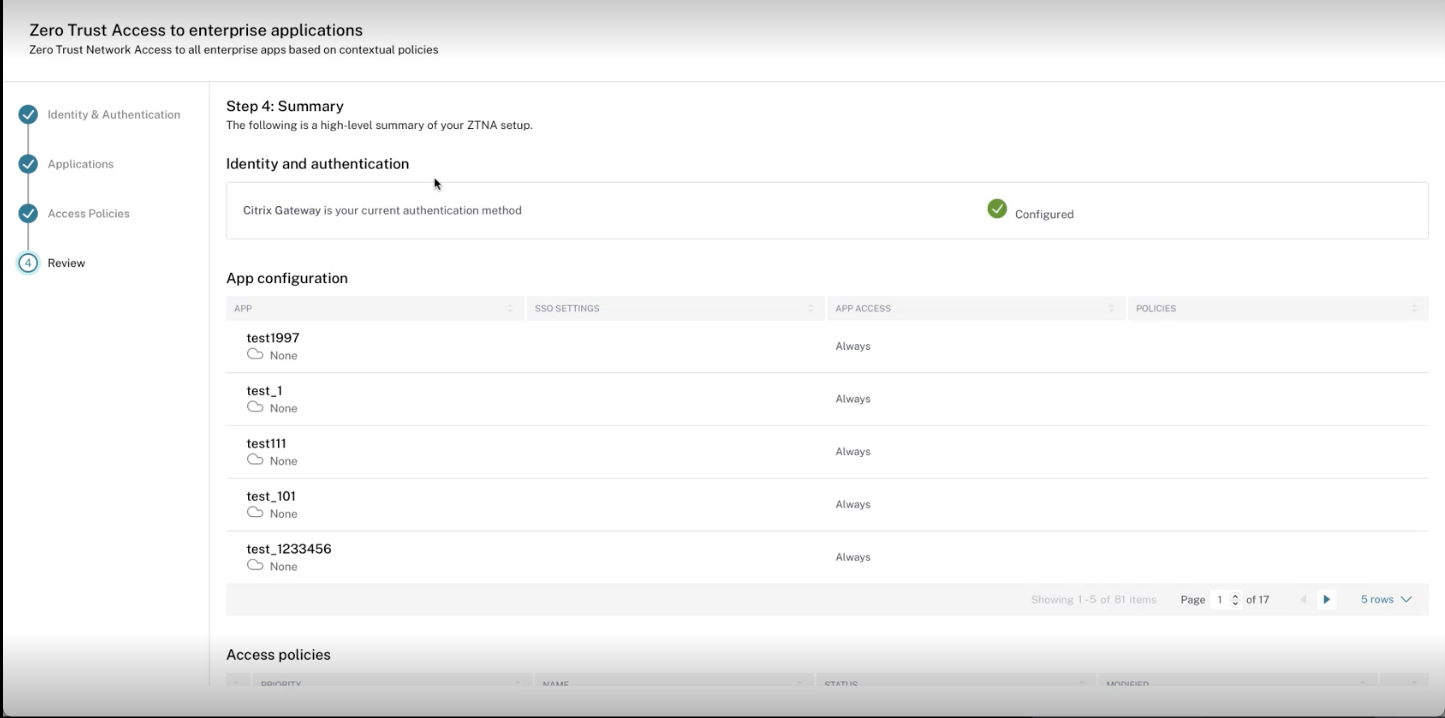
The Review page provides a comprehensive overview of the end user’s configuration, including the authentication mechanism used for their access. This authentication mechanism is not configured independently for the Secure Private Access service. It is inherited from the identity provider that is connected in the Workspace configuration > Authentication tab. You can click the Identity and Access Management > Authentication link to view the list of identity providers available for a user.
Important:
- After you have completed the configuration using the wizard, you can modify the configuration of a section by directly going to that section. You do not have to follow the sequence.
- If you delete all the configured apps or the policies, you must add them again.
Points to remember after a policy is created
-
The policy that you created appears under the Policy rules section and is enabled by default. You can disable the rules, if required. However, ensure that at least one rule is enabled for the policy to be active.
-
A priority order is assigned to the policy by default. The priority with a lower value has the highest preference. The rule with a lowest priority number is evaluated first. If the rule (n) does not match the conditions defined, the next rule (n+1) is evaluated and so on.
Evaluation of rules with priority order example:
Consider that you have created two rules, Rule 1 and Rule 2. Rule 1 is assigned to user A and Rule 2 is assigned to user B, then both rules are evaluated. Consider that both rules Rule 1 and Rule 2 are assigned to user A. In this case, Rule 1 has the higher priority. If the condition in Rule 1 is met, then Rule 1 is applied and Rule 2 is skipped. Otherwise, if the condition in Rule 1 is not met, then Rule 2 is applied to user A.
Note:
If none of the rules are evaluated, then the app is not enumerated to the users.
Add IP addresses of SaaS apps
After onboarding customers to Secure Private Access and Chrome Enterprise Premium, you must allow the list of the IP addresses used by your SaaS applications. This step is critical to ensure that:
- Users can access SaaS applications without connectivity issues or blocks caused by network security controls.
- Traffic from Citrix Secure Private Access and Chrome Enterprise Premium is recognized as legitimate and not inadvertently filtered or denied.
Update Google integration details post onboarding
Once customers are successfully onboarded to Chrome Enterprise Premium, Secure Private Access allows for post-onboarding management of their integration details. This includes the ability to update critical identifiers such as the customer ID and to modify associated user groups.
Perform the following steps to update the integration details post onboarding:
-
In the Secure Private Access admin console, go to Browser settings > Browser.
The Browser page displays the Google Chrome integrations details.
The system also displays the egress IP addresses associated with the Secure Gateway. Each time a user tries to access a Software as a Service (SaaS) application within this integration, traffic is routed through the Google Secure Gateway, which acts as a partner connector, instead of directly connecting to the SaaS application. This gateway inspects and secures the traffic, enforcing security policies and access controls, and ensuring compliance with the organization’s security posture.
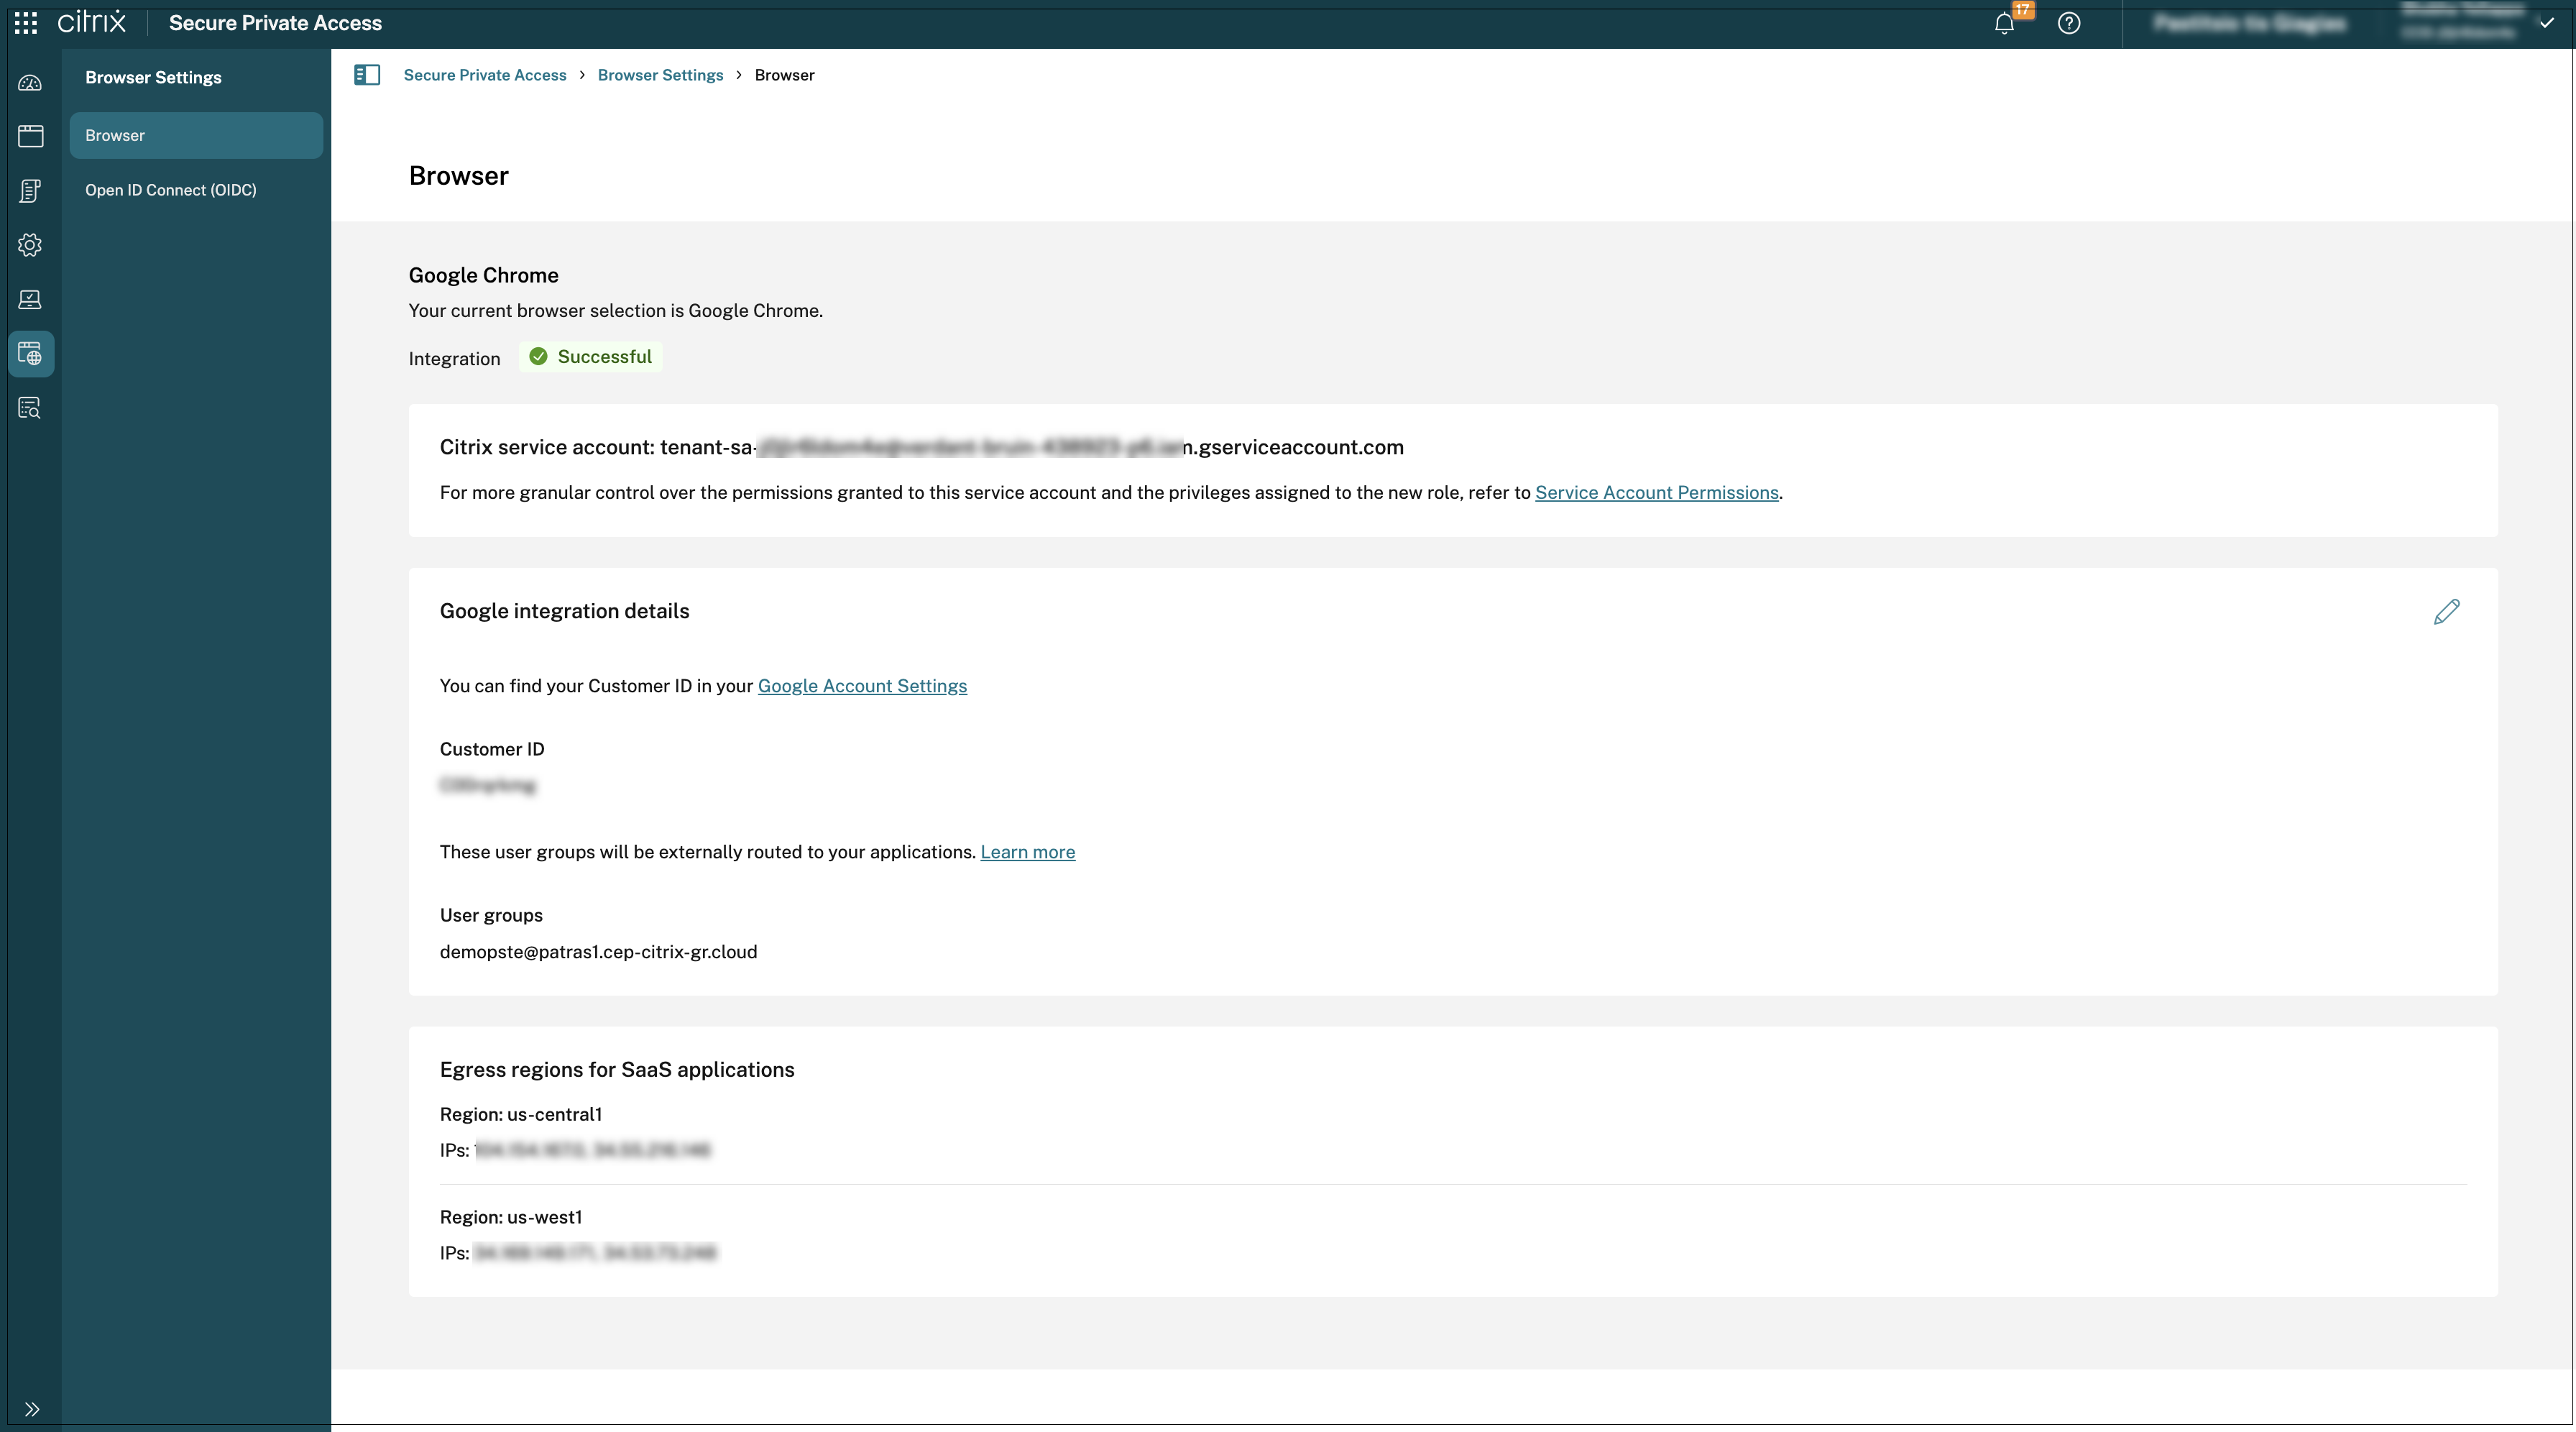
- Click the edit icon and update the customer ID or the user groups or both.
-
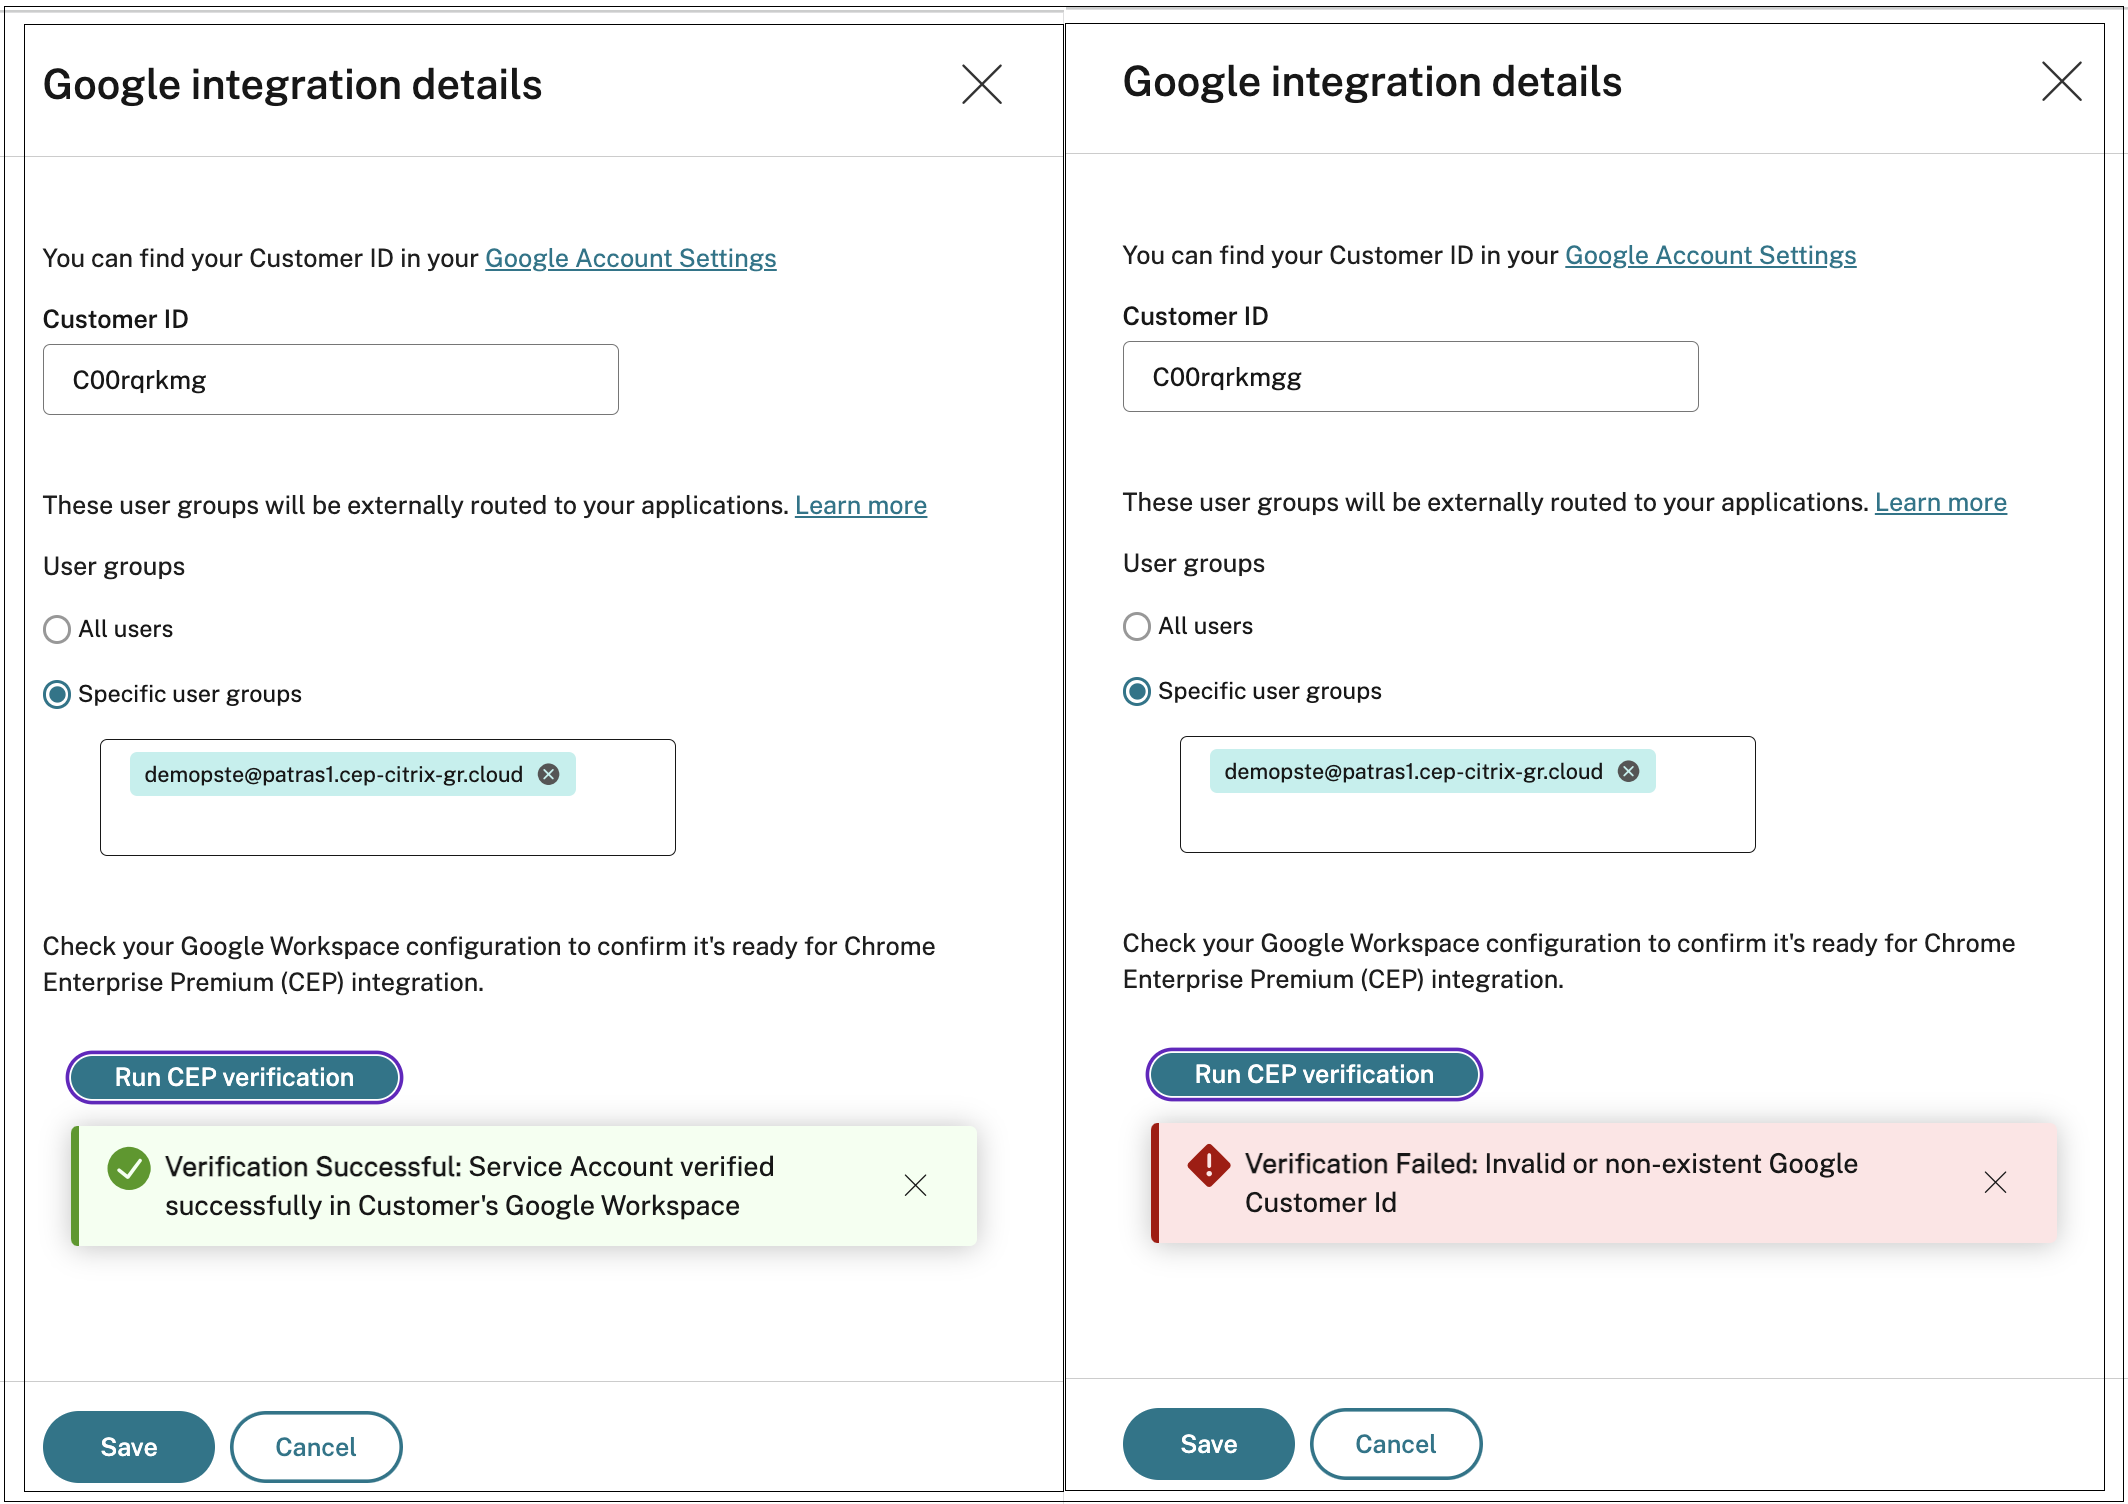
Click Run CEP verification to verify your Google Workspace configuration is ready for Chrome Enterprise Premium integration.
If there are any issues with the integration details, the CEP verification fails and a warning message appears with specific error information to help you resolve the configuration issues.
Provisioning failure issue with multiple user groups
When configuring Chrome Enterprise Integration in Secure Private Access (through the onboarding wizard or the Browser settings page), specifying more than eight user groups might cause provisioning failures. As a workaround, do the following:
- Use a dedicated directory parent group that encompasses all required groups.
- Configure this parent group during onboarding.
- If group membership changes in the directory, repeat the synchronization process to Google’s Directory.
In this article
- Access the Secure Private Access admin-guided workflow wizard
- Setup Google Chrome integration
- Create device posture scans
- Add and manage apps
- Configure access policies
- Review the configuration
- Points to remember after a policy is created
- Add IP addresses of SaaS apps
- Update Google integration details post onboarding
- Provisioning failure issue with multiple user groups