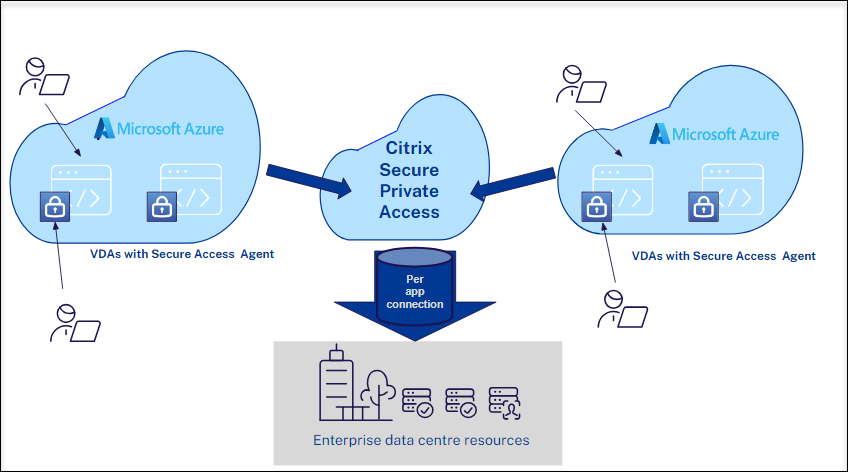
Support for multi-session virtual desktop infrastructure
In a multi-session virtual desktop infrastructure (VDI), multiple users share a virtual machine while maintaining individual desktop environments. Starting from the Citrix Secure Access client for Windows release 24.8.1.19, you can access your enterprise applications from multi-session VDIs for Secure Private Access deployments by ensuring that each user’s session remains isolated, private, and protected.

Note:
Multi-session VDI is supported on Windows OS starting from Windows 10 and from Windows Server 2019.
Multi-session VDI works only on Azure based VDI.
Key features and benefits
-
Authentication: Supports various authentication methods, including condition-based authentication.
-
Contextual access: Allows access to authorized applications only based on Secure Private Access policies for users based on factors like location, device, and group.
-
Reduced cost: Allows multiple users to share computer, which can help organizations save money on hardware costs. The Citrix Secure Access™ client for Windows app further enhances these cost savings by enabling users to access their virtual desktops from any device, reducing the need for dedicated workstations without depending on express routes or legacy VPN.
-
Enhanced flexibility: Enables end users to connect from anywhere abiding to Secure Private Access policies for only allowing authorized application access.
Enable multi-session VDI
To enable multi-session VDI support in the Citrix Secure Access client for Windows app, administrators must ensure that the Citrix Secure Access client for Windows 24.8.1.19 or later is installed on the multisession OS machine.
Admin must perform the following steps to provide contextual access to users on the multi-session OS machine:
-
Open the Registry Editor (regedit.exe).
-
Navigate to HKEY_LOCAL_MACHINE\Software\Citrix\Secure Access Client.
-
Create
EnableMultiSessionFlowandEnableWFPregistries to enable the multi-session VDI. For more information, see NetScaler Gateway Windows VPN client registry keys. -
Close the Registry Editor.
-
Reboot the machine to ensure the settings take effect.
For domain-joined machines where the domain controller IP address is the same as the DNS IP address, the admin must perform the following steps to enable multi-session VDI.
-
Open the Registry Editor (regedit.exe).
-
Navigate to HKEY_LOCAL_MACHINE\Software\Citrix\Secure Access Client.
-
Create
EnableMultiSessionFlowandAlwaysOnServiceregistries to enable the multi-session VDI. For more information, see NetScaler Gateway Windows VPN client registry keys. -
Create a
CloudAlwaysOnUrlregistry of type REG_SZ and provide the connection URL. -
Close the Registry Editor.
-
Reboot the machine to ensure the settings take effect.
-
On the Secure Private Access dashboard, create an application for the domain controller and cloud connector.
Note:
When the domain controller IP address is the same as the DNS IP address, all the calls going to the domain controller are intercepted and are dropped. To avoid domain controller packets from being dropped, it is recommended to create an application and enable access to all the users.
-
Add the domain controller IP address that matches the DNS server IP address to the application, with all TCP/UDP ports allowed.
-
Set access policies to ensure that all users can access the domain controller.
-
Add the cloud connector to the traffic routing type External to prevent it from being tunneled, if the host name of the cloud connector matches your suffix (for example, the host name of the cloud connector is cloudconnector.cloud.com and the suffix is *.cloud.com).