This content has been machine translated dynamically.
Dieser Inhalt ist eine maschinelle Übersetzung, die dynamisch erstellt wurde. (Haftungsausschluss)
Cet article a été traduit automatiquement de manière dynamique. (Clause de non responsabilité)
Este artículo lo ha traducido una máquina de forma dinámica. (Aviso legal)
此内容已经过机器动态翻译。 放弃
このコンテンツは動的に機械翻訳されています。免責事項
이 콘텐츠는 동적으로 기계 번역되었습니다. 책임 부인
Este texto foi traduzido automaticamente. (Aviso legal)
Questo contenuto è stato tradotto dinamicamente con traduzione automatica.(Esclusione di responsabilità))
This article has been machine translated.
Dieser Artikel wurde maschinell übersetzt. (Haftungsausschluss)
Ce article a été traduit automatiquement. (Clause de non responsabilité)
Este artículo ha sido traducido automáticamente. (Aviso legal)
この記事は機械翻訳されています.免責事項
이 기사는 기계 번역되었습니다.책임 부인
Este artigo foi traduzido automaticamente.(Aviso legal)
这篇文章已经过机器翻译.放弃
Questo articolo è stato tradotto automaticamente.(Esclusione di responsabilità))
Translation failed!
SAML
Citrix SecurSpaces™ acts as a SAML 2.0 service provider. Any conformant identity provider works — Okta, Microsoft Entra ID, Ping, ADFS, and others — because the configuration is an exchange of metadata rather than anything provider-specific.
Setting it up is a two-sided task: the identity provider needs to know about SecurSpaces, and SecurSpaces needs to know about the identity provider.
Configure the identity provider
Create a SAML application in your identity provider with the following values, where <your-sds-hostname> is
the domain your platform is deployed on:
| Setting | Value |
|---|---|
| Single Sign-On URL (Assertion Consumer Service URL) | https://<your-sds-hostname>/saml/acs |
| Audience URI (Service Provider Metadata URL) | https://<your-sds-hostname>/saml/metadata |
If your identity provider prefers to import metadata rather than take values by hand, SecurSpaces publishes its own service provider metadata. Use Download metadata on the SAML configuration page.
Attributes
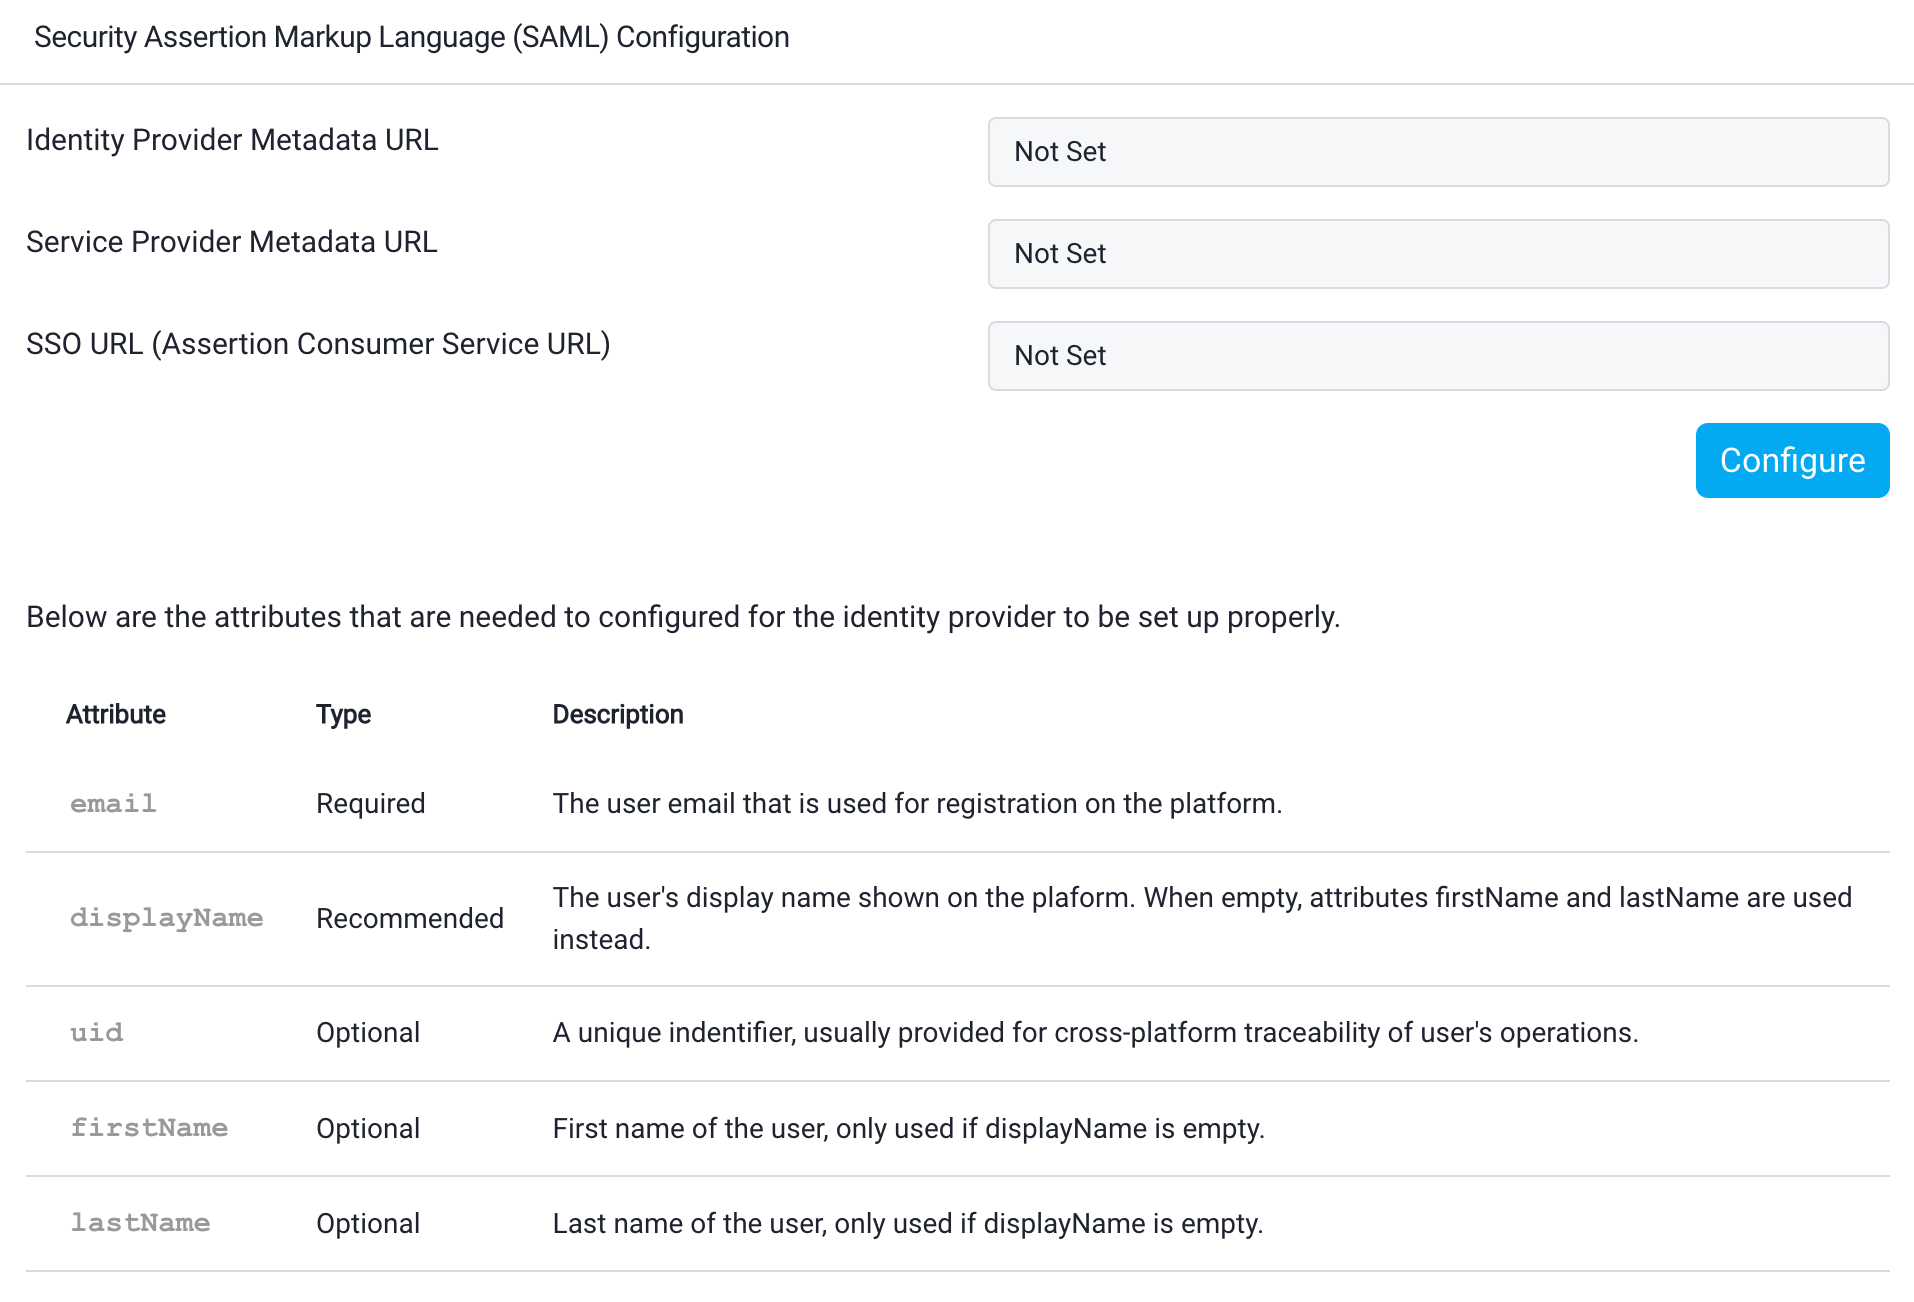
The identity provider must send these attributes in the assertion:
| Attribute | Type | What it does |
|---|---|---|
email |
Required | The email the user is registered with on the platform. Without it the connection does not work. |
displayName |
Recommended | The name shown for the user across the platform. When it is empty, firstName and lastName are used instead. |
firstName |
Optional | Used only when displayName is empty. |
lastName |
Optional | Used only when displayName is empty. |
uid |
Optional | A unique identifier, usually supplied so a user’s actions can be traced across systems. |
Send displayName if you can. Without it the platform assembles a name from firstName and lastName, and
if those are absent too, users are identified by email address throughout the console and the audit log.
Sending uid is worth doing wherever audit data is correlated with other systems, because email addresses
change and a stable identifier does not.
Configure SecurSpaces
- Sign in as a platform administrator.
- Go to System Configuration > SAML Service Provider Configuration, or browse to
https://<your-sds-hostname>/platform/system_configuration/saml_sp. - Select Configure.
- Provide the identity provider’s metadata, either as an Identity Provider Metadata URL or by uploading its XML metadata file.
A metadata URL is the better choice where your identity provider offers one, because certificate rotations are picked up automatically rather than needing the file to be uploaded again.
Related information
- Identity providers
- SCIM — automatic user provisioning
- User access control
- Platform roles
Share
Share
This Preview product documentation is Citrix Confidential.
You agree to hold this documentation confidential pursuant to the terms of your Citrix Beta/Tech Preview Agreement.
The development, release and timing of any features or functionality described in the Preview documentation remains at our sole discretion and are subject to change without notice or consultation.
The documentation is for informational purposes only and is not a commitment, promise or legal obligation to deliver any material, code or functionality and should not be relied upon in making Citrix product purchase decisions.
If you do not agree, select I DO NOT AGREE to exit.