-
-
-
-
-
Platform settings
This content has been machine translated dynamically.
Dieser Inhalt ist eine maschinelle Übersetzung, die dynamisch erstellt wurde. (Haftungsausschluss)
Cet article a été traduit automatiquement de manière dynamique. (Clause de non responsabilité)
Este artículo lo ha traducido una máquina de forma dinámica. (Aviso legal)
此内容已经过机器动态翻译。 放弃
このコンテンツは動的に機械翻訳されています。免責事項
이 콘텐츠는 동적으로 기계 번역되었습니다. 책임 부인
Este texto foi traduzido automaticamente. (Aviso legal)
Questo contenuto è stato tradotto dinamicamente con traduzione automatica.(Esclusione di responsabilità))
This article has been machine translated.
Dieser Artikel wurde maschinell übersetzt. (Haftungsausschluss)
Ce article a été traduit automatiquement. (Clause de non responsabilité)
Este artículo ha sido traducido automáticamente. (Aviso legal)
この記事は機械翻訳されています.免責事項
이 기사는 기계 번역되었습니다.책임 부인
Este artigo foi traduzido automaticamente.(Aviso legal)
这篇文章已经过机器翻译.放弃
Questo articolo è stato tradotto automaticamente.(Esclusione di responsabilità))
Translation failed!
General settings
This section covers fundamental platform-wide configurations. Administrators can manage Maintenance Messages, configure Custom Actions, recover Deleted Projects and Deleted Organizations, set a Custom Documentation URL, and control the Onboarding & Guidance experiences.
- Maintenance Messages
- Custom Actions
- Deleted Projects
- Deleted Organizations
- Documentation
- OpenVSX Marketplace
- Onboarding & Guidance
Maintenance Messages
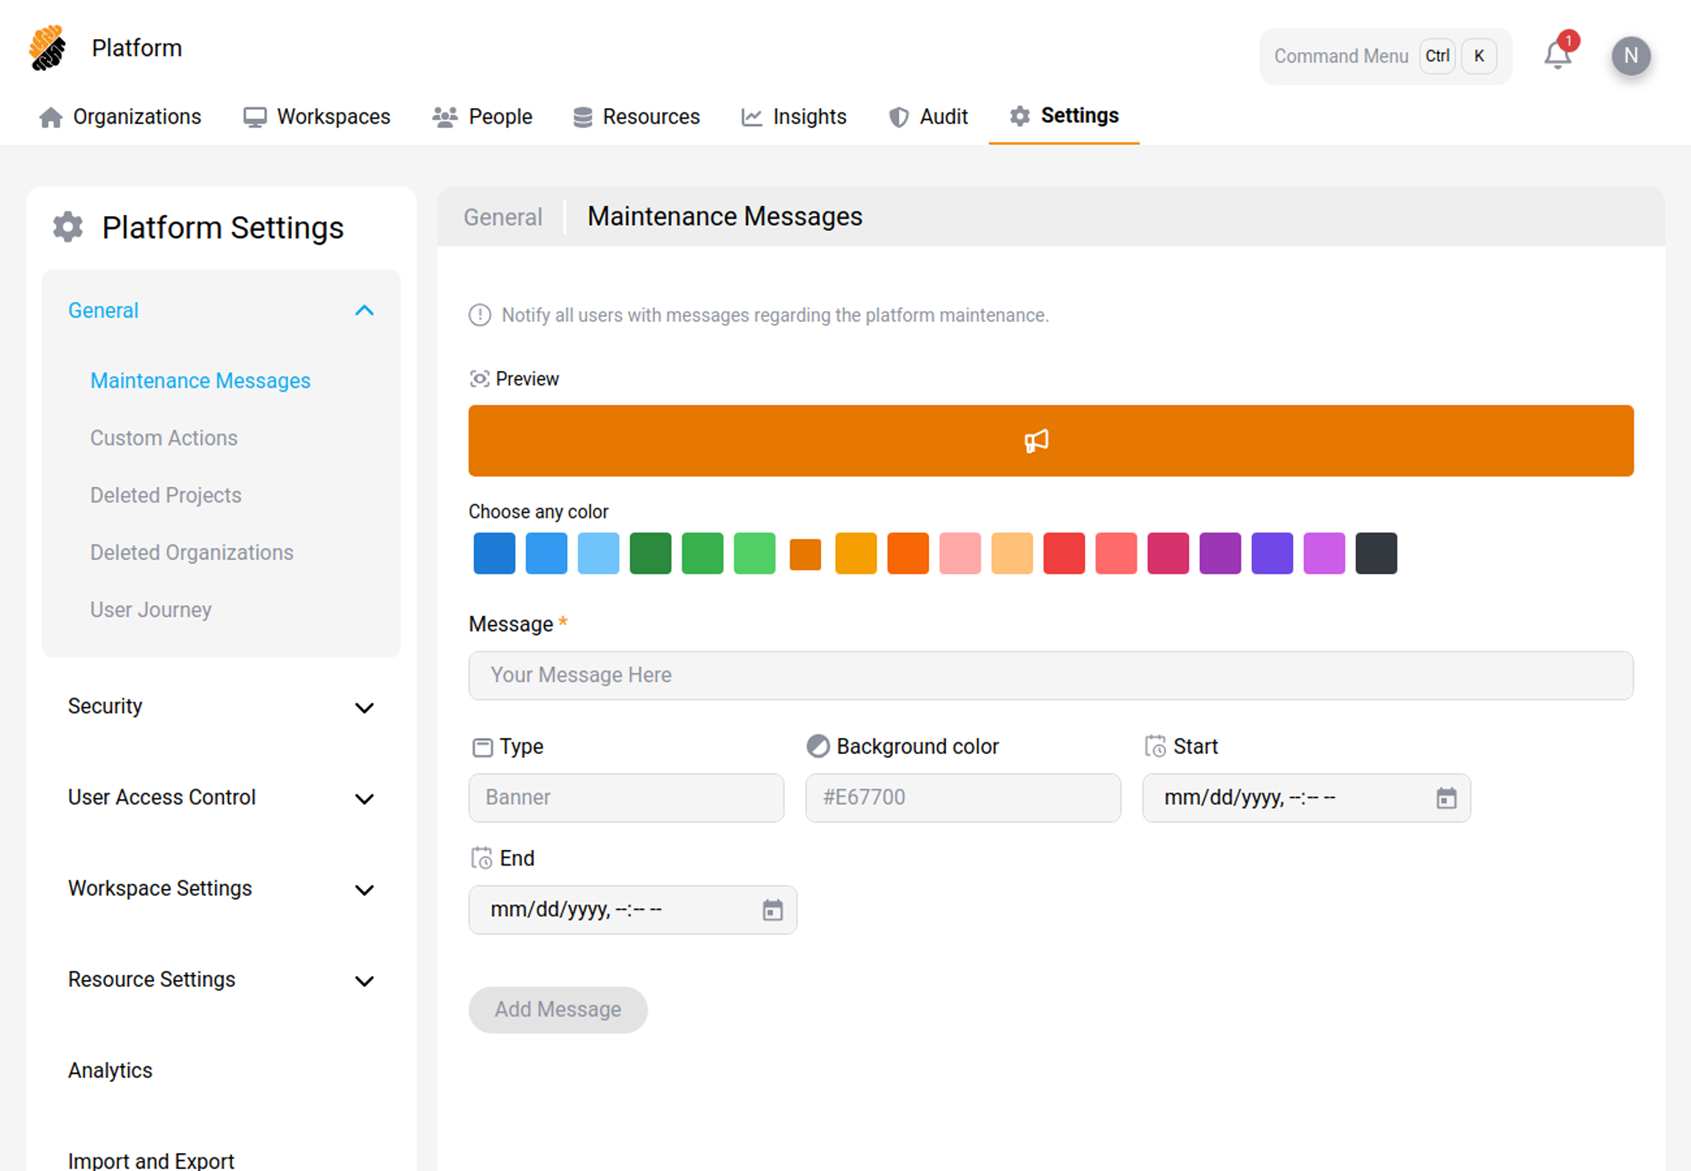
You can configure and display maintenance messages to users. These messages can inform users of scheduled downtime, ongoing maintenance, or other important platform-wide notifications.
Custom Actions
Configure custom actions that automate routine maintenance, such as deleting workspaces that have been inactive for a long time. Each action combines what runs, the conditions that decide which workspaces or users it applies to, and when it runs.
For the available actions, conditions, and scheduling options — including when to use When Condition Met — see Custom Actions.
Deleted Projects
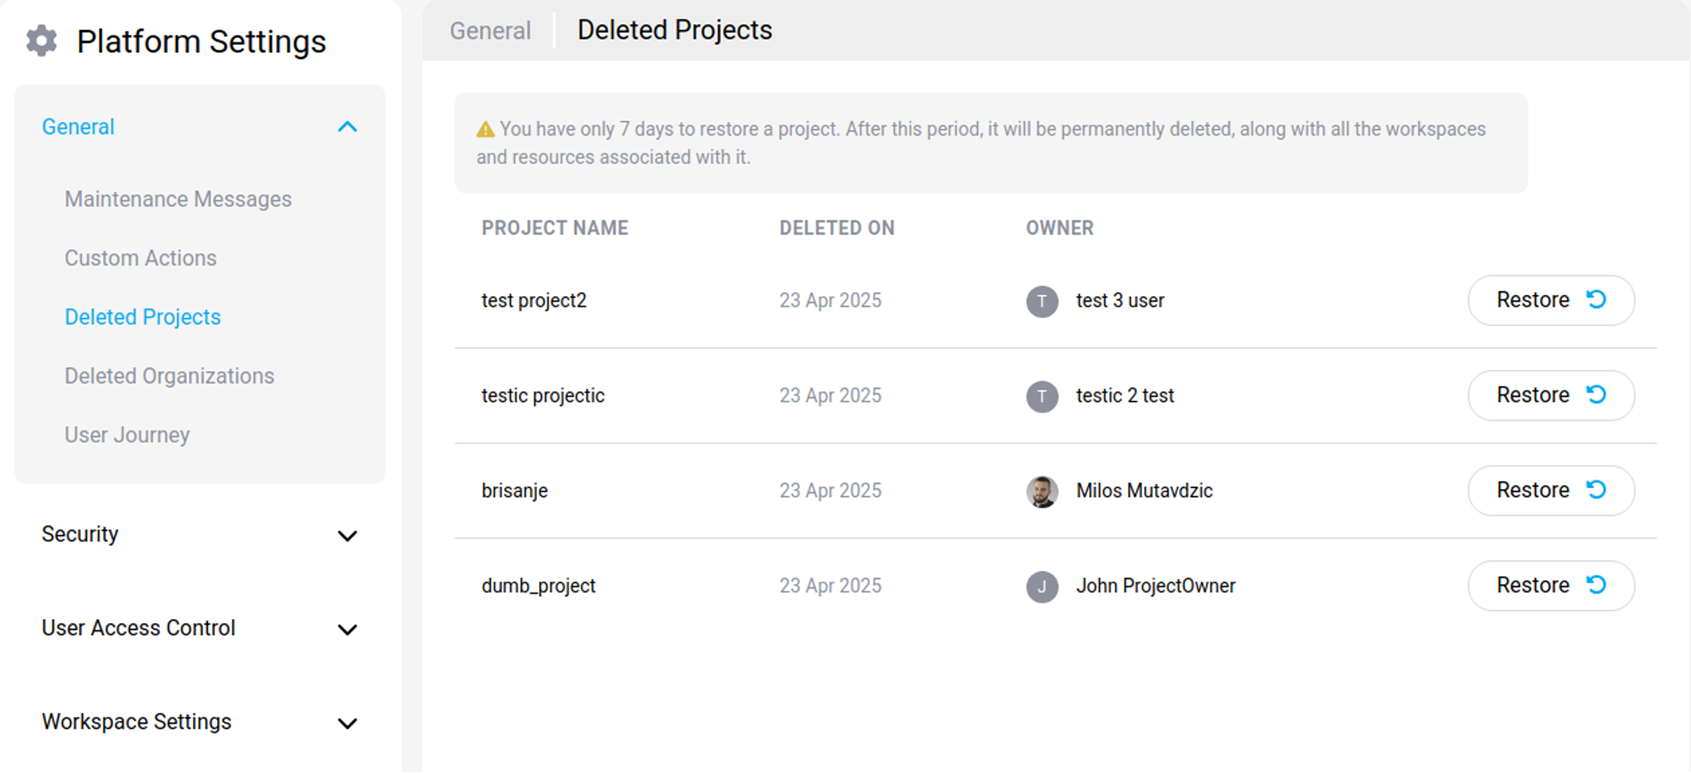
You can recover a deleted project for a period of 7 days on the Deleted Projects tab. Press the Recover button to the right of the project you want to restore.
Deleted Organizations
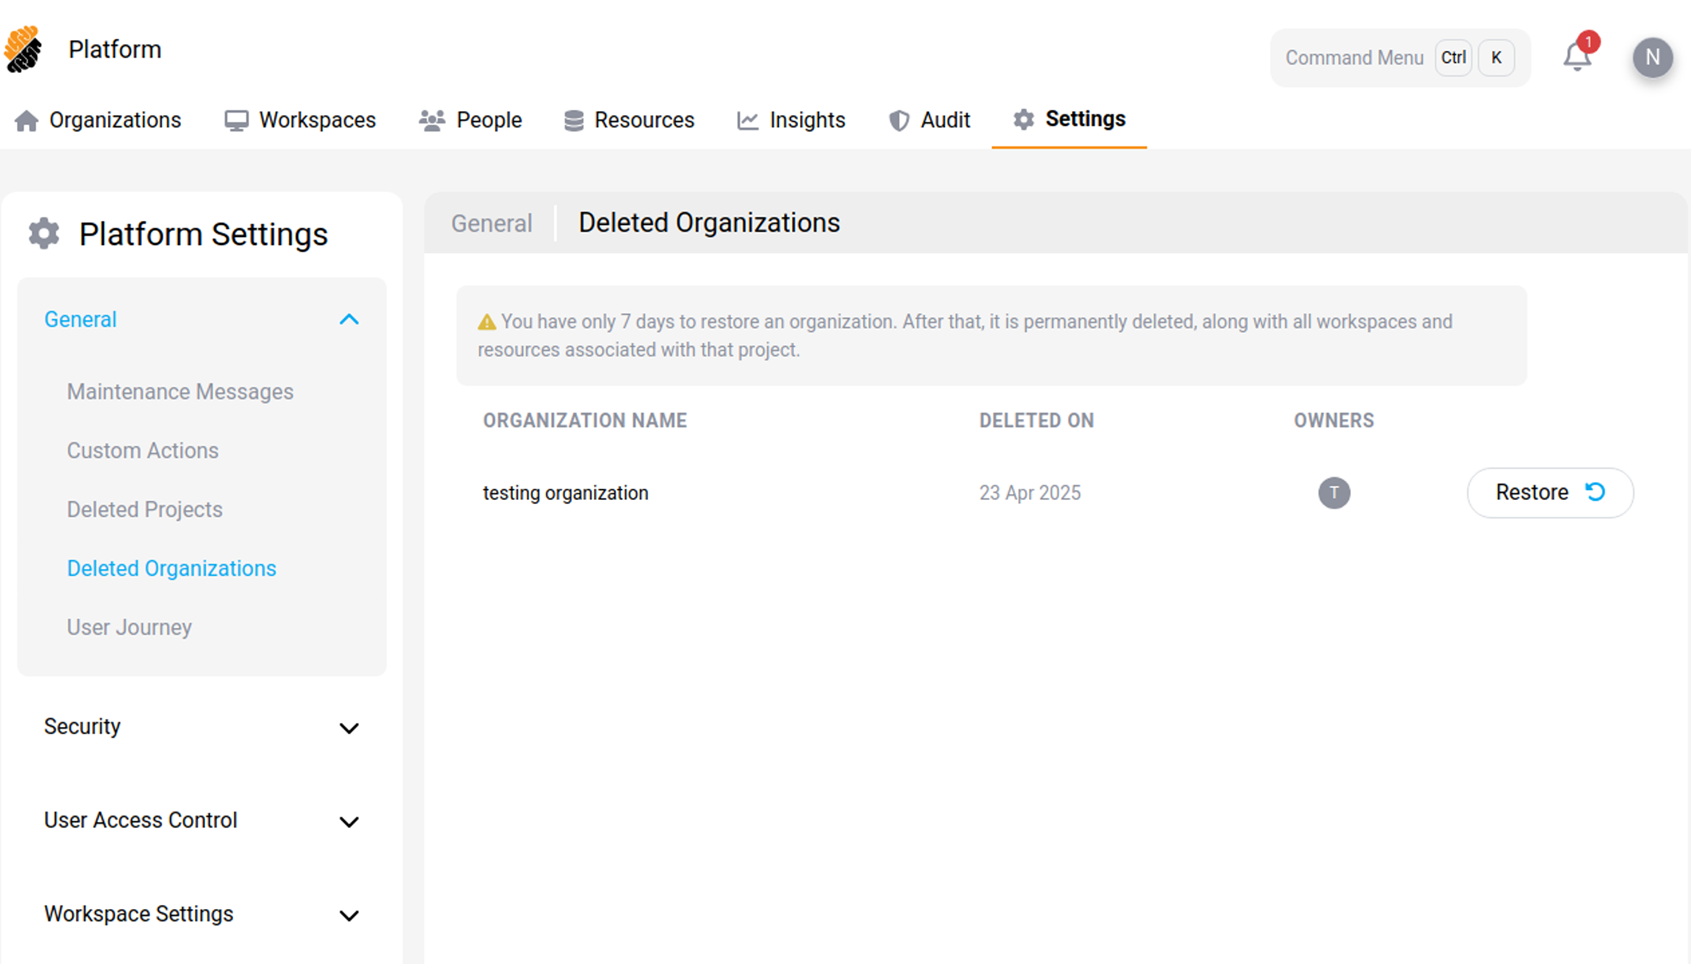
You can recover a deleted organization for a period of 7 days on the Deleted Organizations tab. Press the Recover button to the right of the organization you want to restore.
Documentation
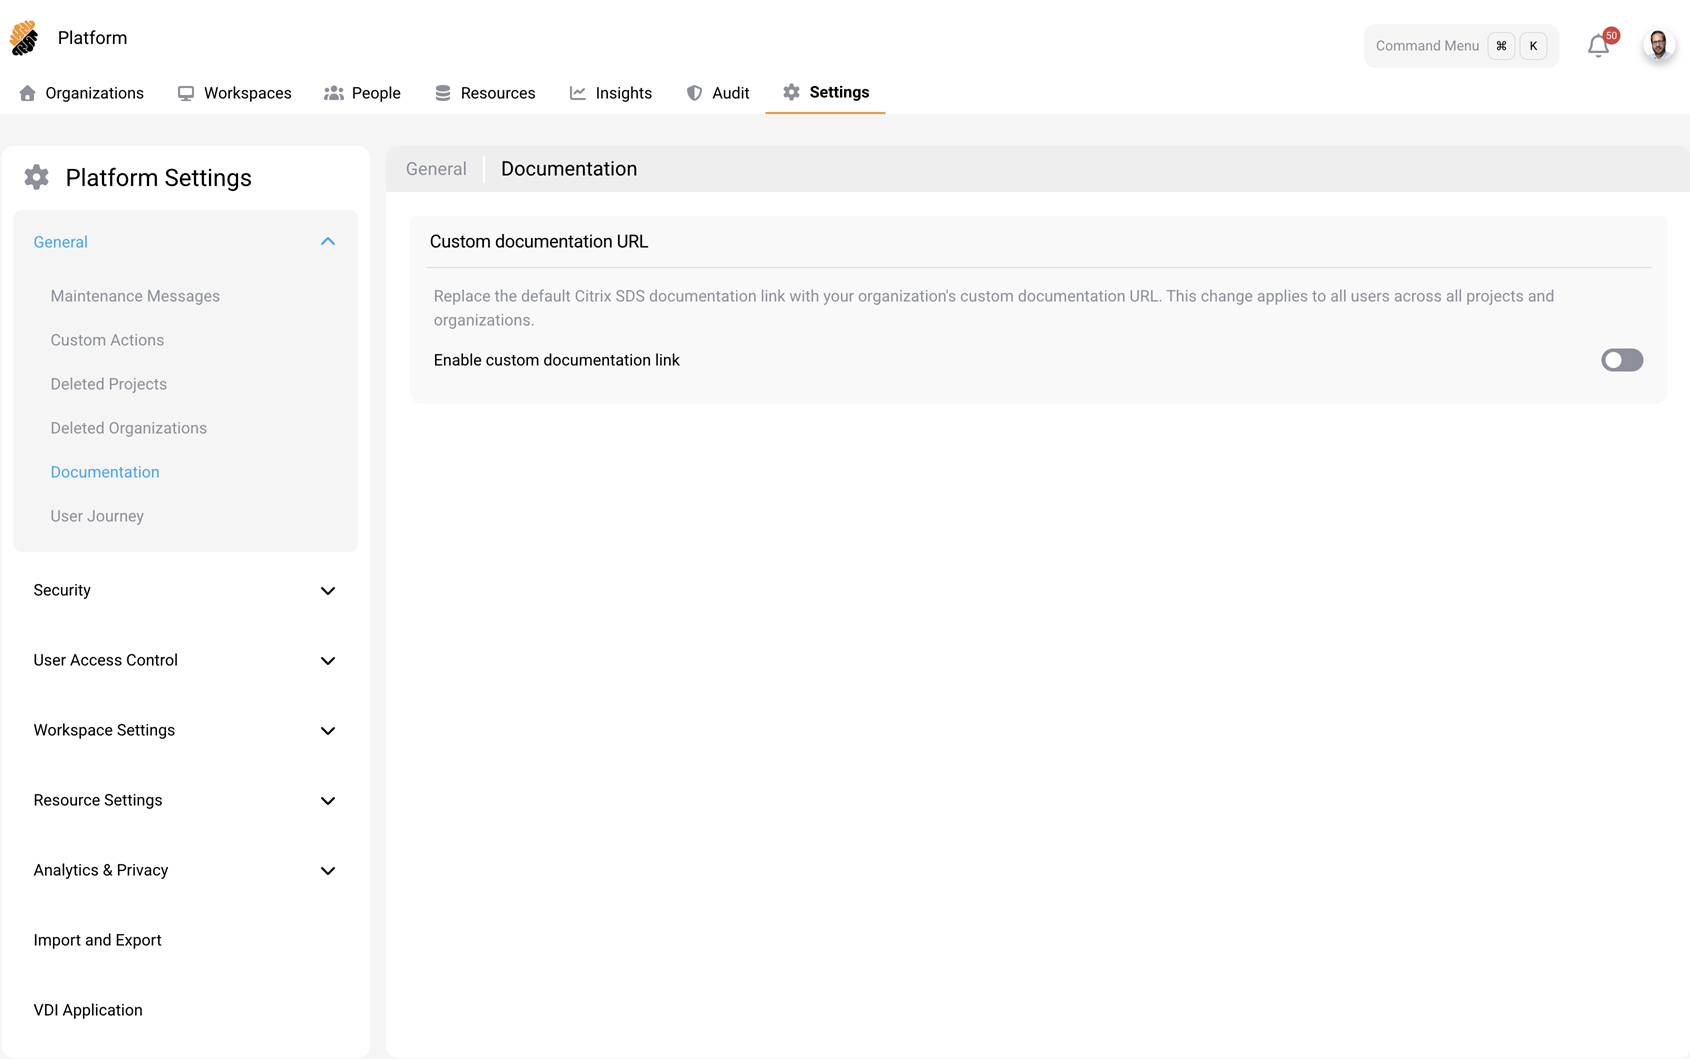
By default, the platform links to the standard Citrix SecurSpaces™ documentation. You can replace this link with a custom documentation URL that points to your organization’s own documentation site.
When enabled, this change applies to all users across all projects and organizations. When you turn the setting off, the link reverts to the default Citrix SecurSpaces documentation.
To set a custom documentation URL:
- Go to Settings > General > Documentation.
- Turn on Enable custom documentation link.
- In the Custom Documentation URL field, enter the full web address of your documentation site, including
https://. - Click Apply.
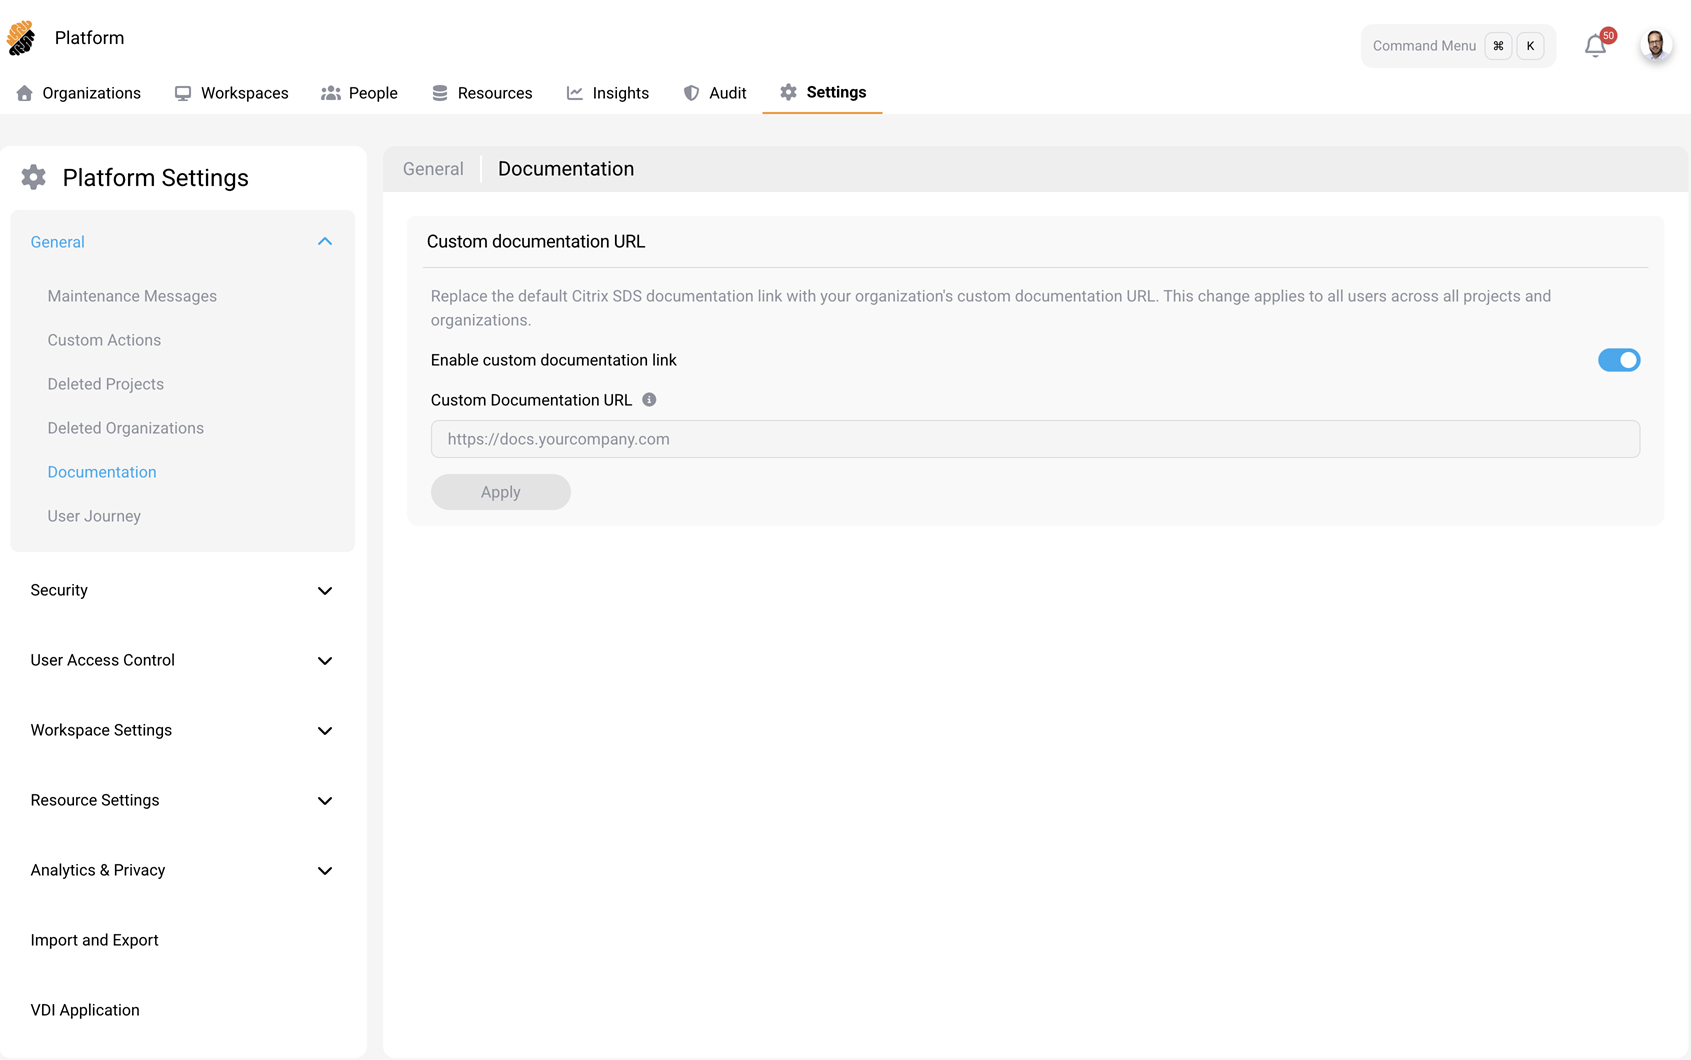
To revert to the default SecurSpaces documentation, turn off Enable custom documentation link.
OpenVSX Marketplace
By default, VS Code workspaces in SecurSpaces use the public Open VSX marketplace for extension discovery and installation. You can override this with a custom OpenVSX marketplace URL so that developers only discover and install extensions from your organization’s approved marketplace.
This setting is configured at the platform level and is inherited by all organizations, projects, and workspaces. When enabled, new workspaces use the configured marketplace immediately. Existing workspaces use the new marketplace after their next restart.
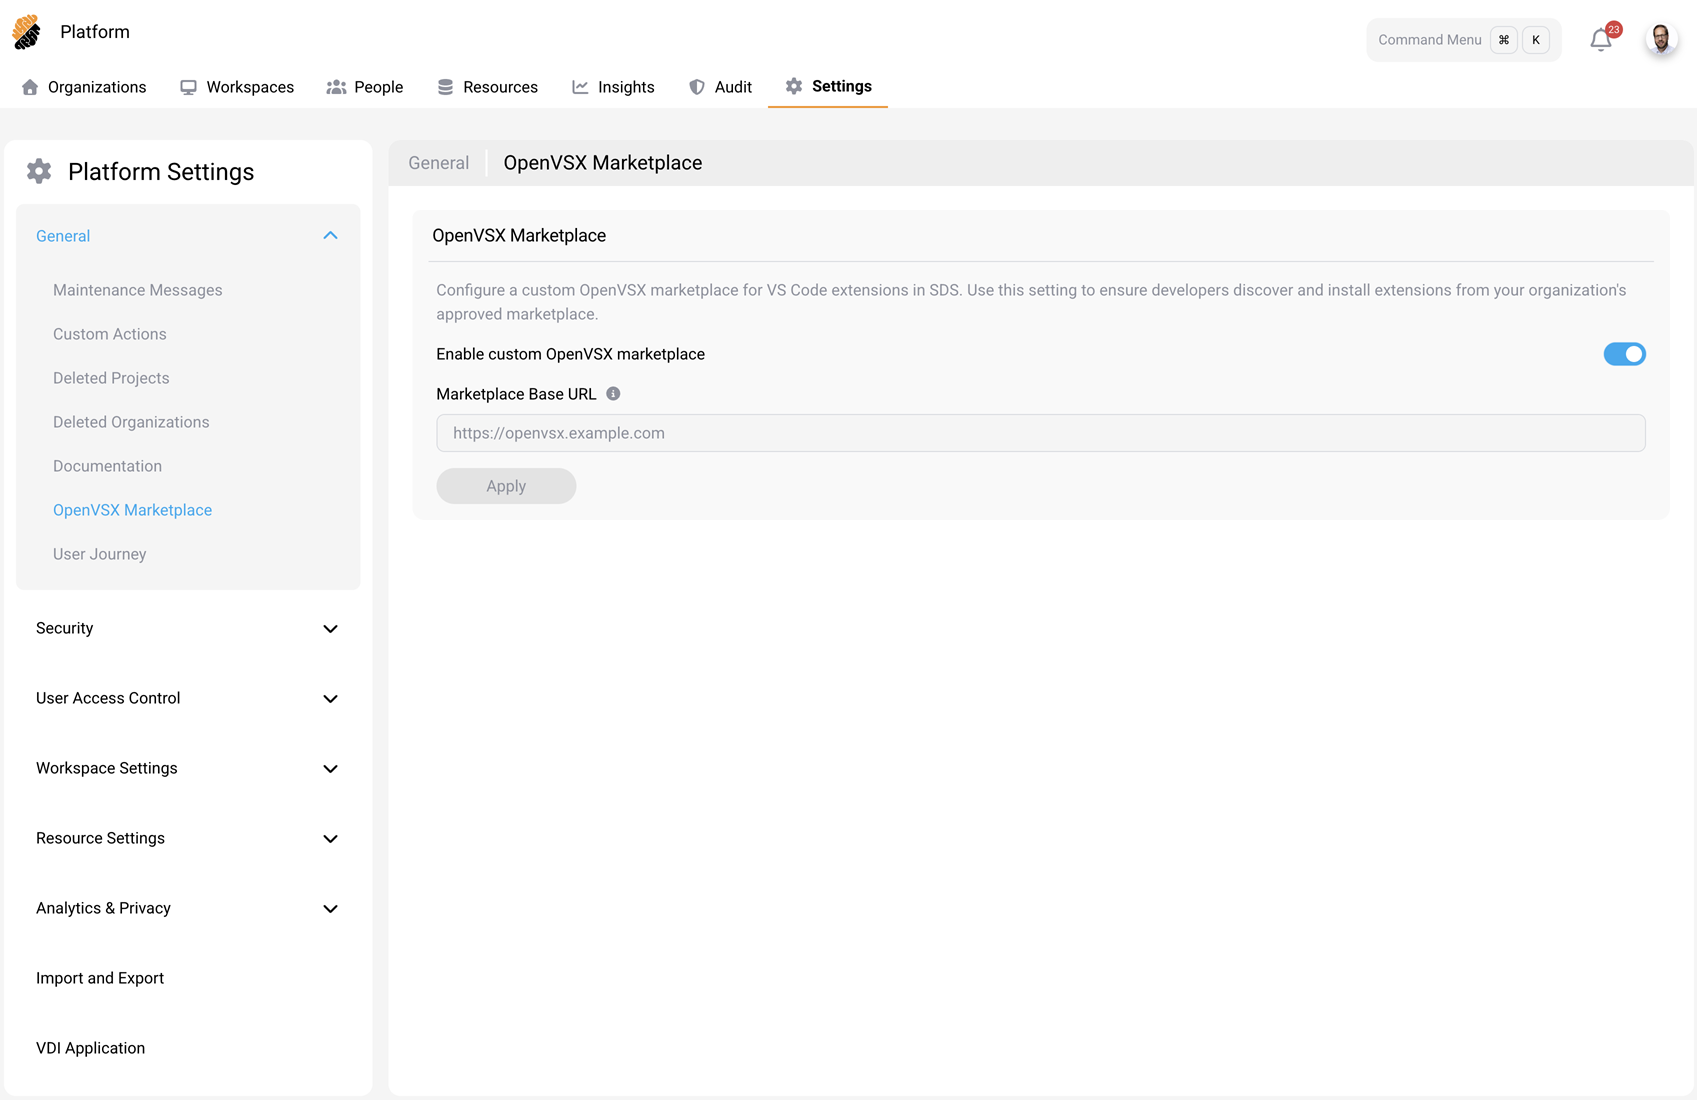
To configure a custom OpenVSX marketplace:
- Go to Settings > General > OpenVSX Marketplace.
- Turn on Enable custom OpenVSX marketplace.
- In the Marketplace Base URL field, enter the base URL of your internal OpenVSX service, including
https://. - Click Apply.
To revert to the default public marketplace, turn off Enable custom OpenVSX marketplace.
Note:
Changes take effect immediately for new workspaces. Existing workspaces continue to use their current marketplace configuration until they are restarted.
Onboarding & Guidance
This section controls the onboarding experiences shown to new users and project owners. Three can be turned on independently:
| Setting | What it shows |
|---|---|
| User Onboarding Checklist | A checklist on the developer’s overview page |
| Project Scaffolding Checklist | A checklist on the project owner’s overview page |
| Classic User Journey | The legacy welcome wizard shown at sign-in, focused on profile security settings |
Note:
Turn on only the experiences your users need. Several overlapping flows at once can overwhelm a new user and dilute the value of each one.
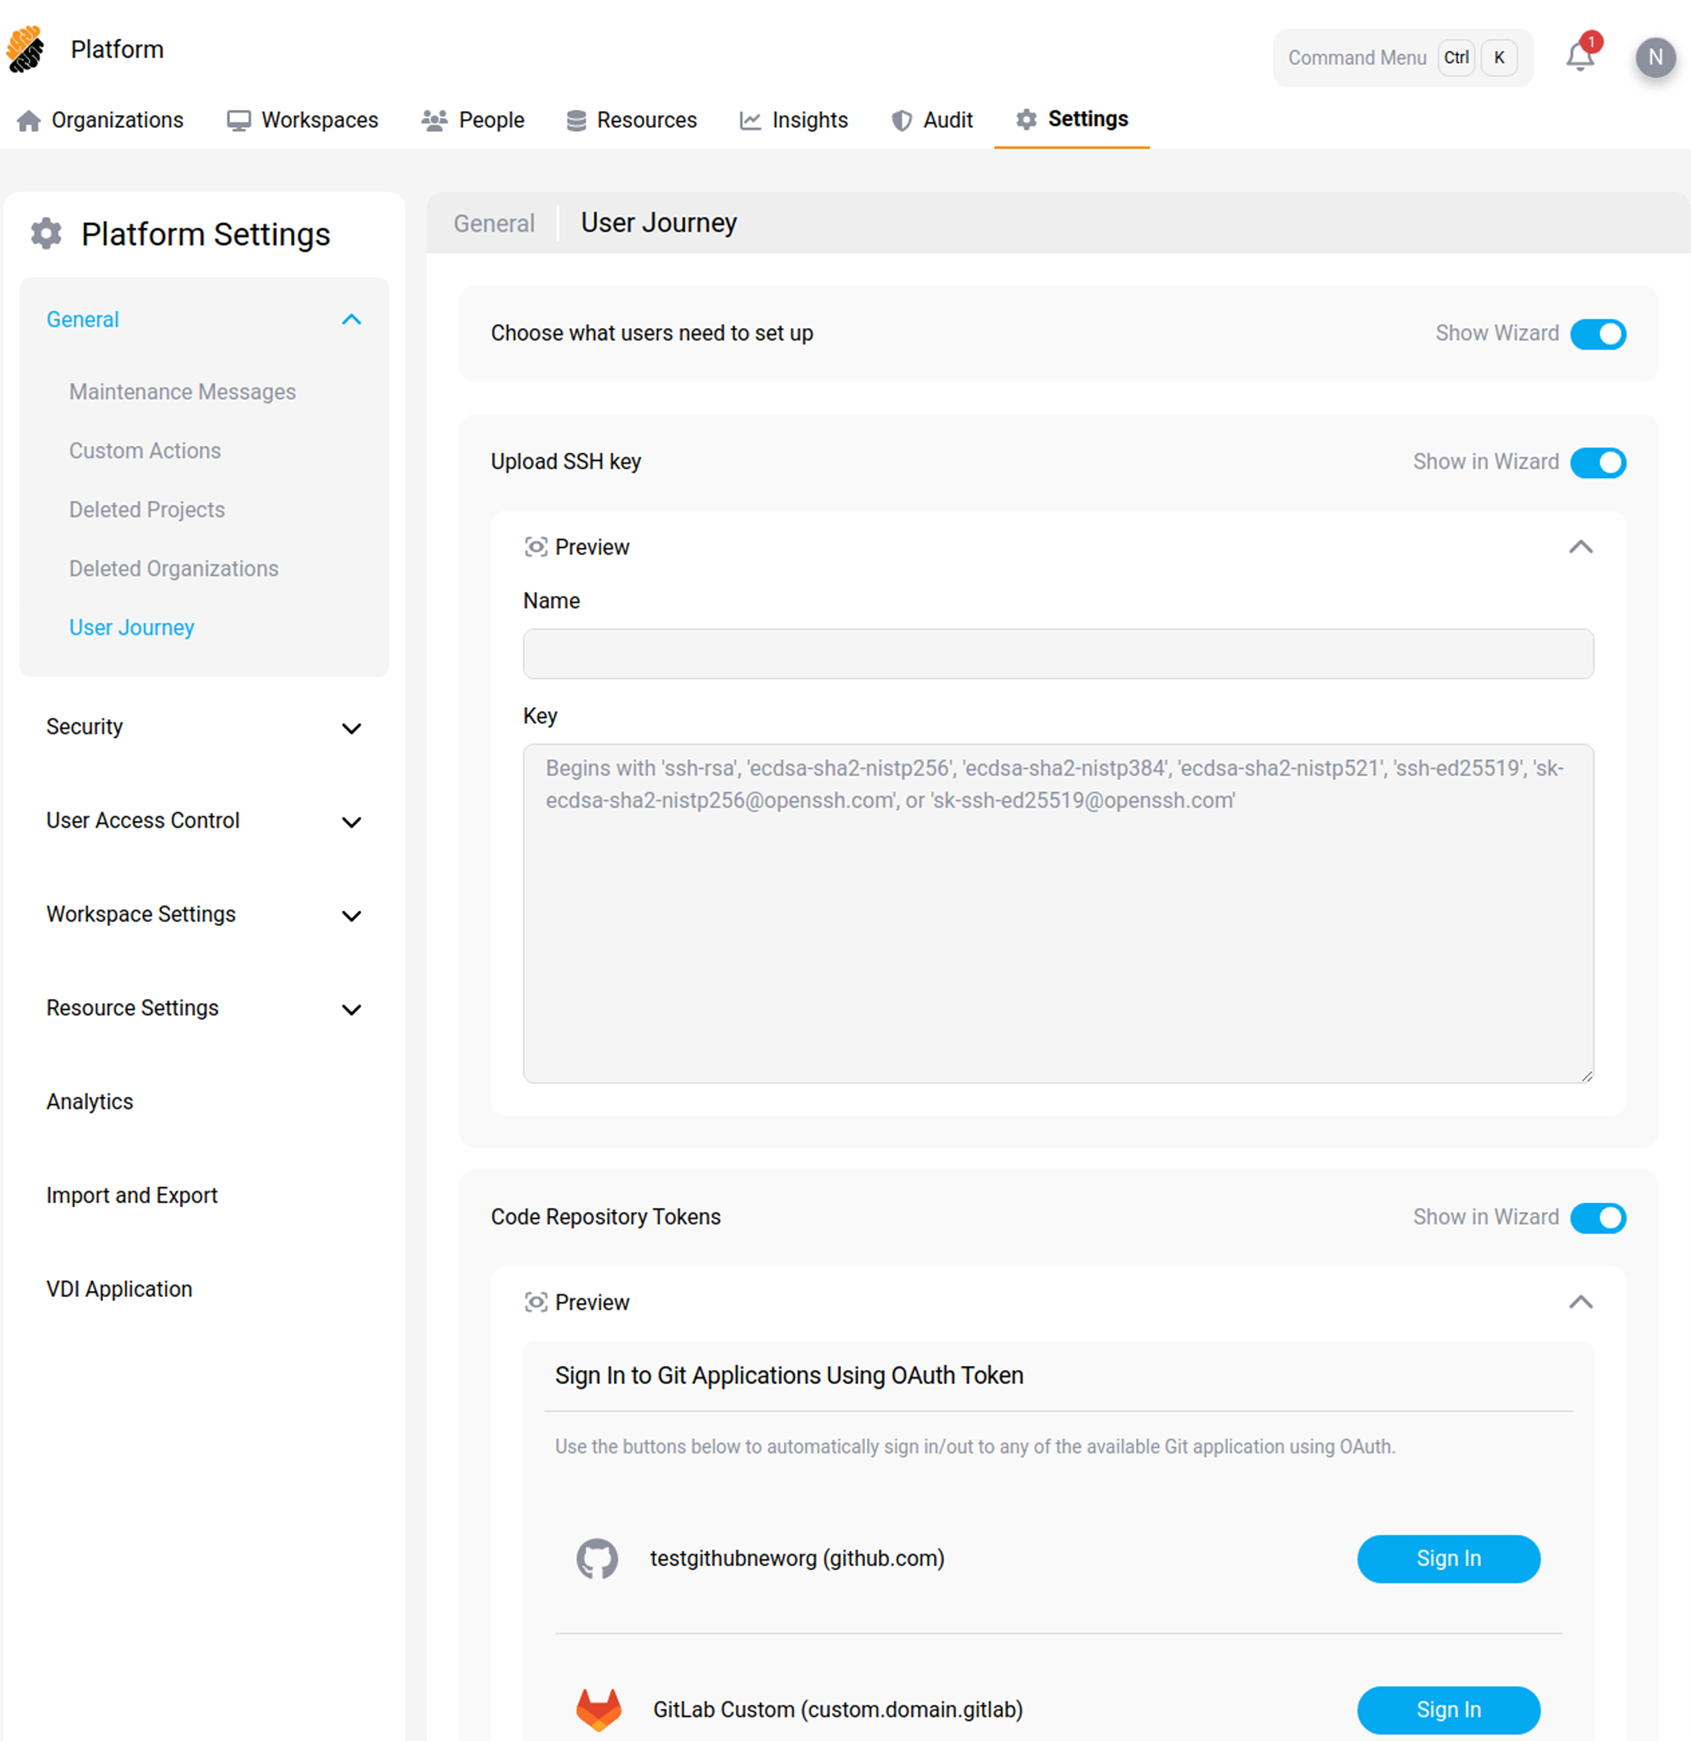
Onboarding checklists
The two checklists give project owners and developers guided next steps from project pages. Each appears as a collapsible side panel and keeps progress as users move through the product.
The Project Scaffolding Checklist guides a project owner to:
- Review container images.
- Add code repositories.
- Configure secrets.
- Create workspace templates.
- Add users.
The User Onboarding Checklist guides a developer to:
- Review their profile.
- Configure integrations.
- Customize their configuration.
- Set up security credentials.
- Create a workspace.
To configure checklist availability:
- Go to Settings > General > Onboarding & Guidance.
- Turn Project Scaffolding Checklist on or off.
- Turn User Onboarding Checklist on or off.
- Select Apply.
Expected result: The selected checklist settings apply to project pages. Users keep their saved checklist progress unless the feature is disabled.
Share
Share
This Preview product documentation is Citrix Confidential.
You agree to hold this documentation confidential pursuant to the terms of your Citrix Beta/Tech Preview Agreement.
The development, release and timing of any features or functionality described in the Preview documentation remains at our sole discretion and are subject to change without notice or consultation.
The documentation is for informational purposes only and is not a commitment, promise or legal obligation to deliver any material, code or functionality and should not be relied upon in making Citrix product purchase decisions.
If you do not agree, select I DO NOT AGREE to exit.