This content has been machine translated dynamically.
Dieser Inhalt ist eine maschinelle Übersetzung, die dynamisch erstellt wurde. (Haftungsausschluss)
Cet article a été traduit automatiquement de manière dynamique. (Clause de non responsabilité)
Este artículo lo ha traducido una máquina de forma dinámica. (Aviso legal)
此内容已经过机器动态翻译。 放弃
このコンテンツは動的に機械翻訳されています。免責事項
이 콘텐츠는 동적으로 기계 번역되었습니다. 책임 부인
Este texto foi traduzido automaticamente. (Aviso legal)
Questo contenuto è stato tradotto dinamicamente con traduzione automatica.(Esclusione di responsabilità))
This article has been machine translated.
Dieser Artikel wurde maschinell übersetzt. (Haftungsausschluss)
Ce article a été traduit automatiquement. (Clause de non responsabilité)
Este artículo ha sido traducido automáticamente. (Aviso legal)
この記事は機械翻訳されています.免責事項
이 기사는 기계 번역되었습니다.책임 부인
Este artigo foi traduzido automaticamente.(Aviso legal)
这篇文章已经过机器翻译.放弃
Questo articolo è stato tradotto automaticamente.(Esclusione di responsabilità))
Translation failed!
SCIM configuration
The Citrix SecurSpaces™ platform adheres to the System for Cross-domain Identity Management (SCIM) 2.0
specification. Use SCIM for automatic provisioning, synchronization, and deprovisioning of users and groups.
The SecurSpaces platform supports both the /Users and /Groups endpoints.
- Use the
/Usersendpoint to create, update, delete, and retrieve users. User responses include direct group memberships in the read-onlygroupsattribute when the user belongs to one or more groups. - Use the
/Groupsendpoint to create, update, delete, and retrieve groups. Group list responses include group members, so identity providers can validate memberships without requesting each group separately.
When your identity provider sends separate SCIM name fields, SecurSpaces maps name.givenName and
name.familyName to the user’s first and last name. If the provider sends name.formatted, SecurSpaces uses
that formatted value as the user’s display name.
Configure the SCIM provider
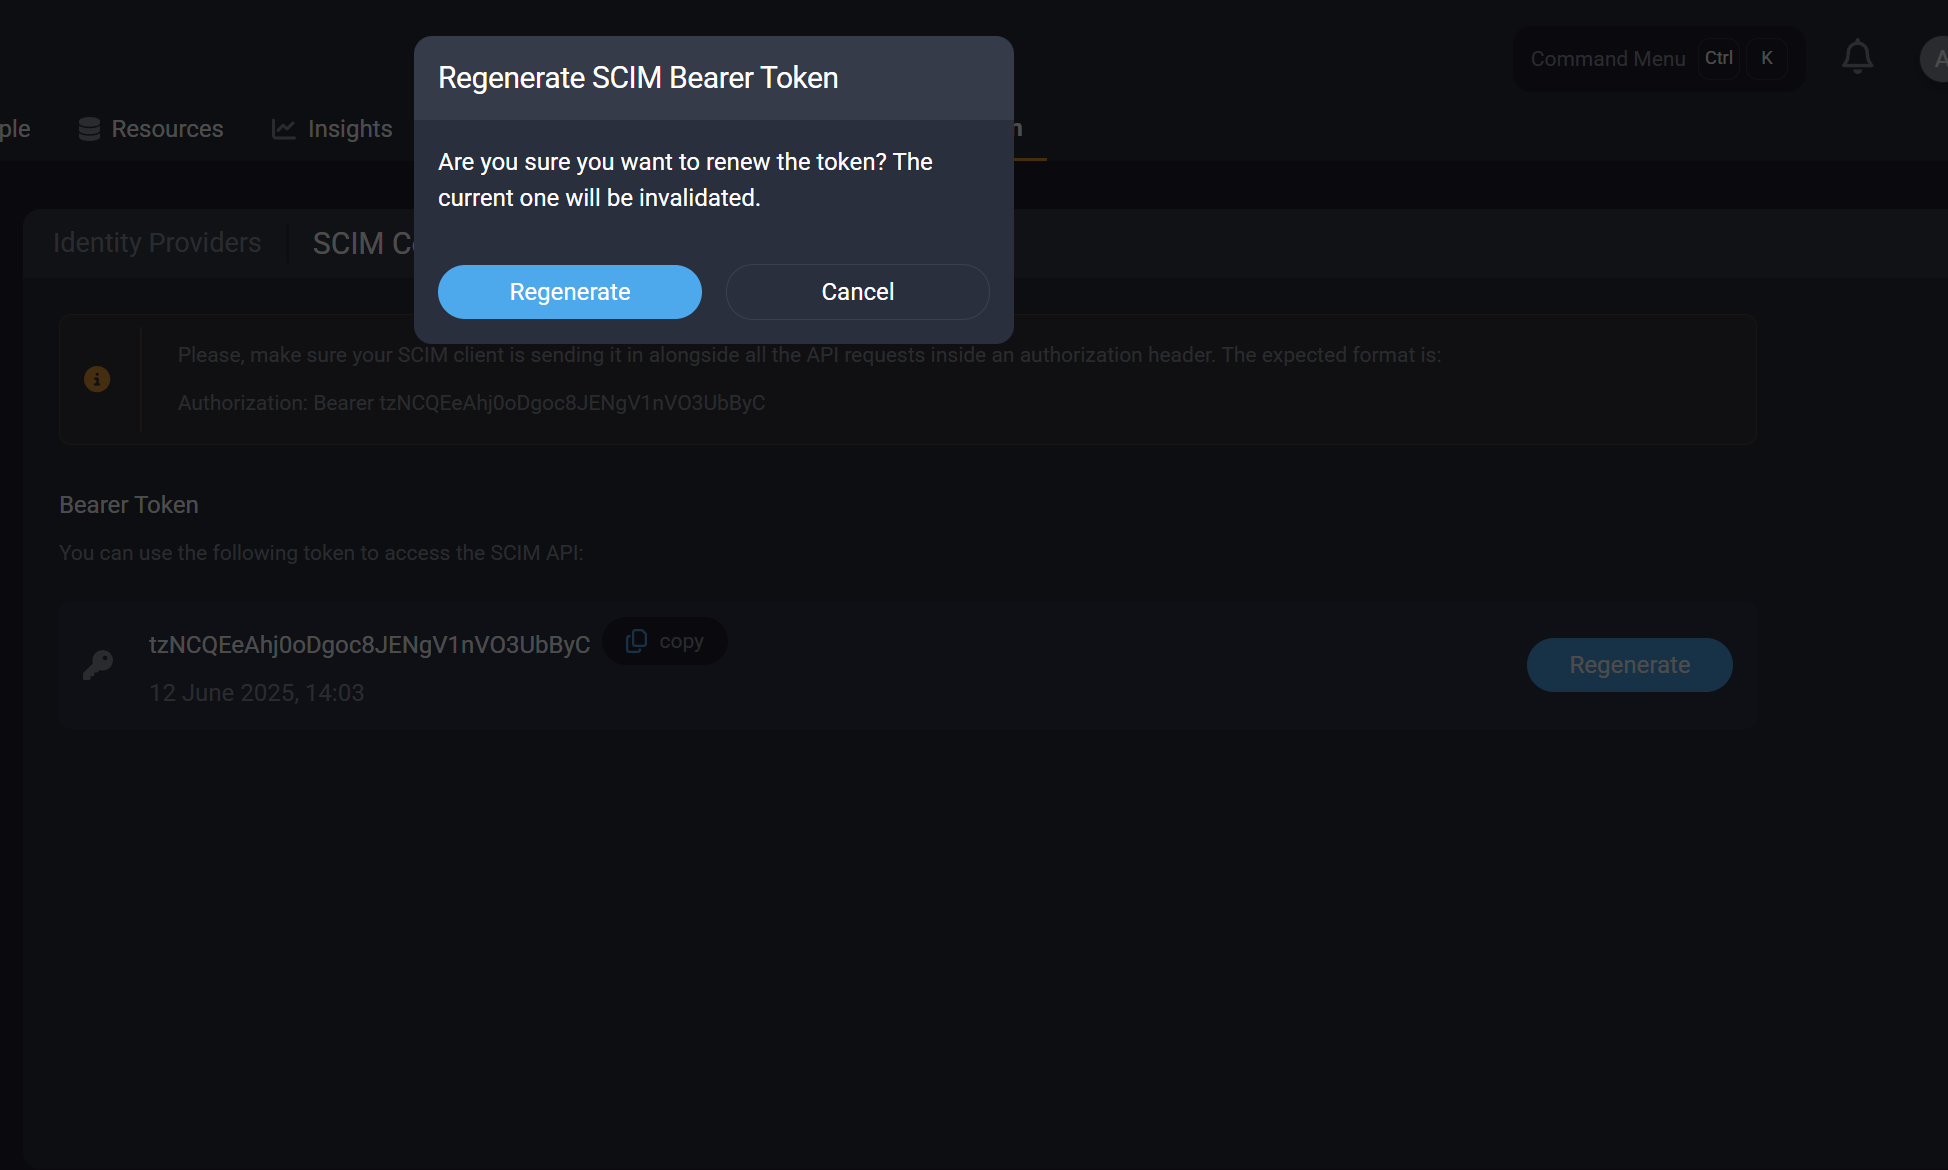
A token is required to authorize requests between your SCIM provider and the SecurSpaces platform. As an administrator, you can obtain the token from System Configuration > Identity Providers > SCIM Configuration.
https://<your-sds-hostname>/system_configuration/identity_providers/scim
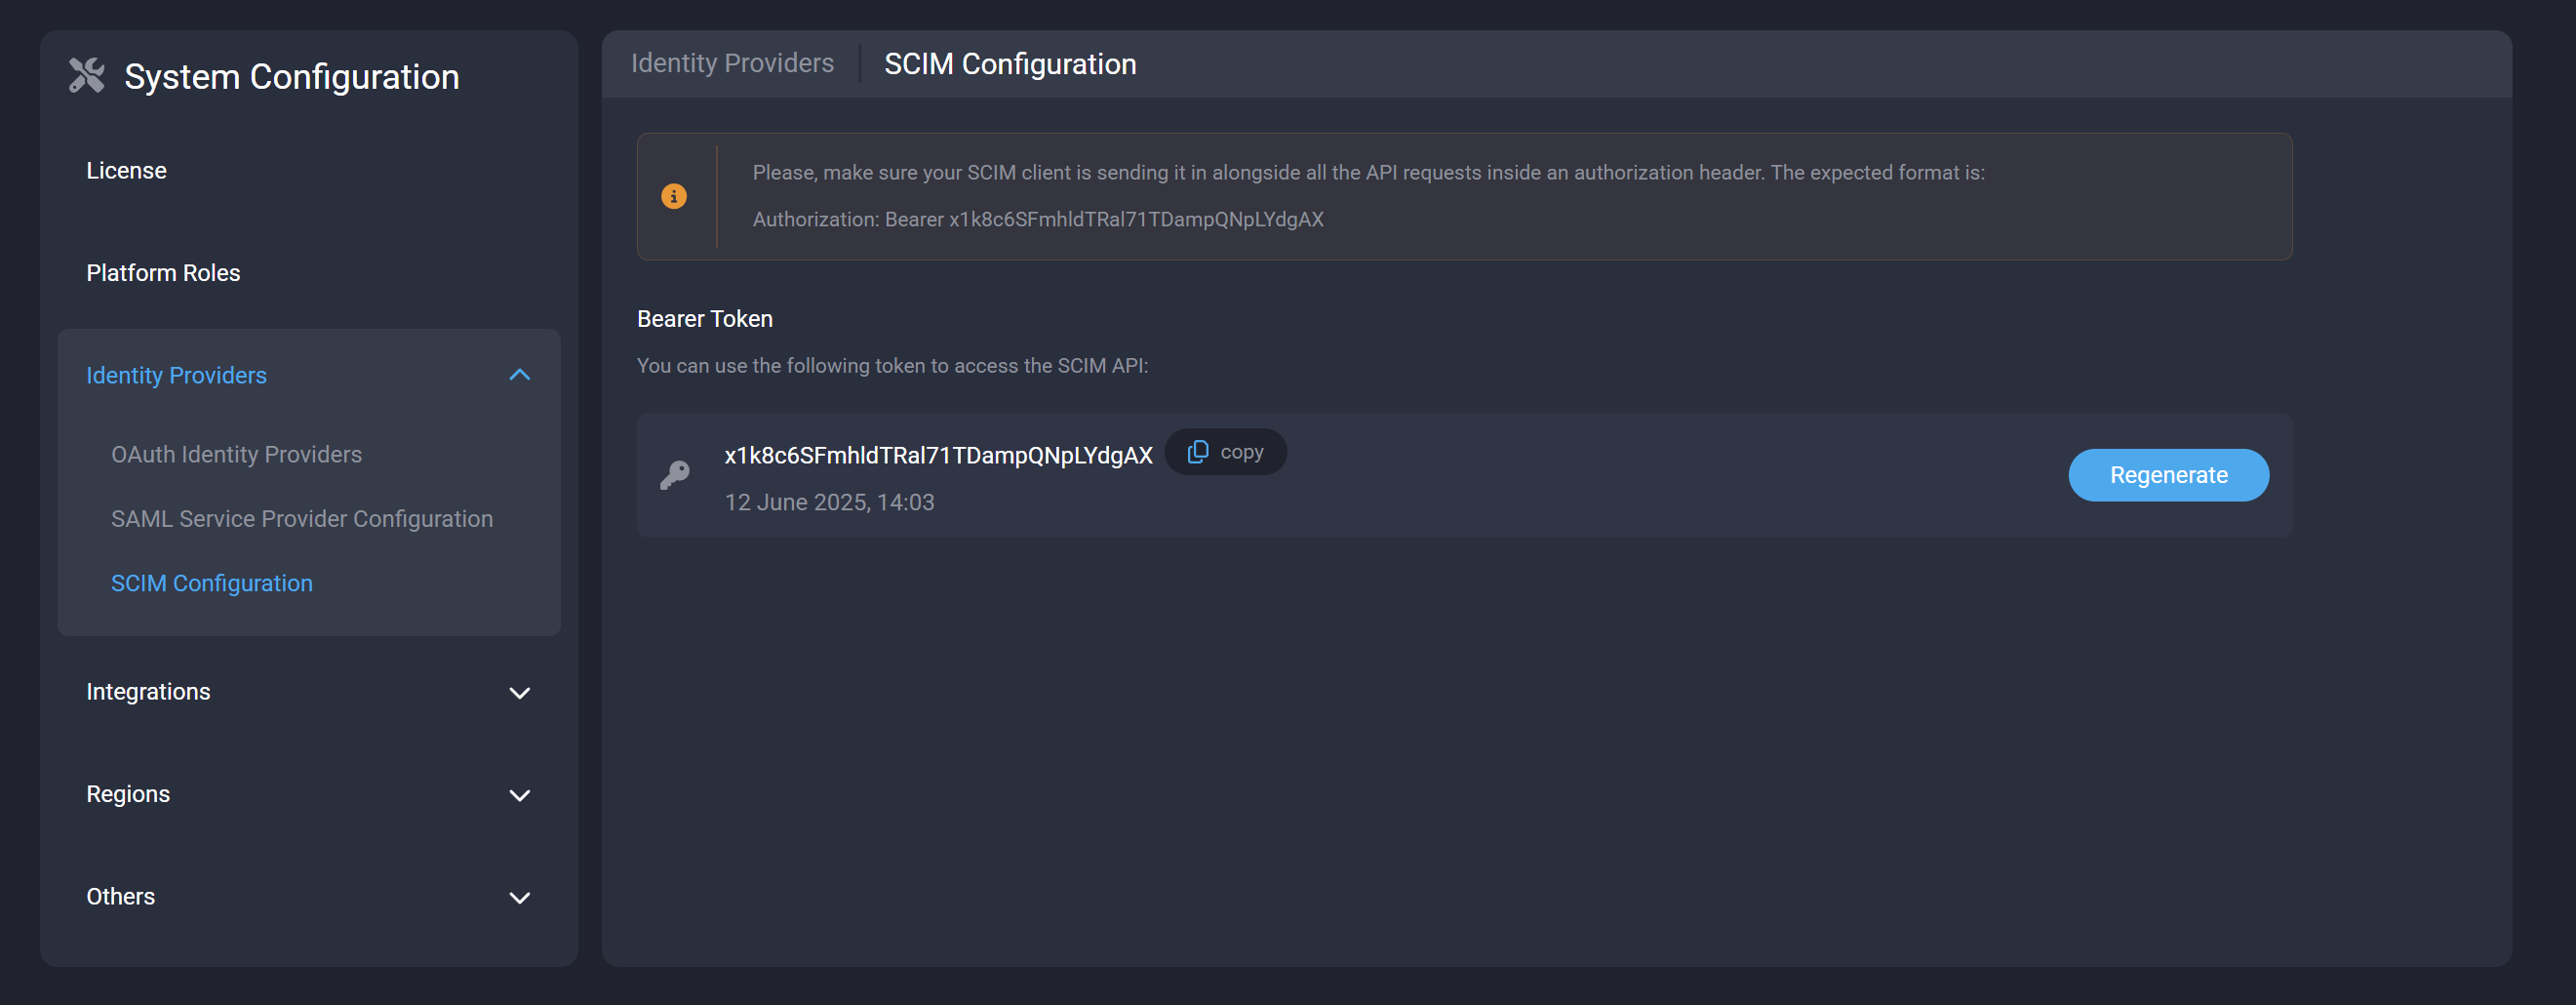
Ensure that your SCIM provider includes this token in all API requests, using the following authorization header format:
Authorization: Bearer <scim-token>
Okta
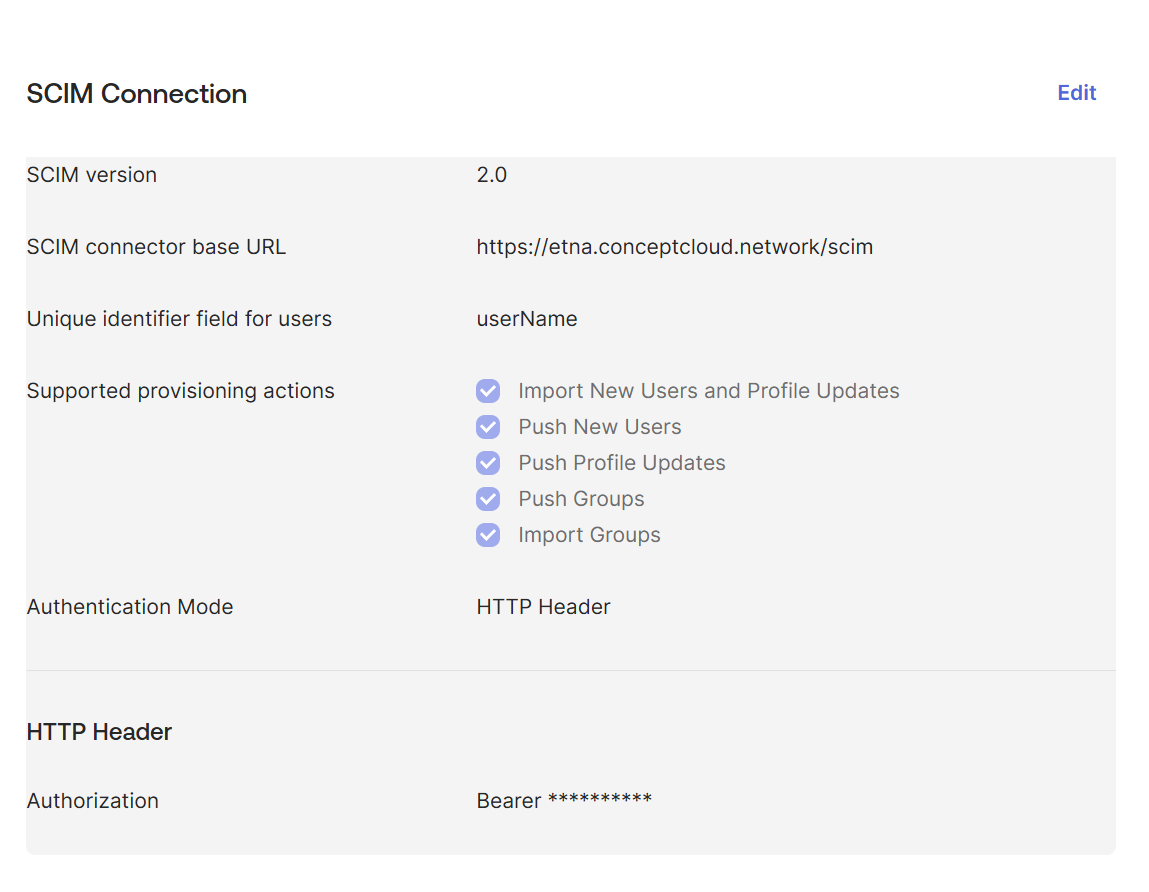
To use Okta, set these fields:
-
SCIM connector base URL:
https://<your-sds-hostname>/scim -
Unique identifier field for users:
userName
The configuration looks similar to this example:
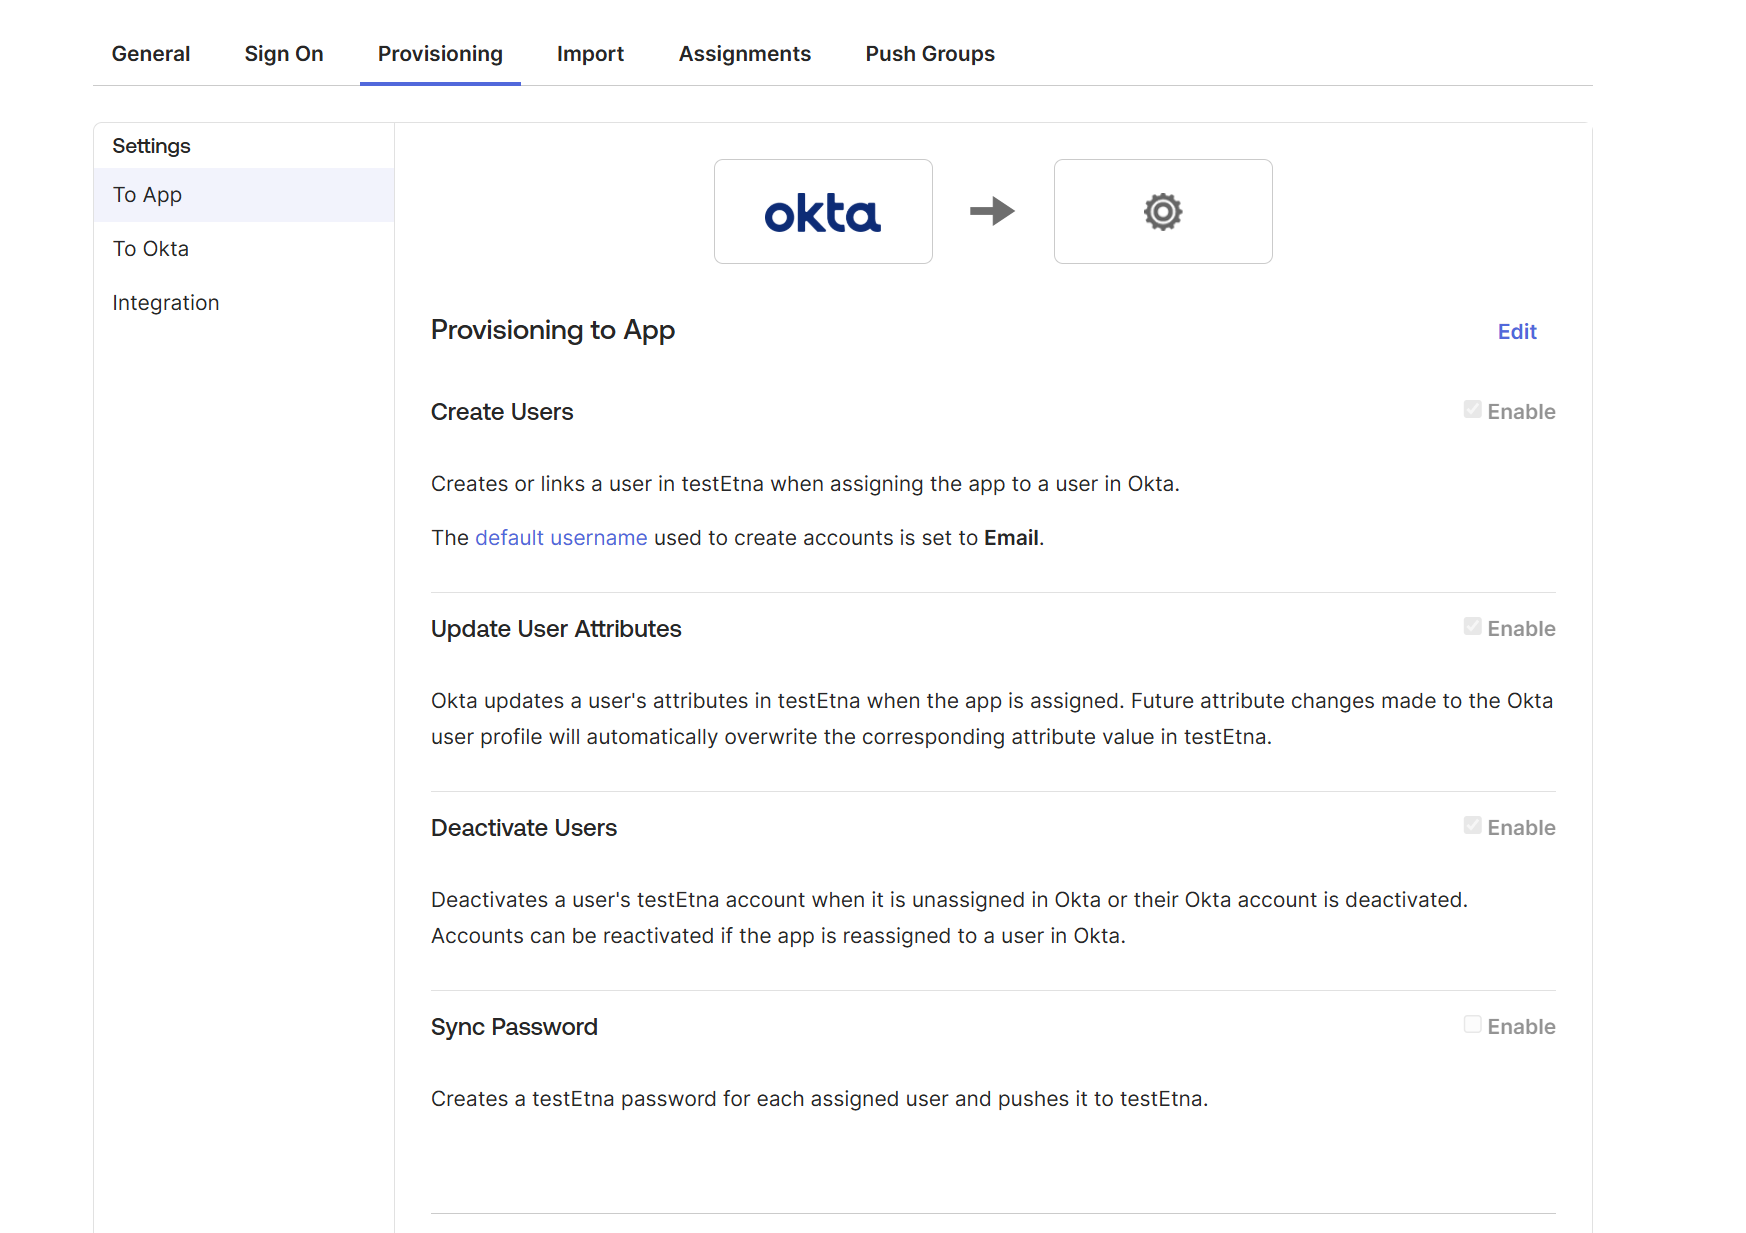
Under users, enable the options that match your provisioning workflow:
Microsoft Entra
To use Microsoft Entra, configure a custom Enterprise Application within your Microsoft Entra tenant.
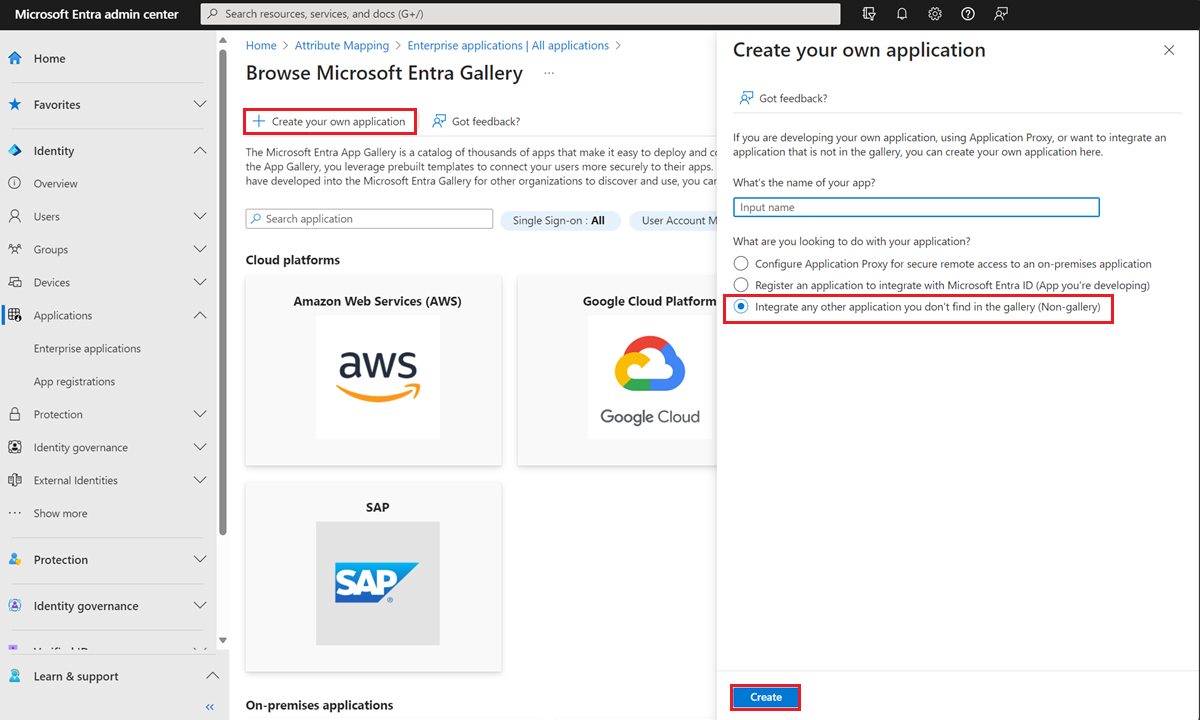
Add an Enterprise Application
- Sign in to the Microsoft Entra admin center with at least Cloud Application Administrator permissions.
- Go to Identity > Applications > Enterprise applications > All applications.
- Select + New application.
- Select Create your own application.
- Enter a unique application name, and select Integrate any other application you don’t find in the gallery.
- Select Create.
Configure provisioning
After the application is created, follow these steps to set up the SCIM connection:
- Go to Identity > Applications > Enterprise applications, and select your newly created application.
- Under Manage, select Provisioning.
- Select + New configuration.
- For Select authentication method, select the supported bearer token option.
- For Tenant URL, enter your SCIM endpoint URL. For example,
https://<your-sds-hostname>/scim. - For Secret token, enter the bearer token provided by SecurSpaces.
- Select Test Connection.
- Select Save.
Note:
A successful test connection might be required to continue.
PingOne
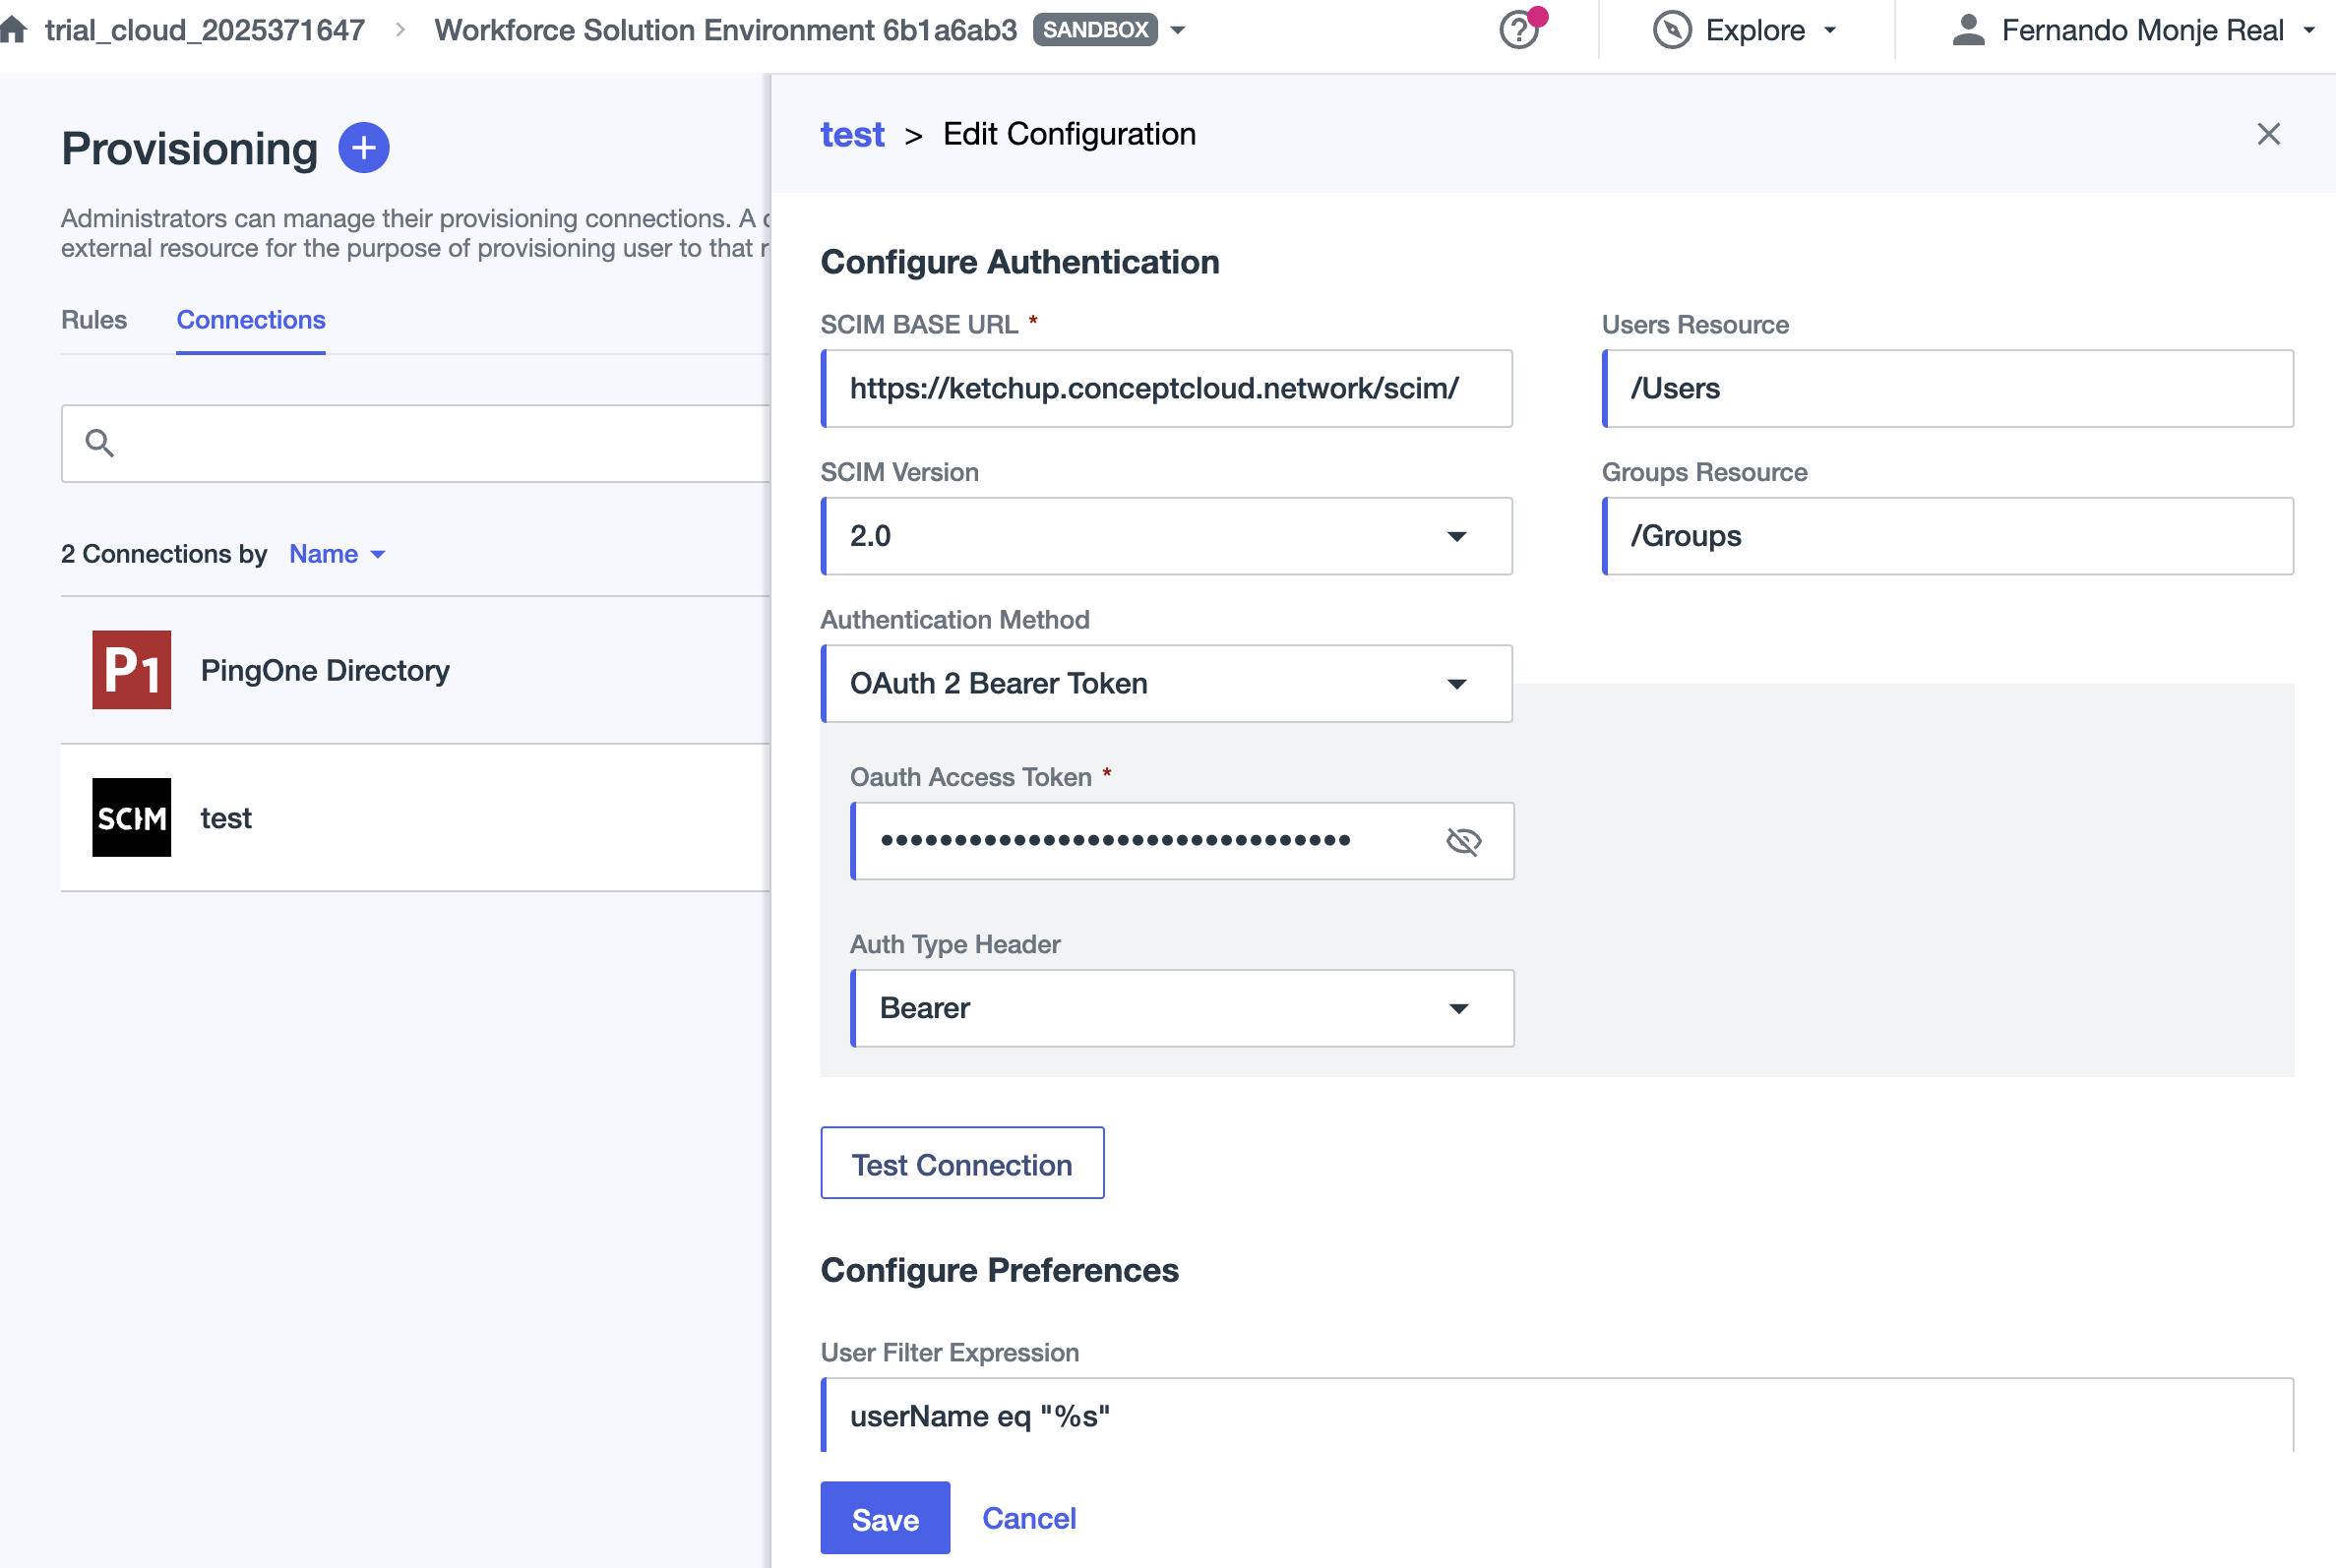
To use PingOne, set these fields:
-
SCIM base URL:
https://<your-sds-hostname>/scim -
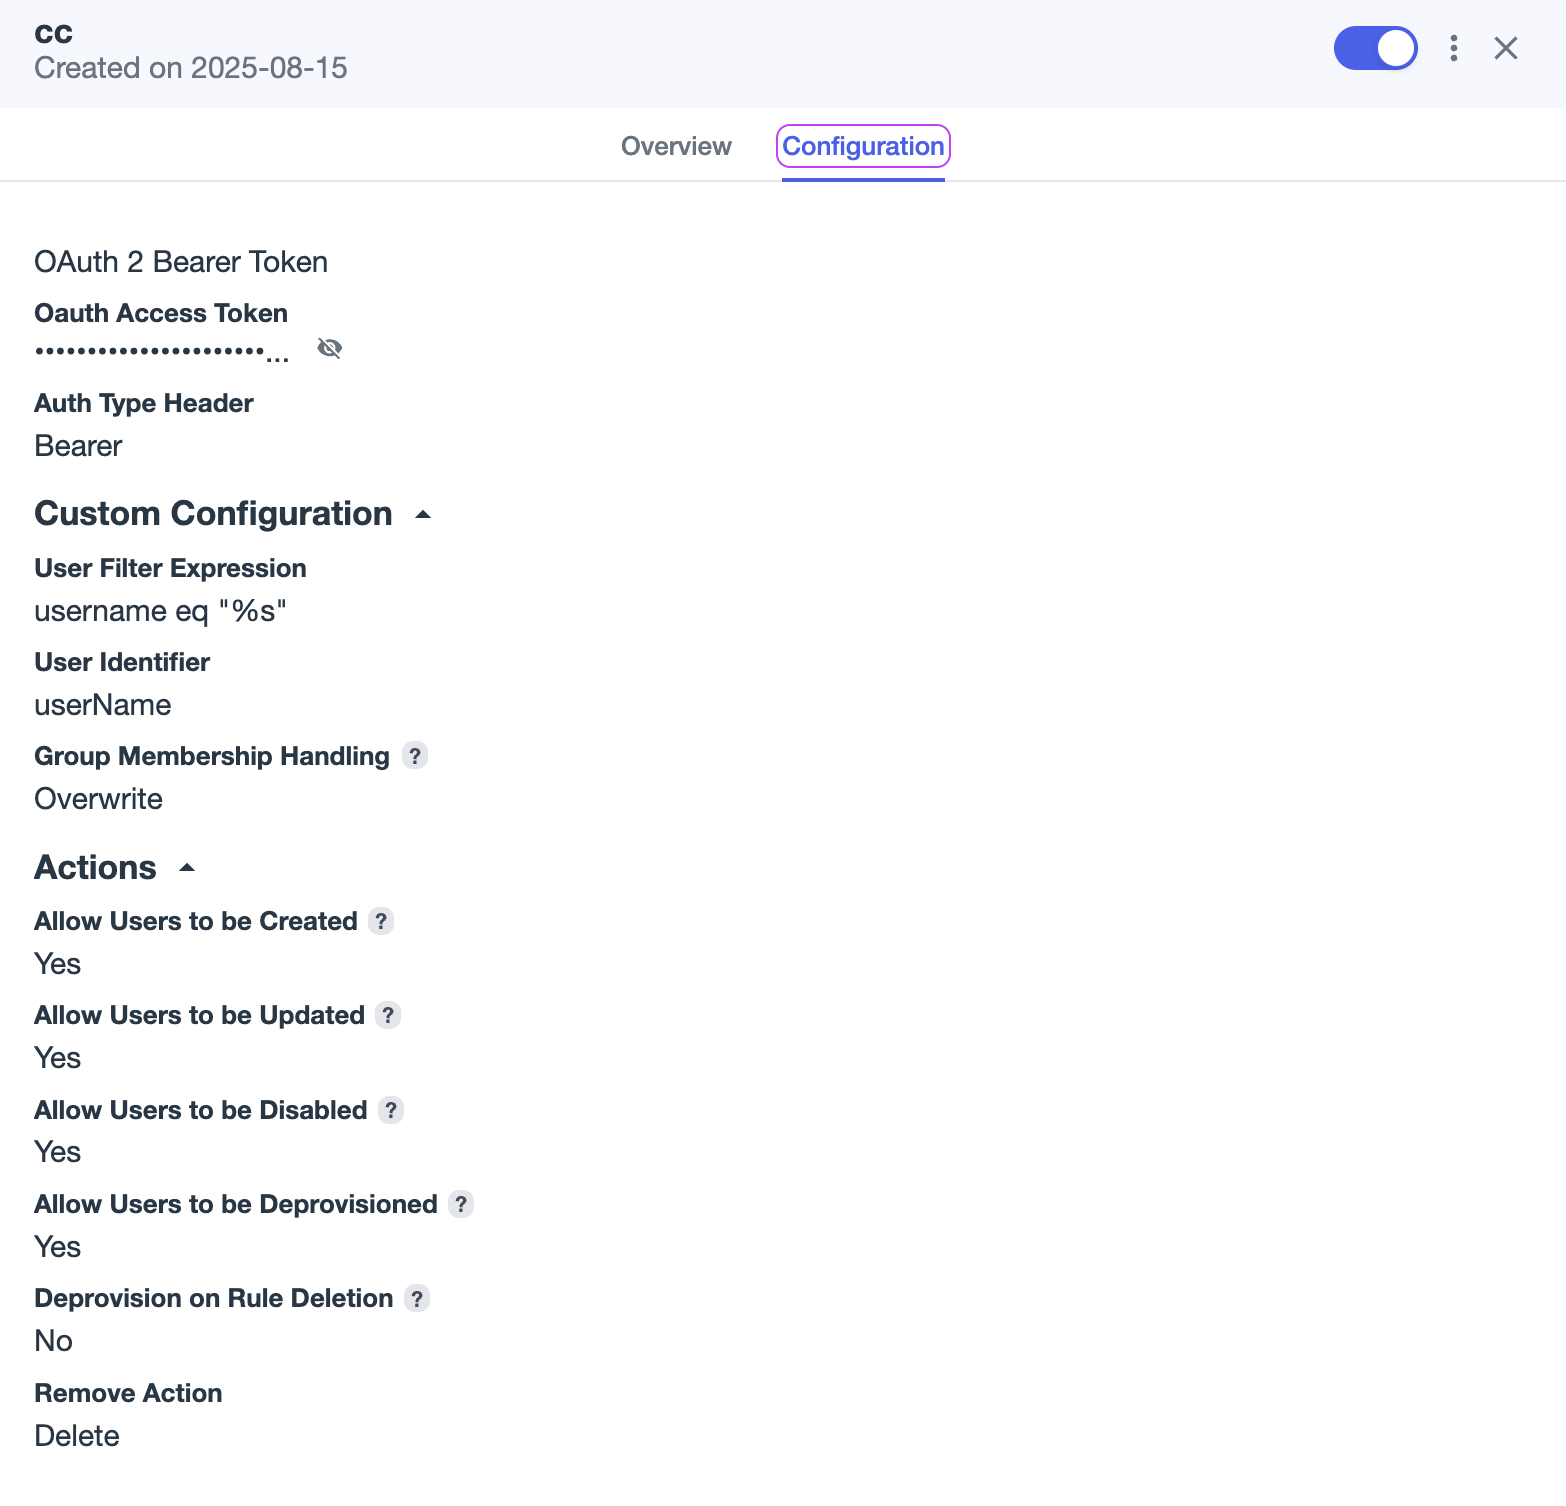
User Filter Expression: Change
usernametouserName, and changeEqtoeq.
The configuration looks similar to this example:
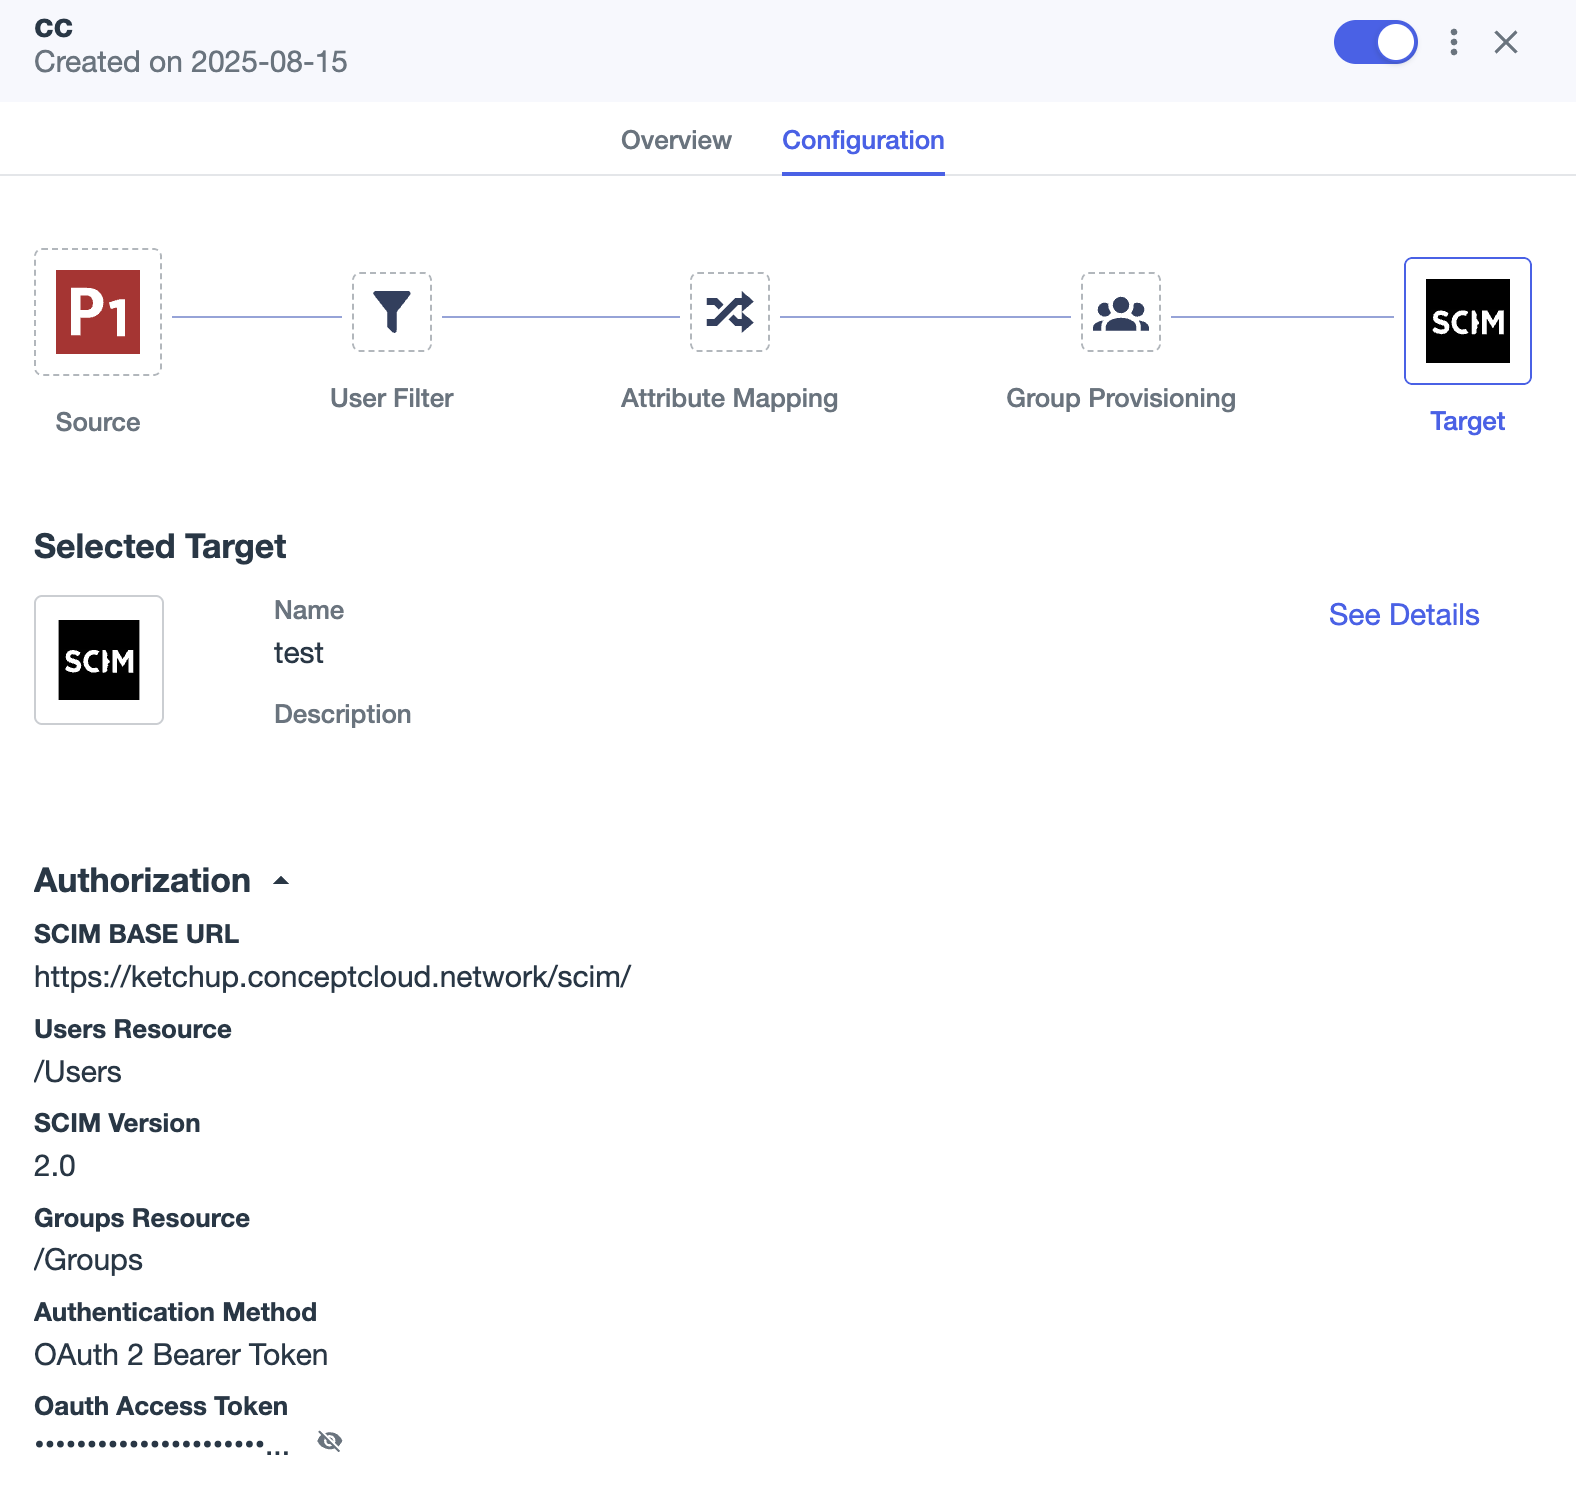
After configuration, the result looks similar to these examples:
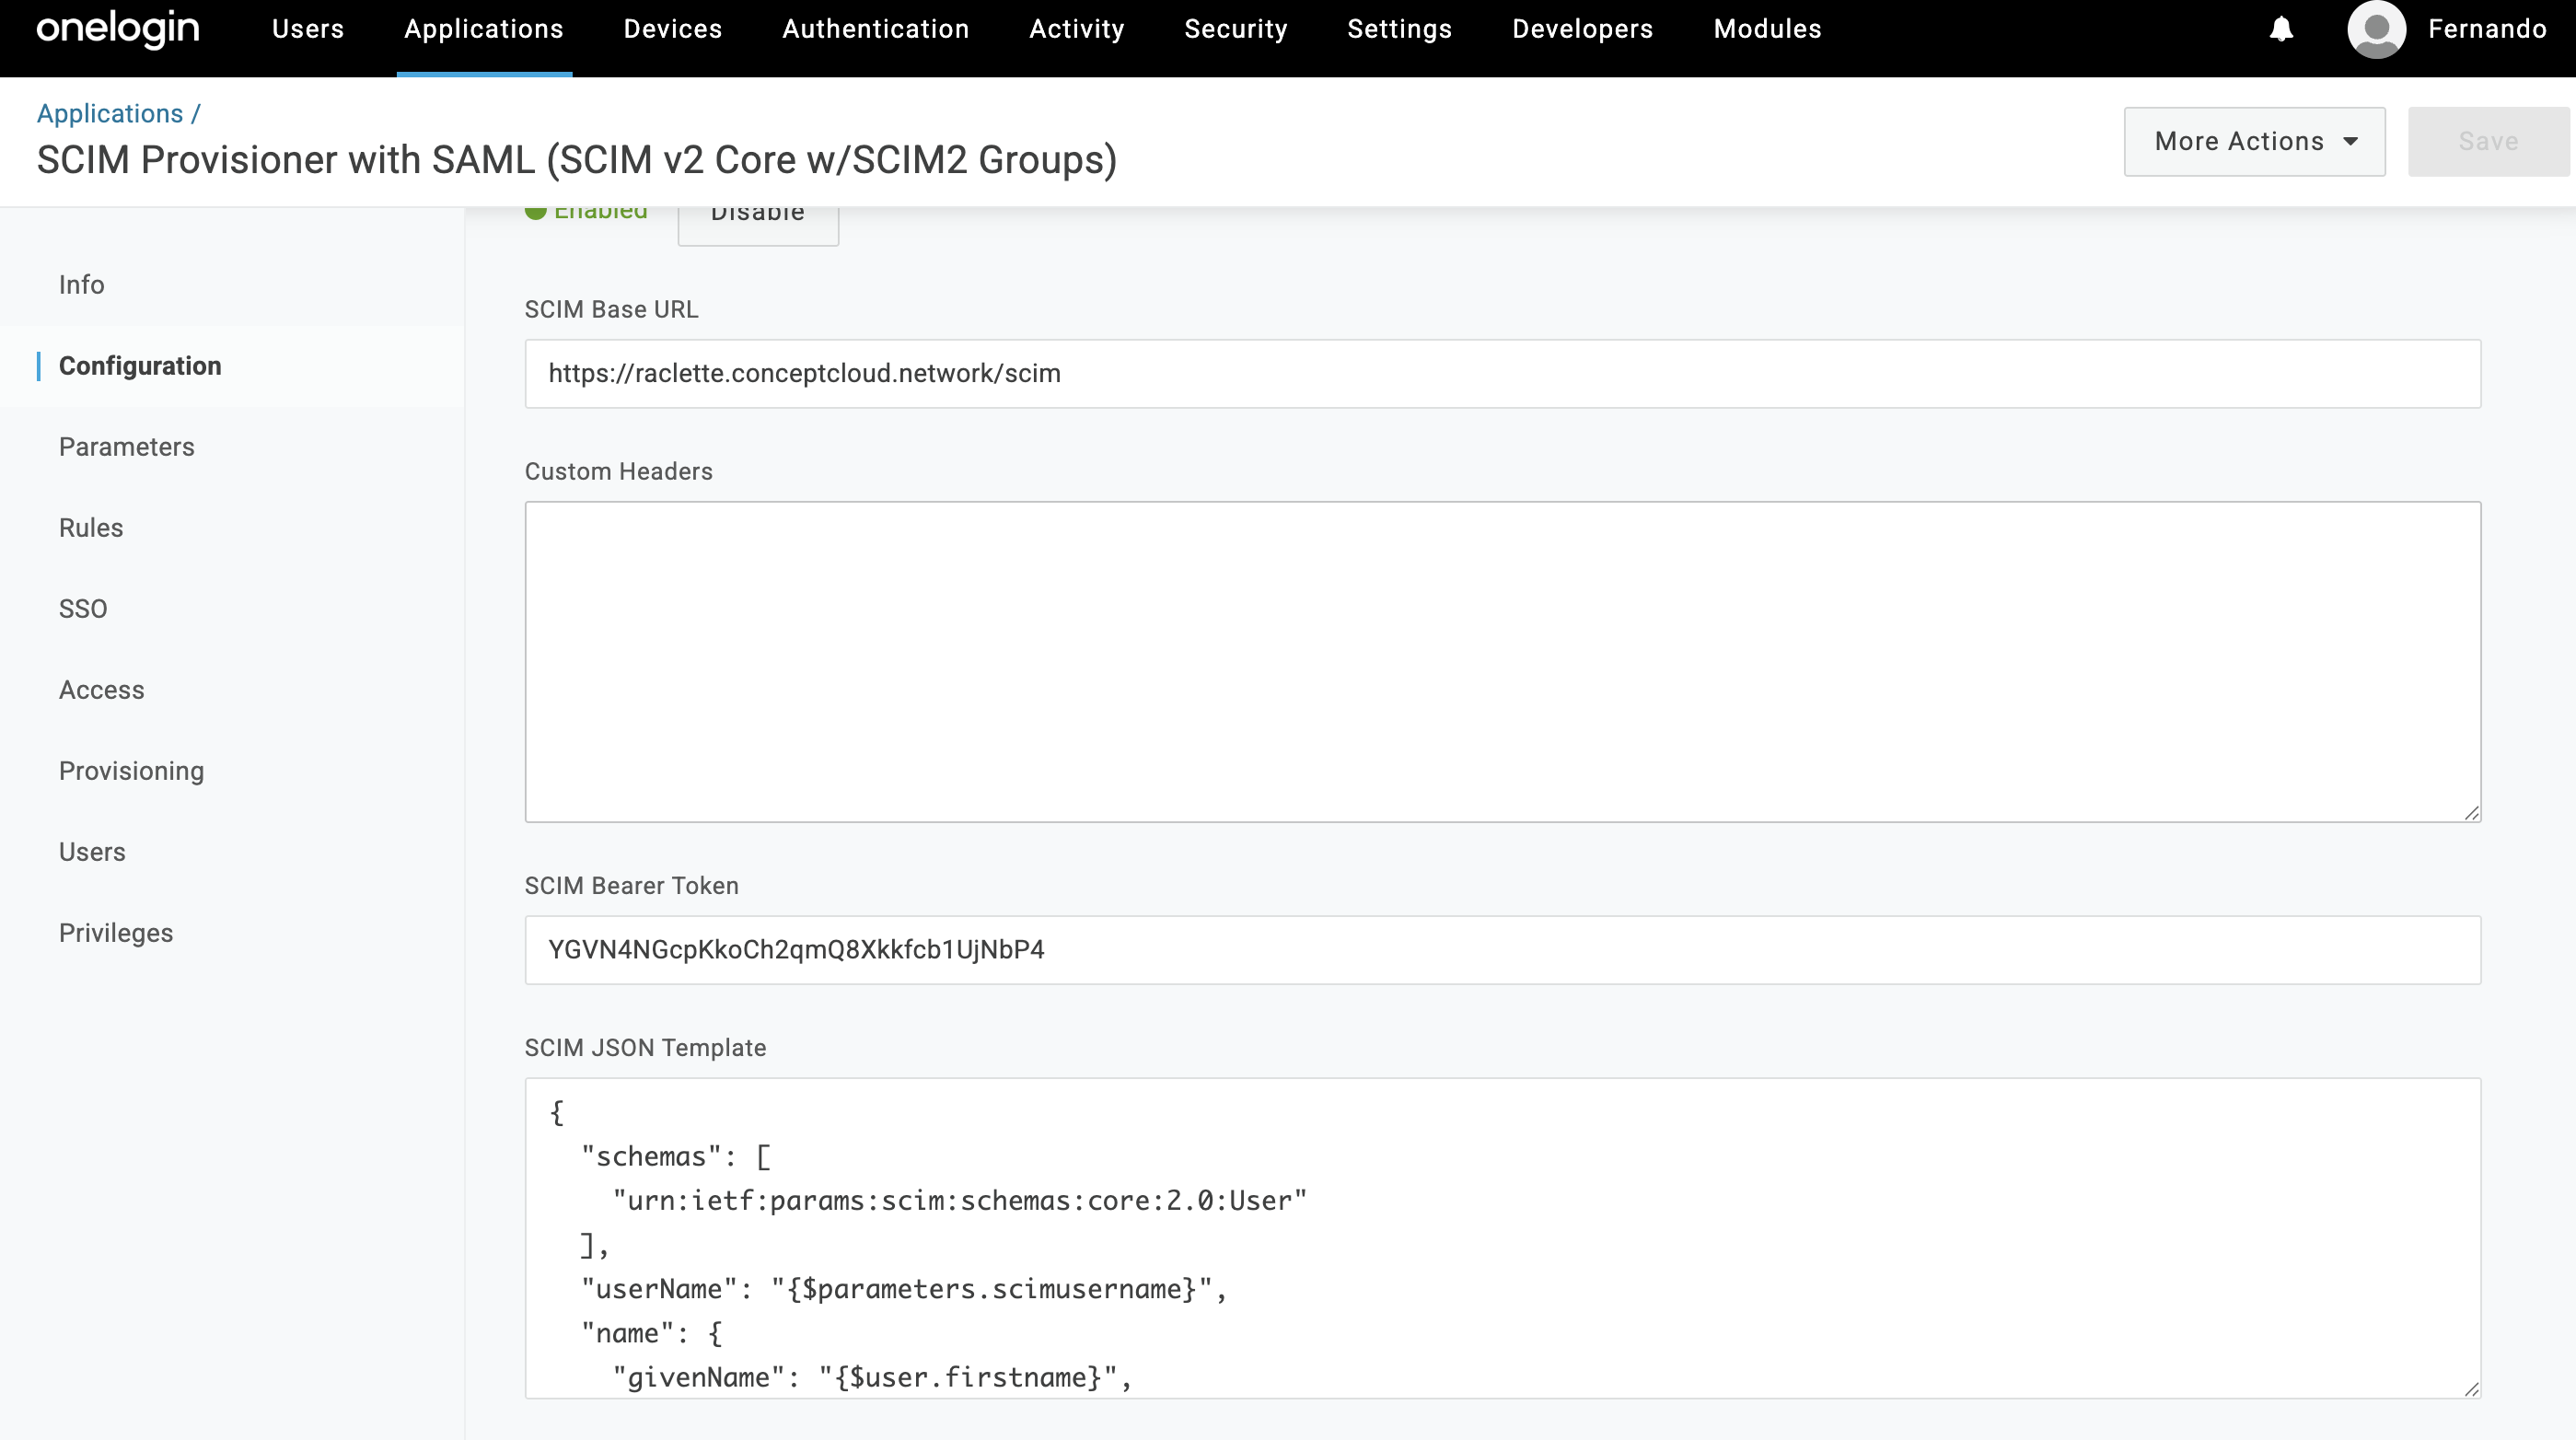
OneLogin
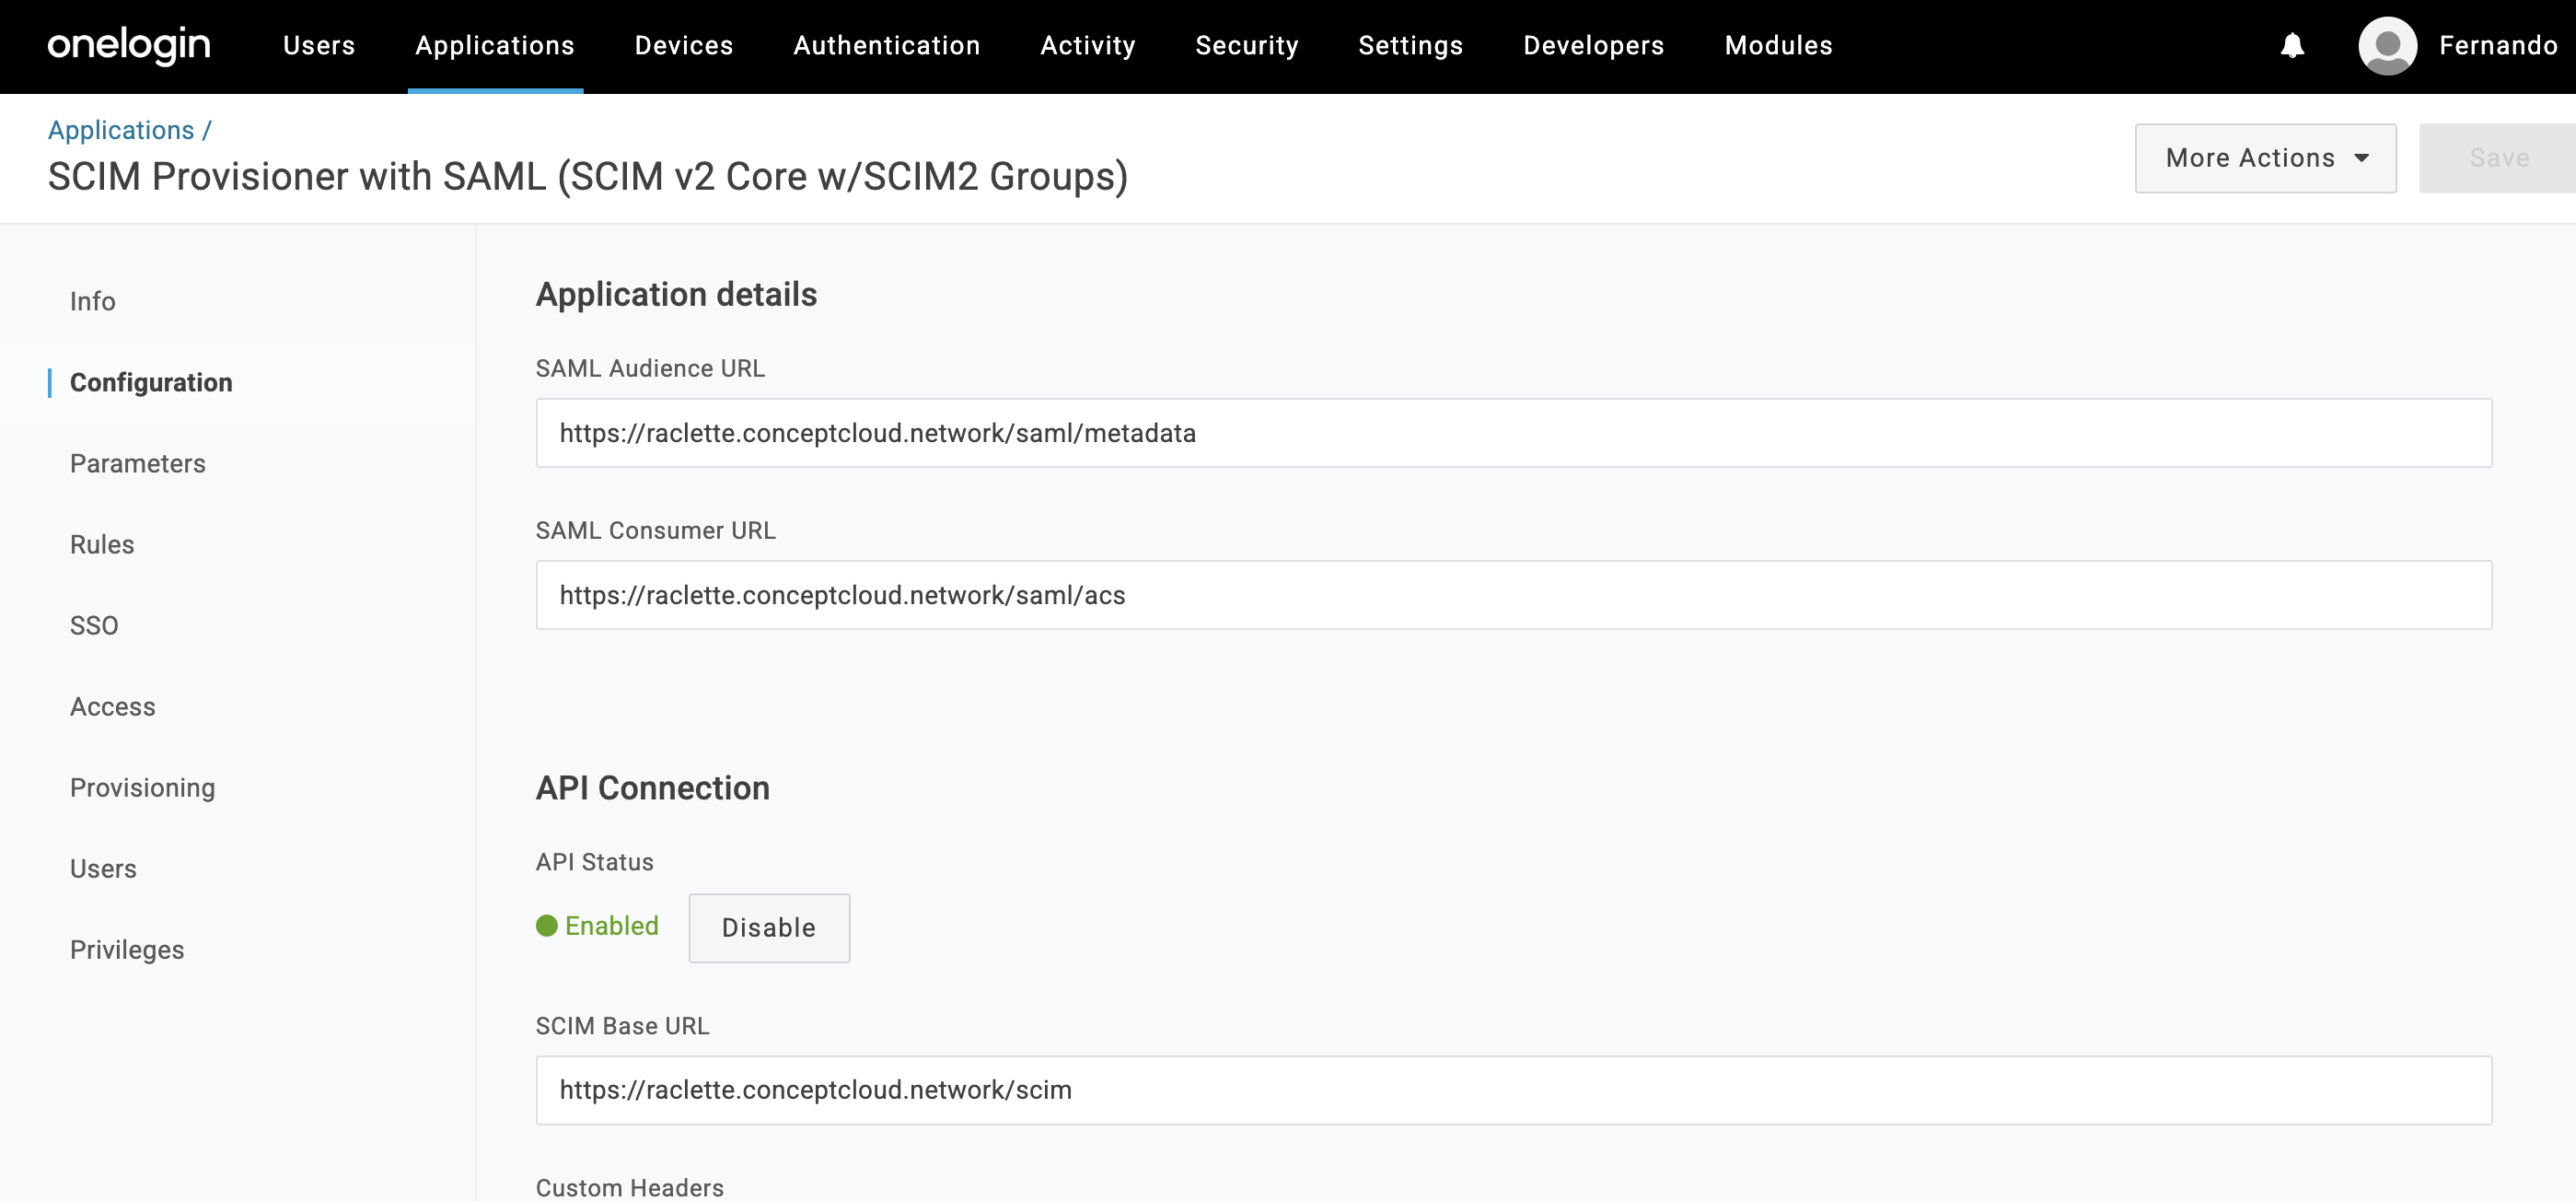
To use OneLogin, set these fields:
-
SCIM base URL:
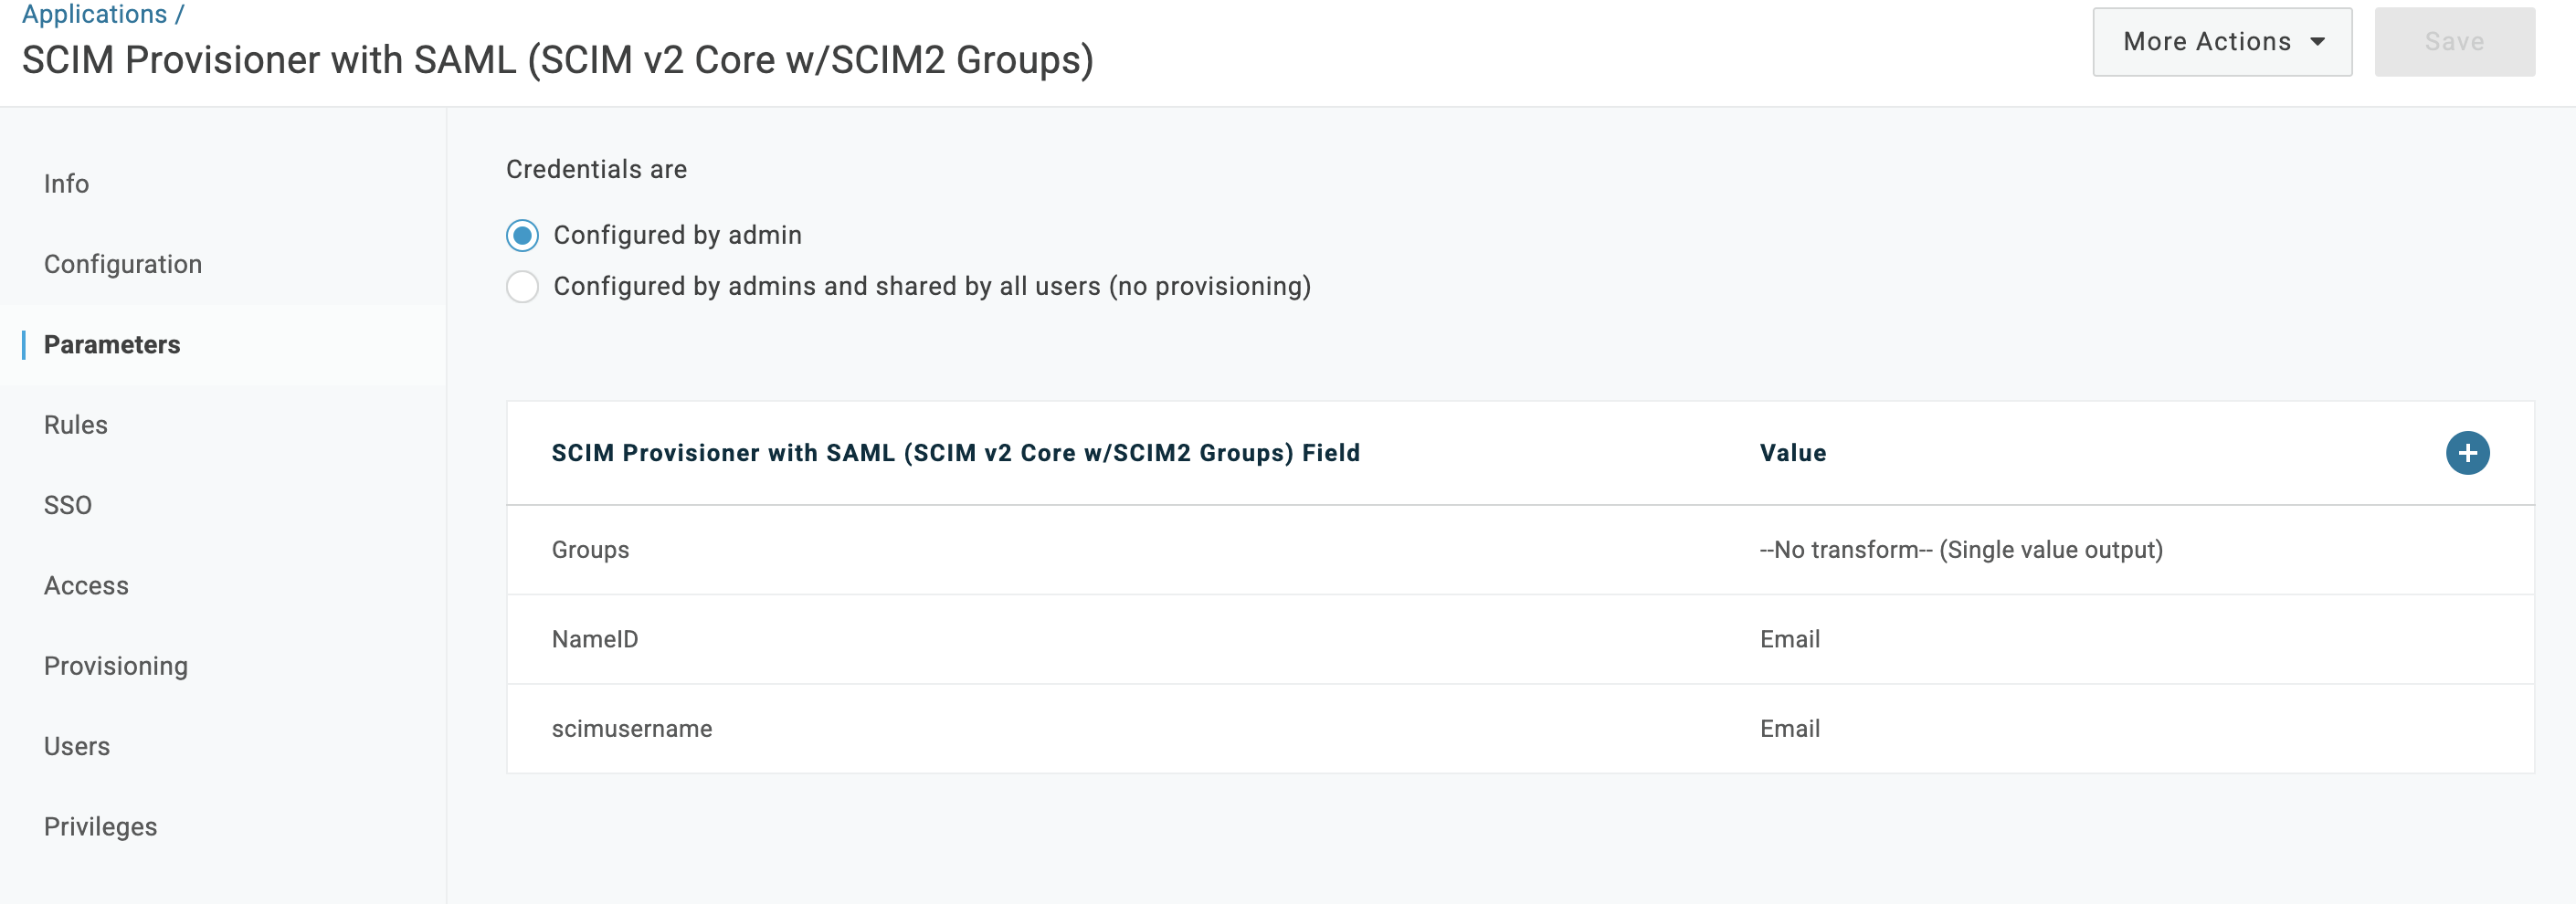
https://<your-sds-hostname>/scim - scimusername: Set the value to Email.
The configuration looks similar to these examples:
The parameters section looks similar to this example:
Xecurify
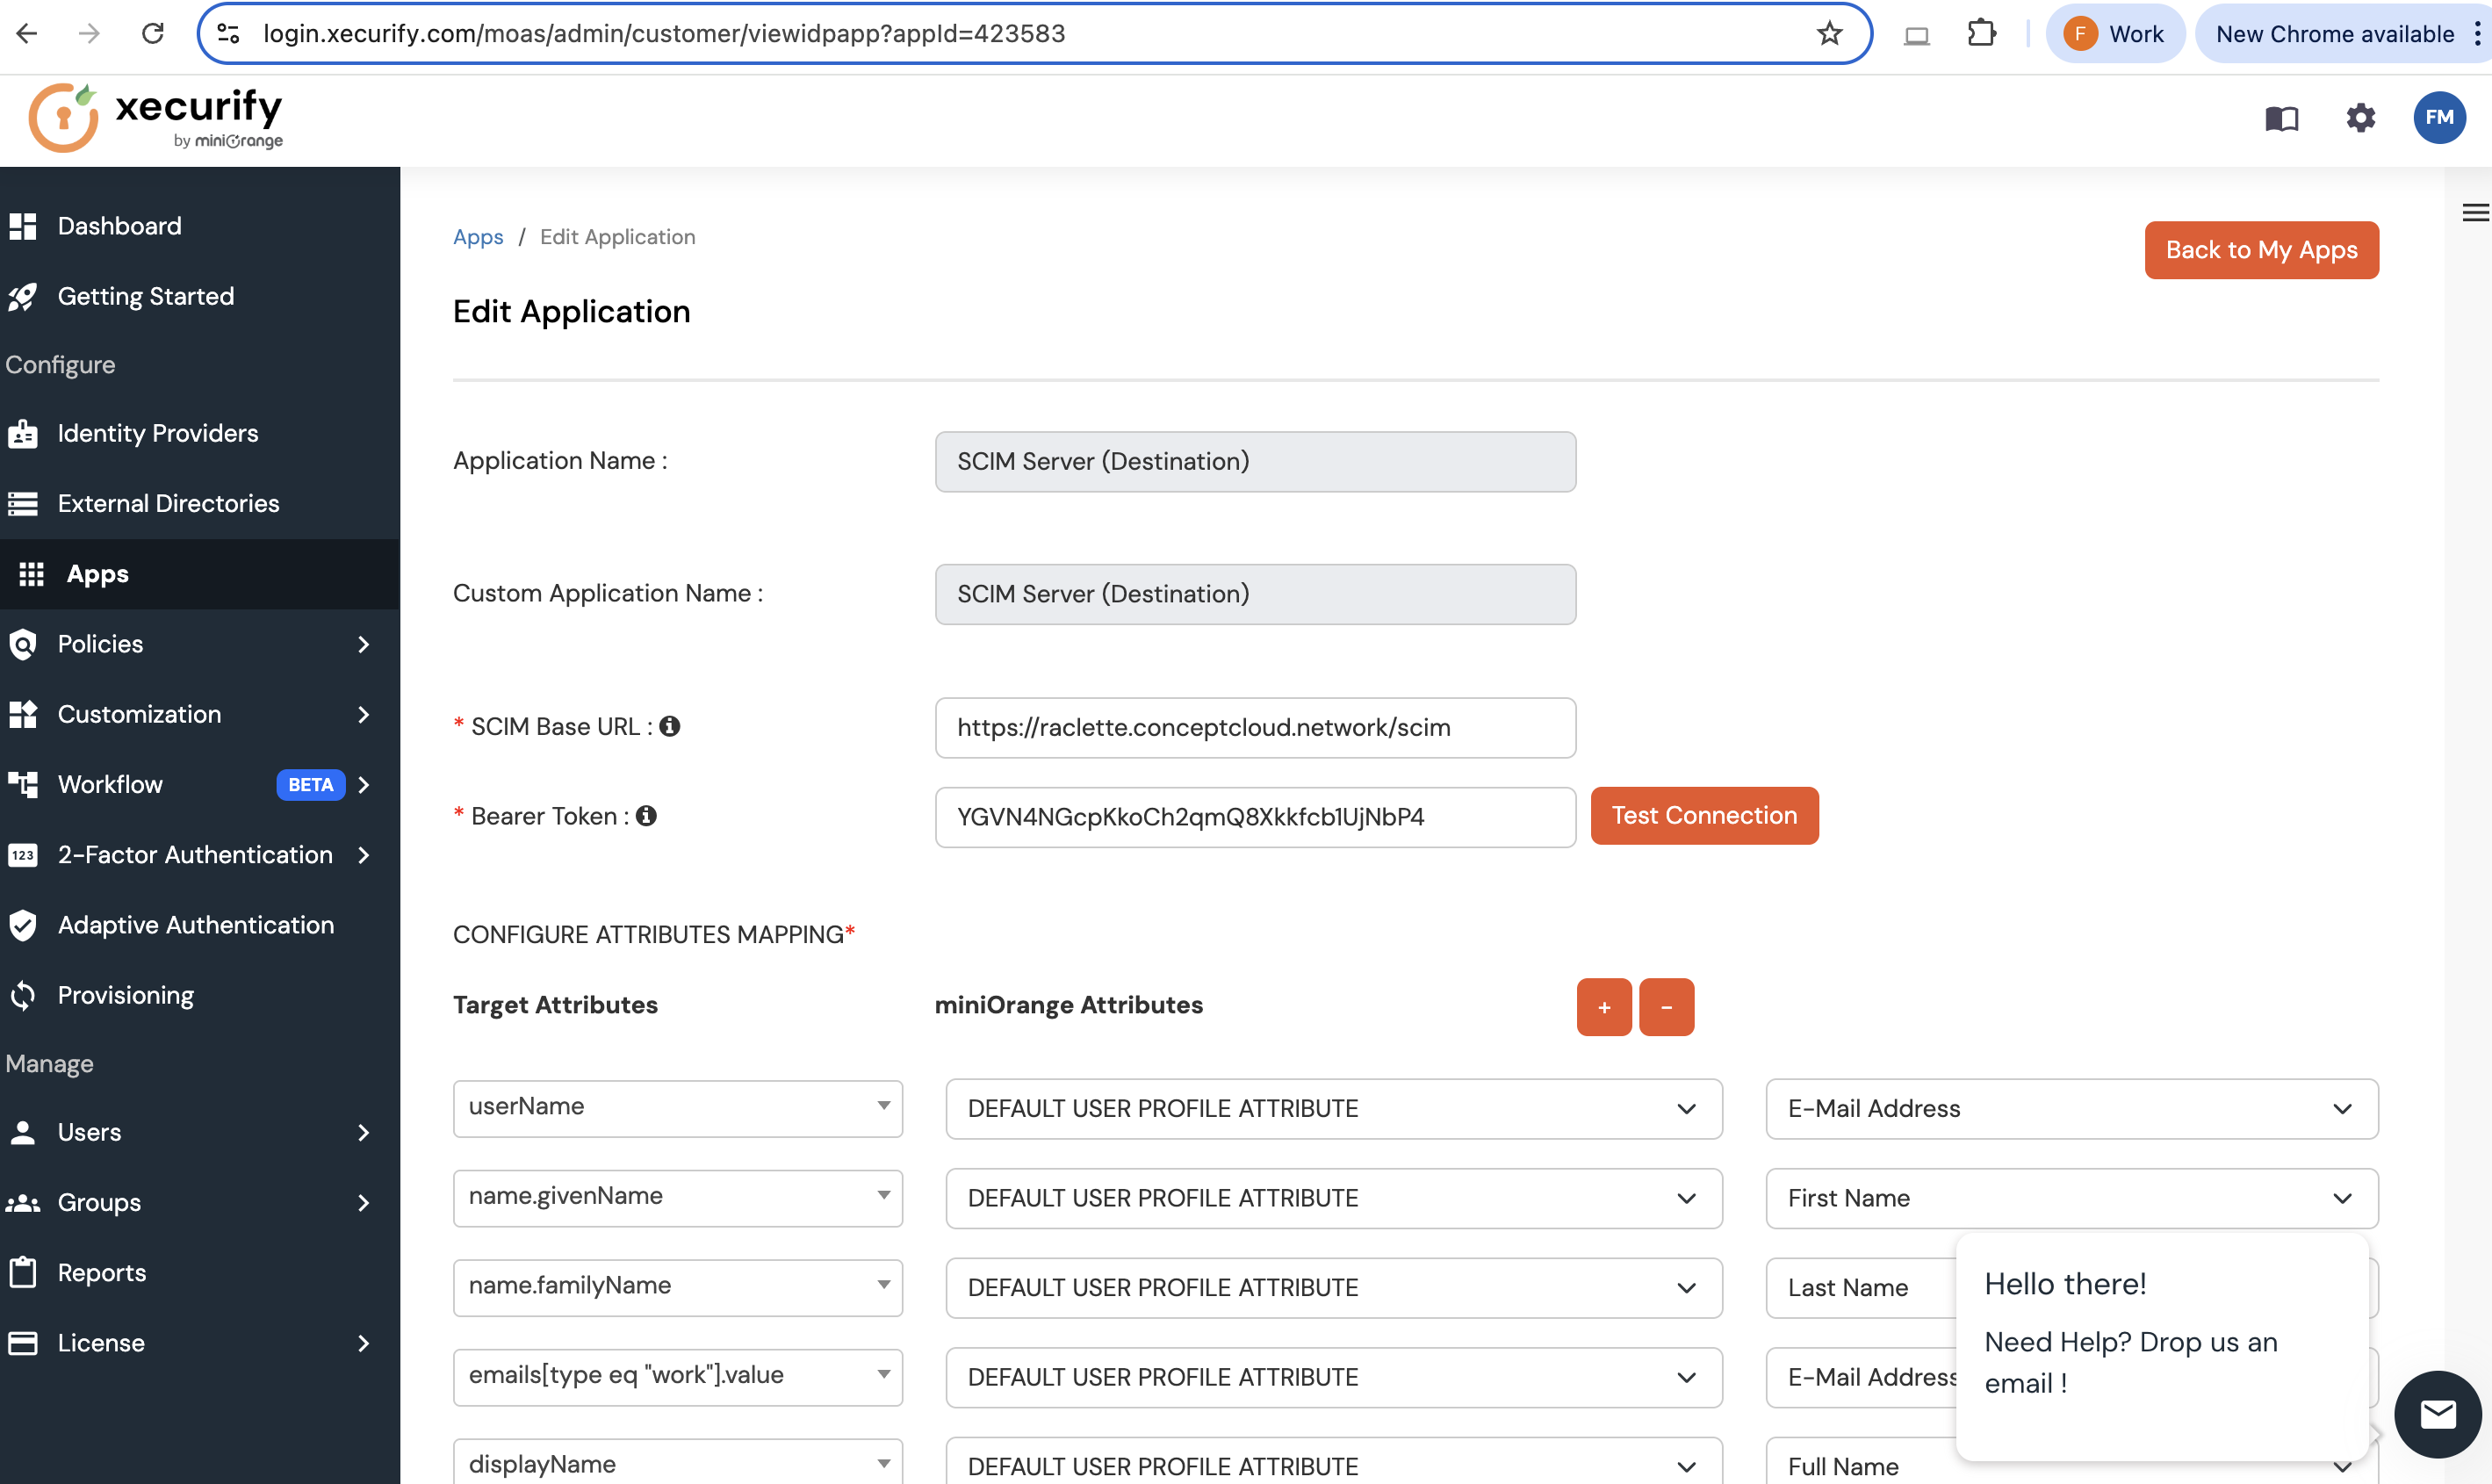
To use Xecurify, also known as miniOrange, set these fields:
-
SCIM Base URL:
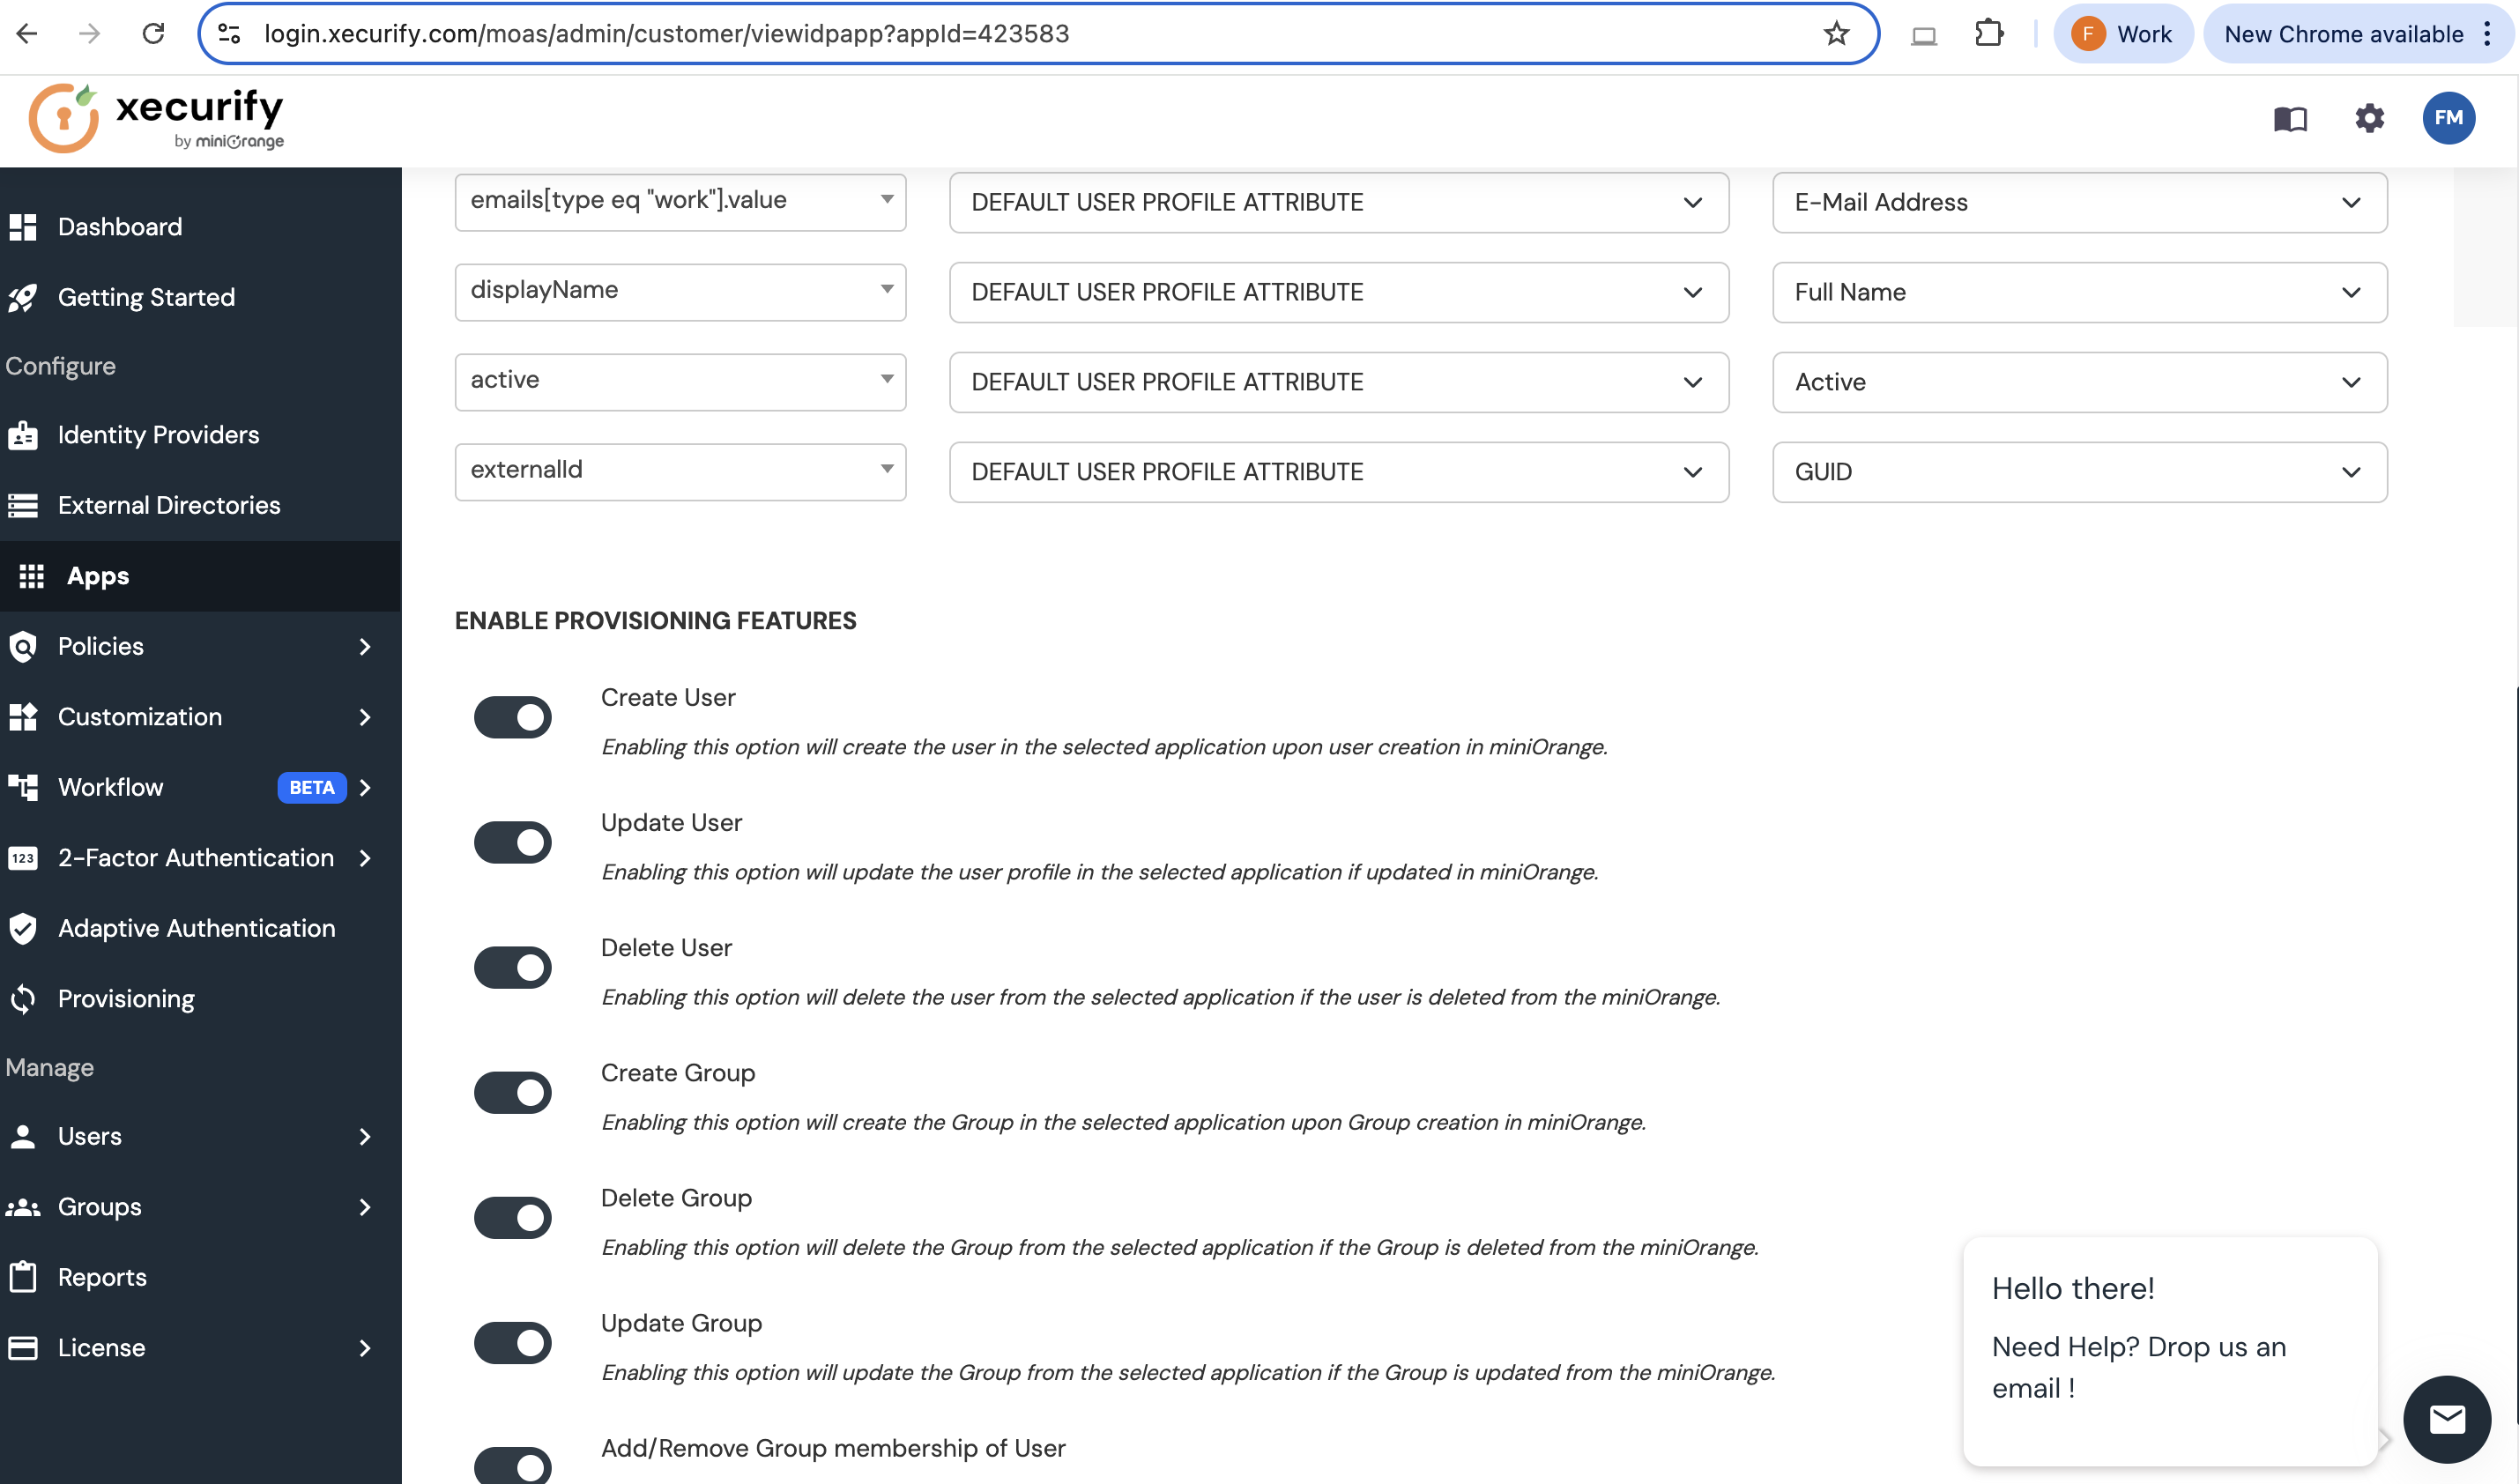
https://<your-sds-hostname>/scim - userName: Set the value to E-Mail Address.
The configuration looks similar to these examples:
Configure the SecurSpaces platform
No additional configuration is needed on the SecurSpaces platform. SCIM is enabled by default.
You can renew the token at any time. Renewing the token invalidates any previously issued tokens.
Related information
Share
Share
This Preview product documentation is Citrix Confidential.
You agree to hold this documentation confidential pursuant to the terms of your Citrix Beta/Tech Preview Agreement.
The development, release and timing of any features or functionality described in the Preview documentation remains at our sole discretion and are subject to change without notice or consultation.
The documentation is for informational purposes only and is not a commitment, promise or legal obligation to deliver any material, code or functionality and should not be relied upon in making Citrix product purchase decisions.
If you do not agree, select I DO NOT AGREE to exit.