Apps configuration using a template
SaaS apps configuration with single sign-on on the Secure Private Access service is simplified by provisioning a template list for popular SaaS apps. The SaaS app to be configured can be selected from the list.
The template pre-fills much of the information required for configuring applications. However, the information specific to the customer must still be provided.
Note:
The following section has the steps to be performed on the Secure Private Access service for configuring and publishing an app using a template. The configuration steps to be performed on the app server is presented in the subsequent section.
Configure and publish apps using template
On the Secure Private Access tile, click Manage.
-
Click Continue and then click Add an app.
Note:
The Continue button appears only for the first time that you use the wizard. In the subsequent usages, you can directly navigate to the Applications page and then click Add an app.
-
Select the app that you want to configure in the Choose a Template list and click Next.
-
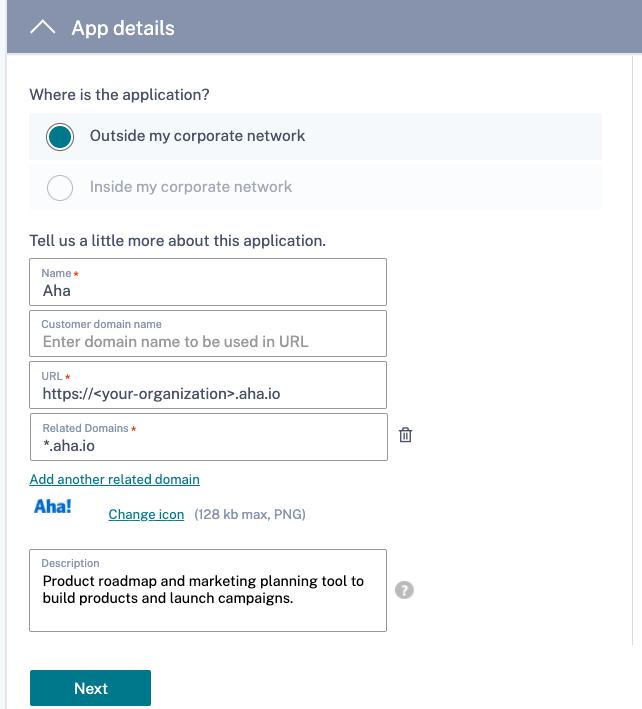
Enter the following details in the App Details section and click Save.
App name – Name of the application.
App description - A brief description of the app. This description that you enter here is displayed to your users in the workspace.
App icon – Click Change icon to change the app icon. The icon file size must be 128x128 pixels. If you do not change the icon, the default icon is displayed.
If you do not want to display the app icon, select Do not display application icon to users.
URL – URL with your customer ID. The user is redirected to this URL if; - SSO fails or - Don’t use SSO option is selected.
Customer domain name and Customer domain ID - Customer domain name and ID are used to create an app URL and other subsequent URLs in the SAML SSO page.
For example, if you are adding a Salesforce app, your domain name is
salesforceformyorgand ID is 123754, then the app URL ishttps://salesforceformyorg.my.salesforce.com/?so=123754.Customer domain name and Customer ID fields are specific to certain apps.
Related Domains – The related domain is auto-populated based on the URL that you have provided. Related domain helps the service to identify the URL as part of the app and route traffic accordingly. You can add more than one related domain.
Icon – Click Change icon to change the app icon. The icon file size must be 128x128 pixels. If you do not change the icon, the default icon is displayed.

-
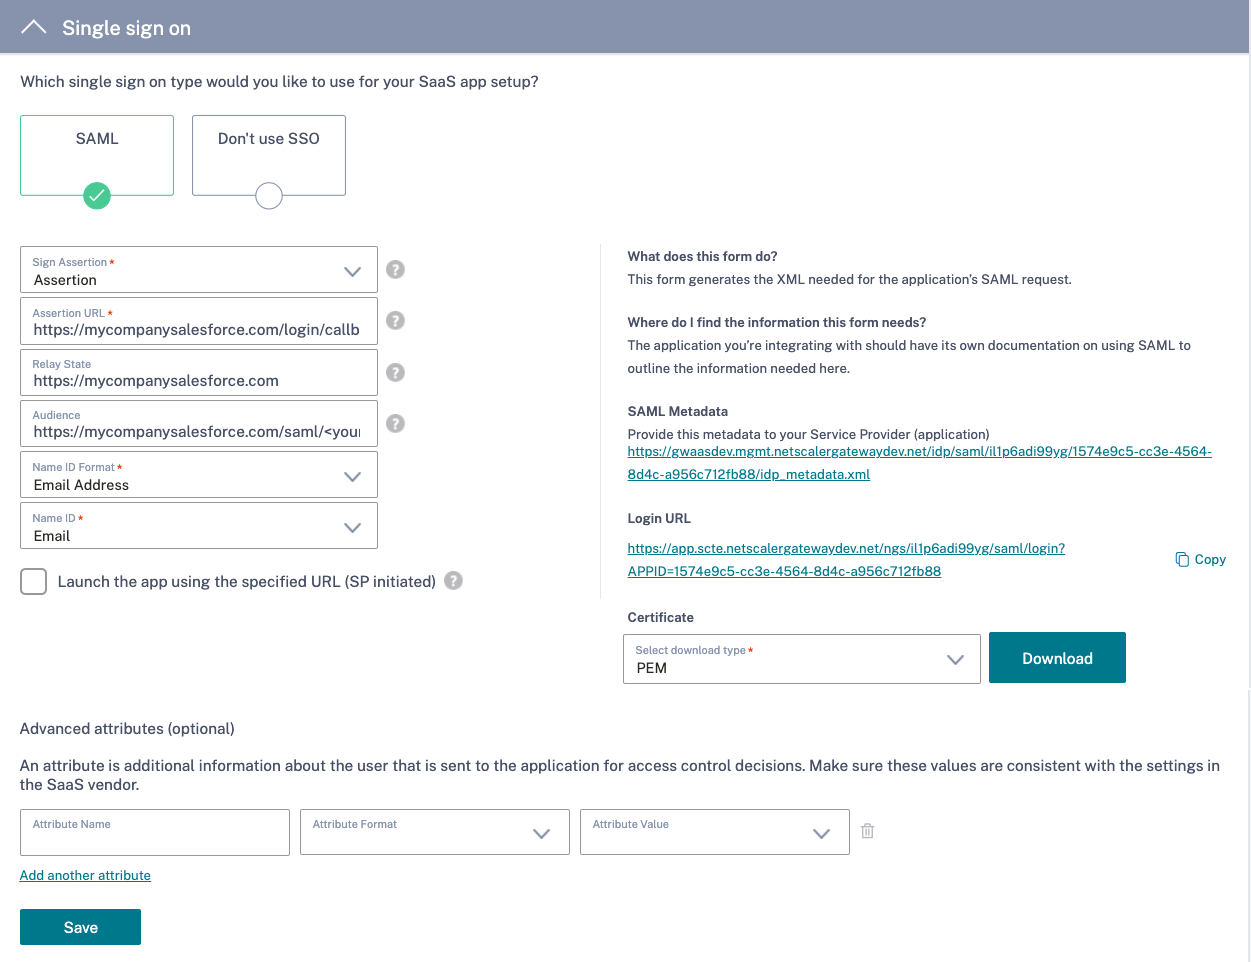
Enter the following SAML configuration details in the Single Sign On section and click Save.
Assertion URL – SaaS app SAML assertion URL provided by the application vendor. The SAML assertion is sent to this URL.
Relay State – The Relay State parameter is used to identify the specific resource the users access after they are signed in and directed to the relying party’s federation server. Relay State generates a single URL for the users. Users can click this URL to log on to the target application.
Audience – Service provider for whom the assertion is intended.
Name ID Format – Supported format type of user.
Name ID – Name of the format type of user.

Note:
When the Don’t use SSO option is selected, the user is redirected to the URL configured under the App Details section.
-
Download the metadata file by clicking the link under SAML Metadata. Use the downloaded metadata file to configure SSO on the SaaS apps server.
Note:
- You can copy the SSO login URL under Login URL and use this URL when configuring SSO on the SaaS apps server.
- You can also download the certificate from the Certificate list and use the certificate when configuring SSO on the SaaS apps server.
-
Click Next.
-
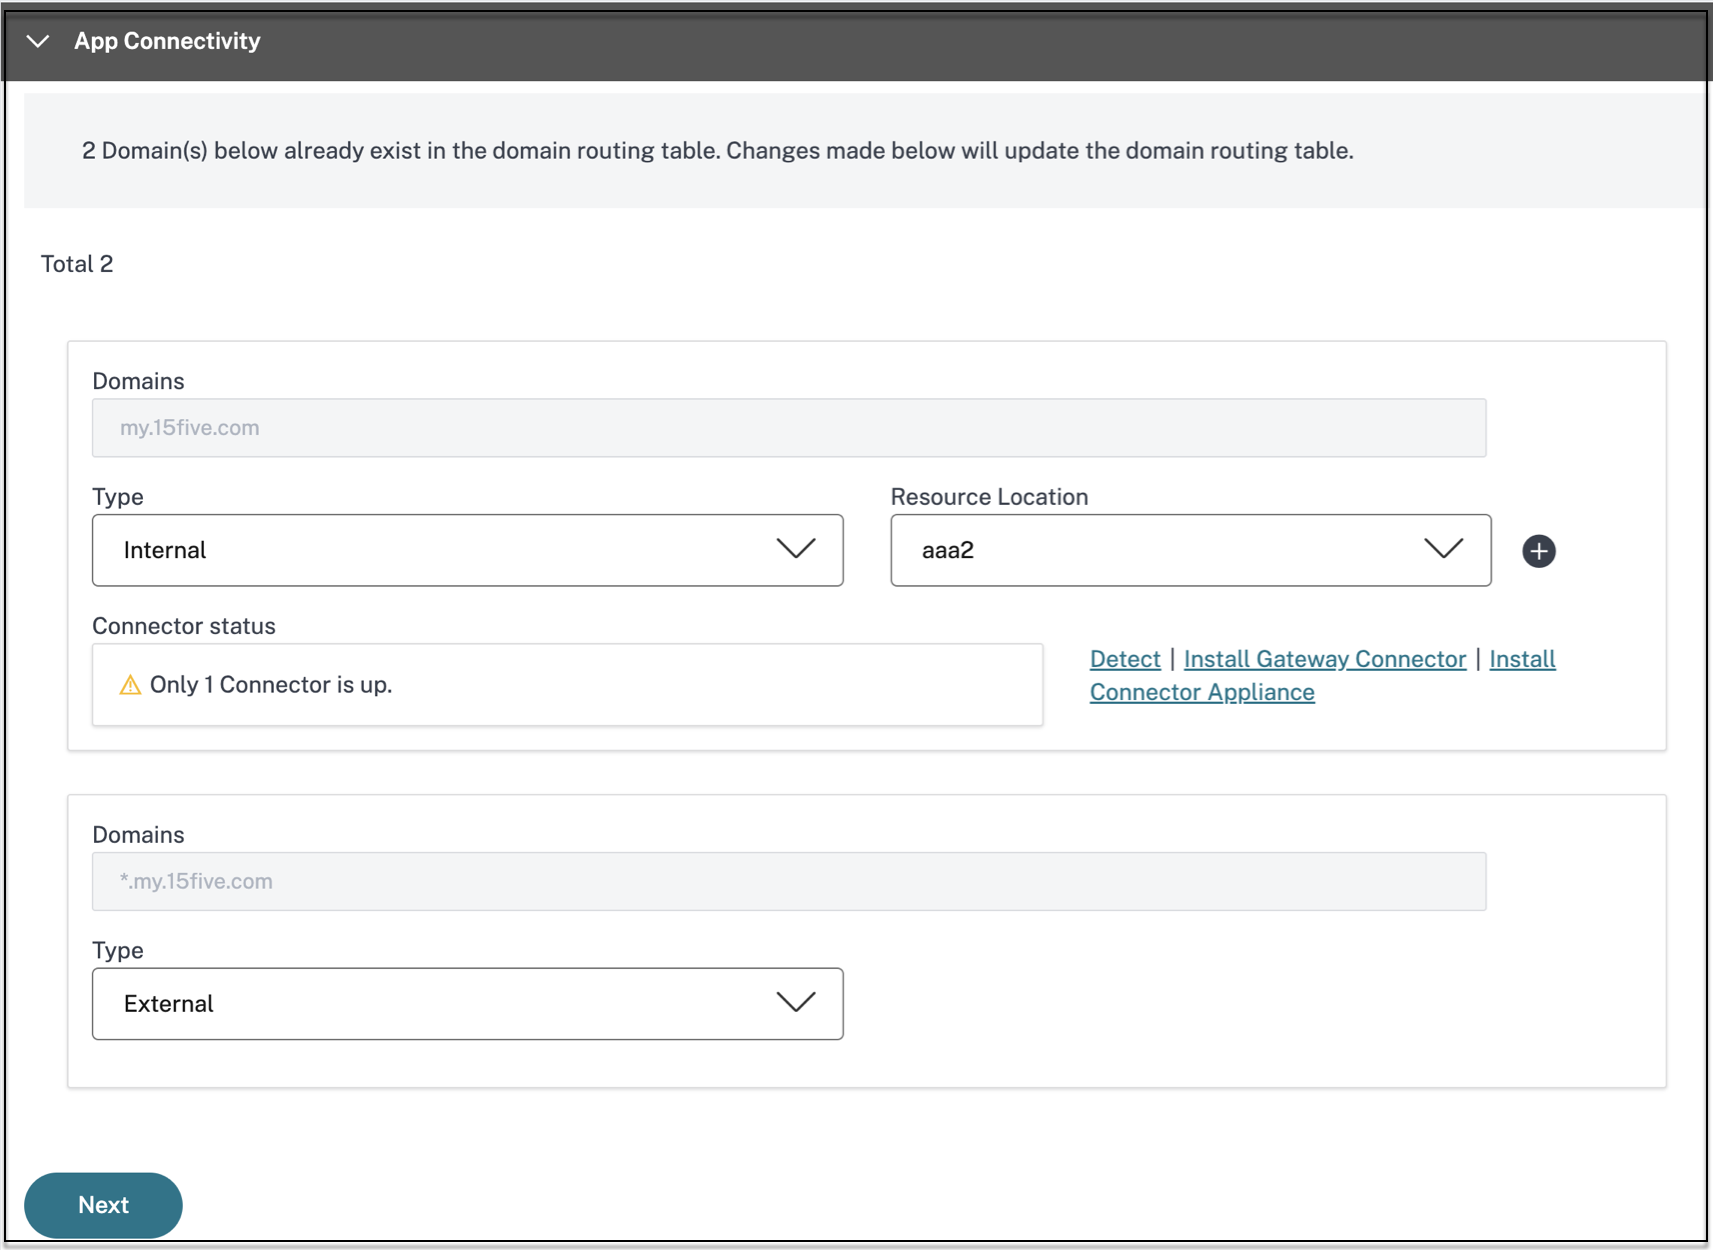
In the App Connectivity section, define routing for the related domains of applications, if the domains must be routed externally or internally through a Citrix Connector Appliance. For details, see Route tables to resolve conflicts if the related domains in both SaaS and web apps are the same.

-
Click Finish.
After you click Finish, the app is added to the Applications page. You can edit or delete an app from the Applications page after you have configured the application. To do so, click the ellipsis button on an app and select the actions accordingly.
- Edit Application
- Delete
Note:
To grant access to the apps for the users, admins are required to create access policies. In access policies, admins add app subscribers and configure security controls. For details, see Create access policies.