Update the Identity Provider SAML Signing Certificate
SAML connections which use signed requests and responses depend on two different SAML signing certificates. One for each side of the SAML connection.
SAML Provider signing certificate
This certificate is provided by your SAML provider and uploaded into Citrix Cloud™ when you configure the SAML connection.
SAML signing certificates need to be rotated before their expiration date occurs to give Citrix Cloud admins time to prepare for deployment. Certificate rotation is required by both Service Providers and Identity Providers in order to ensure alignment and prevent any downtime.
FAQ
What is the SAML provider certificate used for?
The SAML provider certificate is used to verify the signature of SAML responses sent from the SAML provider to Citrix Cloud during the authentication process.
Where do I obtain a copy of the latest Identity Provider (IdP) signing certificate?
This certificate is provided by your SAML provider such as Azure AD, Okta, PingFederate, or ADFS. Citrix does not control the rotation and update of this certificate. This certificate is uploaded into Citrix Cloud when you initially create the SAML connection. The date of expiry on IDP Signing Certificates is usually long lived. They might need replacing every few years and at a lower frequency than the SP Signing Certificate
How will I know if my SAML provider signing certificate is about to expire and impact my Citrix Cloud SAML connection?
Citrix Cloud will display warnings 30 days before the date of expiry approaches for your SAML provider signing certificate.
Certificate Expiring Soon: <certExpirationDate>
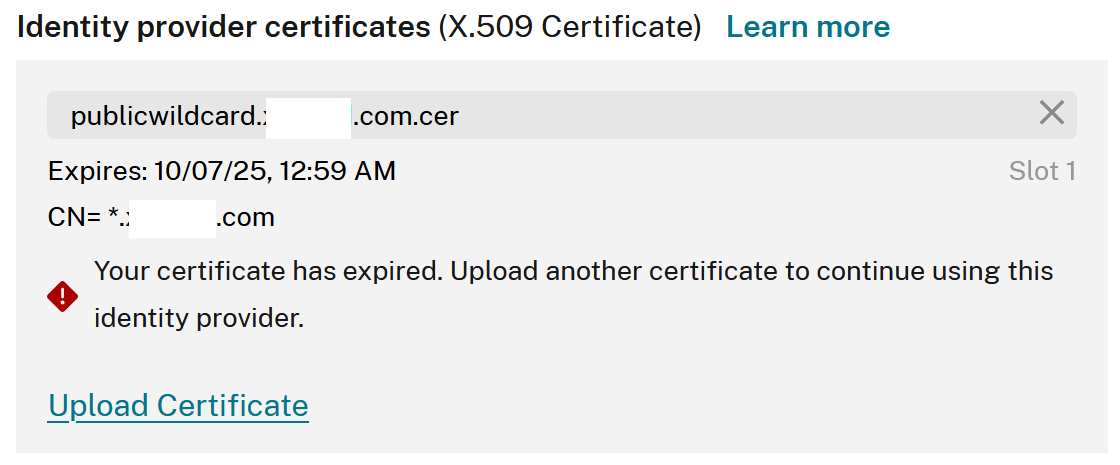
It will also display an error once the certificate has actually expired as shown below.

Can I update the SAML provider certificate whilst still using the SAML connection without downtime?
No. It is necessary to perform a SAML disconnect and reconnect during a scheduled maintenance window. Update the Identity Provider (IdP) Signing Certificate
-
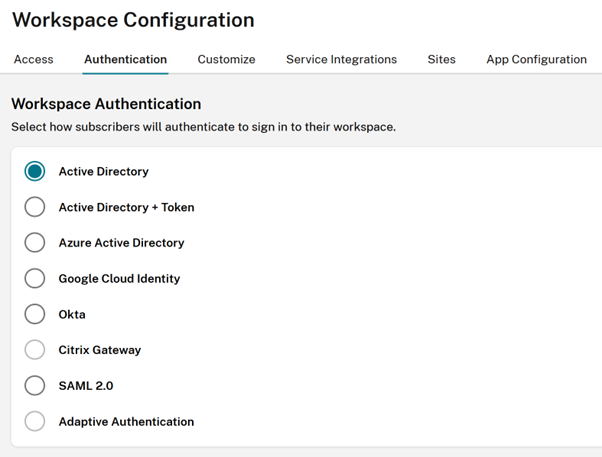
Select an alternative IdP within Workspace Configuration, select Authentication whilst you perform the SAML disconnect/reconnect operation such as Active Directory.

- Backup your existing GO URL such as
https://citrix.cloud.com/go/<yourgourl>used for SAML logon to Citrix Cloud. -
Take a backup of your existing SAML endpoints. These can be copied from the Citrix Cloud console. Backup the following SAML endpoints from within your existing SAML connection.

- Identity Provider Entity ID
- Identity Provider SSO Service URL
- Identity Provider Logout URL
-

-
Backup the EntityID, the SSO URL, and the logout URL.
Important:
Ensure you have a copy of both the existing and replacement IDP signing certificate before performing the disconnect. This is so you have the ability to rollback to the old certificate if the new SAML provider certificate is invalid and causes any logon issues. You will not be able to obtain a copy of the old certificate from the Citrix Cloud UI before performing the disconnect. You will need to obtain it from your SAML application.
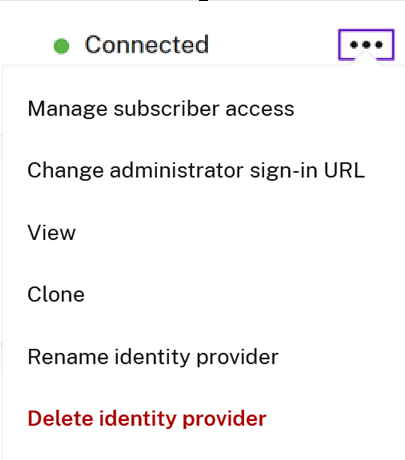
- Disconnect SAML within Identity and Access Management, navigate to Authentication, select the SAML connection, Click the ellipse and select Delete Identity Provider
-
Reconnect SAML within Identity and Access Management and click Authentication


- Accept all of the default SAML connection settings.
-
Reenter all of the SAML application endpoints you backed up earlier or obtain these again for your SAML app from within your SAML provider UI.
- Identity Provider Entity ID
- Identity Provider SSO Service URL
- Identity Provider Logout URL
Important:
If you are using the Scoped EntityID feature, you will also need to update your SAML application with the new scope ID after performing the SAML disconnect/reconnect. For more information on the Scoped EntityID feature, see Configure a SAML application with a scoped Entity ID in Citrix Cloud. Copy the newly generated scope ID from the Citrix Cloud SAML UI and update your SAML application Entity ID with the replacement scope ID.
EntityID should be updated to
https://saml.cloud.com/<new scope ID after reconnect>.