-
-
-
-
Create an image from an existing one
-
-
This content has been machine translated dynamically.
Dieser Inhalt ist eine maschinelle Übersetzung, die dynamisch erstellt wurde. (Haftungsausschluss)
Cet article a été traduit automatiquement de manière dynamique. (Clause de non responsabilité)
Este artículo lo ha traducido una máquina de forma dinámica. (Aviso legal)
此内容已经过机器动态翻译。 放弃
このコンテンツは動的に機械翻訳されています。免責事項
이 콘텐츠는 동적으로 기계 번역되었습니다. 책임 부인
Este texto foi traduzido automaticamente. (Aviso legal)
Questo contenuto è stato tradotto dinamicamente con traduzione automatica.(Esclusione di responsabilità))
This article has been machine translated.
Dieser Artikel wurde maschinell übersetzt. (Haftungsausschluss)
Ce article a été traduit automatiquement. (Clause de non responsabilité)
Este artículo ha sido traducido automáticamente. (Aviso legal)
この記事は機械翻訳されています.免責事項
이 기사는 기계 번역되었습니다.책임 부인
Este artigo foi traduzido automaticamente.(Aviso legal)
这篇文章已经过机器翻译.放弃
Questo articolo è stato tradotto automaticamente.(Esclusione di responsabilità))
Translation failed!
Create an image from an existing one
Requires the Resources permission set to Import.
Most teams need a standard image with a few additions: a language runtime, an internal CLI, a certificate. Maintaining a Dockerfile and a build pipeline for that is disproportionate work.
Create Image From Existing does it on the platform instead. You pick a base image, supply a bash script,
and Citrix SecurSpaces™ builds a new image with your script as the final RUN layer of the Dockerfile, then
pushes it to your registry. The result appears as an ordinary container image that any workspace or template
can use.
Before you start
The option only appears when a platform administrator has configured a destination registry — the registry that images built on the platform are pushed to. Until then, Add Image is a plain button with no dropdown.
If you do not see Create Image, that setting is missing. See Registry access.
You also need a registry credential whose URL matches the destination registry. The build pushes with it, and workspaces pull the finished image with it. If no credential matches, the modal says so and Confirm stays disabled.
Create the image
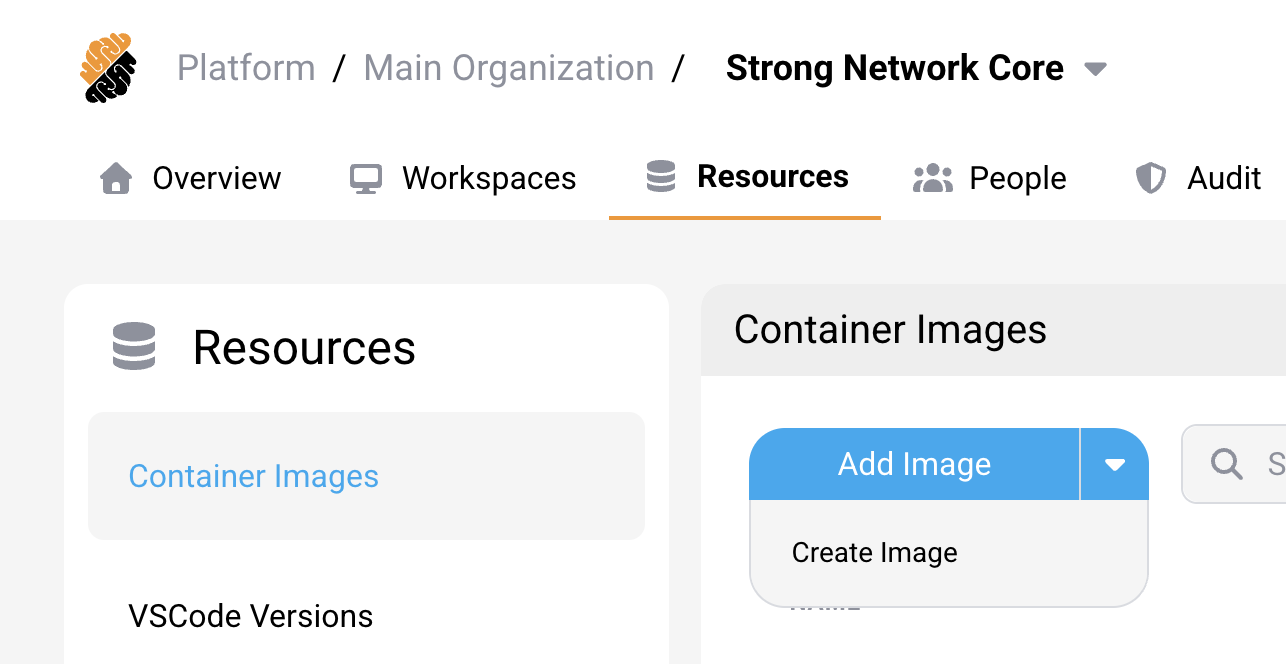
- Open Resources > Container Images.
-
Select the arrow next to Add Image, then select Create Image.
- Choose the Base Image and the Tag to build on.
- Enter the Image Name and Tag for the image you are creating, for example
v1.0.0. - Check the Destination Registry. It is filled in from the platform setting.
-
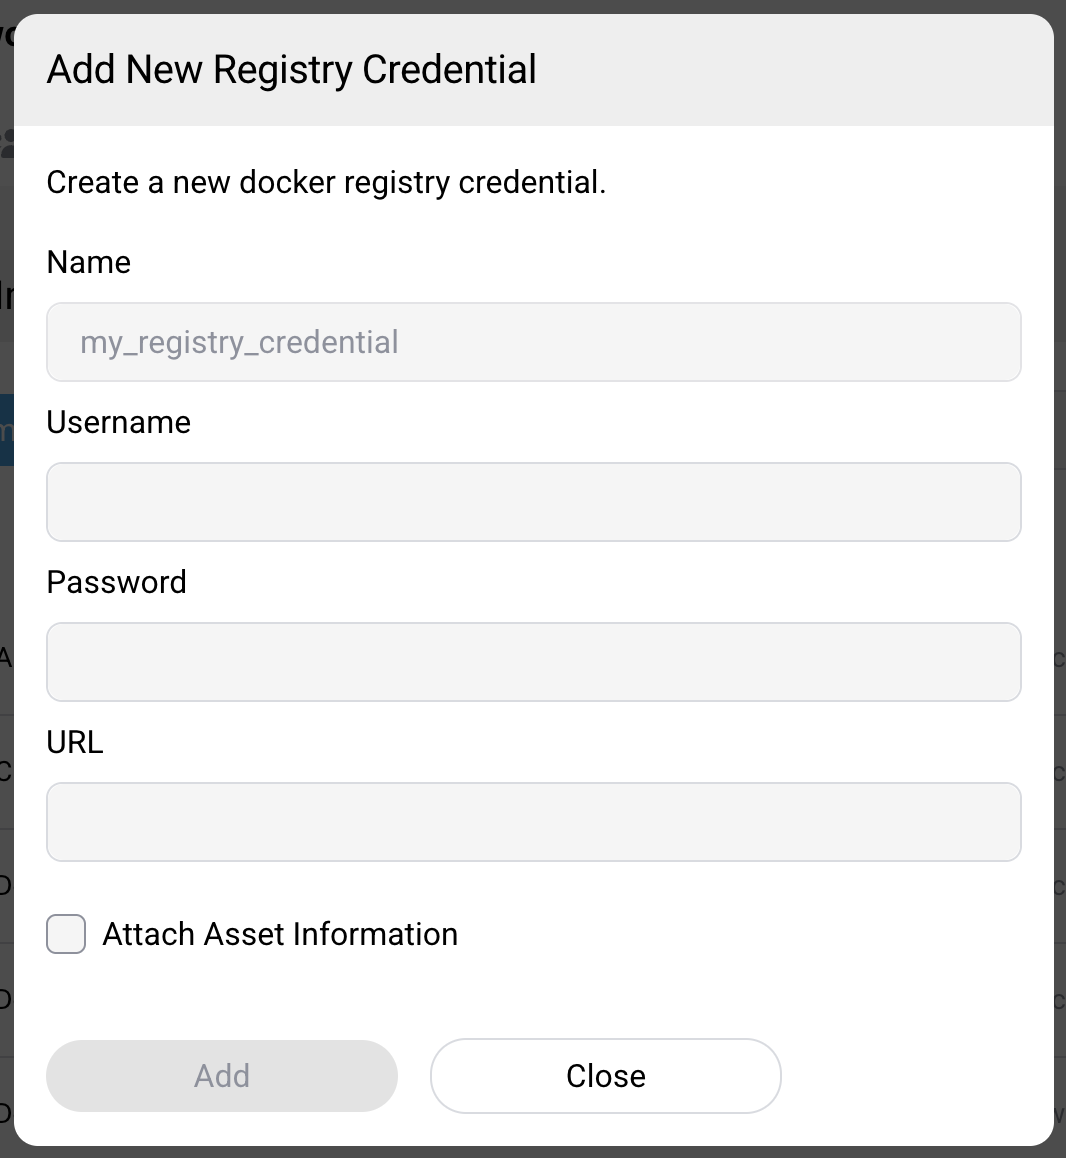
Select a registry credential for that registry. If the list is empty, select Add Credential and provide a name, username, password, and the registry URL.
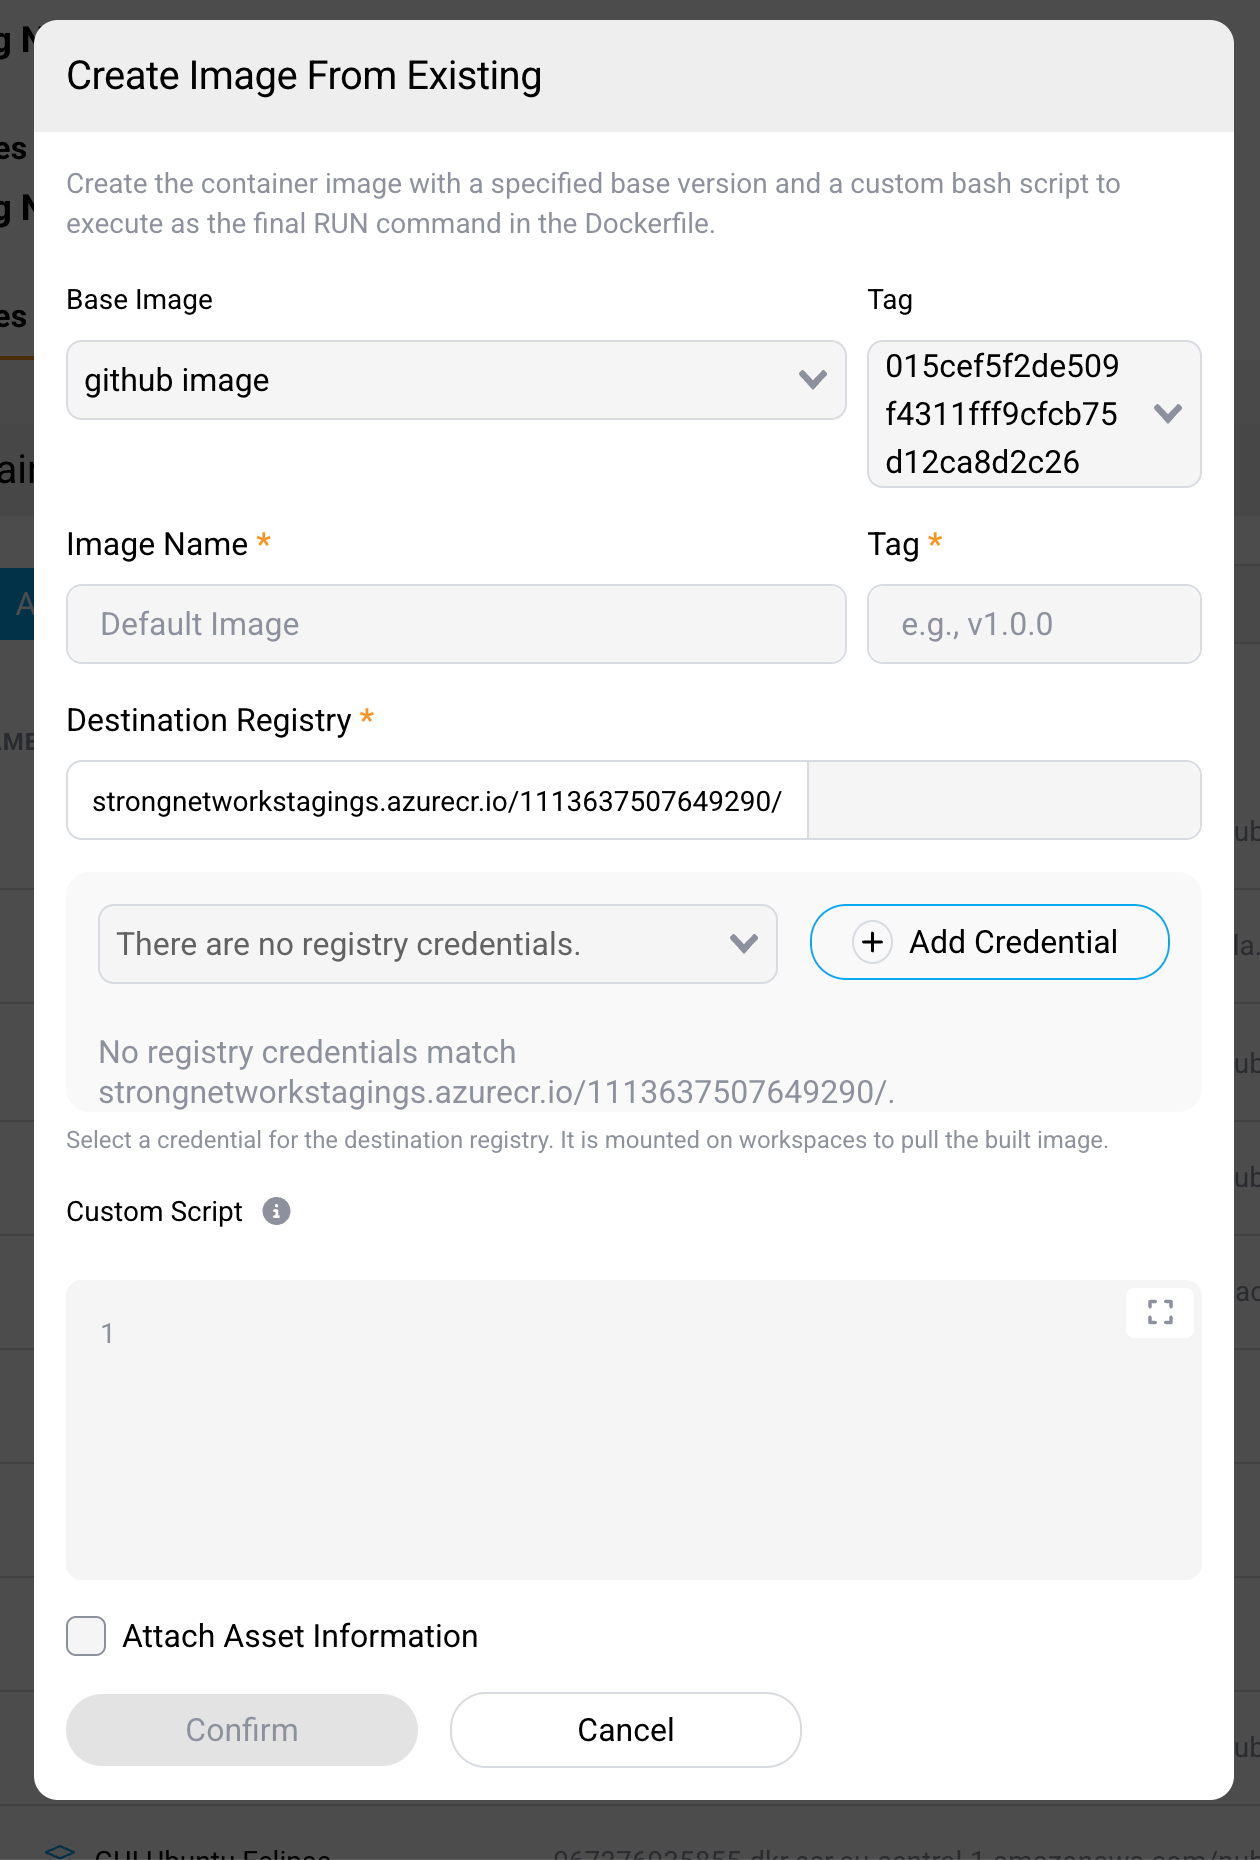
- Enter your Custom Script. It runs as the last
RUNcommand in the generated Dockerfile. - Select Confirm.
The build runs on the cluster. When it finishes, the image is listed alongside your other container images.
Writing the script
The script is a single RUN layer appended to the base image, so ordinary Dockerfile rules apply:
- It runs as part of the build, not at workspace start. Anything it installs is baked into the image.
- It runs non-interactively. Commands that prompt will hang until the build deadline expires.
- Only the filesystem changes persist. Environment variables set with
exportdo not survive the layer. - The base image must still satisfy the
container image requirements
after your script has run — in particular the
developeruser with UID 1000, and the SSH, Git, and Git LFS clients.
Keep the script to what is genuinely shared by the team. A workspace-specific step belongs in a startup script, which runs at start and can be changed without rebuilding.
Build limits
Builds run as a Kubernetes Job with fixed bounds. A build that exceeds them fails rather than degrading the cluster:
| Limit | Default |
|---|---|
| CPU | 500m requested, 2 cores maximum |
| Memory | 1 GiB requested, 4 GiB maximum |
| Wall clock | 30 minutes |
| Retries | None — a failed build is reported, never retried |
A large compile or a script that downloads a great deal of data can exceed the memory limit or the deadline. If that happens, move the heavy work into a base image built by your own pipeline, and use this feature for the thin layer on top.
A platform administrator can raise these bounds with imageBuilderSpecification in the Helm values, which
accepts cpuRequest, cpuLimit, memoryRequest, memoryLimit, and deadlineSeconds. Limits are raised to
match requests if they are configured lower.
How the build is isolated
Your script is arbitrary code, and it runs on the cluster. SecurSpaces builds it in a sandbox rather than on a Docker daemon:
- The build runs rootless BuildKit inside a user namespace, as a non-root user.
- The container is not privileged, drops all Linux capabilities, and the build process itself holds none.
- CPU and memory ceilings mean a runaway script is stopped rather than exhausting the node.
- The Job is never retried, so a hung script cannot restart indefinitely, and it is cleaned up after it finishes.
This is why the feature is gated on a platform-level setting rather than being available by default: enabling it lets project members run build-time code on your cluster, within that sandbox.
Create an image from a workspace
The same build is available while editing a workspace, under Startup Scripts, as create a custom image based on the current workspace image, extended with selected startup scripts. Use it to promote startup scripts that have settled into the image, so they no longer run on every start.
That route additionally requires the workspace image to have a registry credential attached.
Related information
Share
Share
This Preview product documentation is Citrix Confidential.
You agree to hold this documentation confidential pursuant to the terms of your Citrix Beta/Tech Preview Agreement.
The development, release and timing of any features or functionality described in the Preview documentation remains at our sole discretion and are subject to change without notice or consultation.
The documentation is for informational purposes only and is not a commitment, promise or legal obligation to deliver any material, code or functionality and should not be relied upon in making Citrix product purchase decisions.
If you do not agree, select I DO NOT AGREE to exit.