Create a workspace
A workspace is a cloud development environment that you reach through the browser IDE, a terminal, or SSH. Citrix SecurSpaces™ creates one from the Workspaces page.
There are three routes. Starting from a template is the recommended one, because the template already carries the image, resources, and policy your project has agreed.
Basic Set-Up
Select Create Workspace on the Workspaces page or the project Overview page. A Create a Workspace dialog opens and asks how you want to create it:
| Option | What it does |
|---|---|
| Create from Template (Recommended) | Start from a predefined, ready-to-code template. See From a template |
| Create Custom Workspace | Configure a new workspace from scratch, described below |
| Copy Existing Workspace | Duplicate the configuration of one of your workspaces. See From an existing workspace |
An option can appear disabled for two reasons. Create from Template is unavailable when the project has no templates yet. The other two are unavailable when your role requires templates for workspace creation — hover to see which applies, and contact your project owner if you need access.
Selecting an option opens the corresponding wizard.
Basic Info
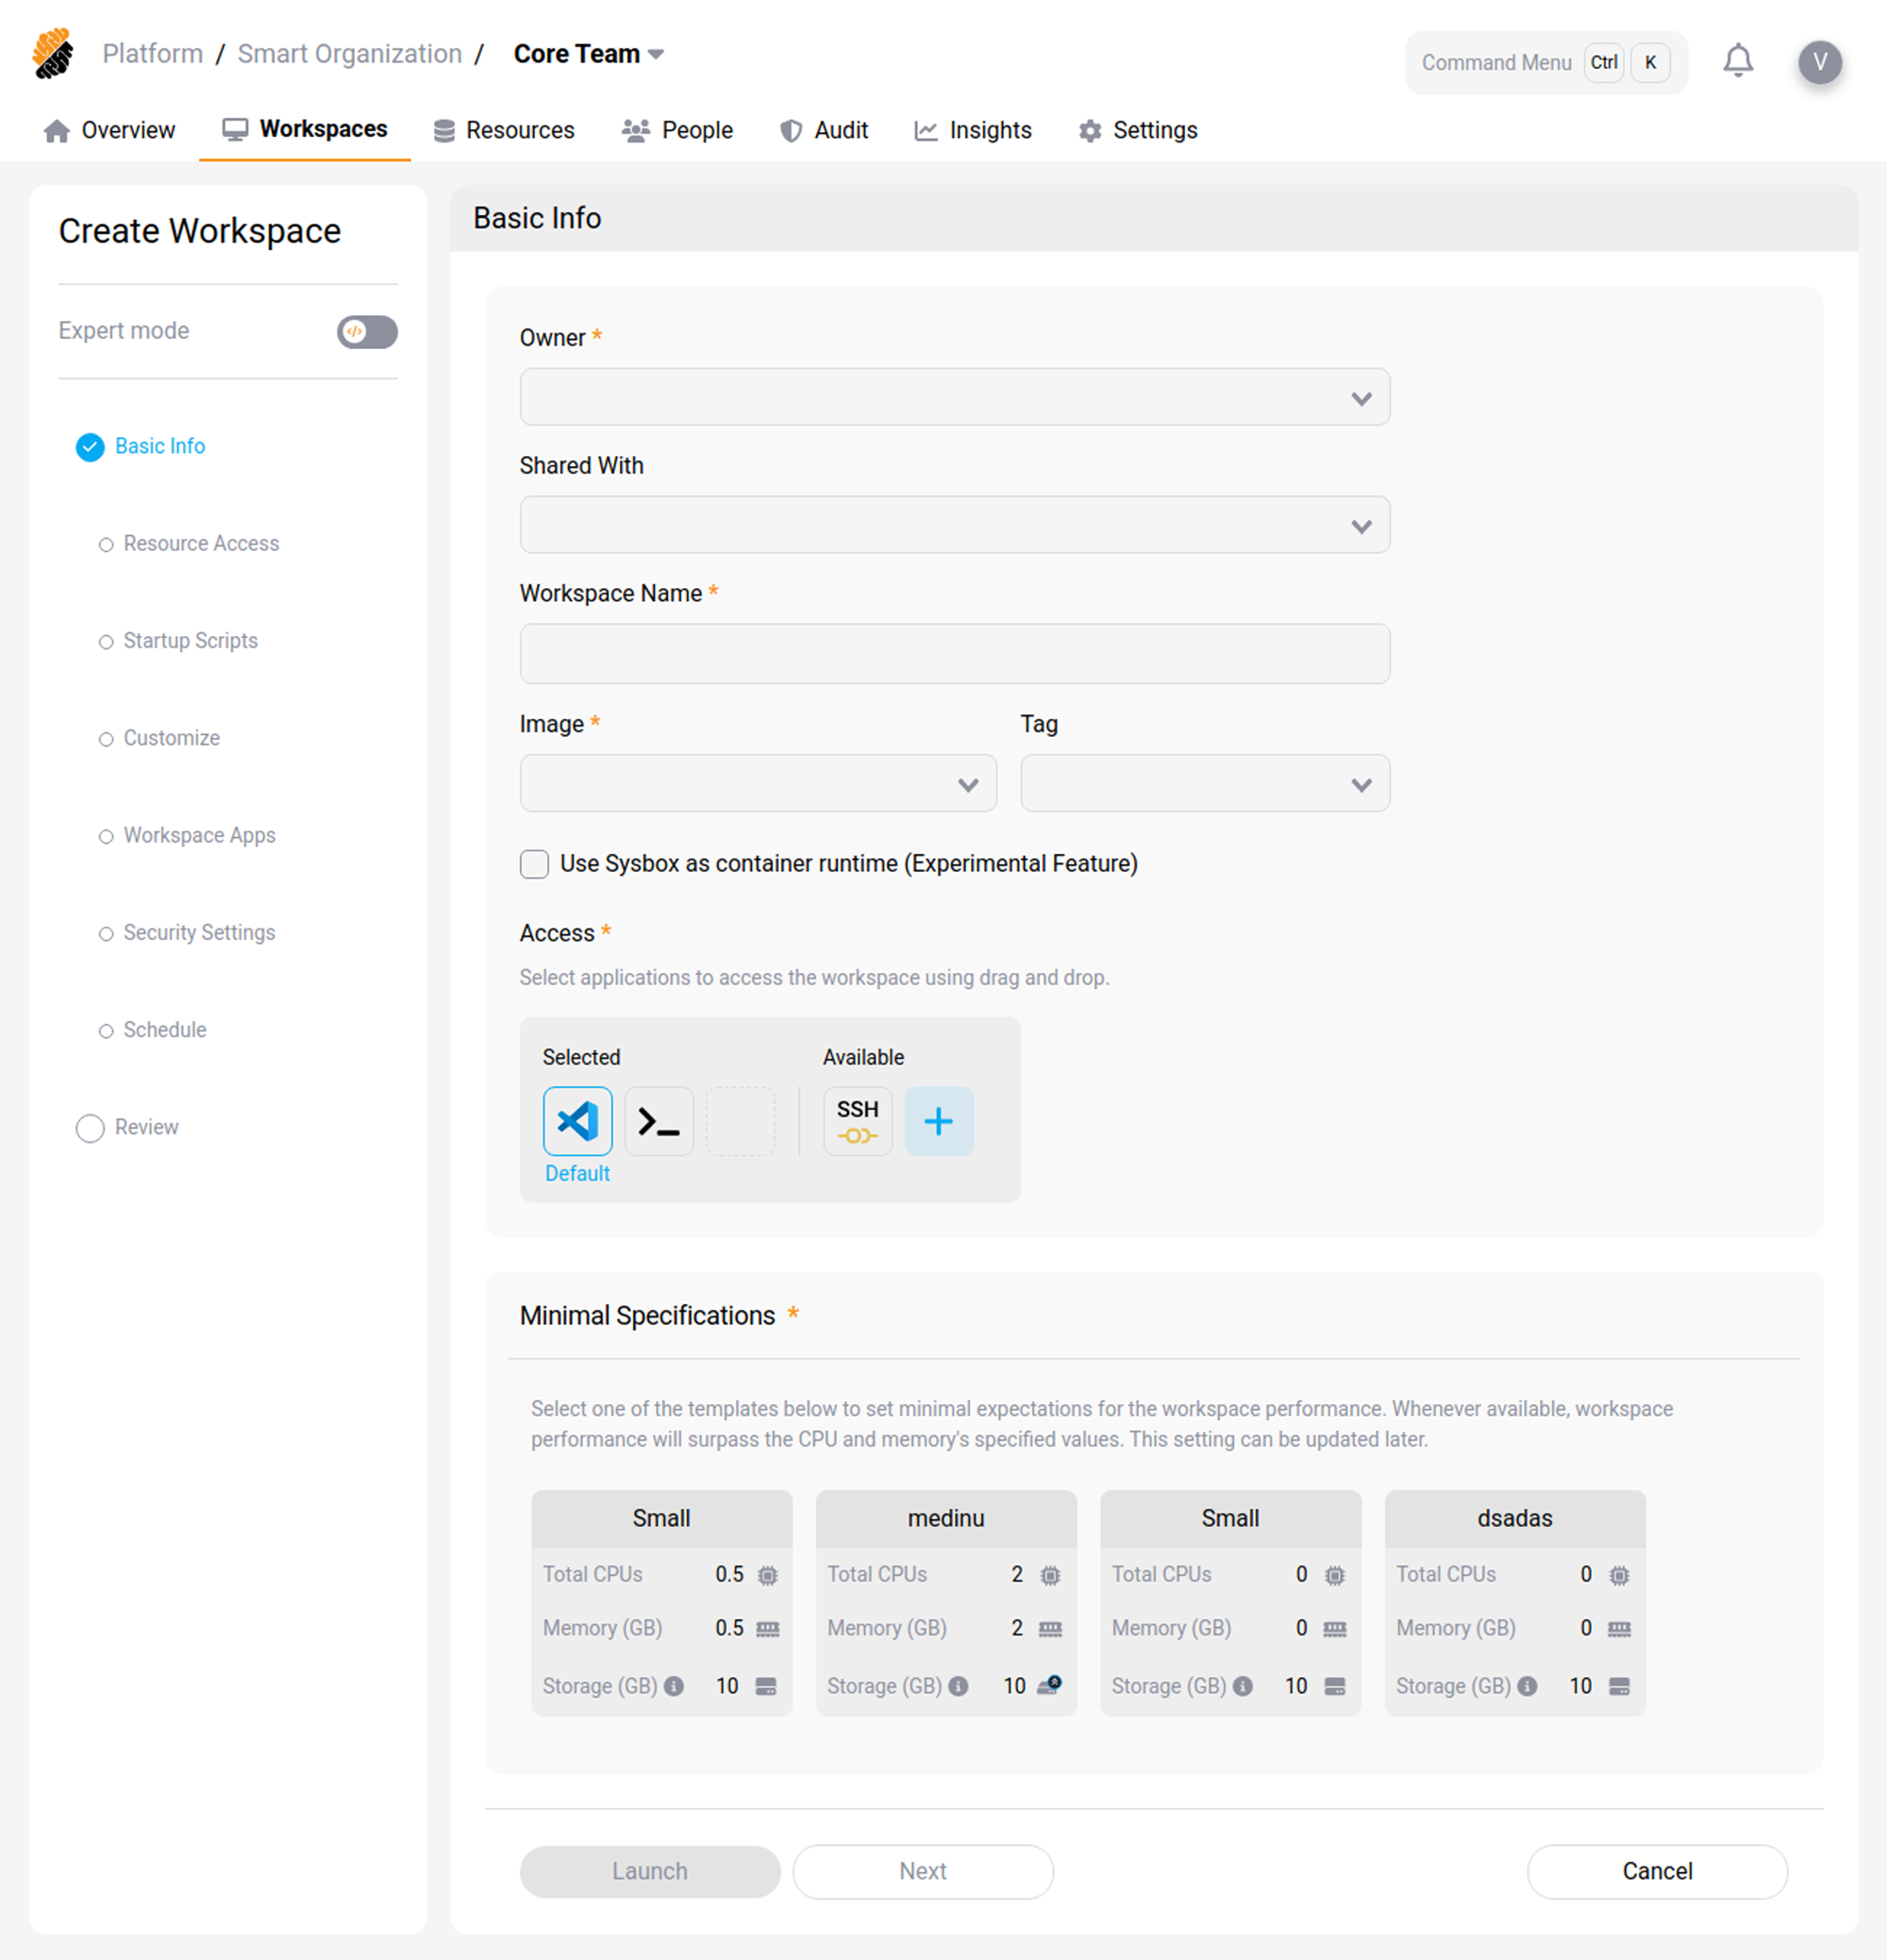
The first step of the wizard holds the core settings: who owns the workspace, what it runs, where it runs, and how you connect to it.
Tip:
Toggle Expert mode at the top of the sidebar to edit the workspace configuration directly as YAML.
| Setting | What it does | Changeable later |
|---|---|---|
| Owner | The user who owns the workspace and has full control over its configuration | Yes |
| Shared with | Project members who can access the workspace alongside the owner, for peer coding and review. Shared users get the same access as the owner | Yes |
| Workspace name | A unique name for the workspace | No |
| Container image | A preconfigured image carrying the tools and dependencies your project needs. Your project owner or administrator maintains the list | Yes, on restart |
| Tag | The image version to use | Yes, on restart |
| VSCode Version | Which IDE version runs in the workspace. See VSCode Version | Yes |
| Access methods | Which connection methods the workspace offers: VS Code for the browser IDE, Terminal for the browser terminal, and SSH. Each one runs as a service in the workspace. Select Add to define a custom access item | Yes |
| Workspace region | Where the workspace is deployed, which affects latency and data residency. Choose a region near your repositories and package registries; if you and your resources differ, prioritize the one closer to you | No |
| Workspace specifications | The compute resource template. Performance can exceed these values when capacity is available. Select the disk icon on the specification card to increase storage | Yes |
Note:
The available specification templates and their values depend on how your platform administrator has configured the environment.
Changing the image or tag on a running workspace takes effect only after the workspace restarts, because the
container is recreated from the new image. The console tells you this and asks you to confirm before it
restarts the workspace. Files under /home/developer are not affected. See
What persists in a workspace.
When the basic settings are right, select Launch to create the workspace immediately, or Next to continue through the remaining steps.
VSCode Version
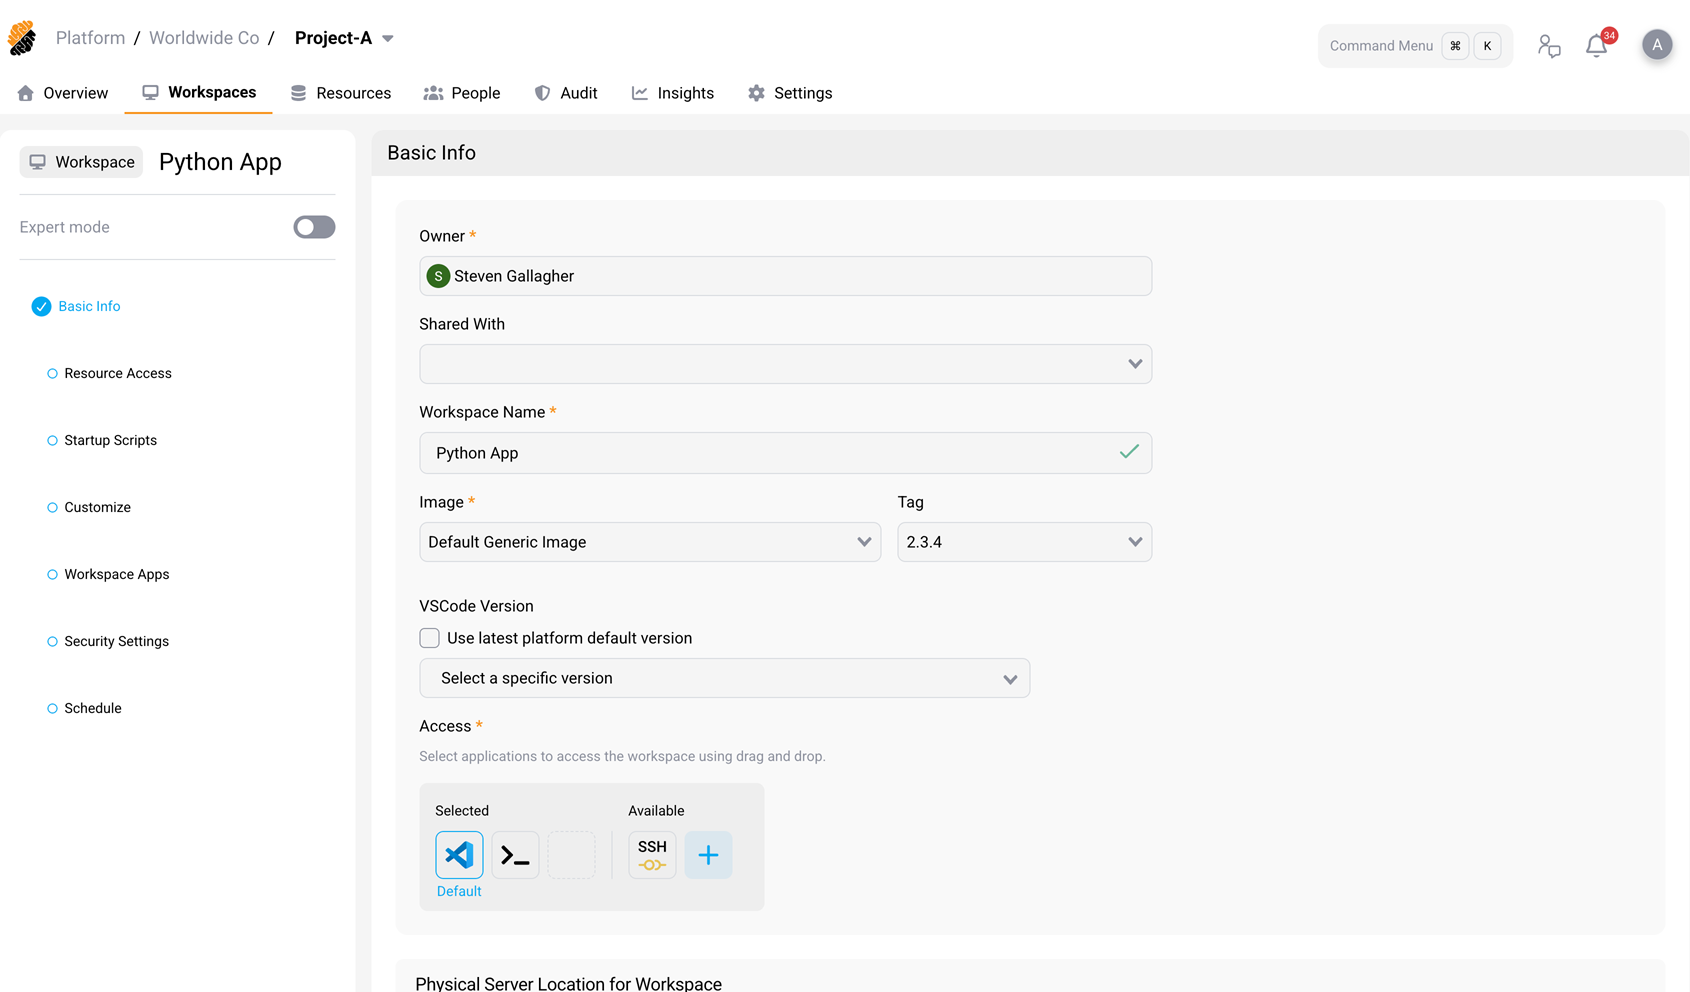
By default, select Use latest platform default version and the workspace follows the IDE version designated as the platform default. When that default changes, the workspace picks up the new one on its next start.
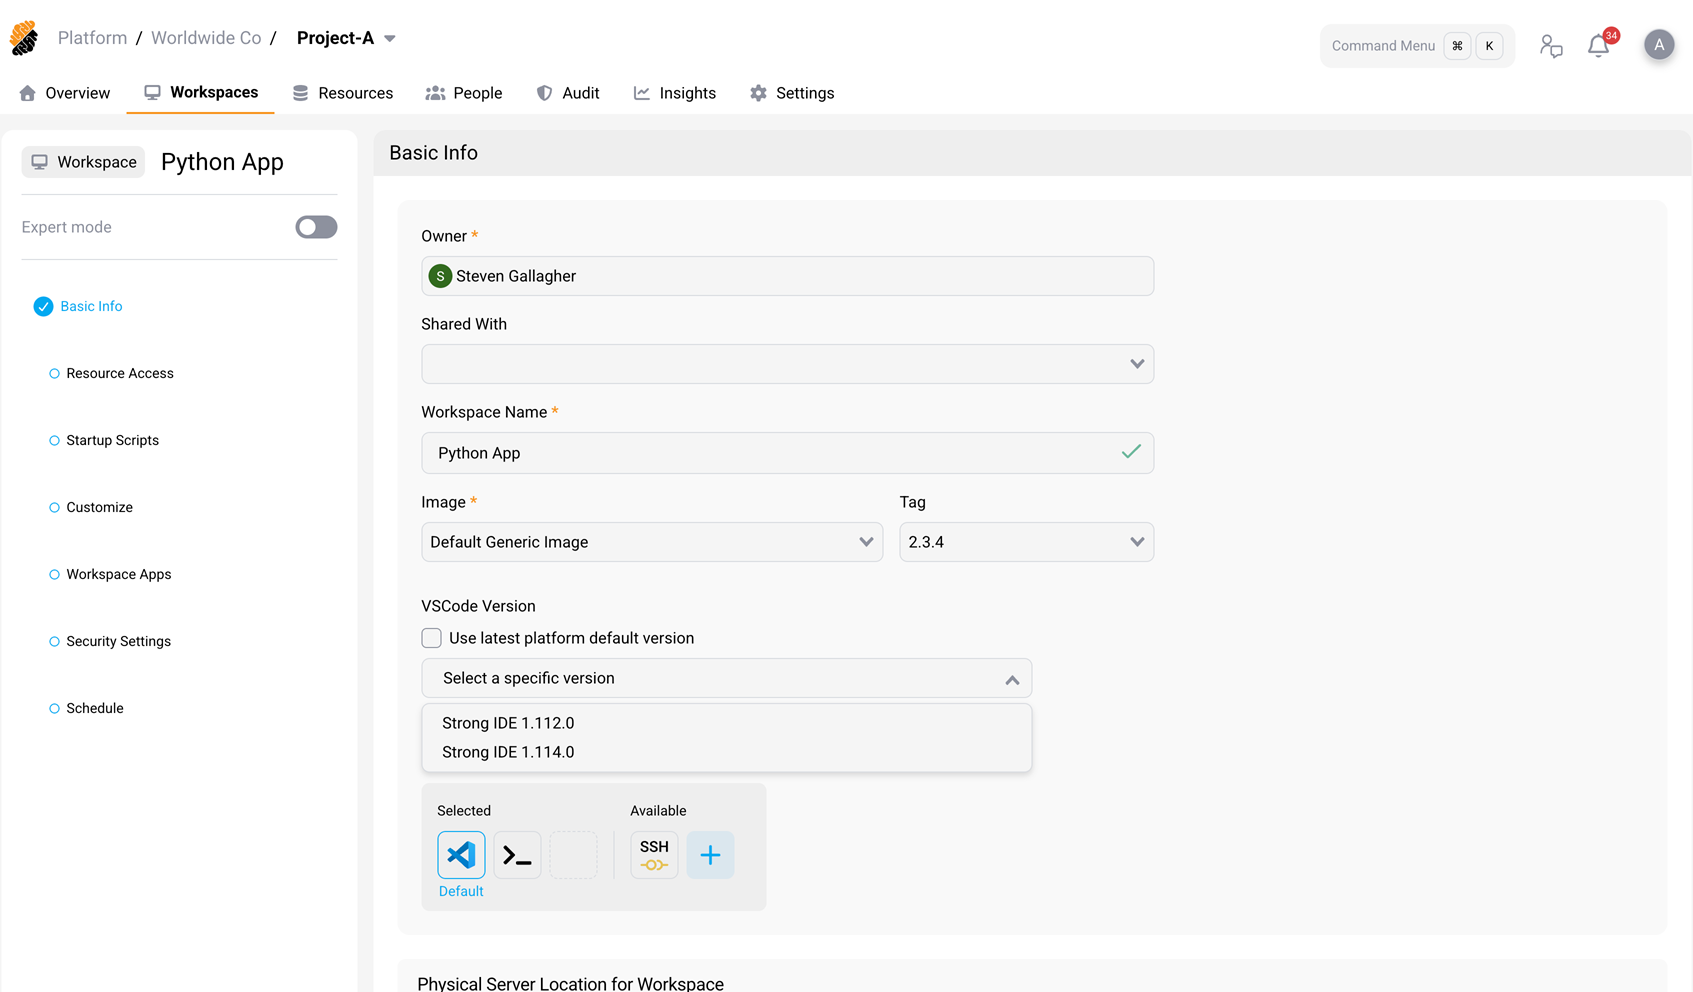
Clear the checkbox to enable Select a specific version and pin the workspace to one version. The list shows the IDE versions imported into your scope, most recently imported first. A pinned workspace is not updated when the platform default changes.
| Situation | What happens |
|---|---|
| No versions have been imported | The checkbox and list are unavailable, and the workspace reports that no VSCode versions are available |
| No version selected, checkbox cleared | The workspace uses the built-in IDE image shipped with the installed platform release |
| You change the version on an existing workspace | The change takes effect on the next start. The home directory (/home/developer) is not affected |
Available versions depend on what has been imported into the platform’s registry. See VSCode Versions.
Note:
This setting is also available when you edit an existing workspace, and when you create or edit a workspace template. A template stores the setting, so workspaces created from it inherit either the pinned version or the automatic update behavior.
Custom Access Items
A custom access item gives one-click access to a service or tool running inside the workspace. Use one when the built-in access methods do not cover a development tool, internal service, or application entry point.
| Field | What it holds |
|---|---|
| Name | The label shown to workspace users |
| Port | The port the service listens on inside the workspace |
| Command | The command that starts or connects to the service |
| Icon | An optional image for the access item |
| Health probe | An optional command that checks whether the item is online |
Custom access items can also be managed through the REST API, for both workspaces and workspace templates. See REST API.
Resource Access Control
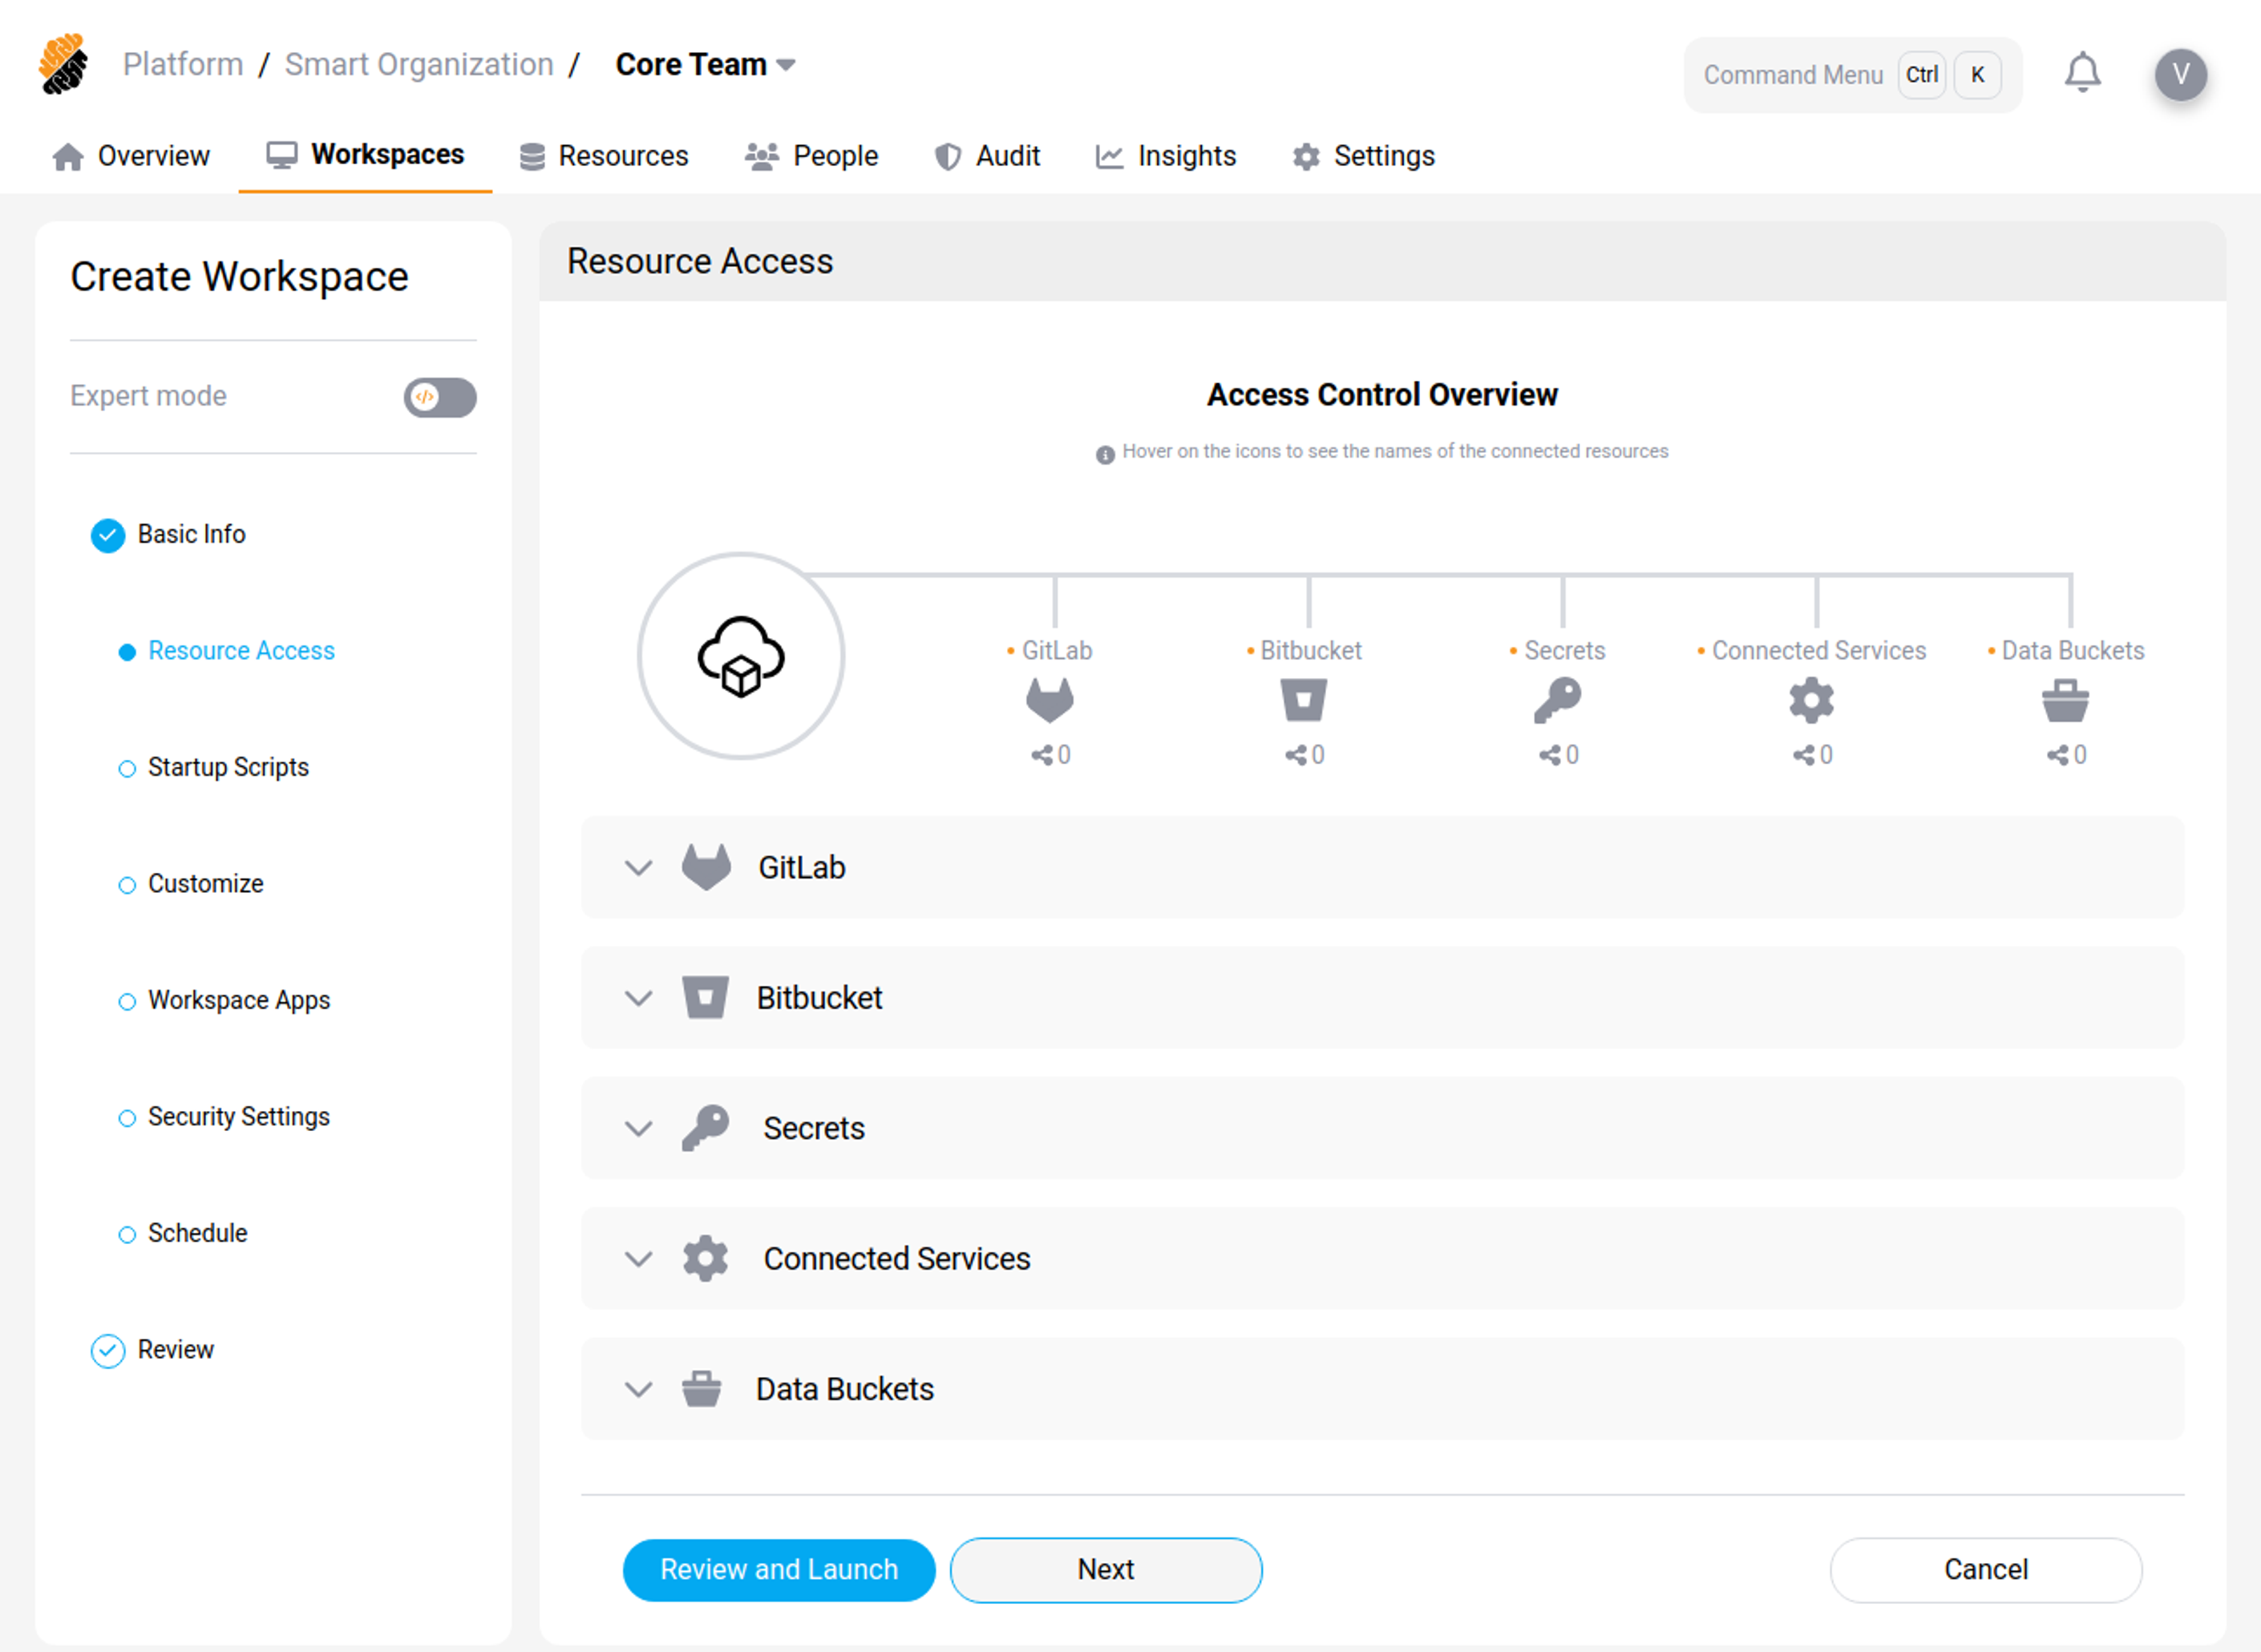
Attach project resources to the workspace. A resource must already exist in the project or organization, and you might need access rights to use it.
| Resource | What attaching it does |
|---|---|
| Git applications and repositories | Connects a whole Git application, or single repositories already imported into the project or organization. You can set the folder in the workspace that the files clone into |
| Secrets | Makes secrets available as files or environment variables. Choose an existing secret or create a new one |
| Connected HTTP and SSH services | Makes a connected service available as environment variables. Which services are available depends on the project, the organization, and the platform configuration |
If a repository is missing
Repositories attached here are cloned while the workspace starts. If a repository is missing after the workspace reaches Running, work through these checks in order:
- Check the workspace configuration. Select the workspace and review its Resource Access Control settings. Confirm the repository you expect is listed, and note the folder it clones into.
- Check your Git provider credentials. Confirm you have authenticated with the right provider and account under your profile integrations.
-
Try cloning manually to find out which of the two is at fault:
git clone <your-repository-url>
<!--NeedCopy-->
A permission error points to your credentials. A successful clone points to the workspace configuration — contact your project owner.
Startup Scripts
The container image provides the fixed tools — languages, compilers, system packages. A startup script handles what changes between users, branches, or runs, and would not belong in a shared image.
A startup script runs every time the workspace starts, either pre-startup or post-startup. Common uses:
| Use | Examples |
|---|---|
| Install dependencies that change often |
npm install, apt update, or building binaries so they match the current branch |
| Start services the runtime does not manage | Local PostgreSQL, Redis, or MongoDB instances, and background processes such as file watchers or test runners |
| Report readiness | Health checks that confirm services are up before handing over the terminal, or a message listing available commands |
Note:
Because the script runs on every start, write it so that running it more than once is safe.
Data Loss Prevention
Requires the Security permission set to Manage.
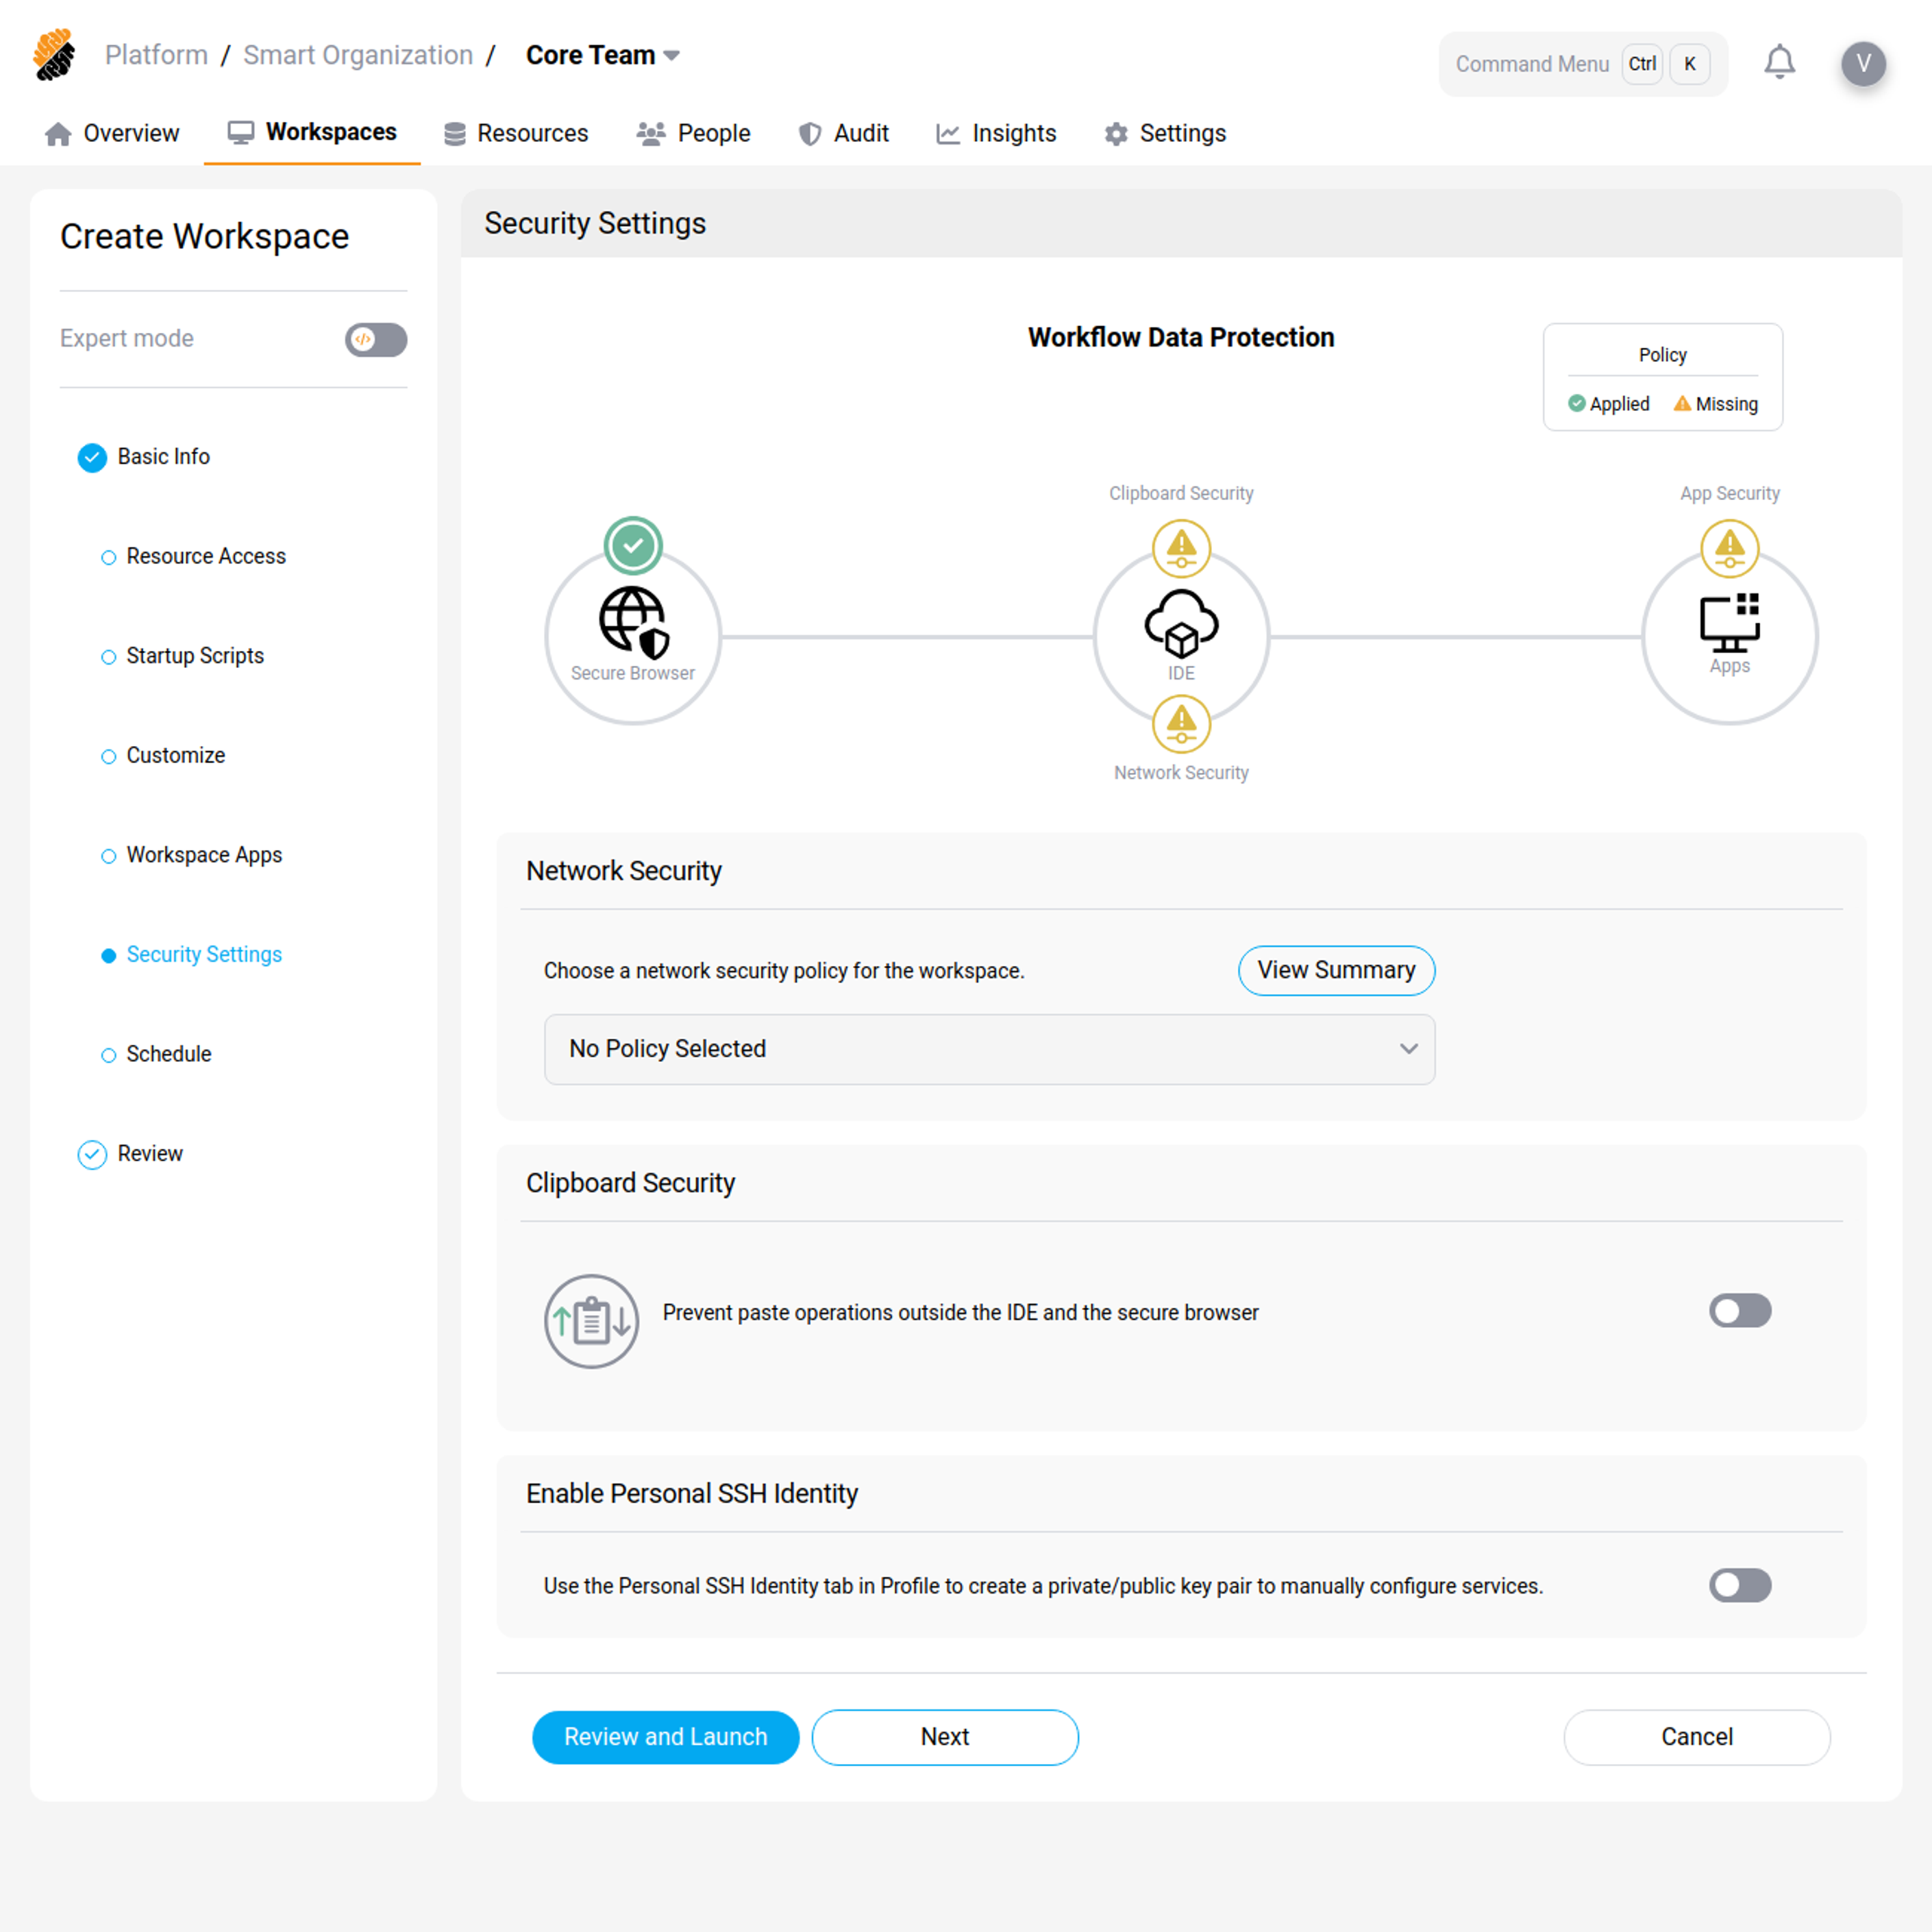
Security Settings control what the workspace can reach and what can leave it:
| Setting | What it does |
|---|---|
| Network Policy | Enforces a network policy on the workspace, controlling outbound traffic. Policies are project or organization resources, defined by a user with Security set to Manage |
| Clipboard Security | Prevents pasting outside the IDE and the Secure Browser |
| Apps Security | Restricts Workspace Apps to the Secure Browser |
Secure Access Management controls how developers connect:
| Setting | What it does |
|---|---|
| Remote Development Over SSH | Allows SSH connections to the workspace |
| Enable Personal SSH Identity | Allows users to use their personal SSH identity from inside the workspace |
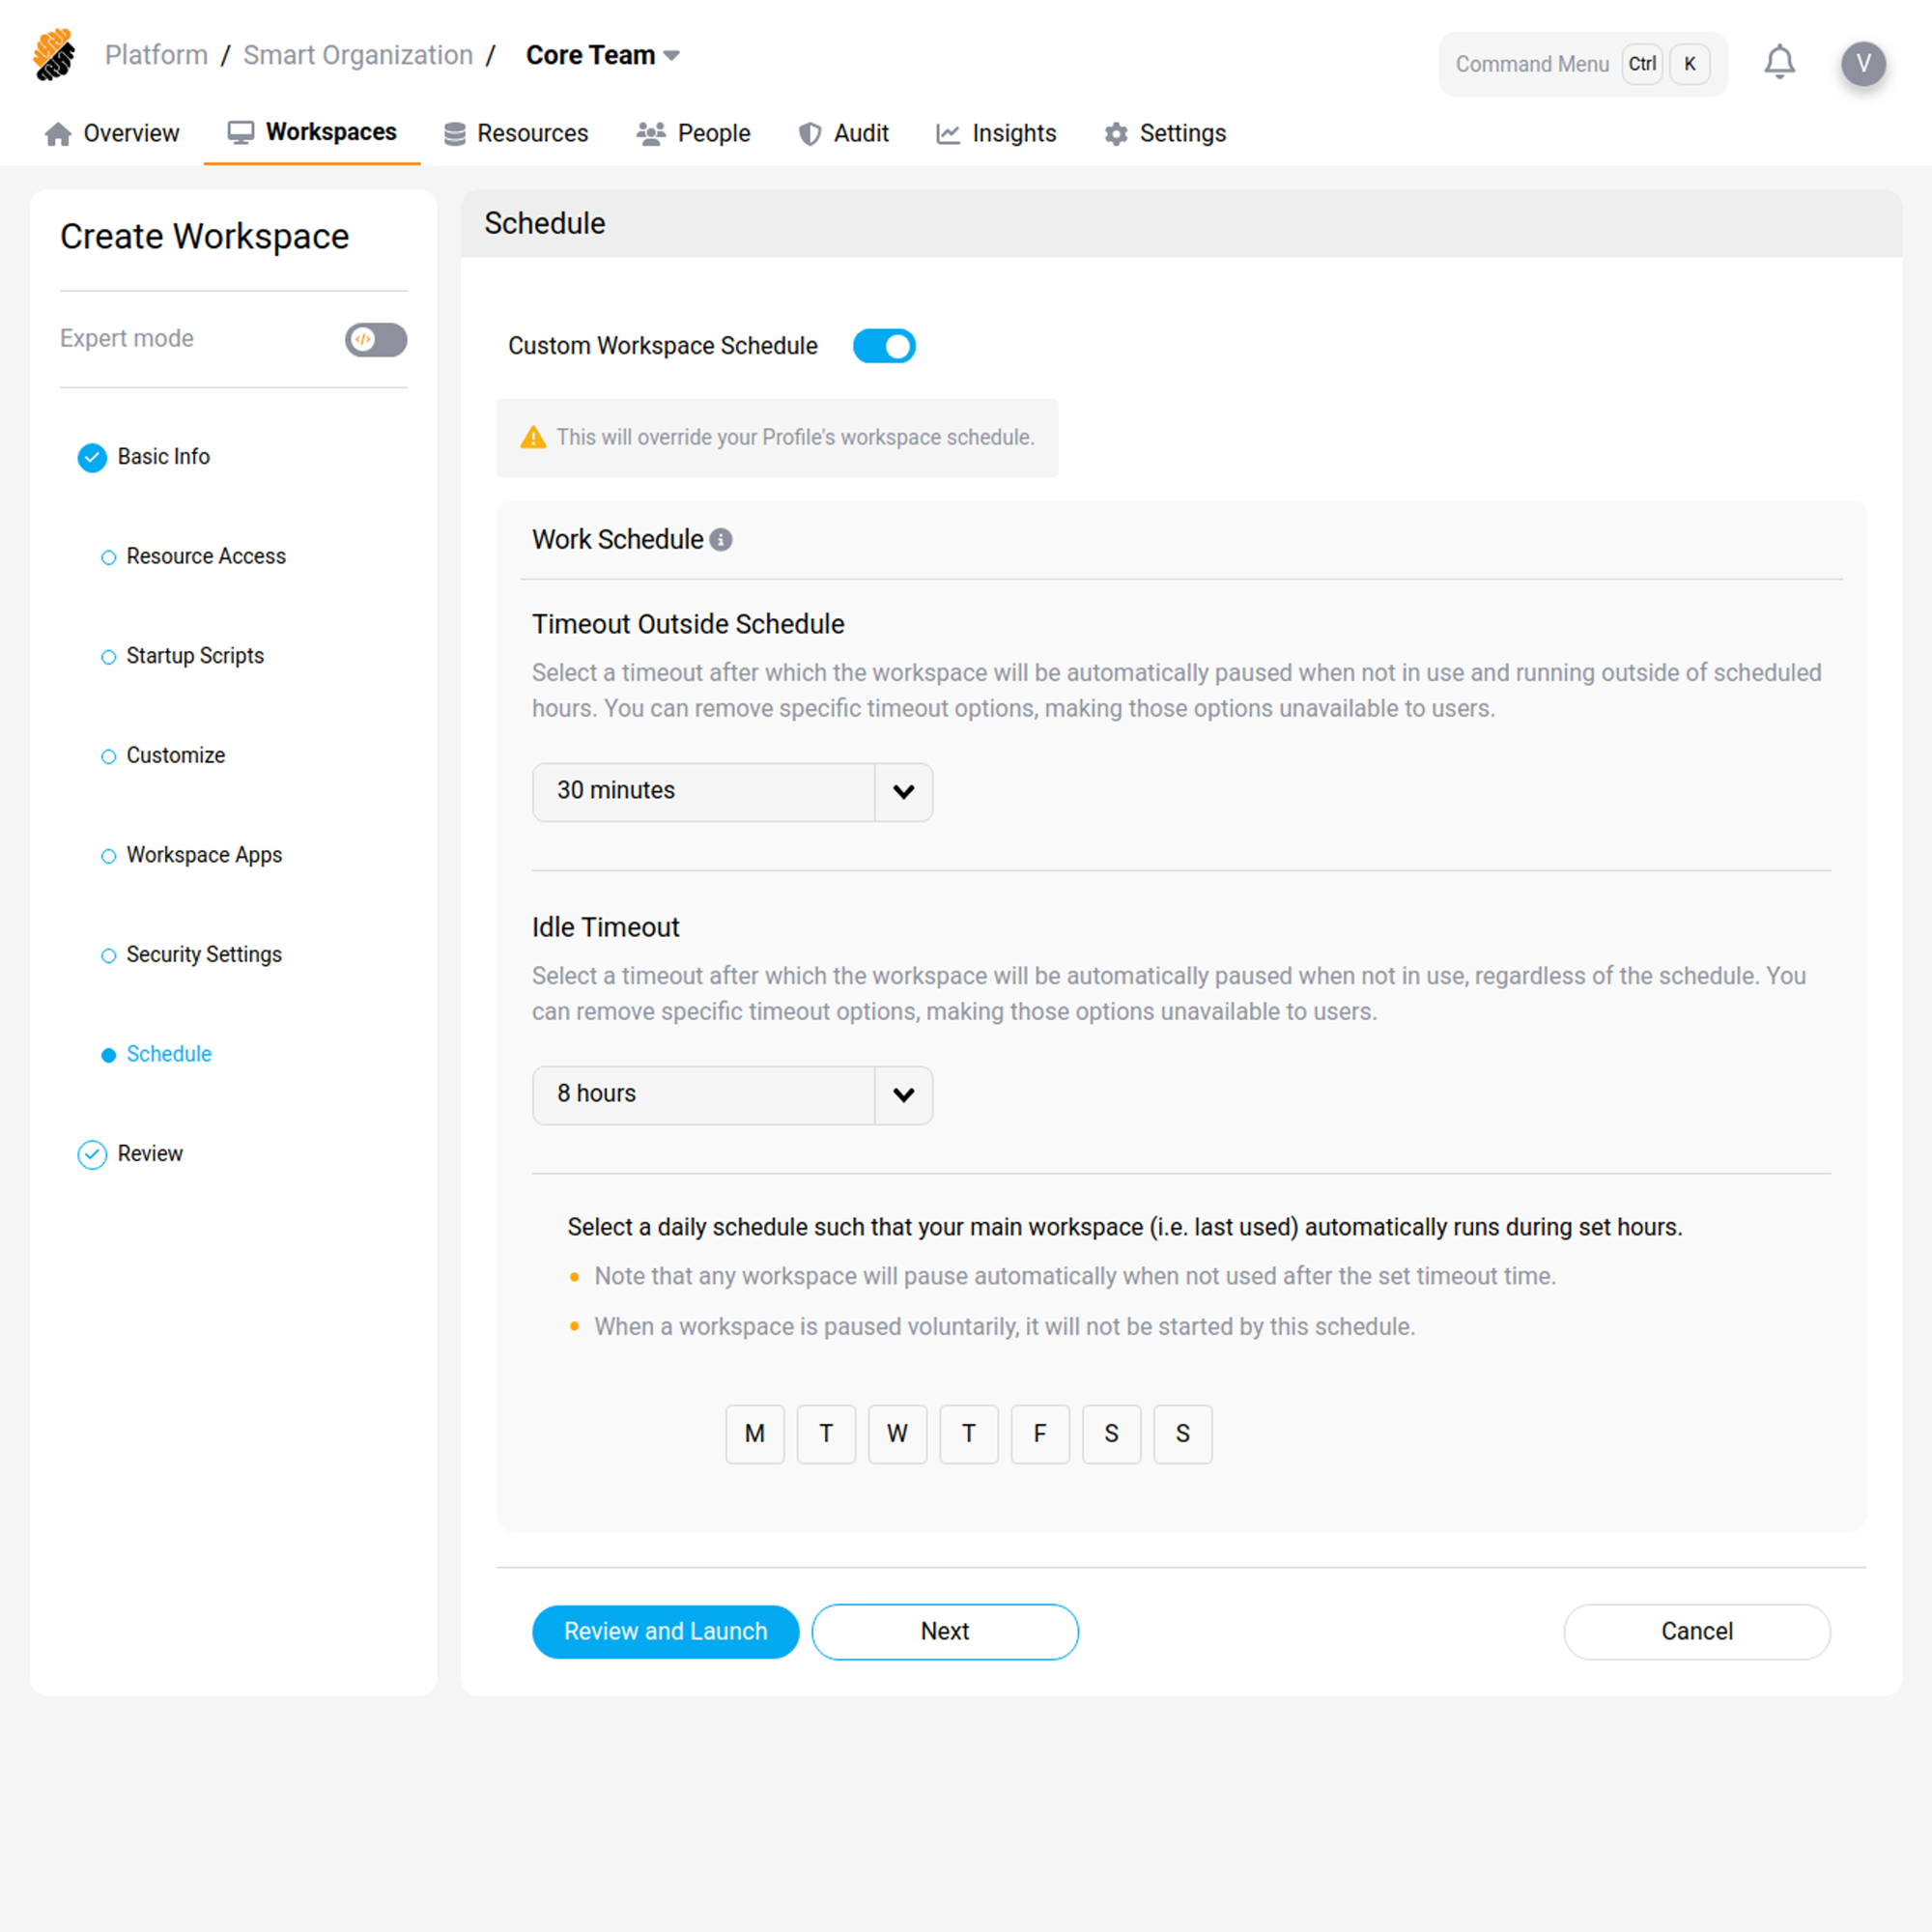
Custom Work Schedule
Define a custom work schedule for the workspace.
Launch it
Review the configuration and launch. The workspace is deployed automatically. You can edit its configuration at any time from the Overview or Workspaces pages.
From an existing workspace
Select Create Workspace, then Copy Existing Workspace. Provide the workspace to copy and the owner for the new workspace, then select Launch.
Tip:
Select Customize to edit the copy as if you were creating it from scratch.
From a template
Select Create Workspace, then Create from Template. This is the recommended route: a template carries the image, resources, credentials, and policy your project has agreed, so the workspace is consistent with everyone else’s.
Provide the template name and the owner for the workspace, then select Launch.
Tip:
Select Customize to edit the workspace as if you were creating it from scratch.