This content has been machine translated dynamically.
Dieser Inhalt ist eine maschinelle Übersetzung, die dynamisch erstellt wurde. (Haftungsausschluss)
Cet article a été traduit automatiquement de manière dynamique. (Clause de non responsabilité)
Este artículo lo ha traducido una máquina de forma dinámica. (Aviso legal)
此内容已经过机器动态翻译。 放弃
このコンテンツは動的に機械翻訳されています。免責事項
이 콘텐츠는 동적으로 기계 번역되었습니다. 책임 부인
Este texto foi traduzido automaticamente. (Aviso legal)
Questo contenuto è stato tradotto dinamicamente con traduzione automatica.(Esclusione di responsabilità))
This article has been machine translated.
Dieser Artikel wurde maschinell übersetzt. (Haftungsausschluss)
Ce article a été traduit automatiquement. (Clause de non responsabilité)
Este artículo ha sido traducido automáticamente. (Aviso legal)
この記事は機械翻訳されています.免責事項
이 기사는 기계 번역되었습니다.책임 부인
Este artigo foi traduzido automaticamente.(Aviso legal)
这篇文章已经过机器翻译.放弃
Questo articolo è stato tradotto automaticamente.(Esclusione di responsabilità))
Translation failed!
スクリーンショット許可リストの構成
アプリをスクリーンショット許可リストに追加するには、次の手順を実行します:
-
Citrix Cloudアカウントにサインインし、[ワークスペースの構成] を選択します。
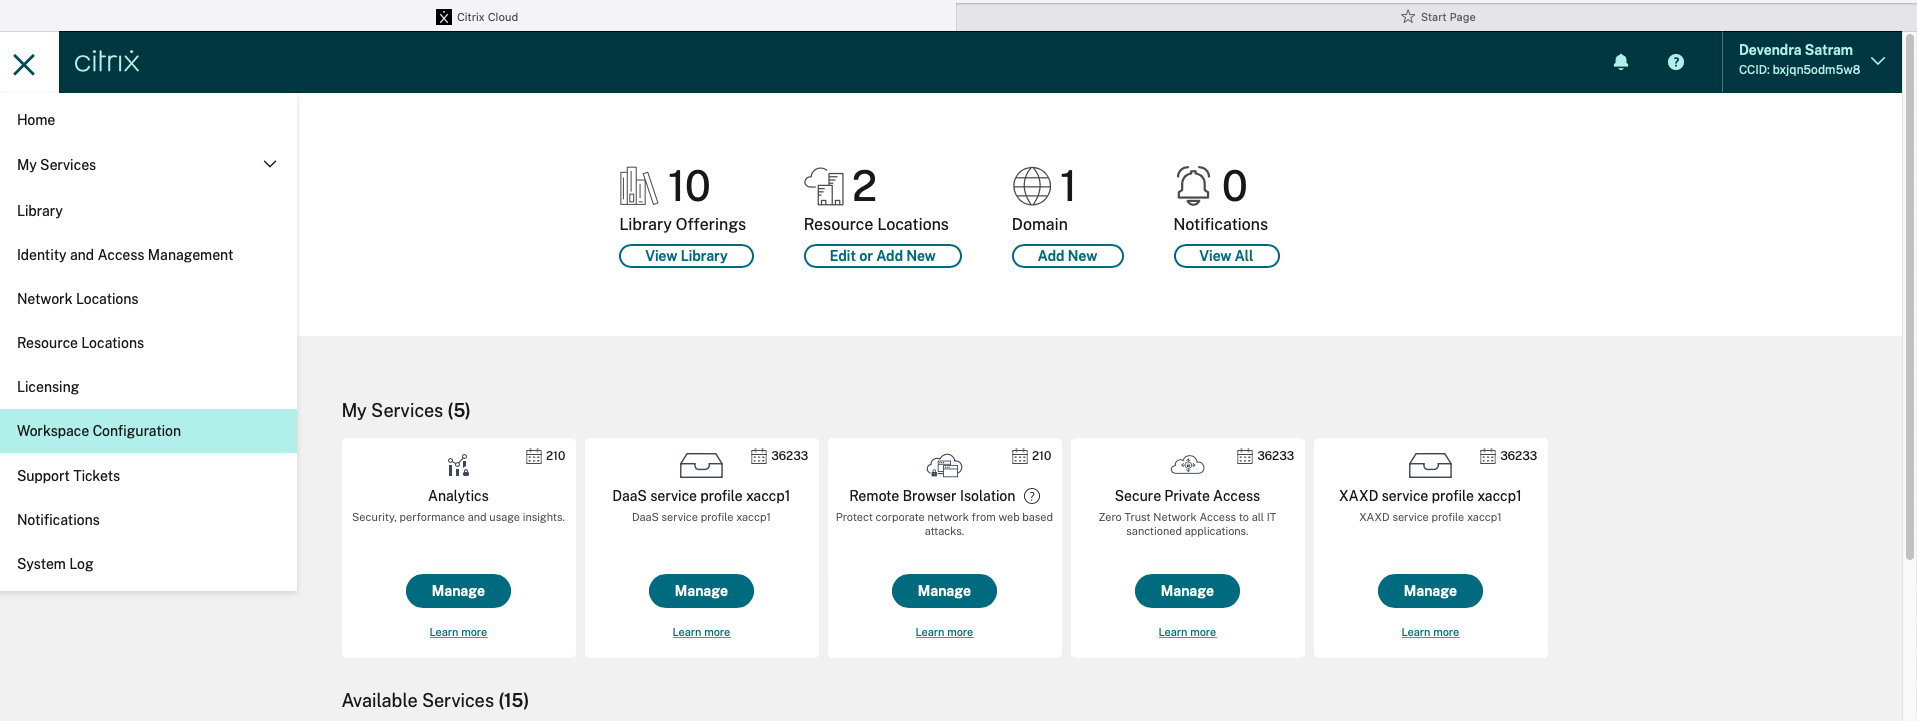
-
[アプリ構成]>[セキュリティと認証]>[構成]>[App Protection] を選択します。
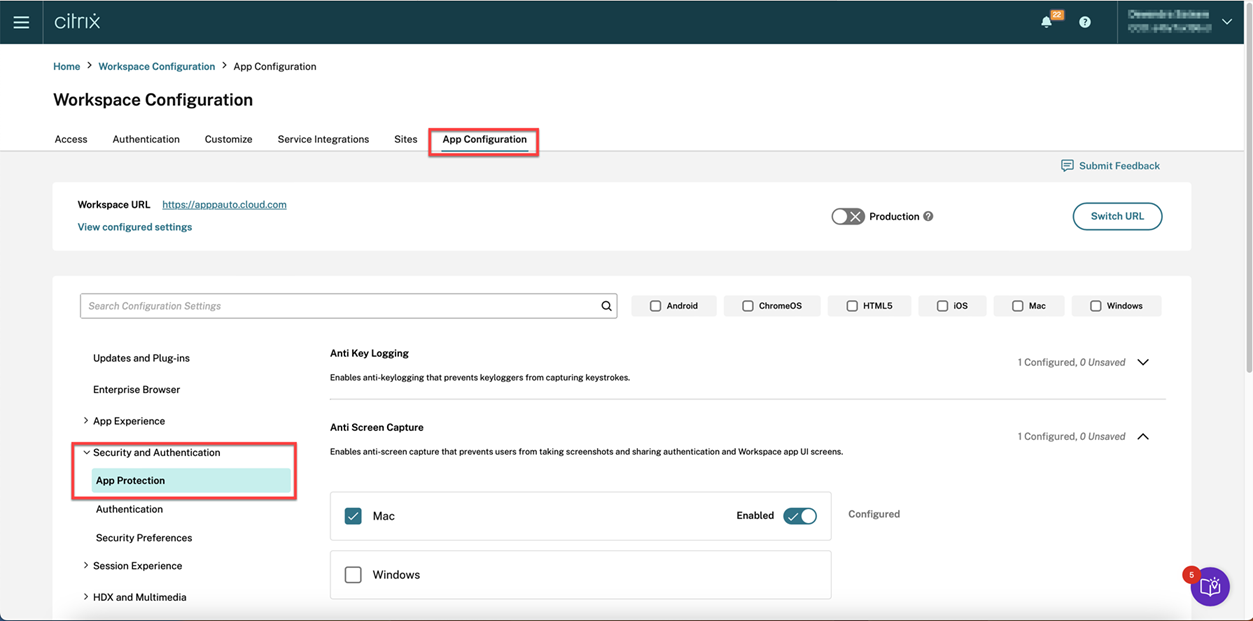
-
[スクリーンショット許可リスト] をクリックし、[Windows] チェックボックスを選択します。
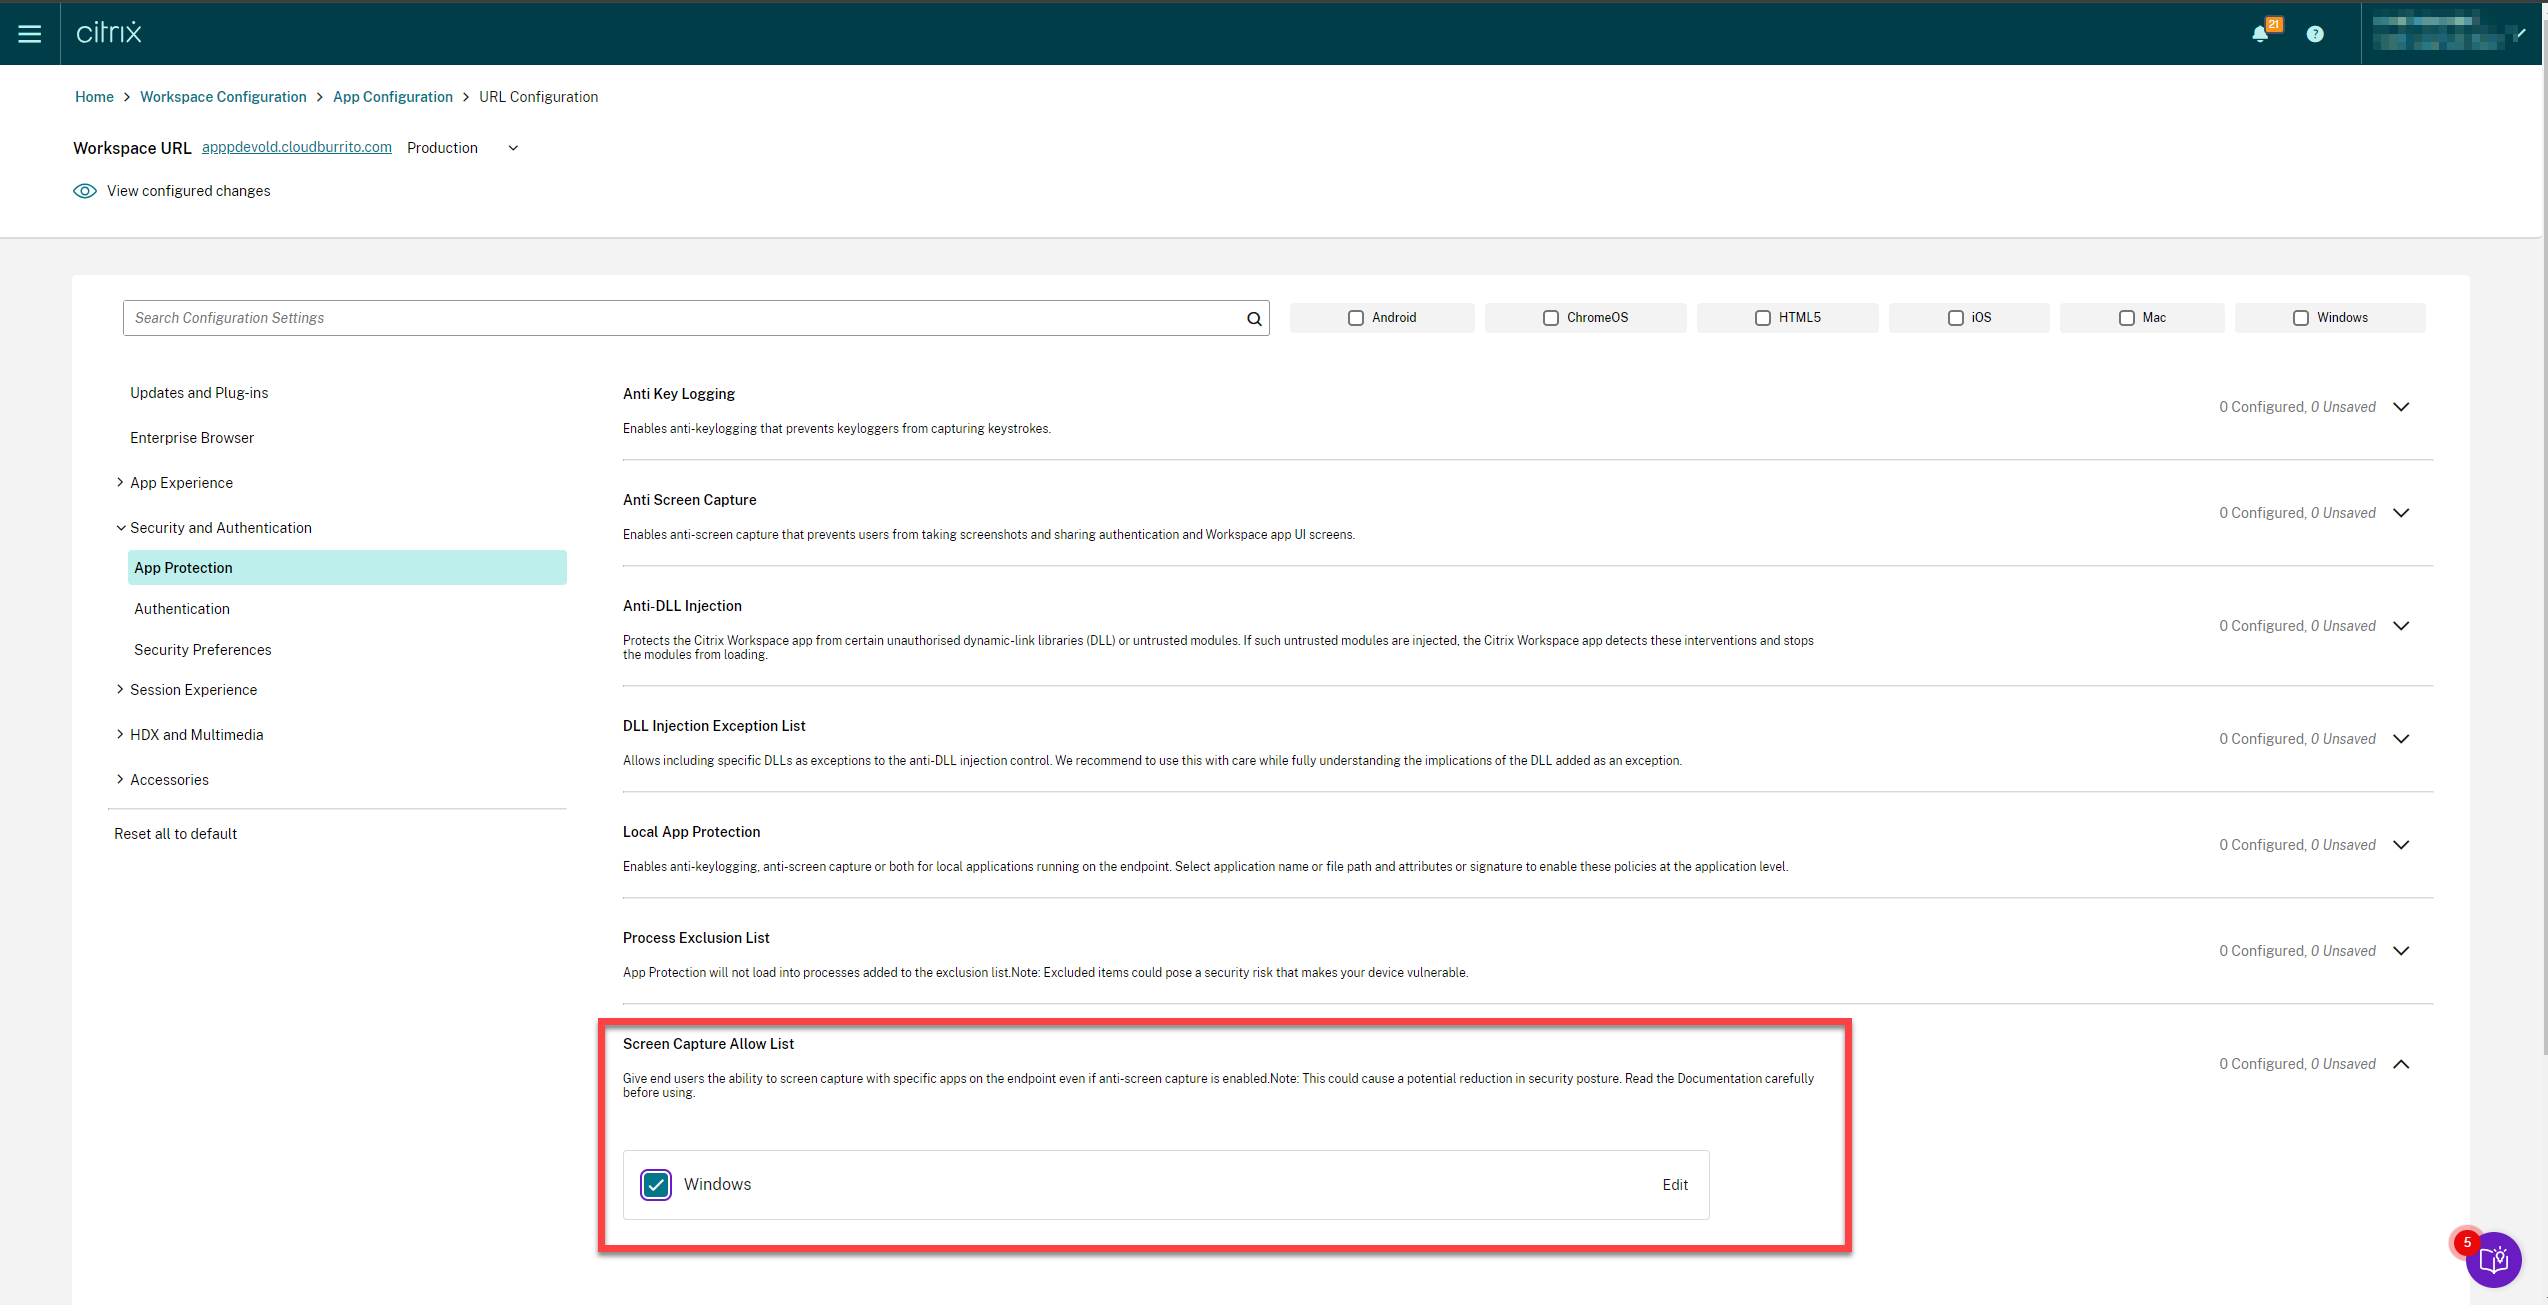
-
[編集] オプションをクリックします。
Manage settings for Windows画面が表示されます。
-
スクリーンショット許可リストに追加する、アプリに関する情報を追加します。
例:
[
 {
 "name": "ScreenshotTool_1.exe",
 "signature": "ScreenshotTool_1 Signature",
 "publisher": "ScreenshotTool_1 Publisher"
 },
 {
  "name": "Screenshottool_2.exe",
  "signature": "",
  "publisher": ""
 }
]
<!--NeedCopy-->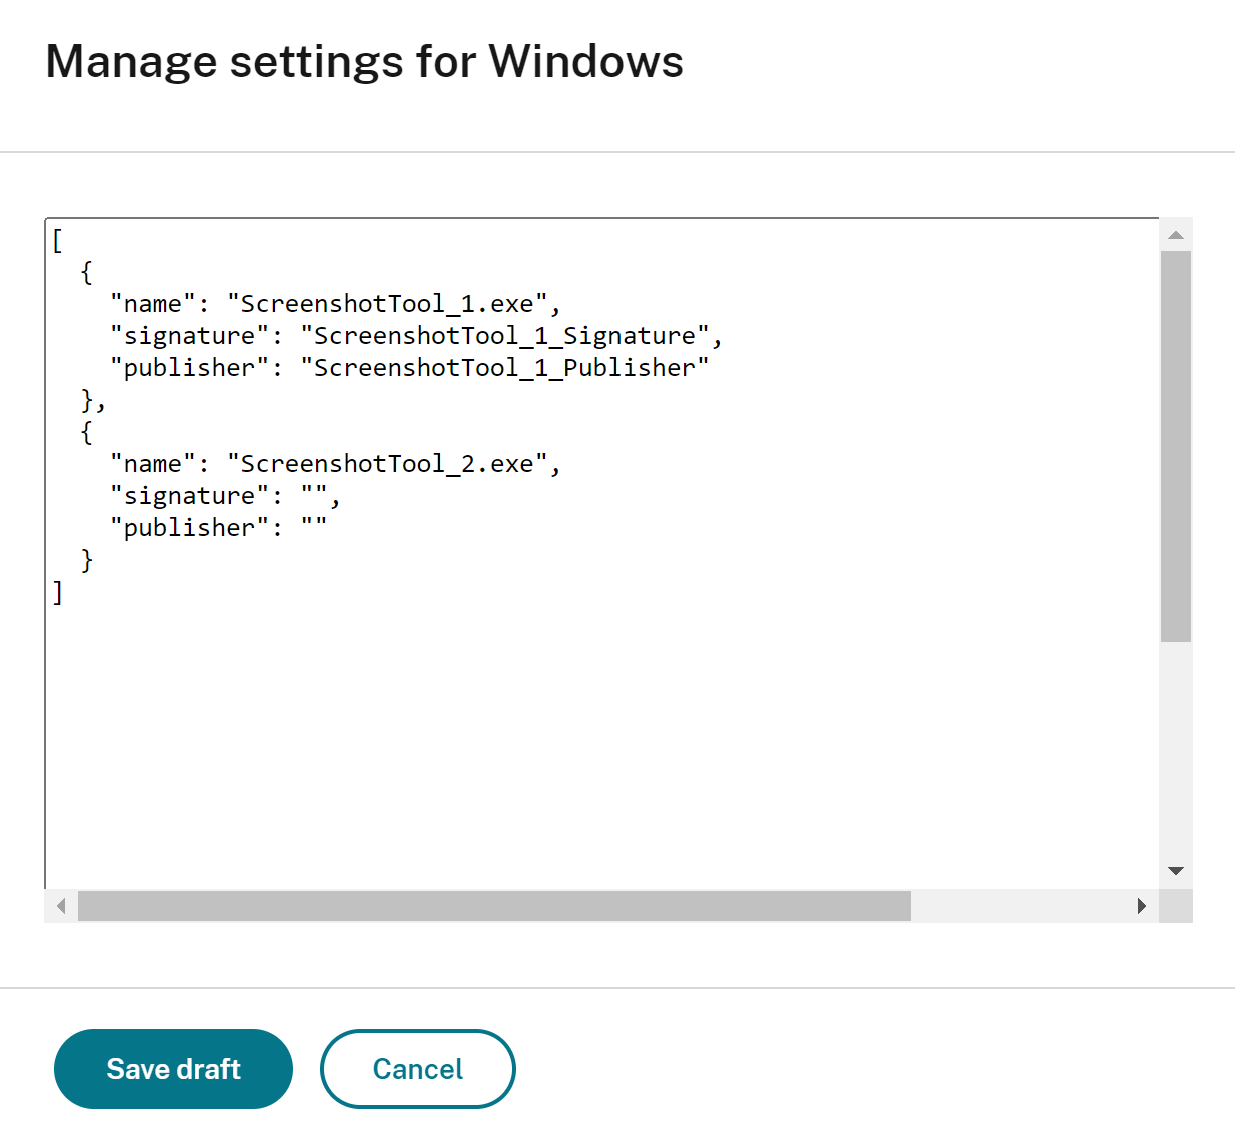
注:
-
nameは必須のフィールドです。一方、publisherとsignatureは必須ではありません。ただし、許可リストに登録されたアプリのみがスクリーンショットを撮ることができるように、関連するpublisherとsignatureを追加することをお勧めします。 -
publisherとsignatureの値がない場合は、同じ名前の悪意のあるアプリケーションがスクリーンショットをキャプチャする可能性があります。 - また、このブロックに複数のエントリを追加することで、スクリーンショット許可リストに複数のアプリを追加することができます。
publisherおよびsignature情報を取得するには、「publisherおよびsignature情報を取得する」を参照してください。 -
-
[下書きを保存] をクリックし、[下書きの公開] をクリックします。
-
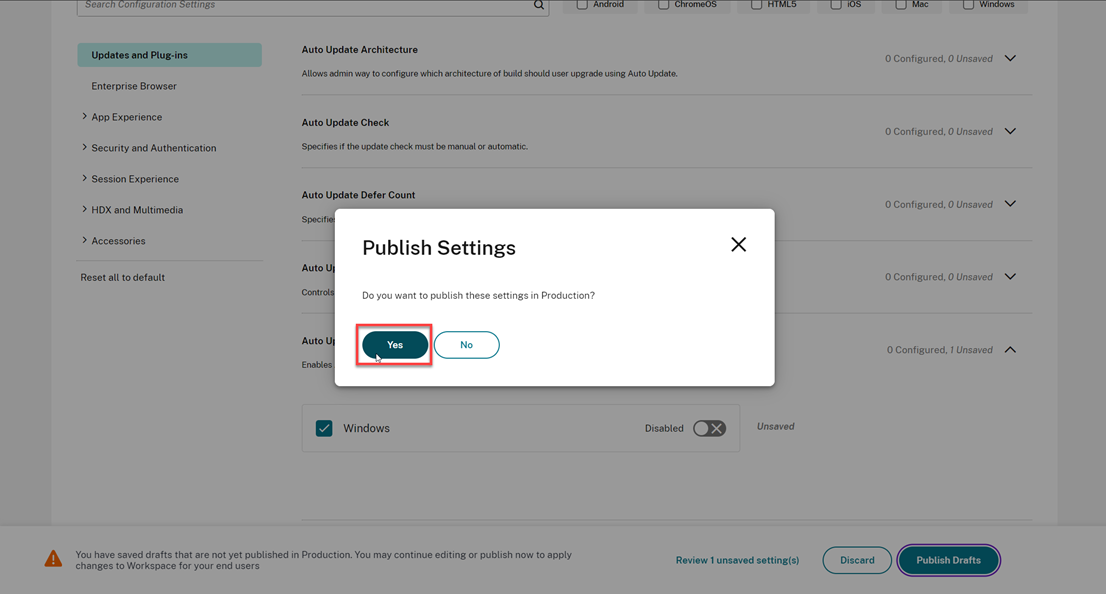
[設定の公開] ダイアログボックスで、[はい] をクリックします。
publisherおよびsignature情報を取得する
publisherおよびsignature情報を取得するには、次の手順を実行します:
-
アプリの関連する
.exeファイルがあるファイルの場所を開きます。 -
.exeファイルを右クリックし、[Properties] をクリックします。プロパティのポップアップ画面が表示されます。 -
[Digital Signatures] をクリックします。[Name of signer] は
publisherの値です。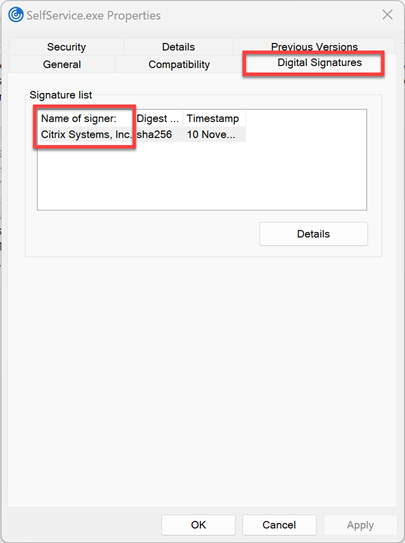
-
[Name of signer] の最初のエントリをクリックしてから、[Details]>[View Certificate] の順にクリックします。
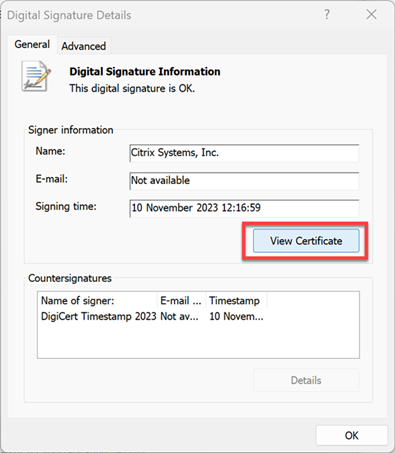
-
[Details]>[Thumbprint] の順にクリックします。テキストボックスに表示される内容は
signatureです。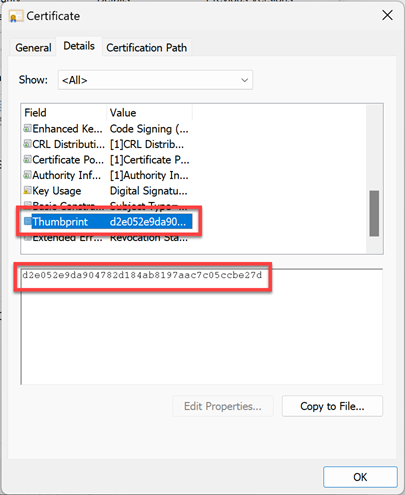
共有
共有
この記事の概要
This Preview product documentation is Citrix Confidential.
You agree to hold this documentation confidential pursuant to the terms of your Citrix Beta/Tech Preview Agreement.
The development, release and timing of any features or functionality described in the Preview documentation remains at our sole discretion and are subject to change without notice or consultation.
The documentation is for informational purposes only and is not a commitment, promise or legal obligation to deliver any material, code or functionality and should not be relied upon in making Citrix product purchase decisions.
If you do not agree, select I DO NOT AGREE to exit.