-
-
Grupos de identidad de diferentes tipos de unión de identidad de máquinas
-
Servicio independiente Citrix Secure Ticketing Authority (STA) de Cloud Connector
-
-
-
-
Comparar, priorizar, modelar y solucionar problemas de directivas
-
-
Hacer copia de seguridad o migrar la configuración
-
Copia de seguridad y restauración mediante la herramienta de configuración automatizada
-
Mejores prácticas para realizar copias de seguridad y restaurar
-
Cmdlets de herramientas de configuración automatizada para la migración
-
Cmdlets de herramientas de configuración automatizada para realizar copias de seguridad y restaurar
-
Solucionar problemas con Configuración automatizada e información adicional
-
Recopilar rastreos de Citrix Diagnostic Facility (CDF) durante el inicio del sistema
-
Servicio de actualización de versiones de VDA (VUS) de Citrix - Tech Preview
This content has been machine translated dynamically.
Dieser Inhalt ist eine maschinelle Übersetzung, die dynamisch erstellt wurde. (Haftungsausschluss)
Cet article a été traduit automatiquement de manière dynamique. (Clause de non responsabilité)
Este artículo lo ha traducido una máquina de forma dinámica. (Aviso legal)
此内容已经过机器动态翻译。 放弃
このコンテンツは動的に機械翻訳されています。免責事項
이 콘텐츠는 동적으로 기계 번역되었습니다. 책임 부인
Este texto foi traduzido automaticamente. (Aviso legal)
Questo contenuto è stato tradotto dinamicamente con traduzione automatica.(Esclusione di responsabilità))
This article has been machine translated.
Dieser Artikel wurde maschinell übersetzt. (Haftungsausschluss)
Ce article a été traduit automatiquement. (Clause de non responsabilité)
Este artículo ha sido traducido automáticamente. (Aviso legal)
この記事は機械翻訳されています.免責事項
이 기사는 기계 번역되었습니다.책임 부인
Este artigo foi traduzido automaticamente.(Aviso legal)
这篇文章已经过机器翻译.放弃
Questo articolo è stato tradotto automaticamente.(Esclusione di responsabilità))
Translation failed!
Instalar agentes VDA mediante Ansible
Información general
En este artículo se describe cómo implementar los VDA con Ansible. Para obtener más información, consulte la documentación de Ansible.
Nota:
En este artículo se describen únicamente las recomendaciones basadas en la forma en que Citrix® ha probado el entorno. Puede personalizar estos pasos según sus necesidades. Citrix no se hace responsable de las actualizaciones o ajustes necesarios para adaptarlo a las necesidades de los clientes.
Pasos clave para implementar VDA con Ansible
- Configure el entorno de máquina virtual.
- Instalar Ansible
- Configuración de Kerberos
- Configurar Ansible
Paso 1: Configurar el entorno de máquina virtual
Ejecute los siguientes comandos en el servidor Windows.
- Configure PS RemoteSigned.
Set-ExecutionPolicy RemoteSigned - Configure WinRM para usar sin cifrar:
winrm set winrm/config/service '@{AllowUnencrypted="true"}'> Nota: > > Si se produce un error en este paso, use el siguiente comando: >Enable-PSRemoting -Force - Abra el puerto 5985 del firewall.
New-NetFirewallRule -DisplayName "Allow WinRm port 5985" -Direction Inbound -Profile Any -Action Allow -LocalPort 5985 -Protocol tcp
Paso 2: Instalar Ansible
Para instalar Ansible con Ubuntu 20.4 o una versión posterior, ejecute los siguientes comandos:
sudo apt updatesudo apt install software-properties-commonsudo add-apt-repository --yes --update ppa:ansible/ansiblesudo apt install ansiblesudo apt install python3-pip
Paso 2i: Instalar Kerberos
Ejecute el siguiente comando para instalar Kerberos:
sudo apt install python3-dev libkrb5-dev krb5-user
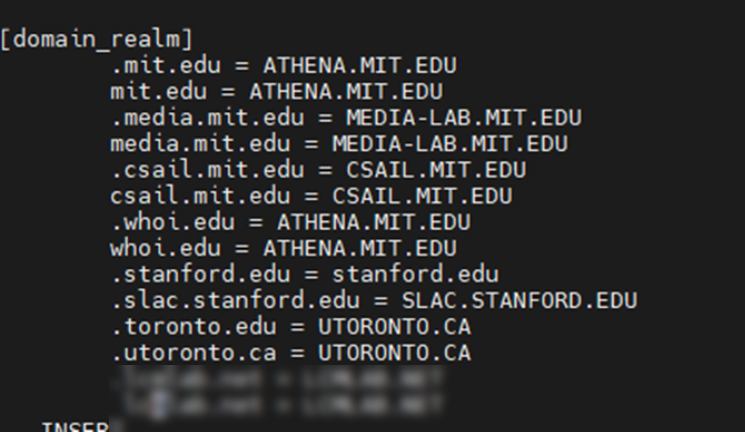
Paso 2ii: Configurar Kerberos
Para configurar Kerberos, ejecute el siguiente comando:
Edit /etc/krb5.conf
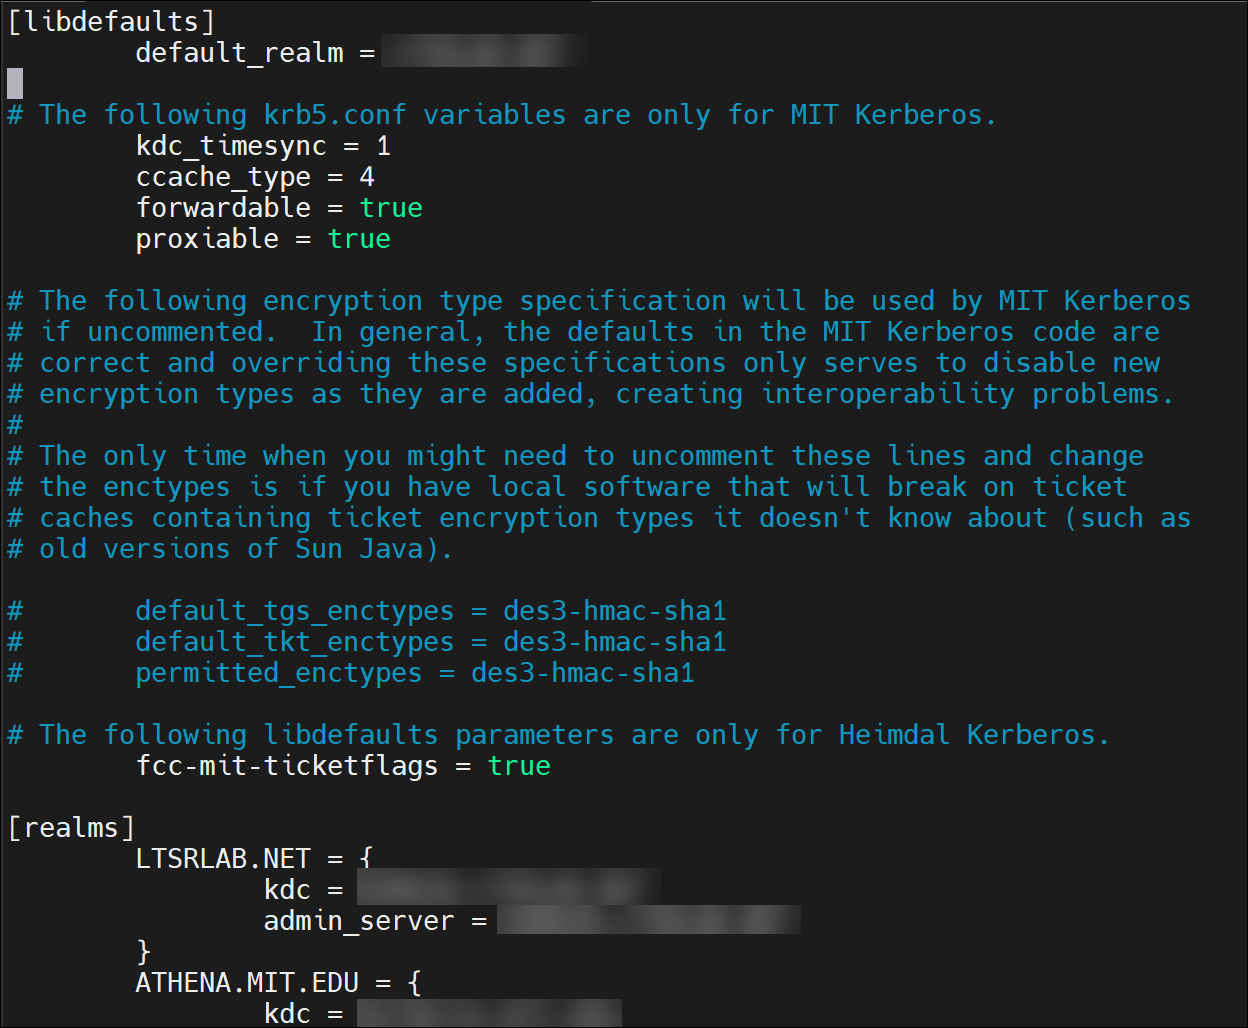
Nota:
Use mayúsculas para el nombre del territorio de Kerberos.
Paso 3: Configurar Ansible
Para configurar el host de Ansible, siga estos pasos:
-
Ejecute este comando:
Edit /etc/ansible/hosts -
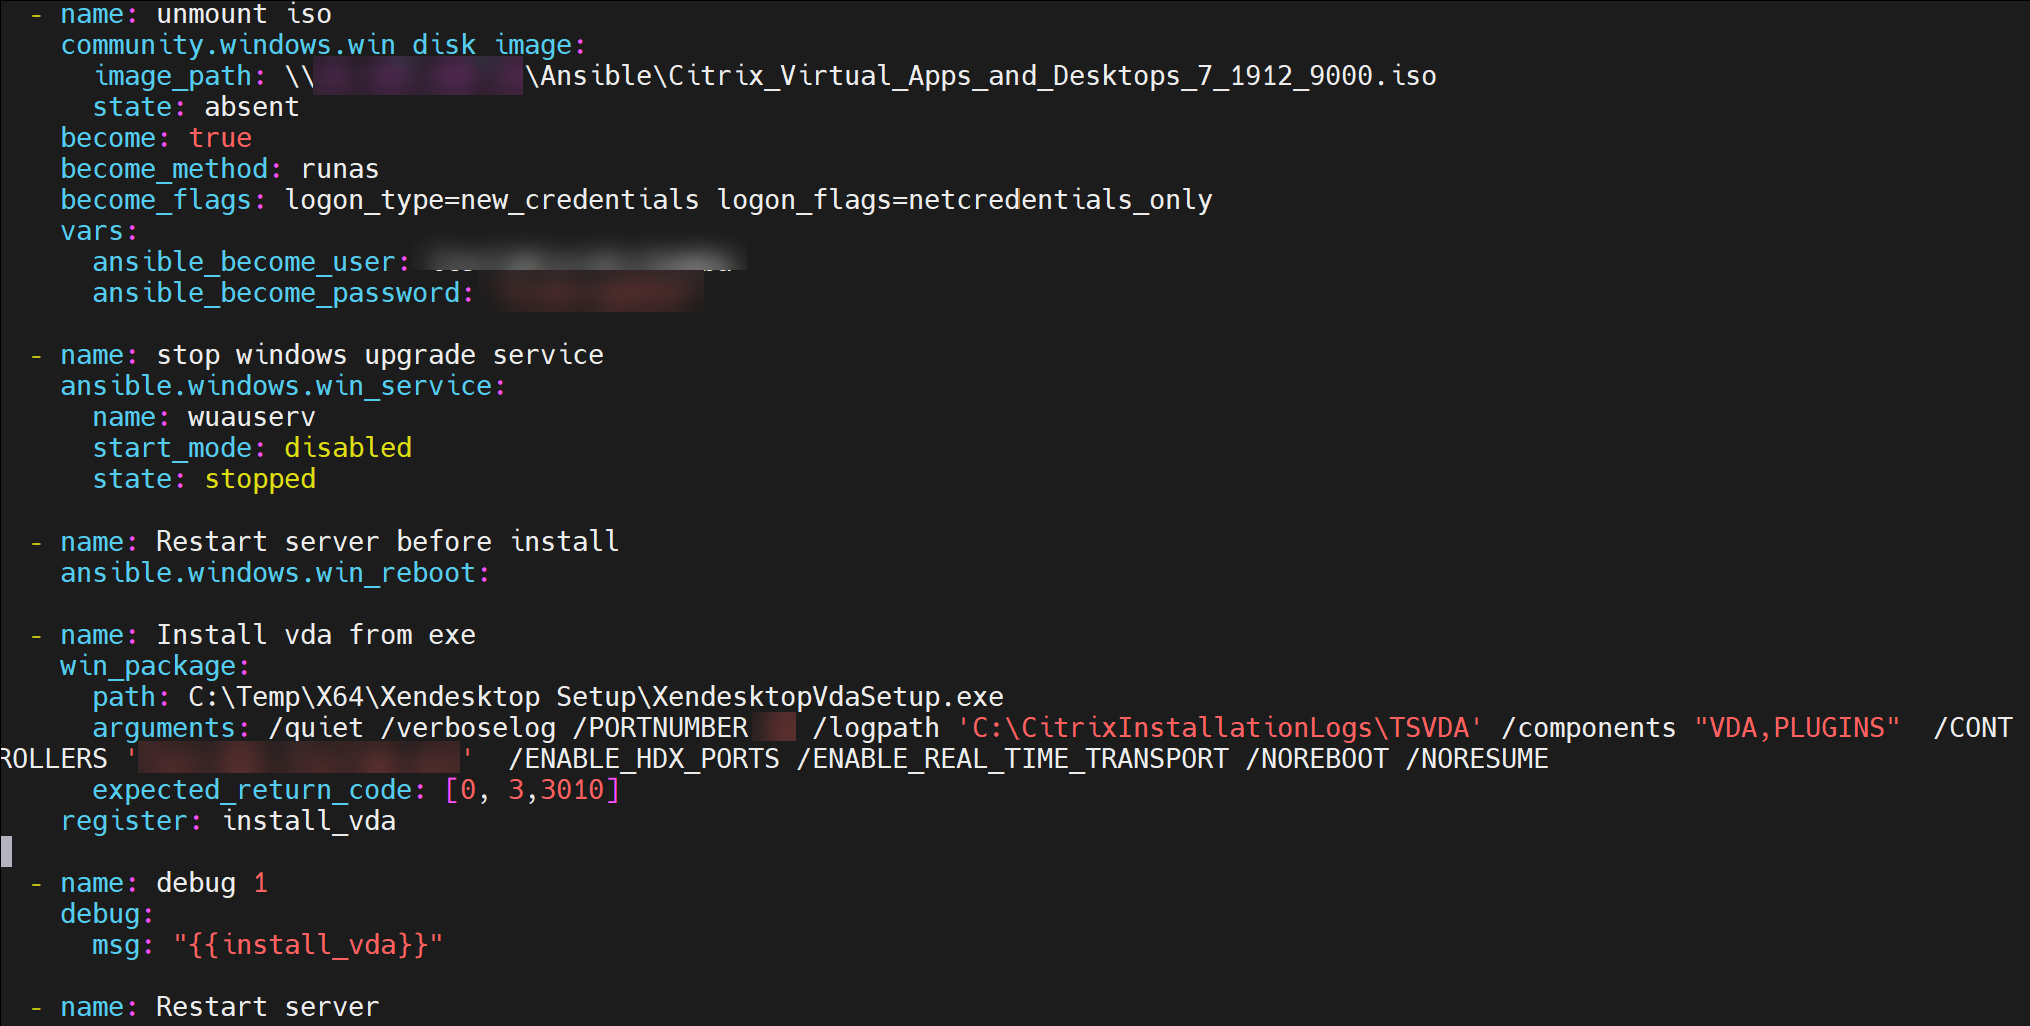
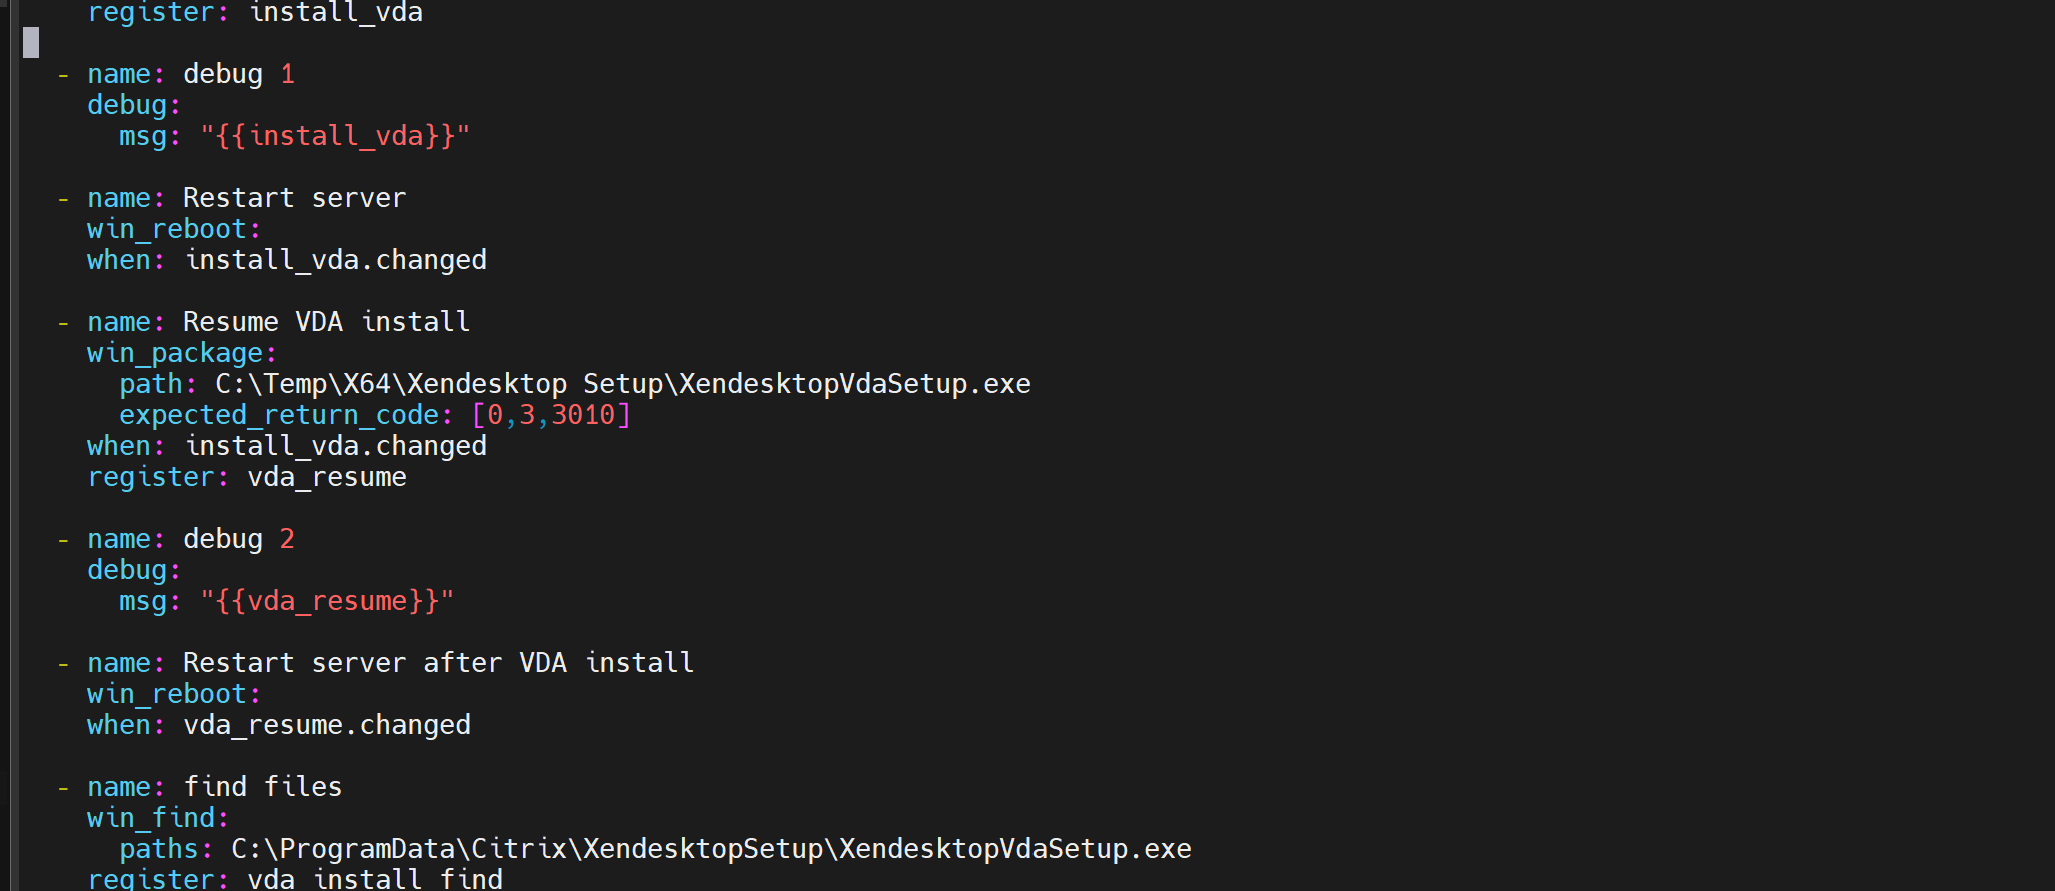
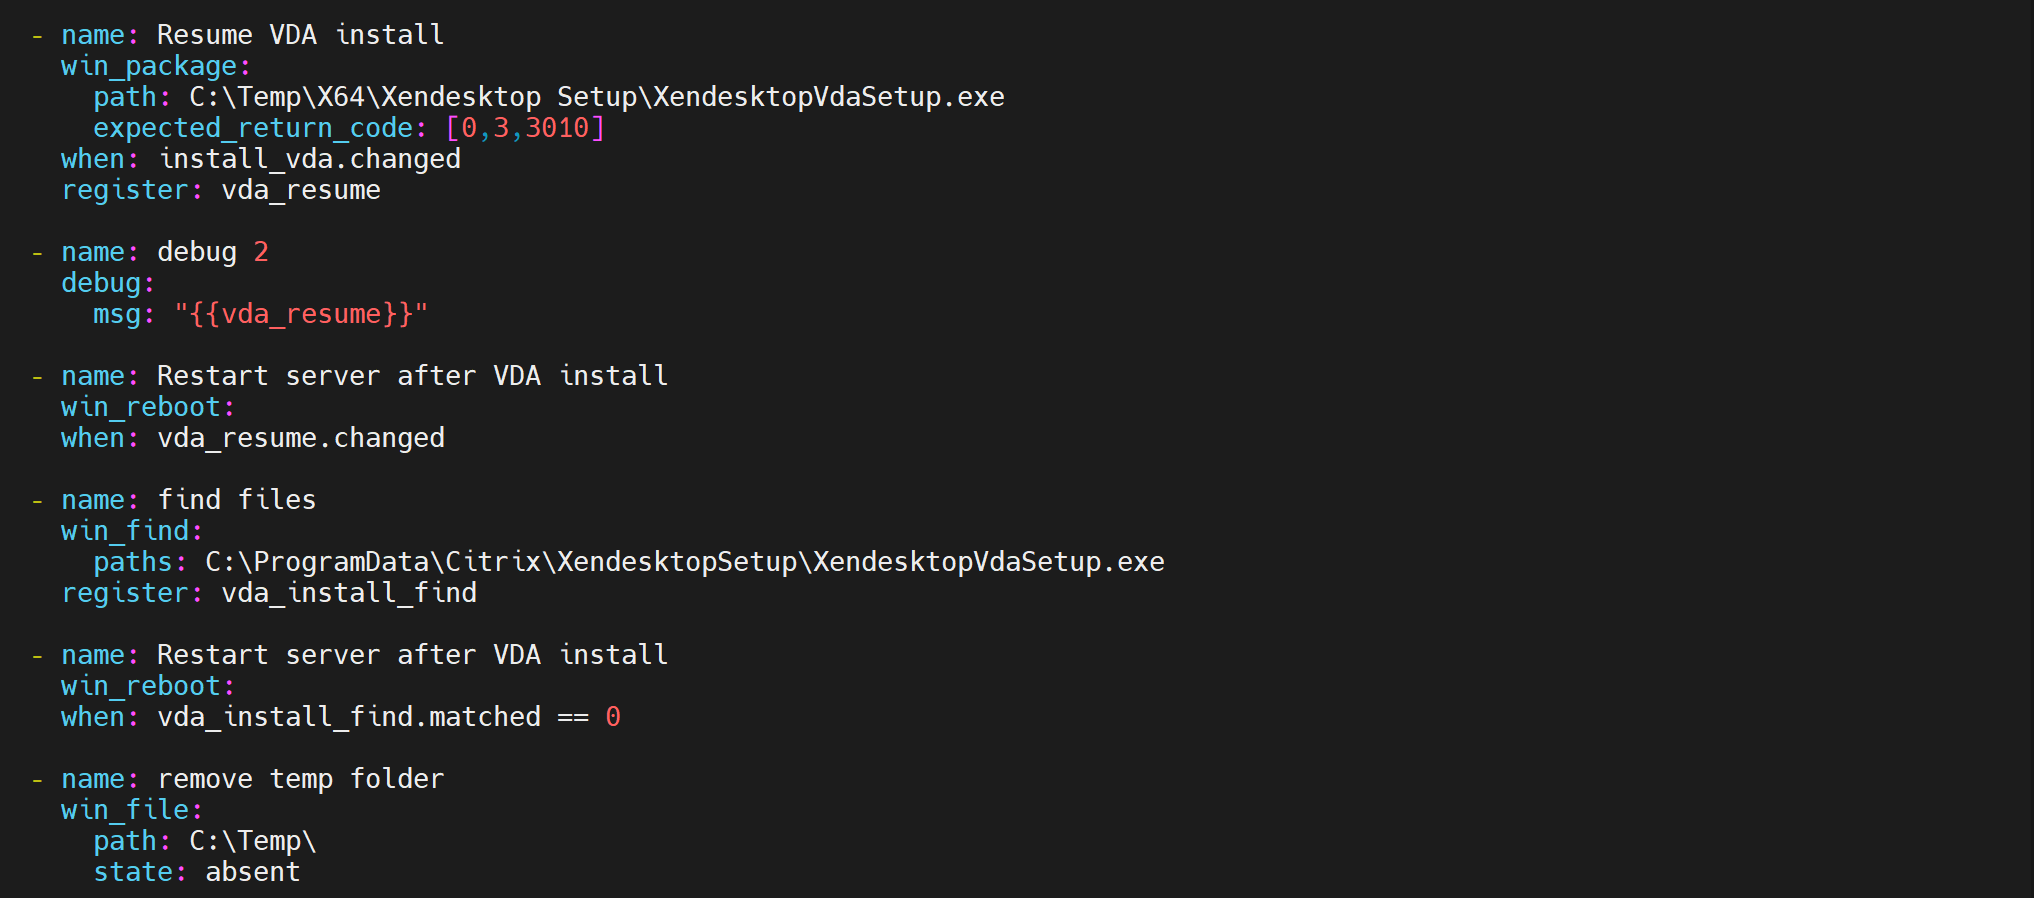
Configure un
Install.yamlarchivo de Delivery Controller/QUIET /NOREBOOT /NORESUME /OPTIMIZE /VERBOSELOG /COMPONENTS VDA /CONTROLLERS 'MyDDC.xd.local' /ENABLE_HDX_PORTS /ENABLE_REAL_TIME_TRANSPORT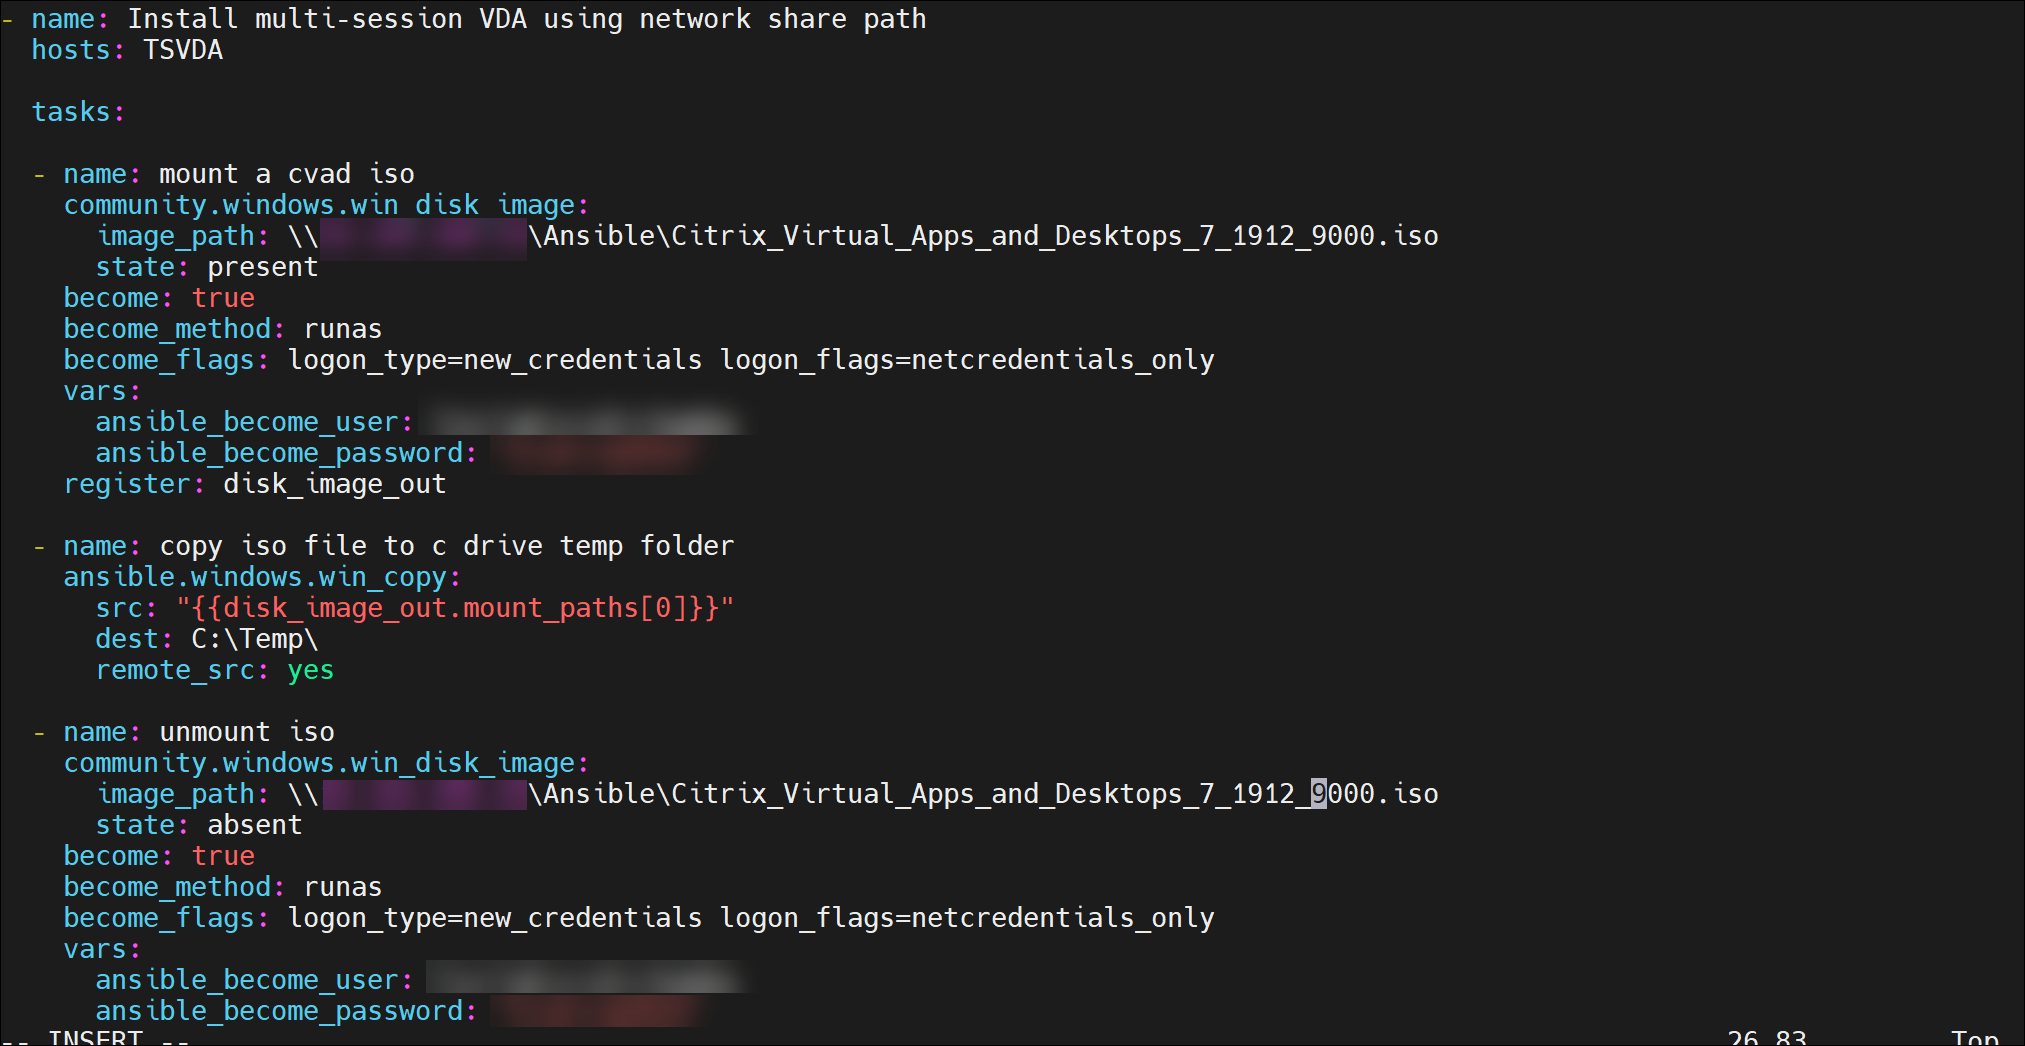
-
Ejecute el archivo YAML con el siguiente comando:
sudo ansible-playbook install.yml -vvv(Modo detallado) -
Puede configurar varios hosts en el archivo de configuración con otras configuraciones adicionales.
Edit /etc/ansible/hosts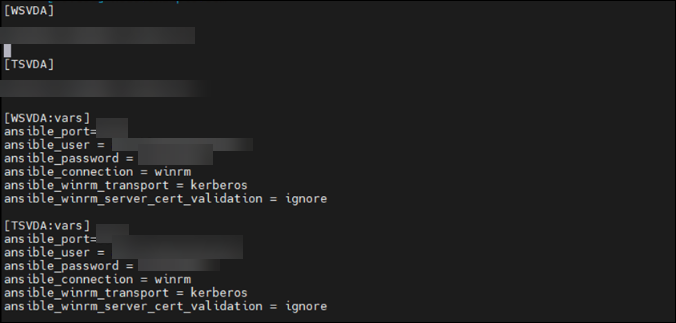
Compartir
Compartir
En este artículo
This Preview product documentation is Citrix Confidential.
You agree to hold this documentation confidential pursuant to the terms of your Citrix Beta/Tech Preview Agreement.
The development, release and timing of any features or functionality described in the Preview documentation remains at our sole discretion and are subject to change without notice or consultation.
The documentation is for informational purposes only and is not a commitment, promise or legal obligation to deliver any material, code or functionality and should not be relied upon in making Citrix product purchase decisions.
If you do not agree, select I DO NOT AGREE to exit.