-
Installing and configuring Provisioning Services
-
Upgrading a Provisioning Services target device vDisk using in-place upgrade
-
-
Deploying virtual desktops to VMs using the XenDesktop Setup Wizard
This content has been machine translated dynamically.
Dieser Inhalt ist eine maschinelle Übersetzung, die dynamisch erstellt wurde. (Haftungsausschluss)
Cet article a été traduit automatiquement de manière dynamique. (Clause de non responsabilité)
Este artículo lo ha traducido una máquina de forma dinámica. (Aviso legal)
此内容已经过机器动态翻译。 放弃
このコンテンツは動的に機械翻訳されています。免責事項
이 콘텐츠는 동적으로 기계 번역되었습니다. 책임 부인
Este texto foi traduzido automaticamente. (Aviso legal)
Questo contenuto è stato tradotto dinamicamente con traduzione automatica.(Esclusione di responsabilità))
This article has been machine translated.
Dieser Artikel wurde maschinell übersetzt. (Haftungsausschluss)
Ce article a été traduit automatiquement. (Clause de non responsabilité)
Este artículo ha sido traducido automáticamente. (Aviso legal)
この記事は機械翻訳されています.免責事項
이 기사는 기계 번역되었습니다.책임 부인
Este artigo foi traduzido automaticamente.(Aviso legal)
这篇文章已经过机器翻译.放弃
Questo articolo è stato tradotto automaticamente.(Esclusione di responsabilità))
Translation failed!
Upgrading a Provisioning Services target device vDisk using in-place upgrade
Use the information contained in this article to upgrade a PVS target device vDisk using the in-place upgrade method.
Note
This upgrade procedure can only be used for Provisioning Services target devices using version 7.6.1 and newer.
Important
For Provisioning Services 7.6.1 and newer, the target being upgraded must have been installed using the PVS target install method, and not upgraded using binary replacement.
Boot a target device into private image mode or a maintenance version
Use the information in this section to boot a target device in either private image mode, or to boot in maintenance mode.
Tip
Before booting from private image mode, Citrix recommends that you backup the vDisk before attempting an upgrade.
Boot in private image mode
1. Shutdown all other devices.
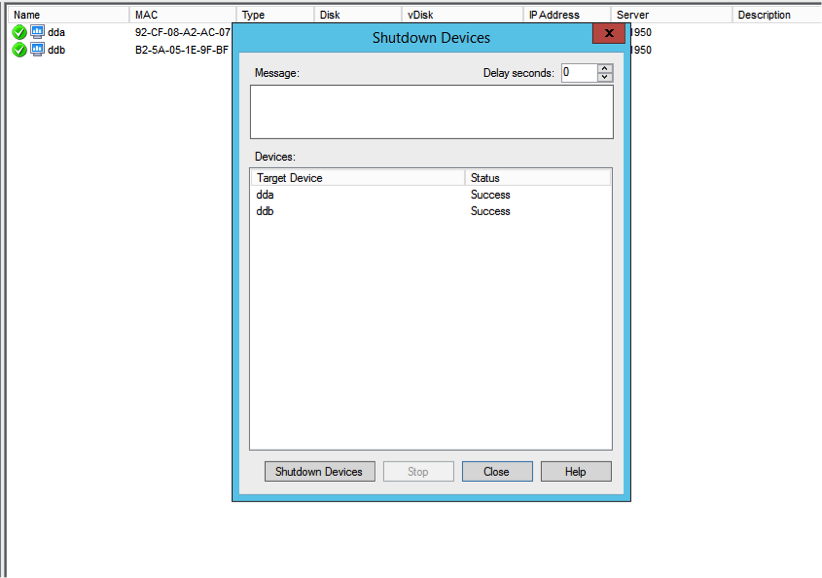
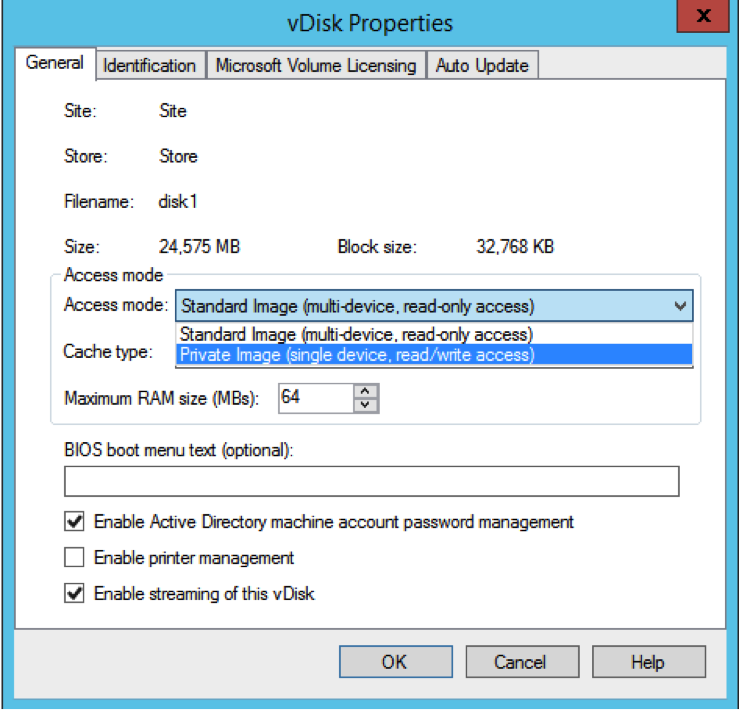
2. Set the vDisk that you want to upgrade to private image mode:
a. Open the vDisk’s properties dialog by right clicking the vDisk, and choose Properties.
b. From the Access mode group, select Private Image (single device, read/write access):
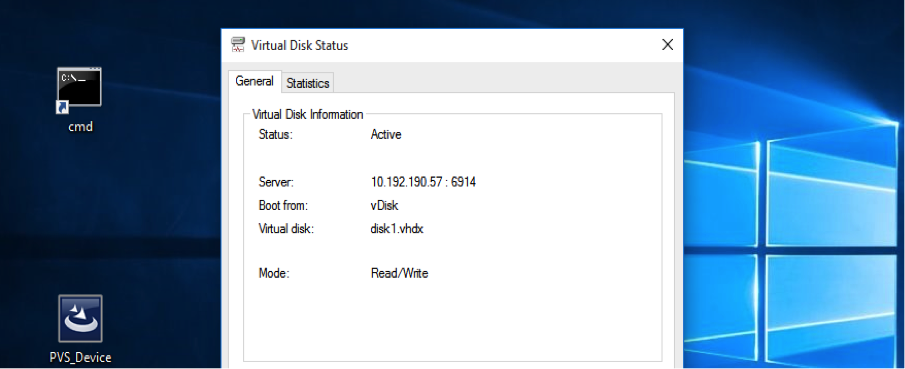
3. Boot a target device using that vDisk:
Boot in maintenance mode
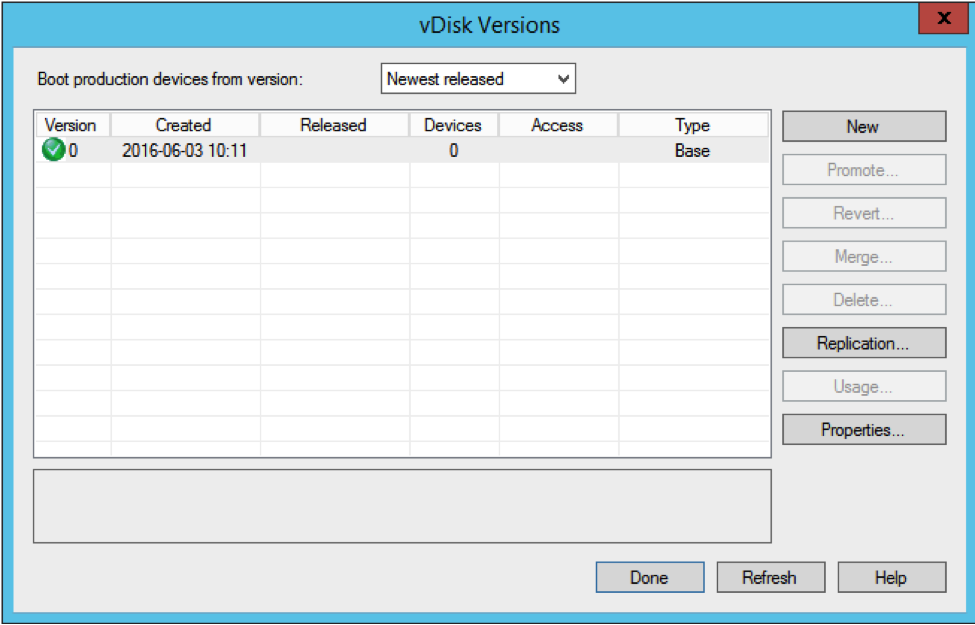
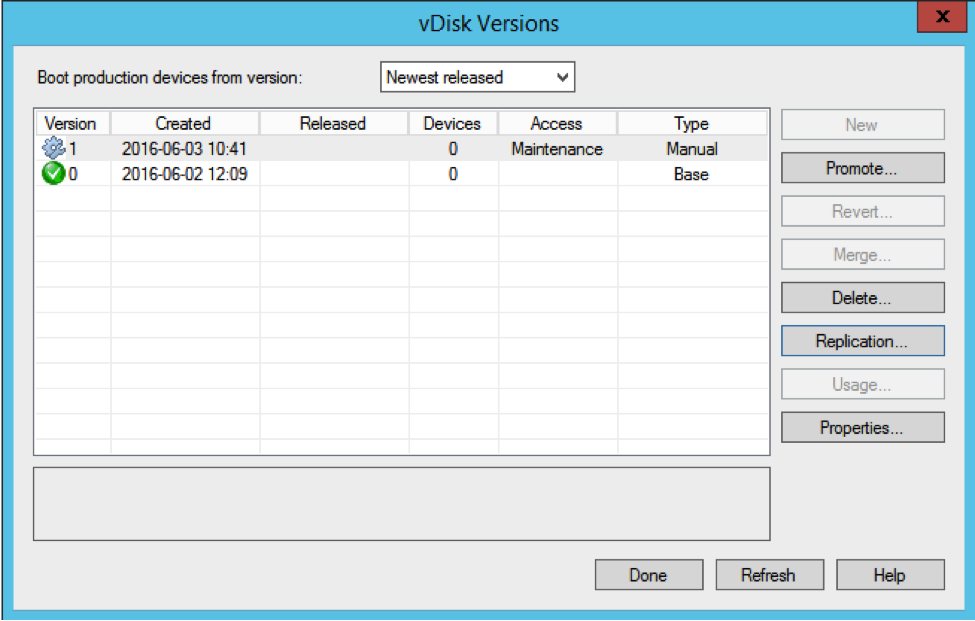
1. Right click the standard mode vDisk and choose the option Versions… to open the vDisk Versions screen.
2. Click the New button (in the upper right portion of the interface) to create a maintenance vDisk version:
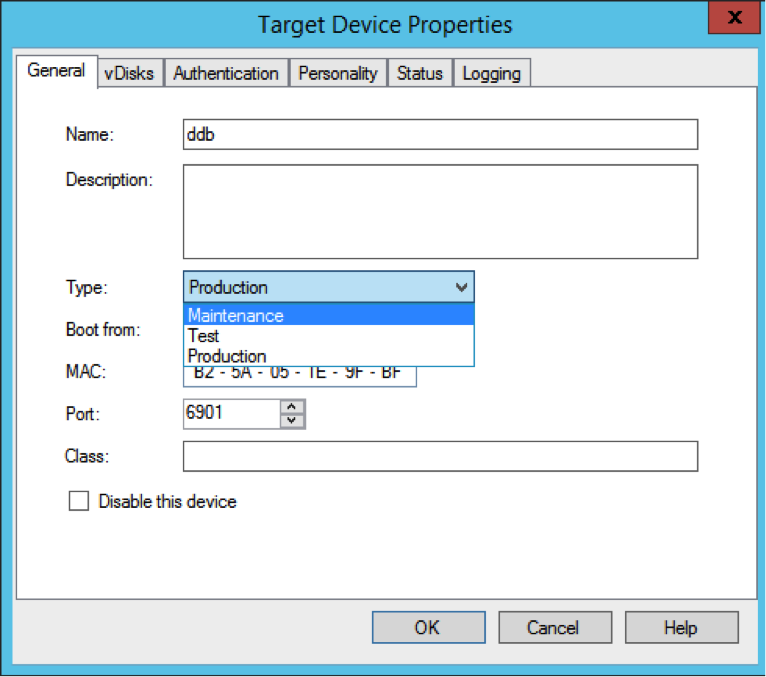
3. Set a target device that is using that vDisk to maintenance mode by right clicking on the target, then choose the Properties option.
4. Choose Maintenance from the drop-down menu for the property type:
5. Boot a target device using the specified vDisk version.
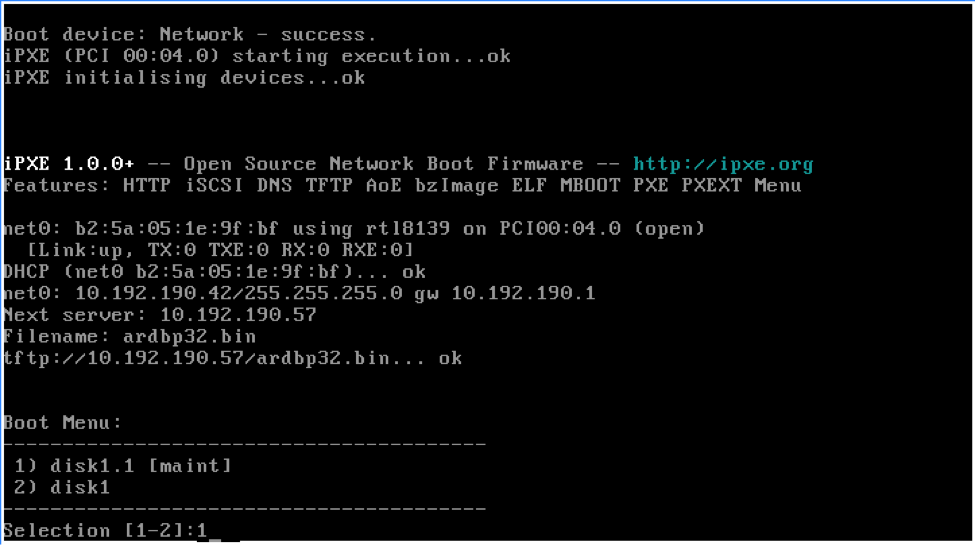
6. Choose option 1 from the boot menu that appears when booting the target device:
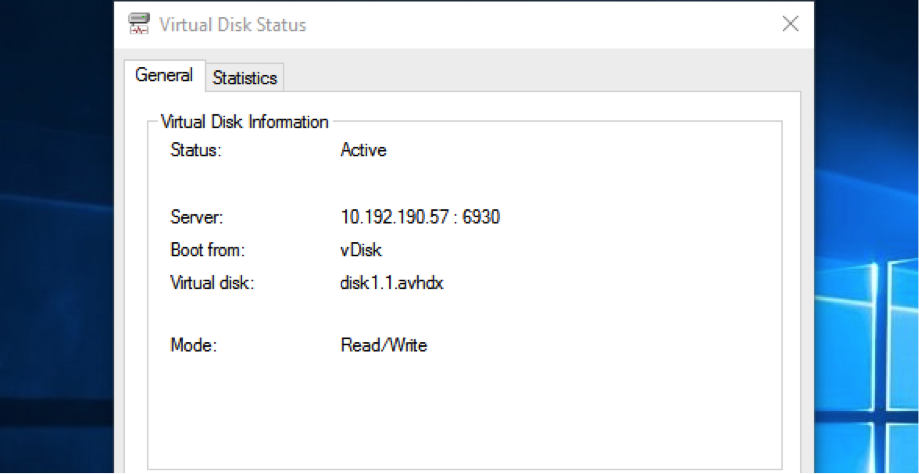
7. The PVS status tray of the device should resemble:
Tip
The virtual disk’s name should be followed by a .x where x is greater than or equal to 1 and the extension should be .avhdx or .avhd.
Upgrade PVS target device software
After booting a device into private image mode or a maintenance version, use the information in this section to upgrade the PVS target device software.
To upgrade PVS target device software:
- Log into the target device using local administrator login credentials.
- Copy the PVS_Device.exe or PVS_Device_x64.exe to the target device.
- Right click the installer and choose Run as administrator.
- Run the installer and choose all the options as you would install a fresh version.
- Click Finish to begin the upgrade.
- Shutdown the target device.
- Open the vDisk version interface (refer to step 1 above).
- Click Promote to promote the vDisk to either a test or production version:
Tip
The New button should be greyed out and inaccessible.
a. Test version - This should be used to verify the vDisk is fully operational before promoting it to the production version.
b. Production version - This represents the version used by all users in a full roll out of the vDisk to the production environment.
Share
Share
This Preview product documentation is Citrix Confidential.
You agree to hold this documentation confidential pursuant to the terms of your Citrix Beta/Tech Preview Agreement.
The development, release and timing of any features or functionality described in the Preview documentation remains at our sole discretion and are subject to change without notice or consultation.
The documentation is for informational purposes only and is not a commitment, promise or legal obligation to deliver any material, code or functionality and should not be relied upon in making Citrix product purchase decisions.
If you do not agree, select Do Not Agree to exit.