Store configuration
Support for store configuration of user devices through MDM tool
Admins can now configure the following settings while deploying Citrix Workspace app through any MDM deployment tool such as Citrix Endpoint Management:
-
StoreURLs – Configure store details so it’s automatically added when the user opens the Citrix Workspace app, simplifying the sign-on experience. To add a store, provide the details for the StoreURLs setting. For example:
<array><string>https://myorg.com/?storename</string></array>You can also add multiple stores as follows:
<array><string>https://myorg.com/?storename1</string><string>https://myorg.com/?storename2</string></array>
To add the StoreURLs to Citrix Workspace app, the user must quit and relaunch Citrix Workspace app.
-
BlockStoreAddition – Prevent the user from adding stores.
To block the user from adding a store, set the value of the BlockStoreAddition setting to True.
For more information, see Mobile Device Management.
StoreFront to Workspace migration
As your organization transitions from on-premises StoreFront to Workspace, users are required to manually add the new Workspace URL to the Citrix Workspace app. This feature enables admins to seamlessly migrate users from a StoreFront store to a Workspace store with minimal user interaction.
Consider, all your end users have a StoreFront store storefront.com added to their Workspace app. As an administrator, you can configure a StoreFront URL to Workspace URL Mapping {‘storefront.com’:’xyz.cloud.com’} in the Global App Configuration service. The Global App Configuration service pushes the setting to all Citrix Workspace app instances, on both managed and unmanaged devices that have the StoreFront URL storefront.com added.
Once the setting is detected, Citrix Workspace app adds the mapped Workspace URL xyz.cloud.com as another store. When the end user launches the Citrix Workspace app, the Citrix Workspace store opens. The previously added StoreFront store storefront.com remains added to the Citrix Workspace app. Users can always switch back to the StoreFront store storefront.com using the Switch Accounts option in the Citrix Workspace app. Admins can control the removal of the StoreFront store storefront.com from the Citrix Workspace app at the users’ end points. The removal can be done through the global app config service.
To enable the feature, do the following steps:
-
Configure StoreFront to Workspace mapping using the Global App Configuration service. For more information on the Global App config service, see Global App Configuration service.
-
Edit the payload in the app config service:
{ "serviceURL": Unknown macro: \{ "url"}
,
"settings":{
"name":"Productivity Apps", [New Store Name]
"description":"Provides access StoreFront to Workspace Migration",
"useForAppConfig":true,
"appSettings":
{ "macos":[ Unknown macro: \{ "category"}
]
}
}
}
<!--NeedCopy-->
Note:
If you’re configuring the payload for the first time, use
POST. If you’re editing the existing payload configuration, usePUTand check that you have the payload that consists of all the supported settings. -
Specify the StoreFront URL
storefront.comas the value for URL in the serviceURL section. -
Configure the Workspace URL
xyz.cloud.cominside the section migrationUrl. -
Use storeFrontValidUntil to set the timeline for the removal of the StoreFront store from the Citrix Workspace app. This field is optional. You can set the following value based on your requirement:
- Valid date in the format (YYYY-MM-DD)
Note:
If you’ve provided a past date, then the StoreFront store is removed immediately upon URL migration. If you’ve provided a future date, then the StoreFront store is removed on the set date.
- Valid date in the format (YYYY-MM-DD)
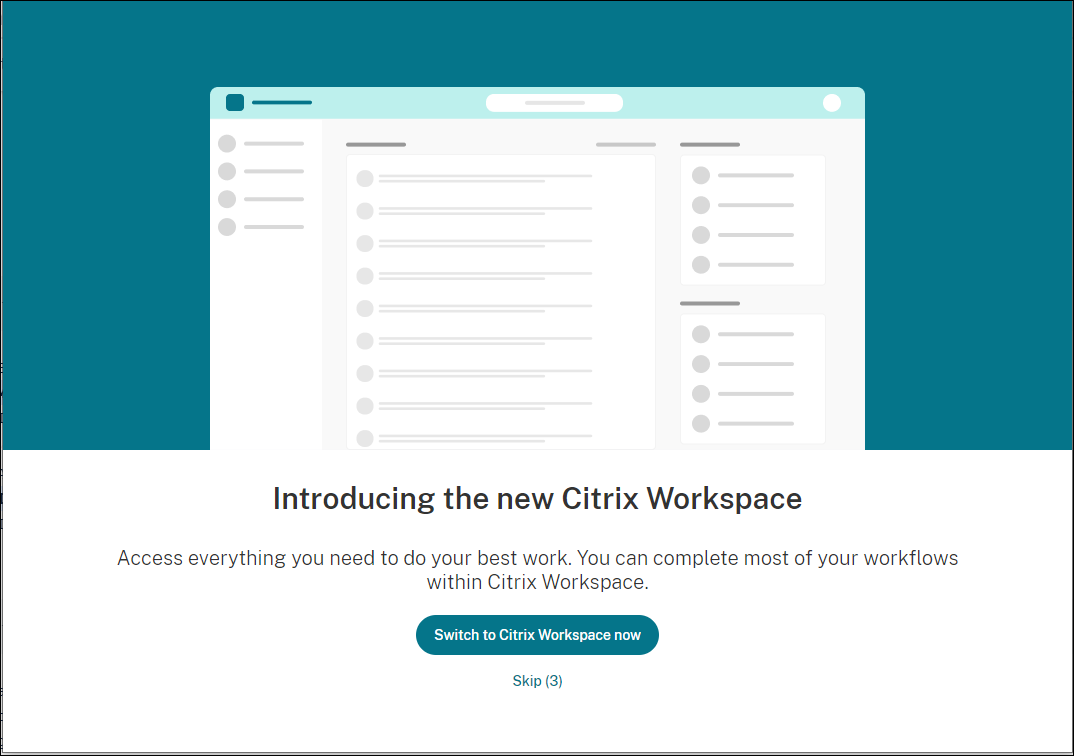
Once the app config service settings are pushed, the following screen appears:

When the user clicks Switch to Citrix Workspace now, the Workspace URL is added to Citrix Workspace app and the authentication prompt appears. Users have a limited option to delay the transition up to three times.
Custom web store
Support for custom web stores
Starting with the 2112 version, you can access your organization’s custom web store from the Citrix Workspace app for Mac. Previously, you accessed all customized stores through the browser only. To use this feature, the admin must add the custom web store to the list of allowed URLs in the allowedWebStoreURLs property in the Global App Configuration service.
Citrix Workspace app for Mac loads the custom web stores with a browser-like experience and extends App Protection capabilities to custom web stores. Making the custom portal accessible from the native Citrix Workspace App provides comprehensive capabilities and user experience for this feature. For more information about Global App Configuration service, see Getting Started.
To add a custom web store URL, perform the following steps:
-
Open the Citrix Workspace app and navigate to Accounts.
-
In the Accounts window, click the + icon and type the URL.
To delete a custom web store URL, perform the following steps:
-
Open the Citrix Workspace app and navigate to Accounts.
-
In the Accounts window, select the account you want to delete and click the - icon.
Support for customized URLs through 301 redirects
Starting with the 2106 version, you can add URLs that redirect to Citrix Workspace from StoreFront or Citrix Gateway through HTTP 301 redirects.
If you’re migrating from StoreFront to Citrix Workspace, you can redirect the StoreFront URL to a Citrix Workspace URL through an HTTP 301 redirect. As a result, when adding an old StoreFront URL, you’re automatically redirected to Citrix Workspace.
Example of a redirect:
The StoreFront URL https://< Citrix Storefront url>/Citrix/Roaming/Accounts can be redirected to a Citrix Workspace URL: https://<Citrix Workspace url>/Citrix/Roaming/Accounts.
Note:
- Citrix Workspace app for Mac does not support Dual Tone Multi Frequency (DTMF) with Microsoft Teams due to pending changes from Microsoft.
- From the 2106 release onward, the Citrix Viewer’s version number and the Citrix Workspace app’s version number might not match. This change does not affect your experience.
Email-based auto-discovery of store
Starting with the 2109 version, You can provide your email address in Citrix Workspace app for Mac to automatically discover the store associated with the email address. If there are multiple stores associated with a domain, by default the first store returned by the Global App Configuration service is added as the store of choice. Users can always switch to another store if necessary.
Sign out of the custom web store when you close Citrix Workspace app
When the signoutCustomWebstoreOnExit setting is set to True, closing the Citrix Workspace app window signs you out of the custom web store. When you reopen the Citrix Workspace app, the web store URL is loaded again. You can configure the signoutCustomWebstoreOnExit setting in the Global App Configuration service.
Support for administrator to restrict the user from changing the store name
Previously, users were able to change the store name by using the Edit Account option.
Starting with the 2402 version, Citrix Workspace app for Mac provides administrators an option to restrict the user from changing the store name. With this feature, administrators can easily identify and maintain consistency in the store names.
To allow the end-users to change the store name, do the following steps:
- Sign in to Citrix Cloud with your credentials.
-
Navigate to Workspace Configuration >Access. Under Workspace URL, you can find a list of existing store URLs.

- Click the ellipsis menu for the store that you want to allow end-users to change the store name.
-
Select Edit.

-
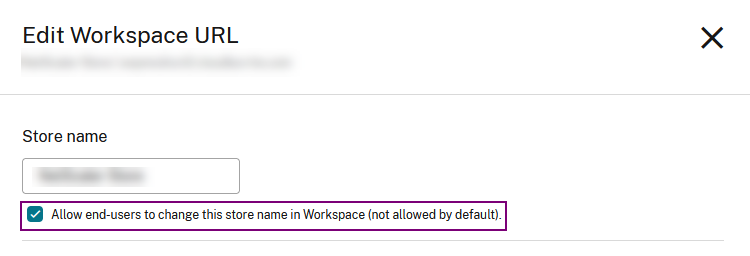
On the Edit Workspace URL dialog box, select Allow end-users to change this store name in Workspace (not allowed by default).

- Click Save.
For more information, see Restrict end users to change the store name in the Citrix Workspace documentation.
In this article
- Support for store configuration of user devices through MDM tool
- StoreFront to Workspace migration
- Custom web store
- Support for custom web stores
- Support for customized URLs through 301 redirects
- Email-based auto-discovery of store
- Sign out of the custom web store when you close Citrix Workspace app
- Support for administrator to restrict the user from changing the store name