Third-party integration with Device Posture service
In addition to the native scans offered by the Device Posture service, the Device Posture service can also be integrated with the following third-party solutions on Windows and macOS.
Microsoft Entra ID integration with Device Posture service
With the Microsoft Entra ID integration, Citrix® supports a unified compliance workflow that works consistently across all Microsoft Entra ID-registered devices, regardless of which Mobile Device Management (MDM) solution is integrated with Microsoft Entra ID.
System requirements
-
Supported platforms: Windows
-
Supported EPA client version for Windows: 26.3.1.10 or later
Microsoft Entra ID API permissions
The following table lists the Microsoft Entra ID API permissions for integration with the Device Posture service.
| API name | Claim value | Permission name | Type |
|---|---|---|---|
| Microsoft Graph | Devices.Read.All | Read all devices | Application |
| Microsoft Graph | User.Read | Sign in and read the user profile | Delegated |
Note:
- Only Privileged Role Administrator and Global Administrator can grant application permissions.
- While the Device Posture service only requires Application Permissions to fetch Entra ID device details, the initial admin grant flow is an interactive process performed by an individual.
- The
User.Read (Delegated)permission included by default in Microsoft Entra ID verifies the administrator’s identity during the grant flow. This ensures only authorized roles (Global Administrator or Privileged Role Administrator) grant the application-level access needed for the Device Posture service.
Configure Entra ID integration
The Entra ID integration configuration is a two-step process.
- Establish trust between Citrix Device Posture service and Microsoft Entra ID. This is a one-time activity that you do to establish trust between Device Posture and Microsoft Entra ID.
- Configure policies to use Microsoft Entra ID compliance information.
Establish trust between Citrix Device Posture service and Microsoft Entra ID
Perform the following steps to establish trust between the Citrix Device Posture service and Microsoft Entra ID.
- Sign into Citrix Cloud™, and then select Identity and Access Management from the menu.
- Click the Device Posture tab, and then click Manage.
-
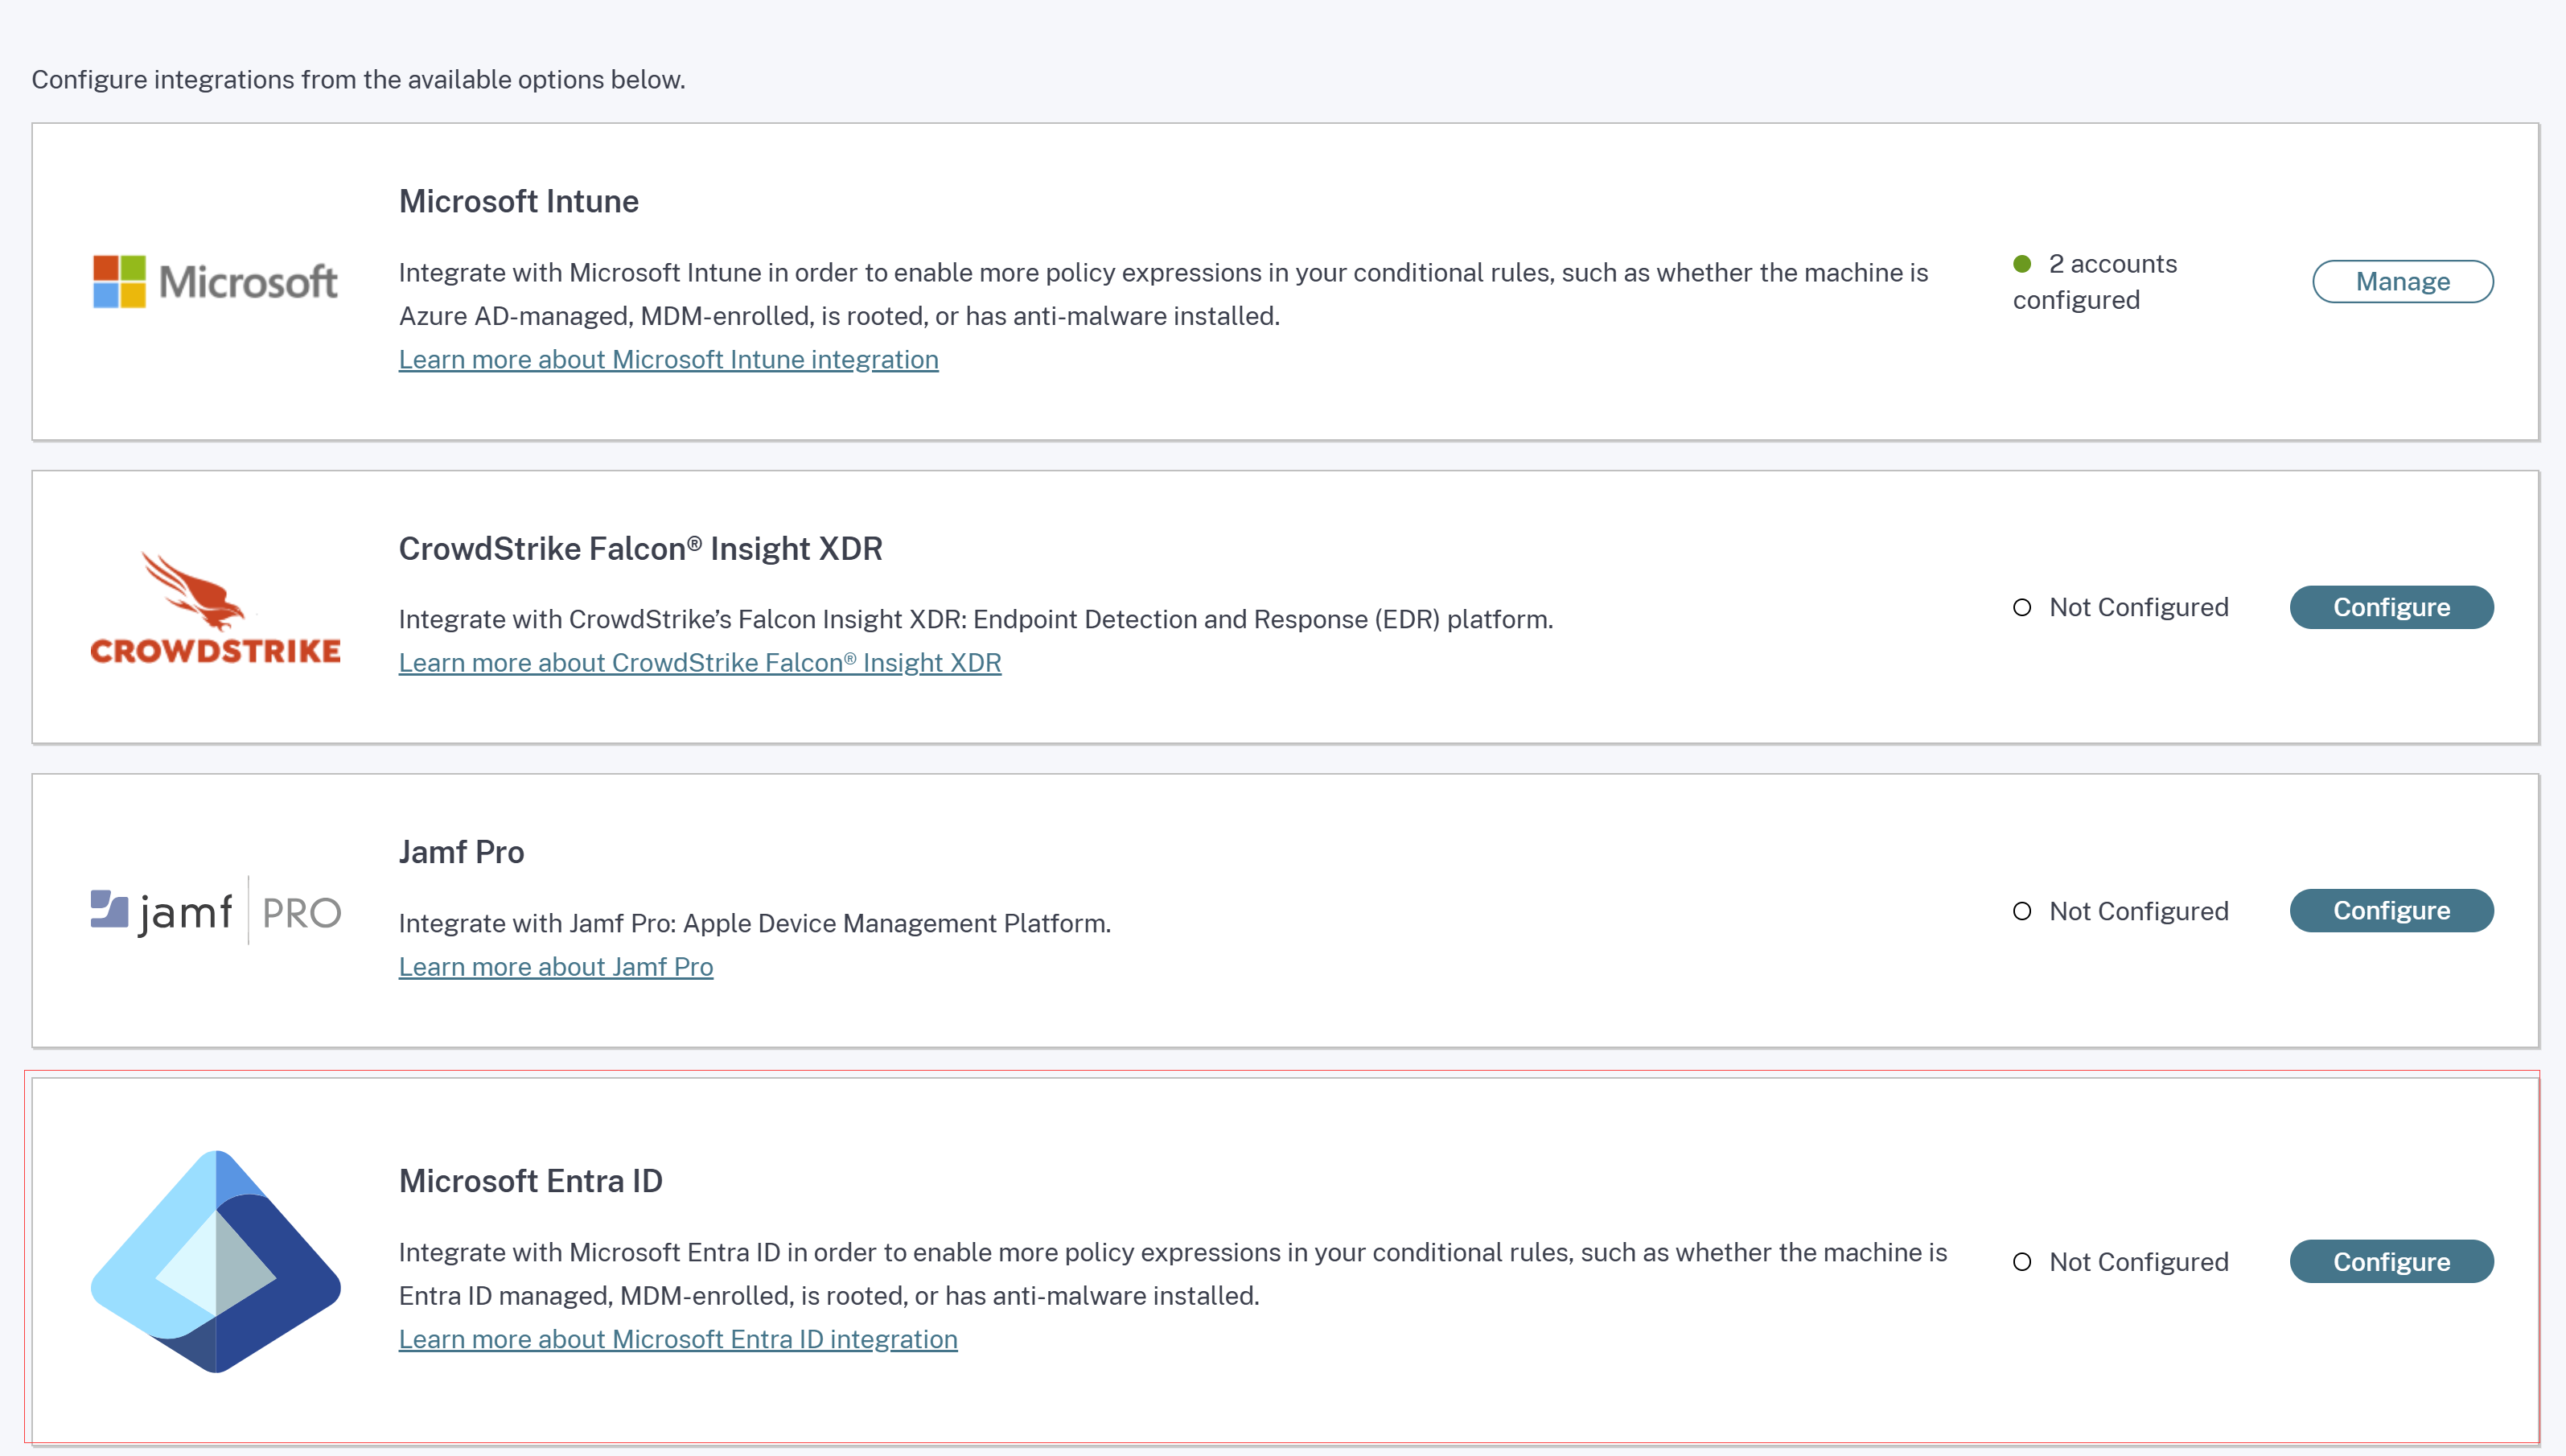
Click the Integrations tab.
Note:
Alternatively, customers can navigate to the Device Posture option on the left navigation pane of the Secure Private Access service GUI, and then click the Integrations tab.
- Click the ellipsis button in the Microsoft Entra ID box, and then click Configure. The Microsoft Entra ID pane appears.
- Enter the name for the profile and then click Connect account.
- Click Done.
The Microsoft Entra ID section displays the number of successfully configured accounts and the number of accounts with issues. To resolve an issue, select the affected profile from the Profile name drop-down list and reconnect the account.
Configure device posture policies for Microsoft Entra ID integration
- Configure a device posture policy. For details, see Configure Device Posture policies.
- In Policy rules, select Microsoft Entra ID.
- Select a condition, and then select the values to be matched.
- Compliant - To check if the device meets the compliance policies configured in Microsoft Entra ID.
- Managed - To check if the device is registered with Microsoft Entra ID.
Note:
You can use this rule with other rules that you configure for device posture.
- Complete the policy configuration and then click Create.
Jamf Pro integration with Device Posture service
Jamf Pro, an Apple mobile device management (MDM) software and security provider, helps organizations configure and secure their Apple devices.
Important:
- The Citrix Secure Access client for macOS version 24.9.6 supports the Jamf Pro integration.
- For the Jamf Pro integration with Device Posture to work on iOS devices, administrators must push the Citrix Workspace™ app from the Jamf Pro portal. For details, see Push the Citrix Workspace app from the Jamf Pro portal.
Configure Jamf Pro integration
Jamf Pro integration configuration is a two-step process.
Establish trust between Citrix Device Posture service and Jamf Pro service
Perform the following steps to establish trust between Citrix Device Posture service and Jamf Pro service.
- Sign into Citrix Cloud, and then select Identity and Access Management from the menu.
- Click the Device Posture tab, and then click Manage.
-
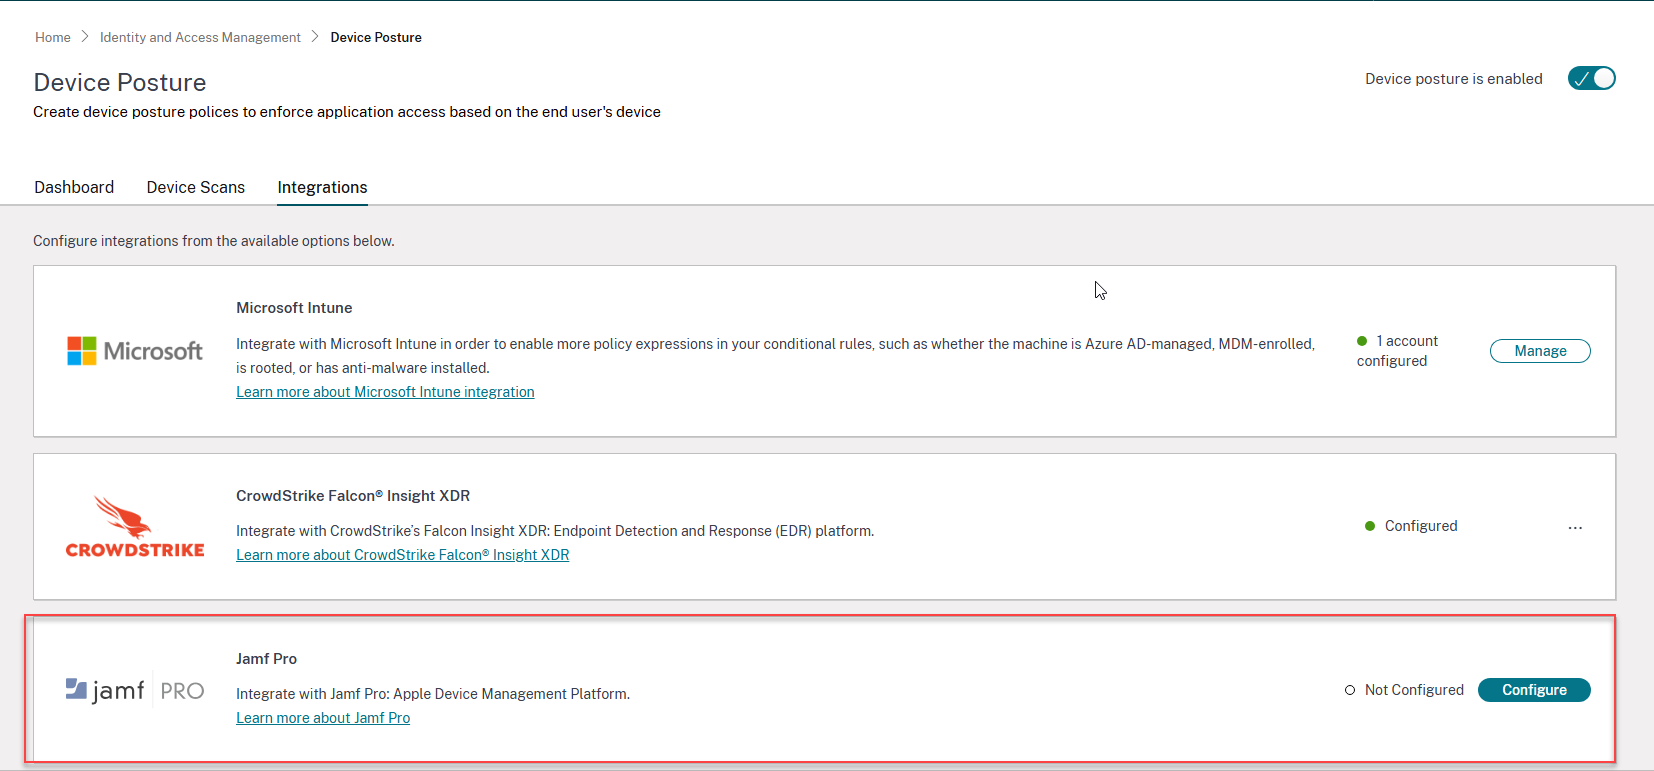
Click the Integrations tab.
Note:
Alternatively, customers can navigate to the Device Posture option on the left navigation pane of the Secure Private Access service GUI, and then click the Integrations tab.
- Click the ellipsis button in the Jamf Pro box, and then click Connect. The Configure Jamf Pro Integration pane appears.
-
Enter the client ID, client secret, and Jamf Pro URL and then click Save.
Note:
- You can obtain the API client ID from the Jamf Pro portal.
- Ensure that you select the Read Computers and Read Mobile Devices scopes with read permissions for establishing the trust.
- The Jamf Pro URL is provided by Jamf for each customer account. The Jamf Pro URL is in the format
https://<organization name>.jamfcloud.com.
The integration is considered successful after the status changes from Not Configured to Configured.
If the integration is not successful, the status appears as Pending. You must click the ellipsis button, and then click Reconnect.
Configure device posture policies for Jamf Pro integration
- Configure a device posture policy. For details, see Configure Device Posture policies.
- In Policy rules, select Jamf Pro.
-
Select a condition, and then select the values to be matched.
- Auto Enrolled - To check if the Apple device is automatically enrolled into the Jamf system during the initial setup.
- Managed - To check if the device is managed by Jamf Pro.
- Time Since Last Contacted - Applicable for macOS only. To check the time (in minutes) since the device last communicated with the Jamf Pro server.
- Time Since Last Inventory Updated - Applicable for iOS only. To check the time (in minutes) since the device last communicated with Jamf Pro to update its inventory data.
-
Click + to add additional qualifiers.
Note:
You can use this rule with other rules that you configure for device posture.
- Complete the policy configuration and then click Create.
Push Citrix Workspace app from Jamf Pro portal to iOS devices
To support Jamf Pro integration with Device Posture on iOS devices, admins must push the Citrix Workspace app from the Jamf Pro portal to the iOS devices. Perform the following steps:
- Sign in to your Jamf Pro MDM.
- Add the Citrix Workspace app that you want to manage.
- Link the app in the App store.
- Create an app configuration policy for the app.
-
Add the following XML to the app configuration.
<dict>

<key>UDID</key>

<string>$UDID</string>

</dict>

<!--NeedCopy-->
Microsoft Intune integration with Device Posture service
Microsoft Intune classifies a user’s device as compliant or registered based on its policy configuration. During user login into Citrix Workspace, device posture can check with Microsoft Intune about the user’s device status and use this information to classify the devices within Citrix Cloud as compliant, non-compliant (partial access), or even deny access to the user login page. Services like Citrix DaaS™ and Citrix Secure Private Access™ in turn use device posture’s classification of devices to provide contextual access (Smart Access) to virtual apps and desktops, and SaaS and Web apps respectively.
Integration of multiple Microsoft Intune accounts with Device Posture
The Device Posture service supports integration of up to five Microsoft Intune accounts. This allows organizations with multiple Intune tenants (often a result of mergers, acquisitions, or departmental segmentation) to seamlessly manage device posture across all their environments.
Some of the key benefits of integrating multiple Intune accounts with the Device Posture service are:
- Centralized device posture management: Manage the posture of devices across multiple Intune tenants from a single Device Posture console.
- Streamlined administration: Eliminates the need to switch between different Device Posture instances or manage separate configurations for each Intune account.
- Improved visibility: Gain a consolidated view of the security posture of all devices, regardless of which Intune tenant they are managed by.
- Enhanced flexibility: Supports organizations with complex IT environments and multiple Intune deployments.
Configure Microsoft Intune integration
Intune integration configuration is a two-step process.
-
Integrate device posture with Microsoft Intune service. This is a one-time activity that you do to establish trust between Device Posture and Microsoft Intune.
Integrate device posture with Microsoft Intune
- To access the Integrations tab, use one of the following methods:
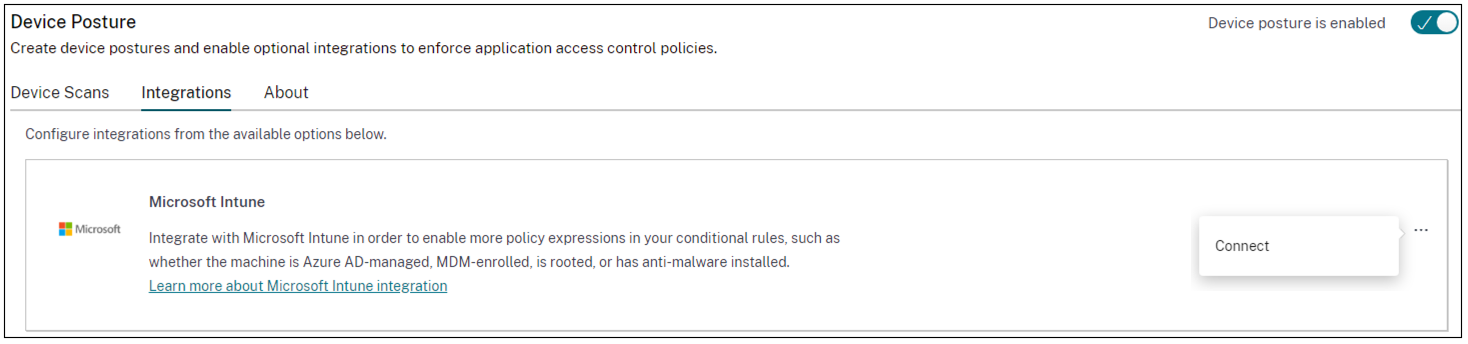
- Access the URL https://device-posture-config.cloud.com on your browser, and then click the Integrations tab.
- Secure Private Access customers - On the Secure Private Access GUI, on the left side navigation pane, click Device Posture, and then click the Integrations tab.
-
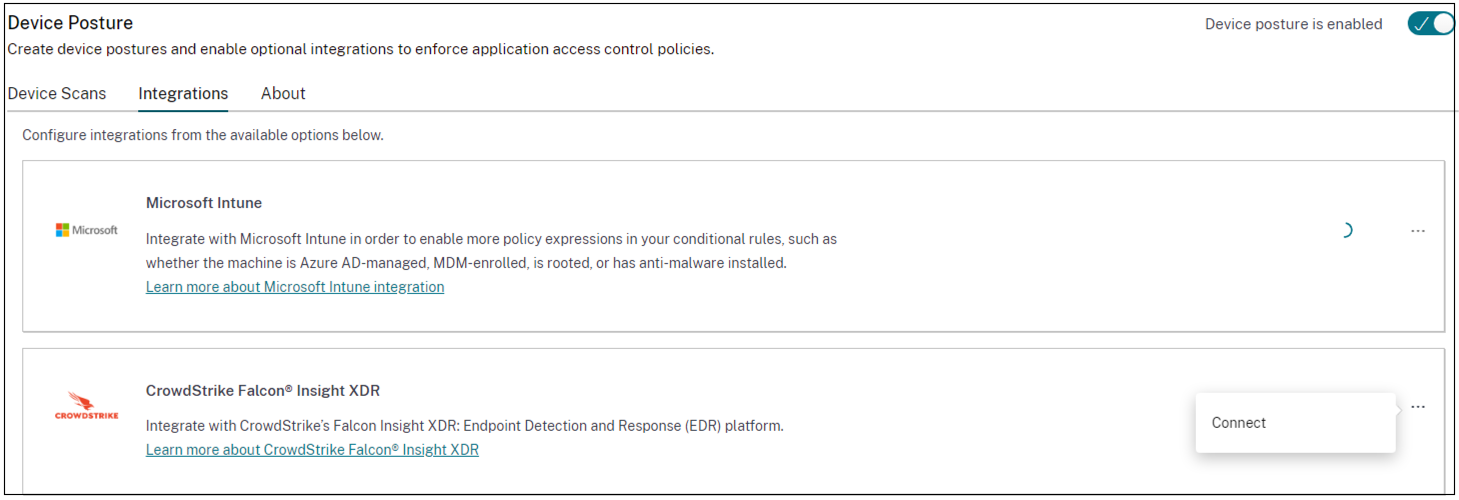
Click the ellipsis button, and then click Connect. The admin is redirected to Azure AD to authenticate.

Integrate multiple Microsoft Intune accounts with Device Posture
- In the Integrations page, click Manage in the Microsoft Intune section.
- In Profile name, enter a profile name to connect to your Microsoft Intune account.
-
Click Connect account.

Once the connection is established, the status appears as Configured and the tenant ID associated with the account is displayed.
- Click Done.
The Microsoft Intune section displays the number of successfully configured accounts and the number of accounts with issues. To resolve an issue, select the affected profile from the Profile name drop-down list and reconnect the account.

After the integration status changes from Not Configured to Configured, admins can create a device posture policy.
If the integration is not successful, the status appears as Pending. You must click the ellipsis button, and then click Reconnect.
Microsoft Intune API permissions
The following table lists the Microsoft Intune API permissions for integration with the Device Posture service.
| API name | Claim value | Permission name | Type |
|---|---|---|---|
| Microsoft Graph | DeviceManagementManagedDevices.Read.All | Read Microsoft Intune devices | Application |
| Microsoft Graph | DeviceManagementServiceConfig.Read.All | Read Microsoft Intune devices | Application |
| Microsoft Graph | User.Read | Sign in and read user profile | Delegated |
Note:
- Only Privileged Role Administrator and Global Administrator can grant application permissions.
- While the Device Posture service only requires Application Permissions to fetch Entra ID device details, the initial admin grant flow is an interactive process performed by an individual.
- The
User.Read (Delegated)permission included by default in Microsoft Entra ID verifies the administrator’s identity during the grant flow. This ensures only authorized roles (Global Administrator or Privileged Role Administrator) grant the application-level access needed for the Device Posture service.
Configure device posture policies for Intune integration
- Configure a device posture policy. For details, see Configure Device Posture policies.
- In Policy rules, select Microsoft Intune.
-
Select a condition, and then select the values to be matched.
- Managed - Indicates that the device is enrolled in Intune.
- Compliant - Indicates that the device meets the compliance policies set by the Intune administrator in the Intune admin center.
Note:
You can use this rule with other rules that you configure for device posture.
- Complete the policy configuration and then click Create.
CrowdStrike integration with Device Posture service
CrowdStrike Zero Trust Assessment (ZTA) delivers security posture assessments by calculating a ZTA security score from 1 to 100 for each end device. A higher ZTA score means that the posture of the end device is better.
Citrix Device Posture Service can enable contextual access (Smart Access) to Citrix Desktop as a Service (DaaS) and Citrix Secure Private Access (SPA) resources by using the ZTA score of an end device.
Device Posture administrators can use ZTA score as part of policies and classify the end devices as compliant, non-compliant (partial access), or even deny access. This classification can in turn be used by organizations to provide contextual access (Smart Access) to virtual apps and desktops, and SaaS and Web Apps. ZTA score policies are supported for Windows and macOS platforms.
Configure CrowdStrike integration
CrowdStrike integration configuration is a two-step process.
-
Establish trust between Citrix Device Posture service and CrowdStrike ZTA service. This is a one-time activity.
-
Configure access policies. The access policies use the CrowdStrike ZTA score as a rule to provide smart access to Citrix DaaS and Citrix Secure Private Access resources.
Establish trust between Citrix Device Posture service and CrowdStrike ZTA service
Perform the following steps to establish trust between Citrix Device Posture service and CrowdStrike ZTA service.
- Sign into Citrix Cloud, and then select Identity and Access Management from the hamburger menu.
- Click the Device Posture tab, and then click Manage.
-
Click the Integrations tab.
Note:
Alternatively, customers can navigate to the Device Posture option on the left navigation pane of the Secure Private Access service GUI, and then click the Integrations tab.
- Click the ellipsis button in the CrowdStrike box, and then click Connect. The CrowdStrike Falcon Insight XDR integration pane appears.
-
Enter the client ID and client secret and then click Save.
Note:
- You can obtain the ZTA API client ID and client secret from the CrowdStrike portal (Support and resources > API clients and keys).
- Ensure that you select the Zero Trust Assessment and Host scopes with read permissions for establishing the trust.
The integration is considered successful after the status changes from Not Configured to Configured.
If the integration is not successful, the status appears as Pending. You must click the ellipsis button, and then click Reconnect.
Configure device posture policies for CrowdStrike integration
Perform the following steps to configure policies to use the CrowdStrike ZTA score as a rule to provide smart access to Citrix DaaS and Citrix Secure Private Access resources.
- Configure a device posture policy. For details, see Configure Device Posture policies.
- In Policy rules, select CrowdStrike.
- For the Risk Score qualifier, select the condition, and then enter the risk score.
-
Click + to add a qualifier that checks if the CrowdStrike Falcon sensor is running.
Note:
You can use this rule with other rules that you configure for device posture.
- Complete the policy configuration and then click Create.