Manage catalogs
Note:
This article describes the tasks you can use to manage catalogs that were created in the Citrix DaaS Flex interface. For information about catalog management using the Web Studio management interface, see Manage machine catalogs.
Add machines to a catalog
While machines are being added to a catalog, you cannot make any other changes to that catalog.
- From the Quick Deploy > Microsoft Azure dashboard, click a catalog.
-
On the Machines tab, click Add Machines.
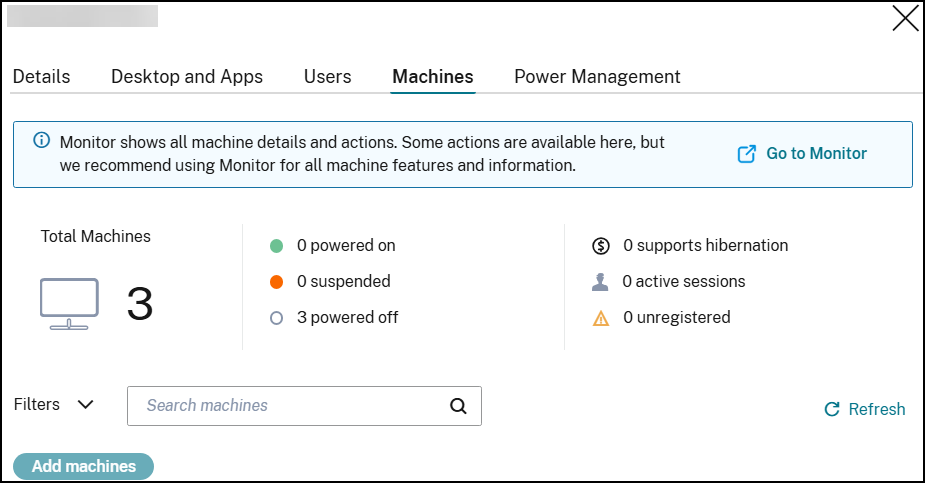
- Enter the number of users you want to add to the catalog.
- If the VDAs in the catalog are Active Directory domain-joined, input a service account and password for adding the newly created VDAs to the domain.
- Click Add Machines.
Update a catalog with a new image
The behavior of updating the image of a catalog is determined by the catalog delivery model:
-
For a random catalog, all the machines currently in the catalog are updated with the latest image. If you add more desktops to that catalog, they are based on the latest image.
-
For a static catalog, the machines currently in the catalog are not updated with the latest image. Machines currently in the catalog continue to use the image they were created from. However, if you add more machines to that catalog, they are based on the latest image.
You can update a catalog containing machines with gen1 images with a gen2 image, if the catalog’s machines support gen2. Similarly, you can update a catalog containing gen2 machines with a gen1 image, if the catalog’s machines support gen1.
To update a catalog with a new image:
- From the Citrix DaaS Flex dashboard, select a catalog.
-
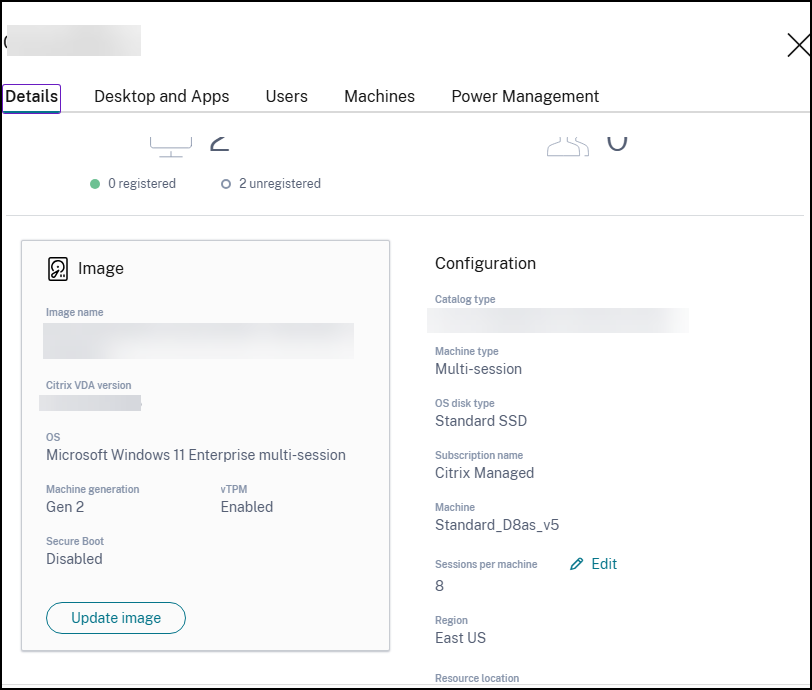
On the Details tab, click Update Image.
-
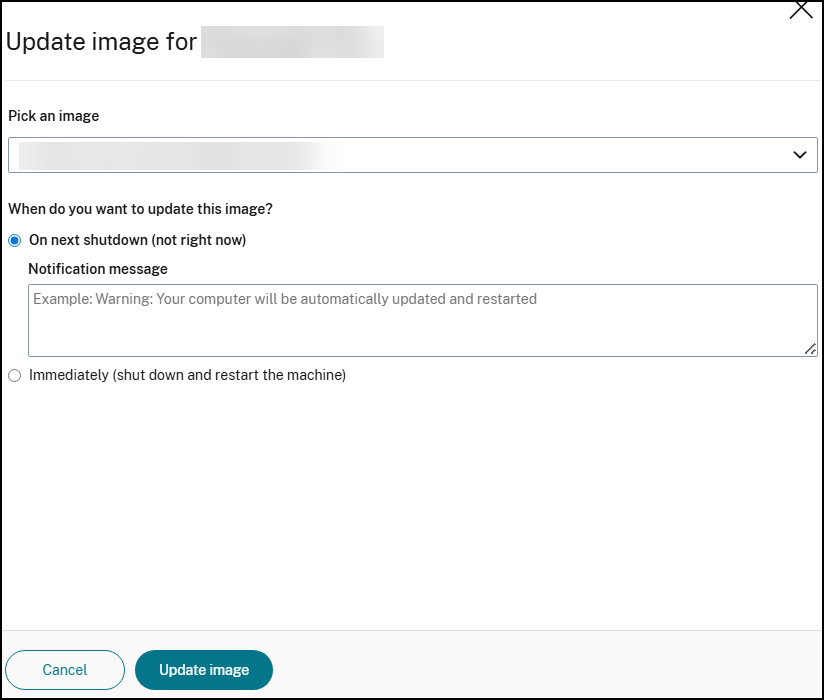
Select an image.
-
For random or multi-session catalogs: Select when you want to update the image:
-
On next shutdown and enter notification message to the users
-
Immediately and select the desired distribution time.
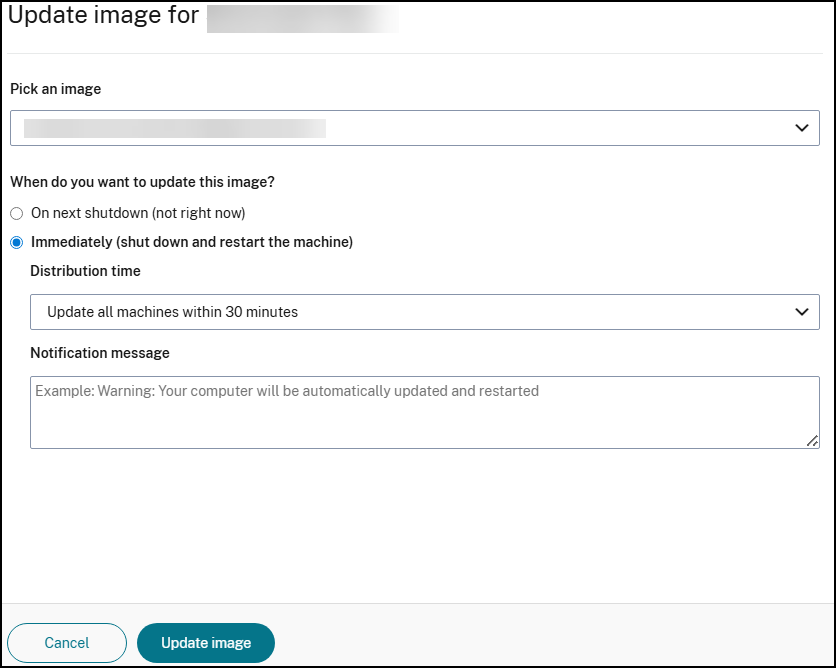
After Citrix DaaS Flex completes the initial image processing, users receive a warning to save their work and log off from their desktops.
-
- Click Update Image.
Manage machines in a catalog
- From the Citrix DaaS Flex dashboard, select a catalog.
-
On the Machines tab, find the machine you want to manage. In the ellipsis menu for that machine, select the desired action:
- Restart: Restart the selected machine.
- Start: Start the selected machine. This action is available only if the machine is powered off.
- Shutdown: Shut down the selected machine. This action is available only if the machine is powered on.
-
Turn maintenance mode on or off: Turn maintenance mode on or off for the selected machine.
By default, maintenance mode is turned off for a machine. Turning on maintenance mode for a machine prevents new connections from being made to that machine. Users can connect to existing sessions on that machine, but they cannot start new sessions on that machine. You might place a machine in maintenance mode before applying patches, or for troubleshooting.
-
Delete: Delete the selected machine. This action is available only when the machine’s session count is zero. Confirm the deletion.
When a machine is deleted, all data on the machine is removed.
- Force restart: Force a restart of the selected machine. Select this action only if a Restart action for the machine failed.
Add apps to a catalog
- From the Citrix DaaS Flex dashboard, select a catalog.
- On the Desktop and Apps tab, click Manage Apps.
-
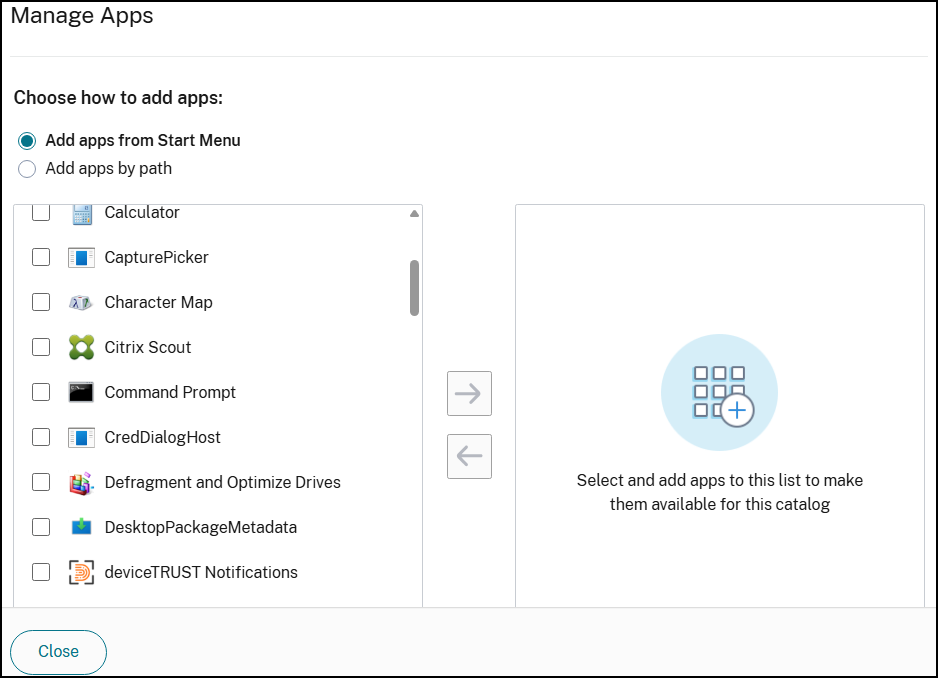
Select how you are adding apps:
-
Add apps from Start Menu
-
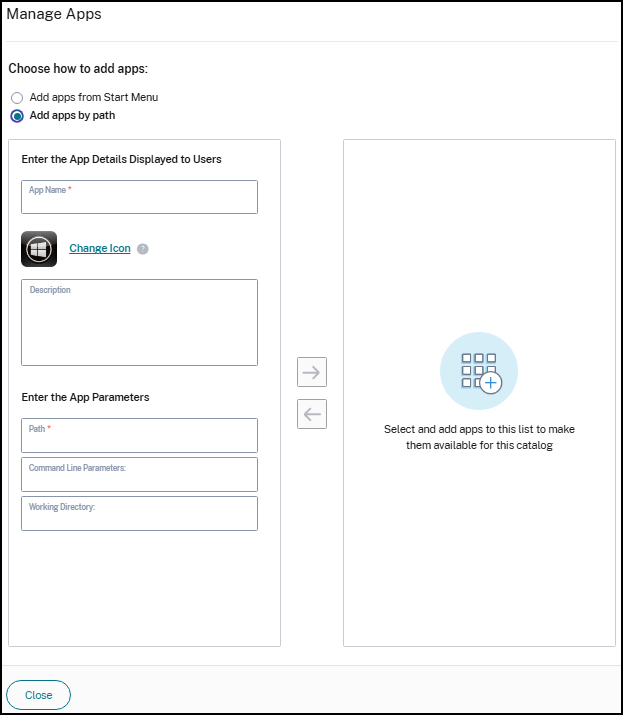
Add apps by path
-
-
To add apps:
-
From the Start menu:
- Select available apps in the left column. Use Search to tailor the apps list. Click the right arrow between the columns. The selected apps in the right column are available in the Workspace or StoreFront portal for users assigned to the catalog.
- To remove apps, select them in the right column. Click the left arrow between columns.
- If the Start menu has more than one version of the same app, with the same name, you can add only one. To add another version of that app, edit that version to change its name. Then you can add that version of the app.
-
By path:
- Enter the name for the app. This is the name users see in the Citrix Workspace or StoreFront portal.
- The icon shown is the icon users see in Citrix Workspace. To select another icon, click ‘Change icon’ and navigate to the icon you want to display.
- Enter a description of the application (optional).
- Enter the path to the app. Optionally, add command line parameters and the working directory. For details about command line parameters, see Pass parameters to published applications.
-
- When you’re finished, click Close.
Edit an app in a catalog
- From the Quick Deploy > Microsoft Azure dashboard, select a catalog.
- On the Desktop and Apps tab, click the row containing the app you want to edit.
- Click the pencil icon.
-
Type changes in any of the following fields:
- Name: The name of the application users see in Citrix Workspace.
- Description
- Path: The path to the executable.
- Command line parameters: For details, see Pass parameters to published applications.
- Working directory
- To change the icon users see in their Citrix Workspace, click Change icon and navigate to the icon you want to display.
- When you’re done, click Save.
Pass parameters to published applications
When you associate a published application with file types, the percent and star symbols (enclosed in double quotation marks) are appended to the end of the command line. These symbols act as a placeholder for parameters passed to user devices.
-
If a published application does not launch when expected, verify that its command line contains the correct symbols. By default, parameters supplied by user devices are validated when the symbols are appended.
- For published applications that use customized parameters supplied by the user device, the symbols are appended to the command line to bypass command-line validation. If you do not see these symbols in a command line for the application, add them manually.
-
If the path to the executable file includes directory names with spaces (such as “C:\Program Files”), enclose the command line for the application in double quotation marks to indicate that the space belongs in the command line. Add double quotation marks around the path, and another set of double quotation marks around the percent and star symbols. Add a space between the closing quotation mark for the path and the opening quotation mark for the percent and star symbols.
- For example, the command line for the published application Windows Media Player is: “C:\Program Files\Windows Media Player\mplayer1.exe” “%*”
Remove apps from a catalog
Note:
Removing an app from a catalog does not remove it from the machines. It just removes it from users’ Citrix Workspace or StoreFront portal.
- From the Citrix DaaS Flex dashboard, select a catalog.
- On the Desktop and Apps tab, click the trash icon next to the apps you want to remove.
Delete a catalog
Note:
When you delete a catalog, all the machines in the catalog are permanently destroyed. Deleting a catalog cannot be reversed.
- Select a catalog.
- On the Details tab, click Delete Catalog on the lower portion of the window.
- Confirm the deletion by selecting the acknowledgment check boxes and then clicking the confirmation button.
VDA snapshot and restore
The Citrix DaaS Flex snapshot and restore features provide a way to recover from unplanned data loss or other failures in VDAs that deliver desktops and apps. The snapshot operation takes and stores a snapshot of the machine. Later, a restore operation uses a snapshot you select.
You can configure daily and weekly snapshot schedules for all the machines in a catalog. These snapshots are called automatic snapshots. A snapshot is taken of each machine in the catalog. There are no default snapshot schedules.
You can take a manual snapshot of a single VM in a catalog on demand. You can create a manual snapshot of a machine even if the catalog it belongs to has scheduled snapshots. Scheduled snapshots can only be configured at the catalog level, not on individual machines.
Note:
The Citrix DaaS for Azure snapshot and restore features are supported only for machines in static catalogs and assigned to users.
Snapshot schedules
Snapshot schedules apply to all machines in a catalog. Snapshot schedules are not configured by default.
To manage snapshot schedules:
- From the Citrix DaaS Flex dashboard, select a catalog.
- On the Details tab, click Schedule Snapshots.
-
On the Schedule Snapshots page, configure schedules for weekly or daily automatic snapshots, or both:
- To add or change weekly snapshots, move the slider for Weekly automatic snapshots until a check mark appears. Select the day of the week and the start time.
- To add or change daily snapshots, move the slider for Daily automatic snapshots until a check mark appears. Select the start time.
- To remove weekly snapshots, move the slider for Weekly automatic snapshots until an X appears.
- To remove daily snapshots, move the slider for Daily automatic snapshots until an X appears.
- When you’re done, click Save.
Manual snapshots
A manual snapshot is for a single machine in a catalog.
- From the Quick Deploy > Microsoft Azure dashboard, select a catalog.
- On the Machines tab, find the machine you want to take a snapshot of. Select Snapshots in the ellipsis menu for that machine.
- On the Snapshots for [VDA-name] page, click Create Manual Snapshot.
- Provide a name for the snapshot. Choose a name you can easily identify later.
- Confirm your request.
View and manage snapshots
- From the Citrix DaaS Flex dashboard, select a catalog.
- On the Machines tab, find the machine you want to take a snapshot of. Select Snapshots in the ellipsis menu for that machine.
-
On the Backups for [VDA-name] page:
- If there are no snapshots for the machine, a message guides you to either create a manual snapshot for this machine, or create scheduled snapshots for all of the machines in the catalog containing this machine.
- You can select one of the snapshots and restore the machine. See Restore.
-
You can delete snapshots. Select the check boxes for one or more snapshots and then click Delete in the table header. Confirm your request.
Note:
When you delete a catalog, all snapshots are destroyed.
Restore
You can restore a machine from any available snapshot for that machine. During a restore, the machine is powered off. None of the actions in a machine’s ellipsis menu are available while a snapshot is being restored.
- From the Citrix DaaS Flex dashboard, select a catalog.
- In the Machines tab, find the machine you want to take a snapshot of. Select Snapshots in the ellipsis menu for that machine.
- On the Snapshots for [VDA-name] page, select the check box of the snapshot you want to use.
- Click Restore in the table header.
- Confirm the request.
The Status column on the Machines tab indicates the progress and outcome of the restore operation. If a machine fails to restore a snapshot, try again.