This content has been machine translated dynamically.
Dieser Inhalt ist eine maschinelle Übersetzung, die dynamisch erstellt wurde. (Haftungsausschluss)
Cet article a été traduit automatiquement de manière dynamique. (Clause de non responsabilité)
Este artículo lo ha traducido una máquina de forma dinámica. (Aviso legal)
此内容已经过机器动态翻译。 放弃
このコンテンツは動的に機械翻訳されています。免責事項
이 콘텐츠는 동적으로 기계 번역되었습니다. 책임 부인
Este texto foi traduzido automaticamente. (Aviso legal)
Questo contenuto è stato tradotto dinamicamente con traduzione automatica.(Esclusione di responsabilità))
This article has been machine translated.
Dieser Artikel wurde maschinell übersetzt. (Haftungsausschluss)
Ce article a été traduit automatiquement. (Clause de non responsabilité)
Este artículo ha sido traducido automáticamente. (Aviso legal)
この記事は機械翻訳されています.免責事項
이 기사는 기계 번역되었습니다.책임 부인
Este artigo foi traduzido automaticamente.(Aviso legal)
这篇文章已经过机器翻译.放弃
Questo articolo è stato tradotto automaticamente.(Esclusione di responsabilità))
Translation failed!
[可选] 为 Citrix Infrastructure Monitor 配置 HTTPS 的步骤
注意:
Citrix Infrastructure Monitor 服务也在 HTTP 模式下运行,在这种情况下,不需要设置以下配置。 但是,我们建议您在 https 模式下使用。 请仅在需要为 Citrix Infrastructure Monitor 配置 HTTPS 时执行以下步骤。
步骤 1:将证书上载到计算机
-
为安装了 Citrix Infrastructure Monitor. 的计算机获取
PFX证书。 有关生成 PFX 文件的详细信息,请参阅如何创建 PFX 文件。注意:
也可以使用受密码保护的 PFX 文件。
-
将证书上载到计算机上的任意位置。
步骤 2:将证书导入到计算机证书中
- 单击开始 > 运行 > 键入
mmc,然后单击确定。 此时将出现控制台 1- [控制台根目录] 窗口。 -
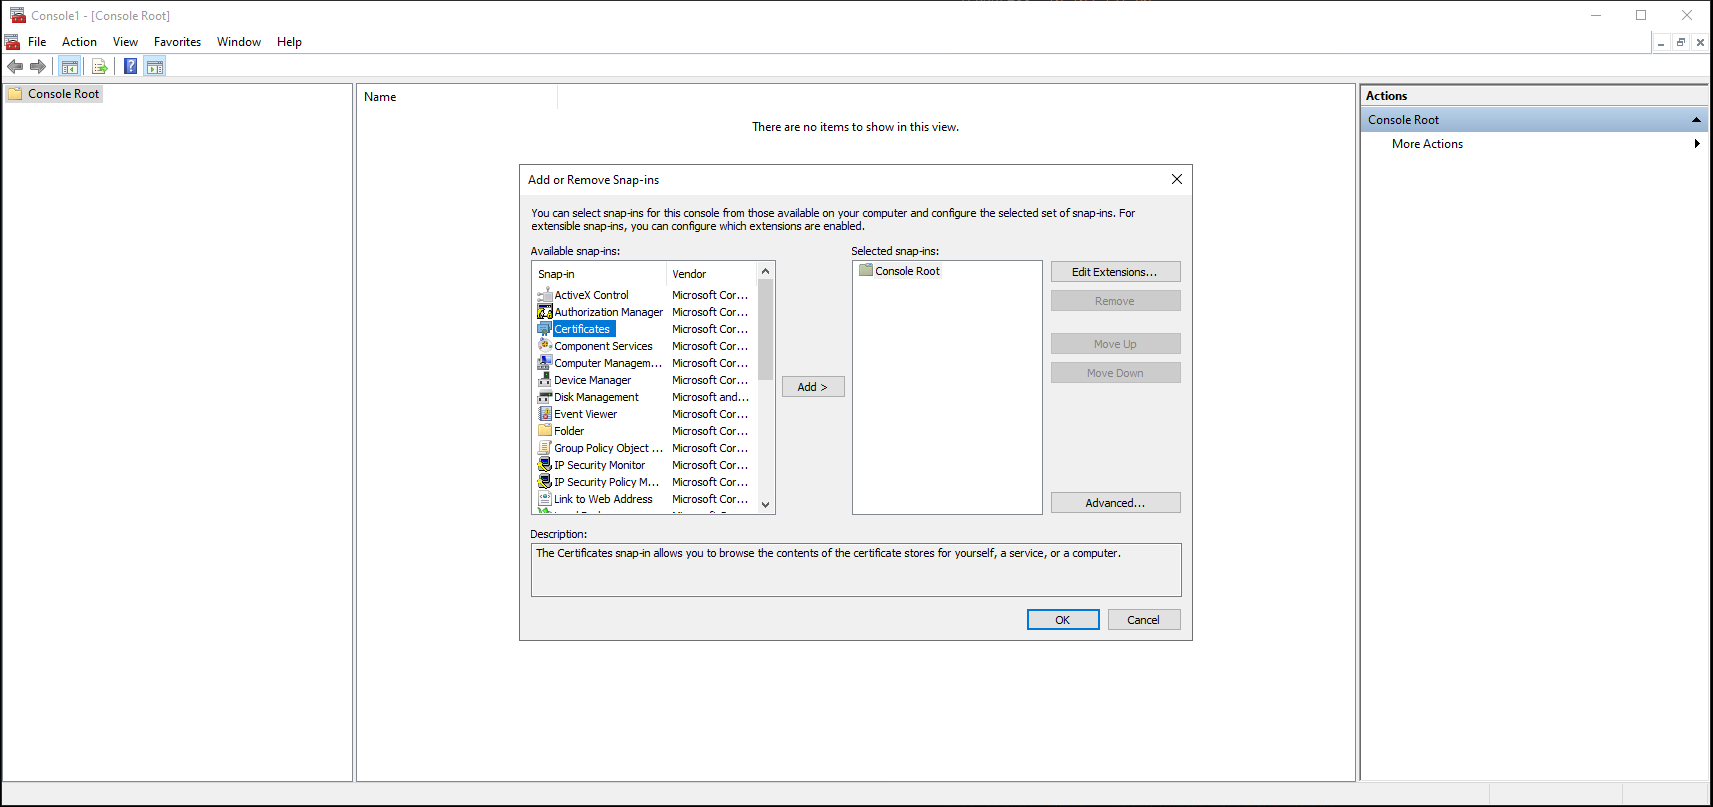
在文件菜单中,单击添加/删除管理单元。 此时将出现添加或删除管理单元窗口。
-
在管理单元下,双击证书。 此时将出现“证书”管理单元窗口。
-
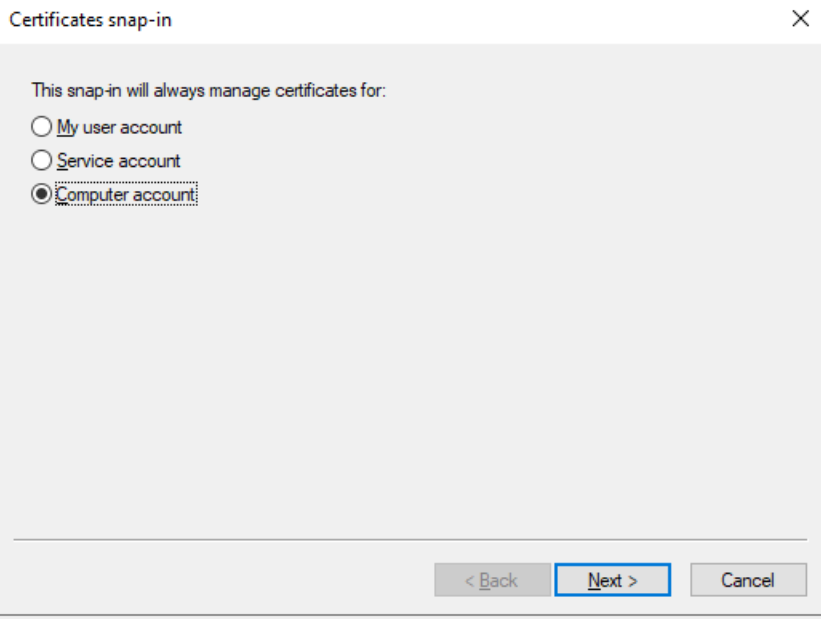
选择计算机帐户,然后单击下一步。 此时将出现选择计算机窗口。
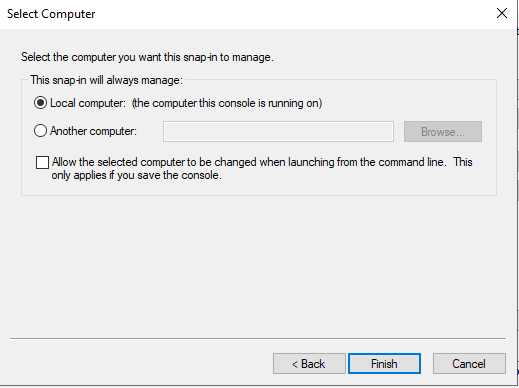
- 选择本地计算机。
- 单击完成。 证书(本地计算机)部分显示在新控制台的选定管理单元列表中。
- 单击确定。
-
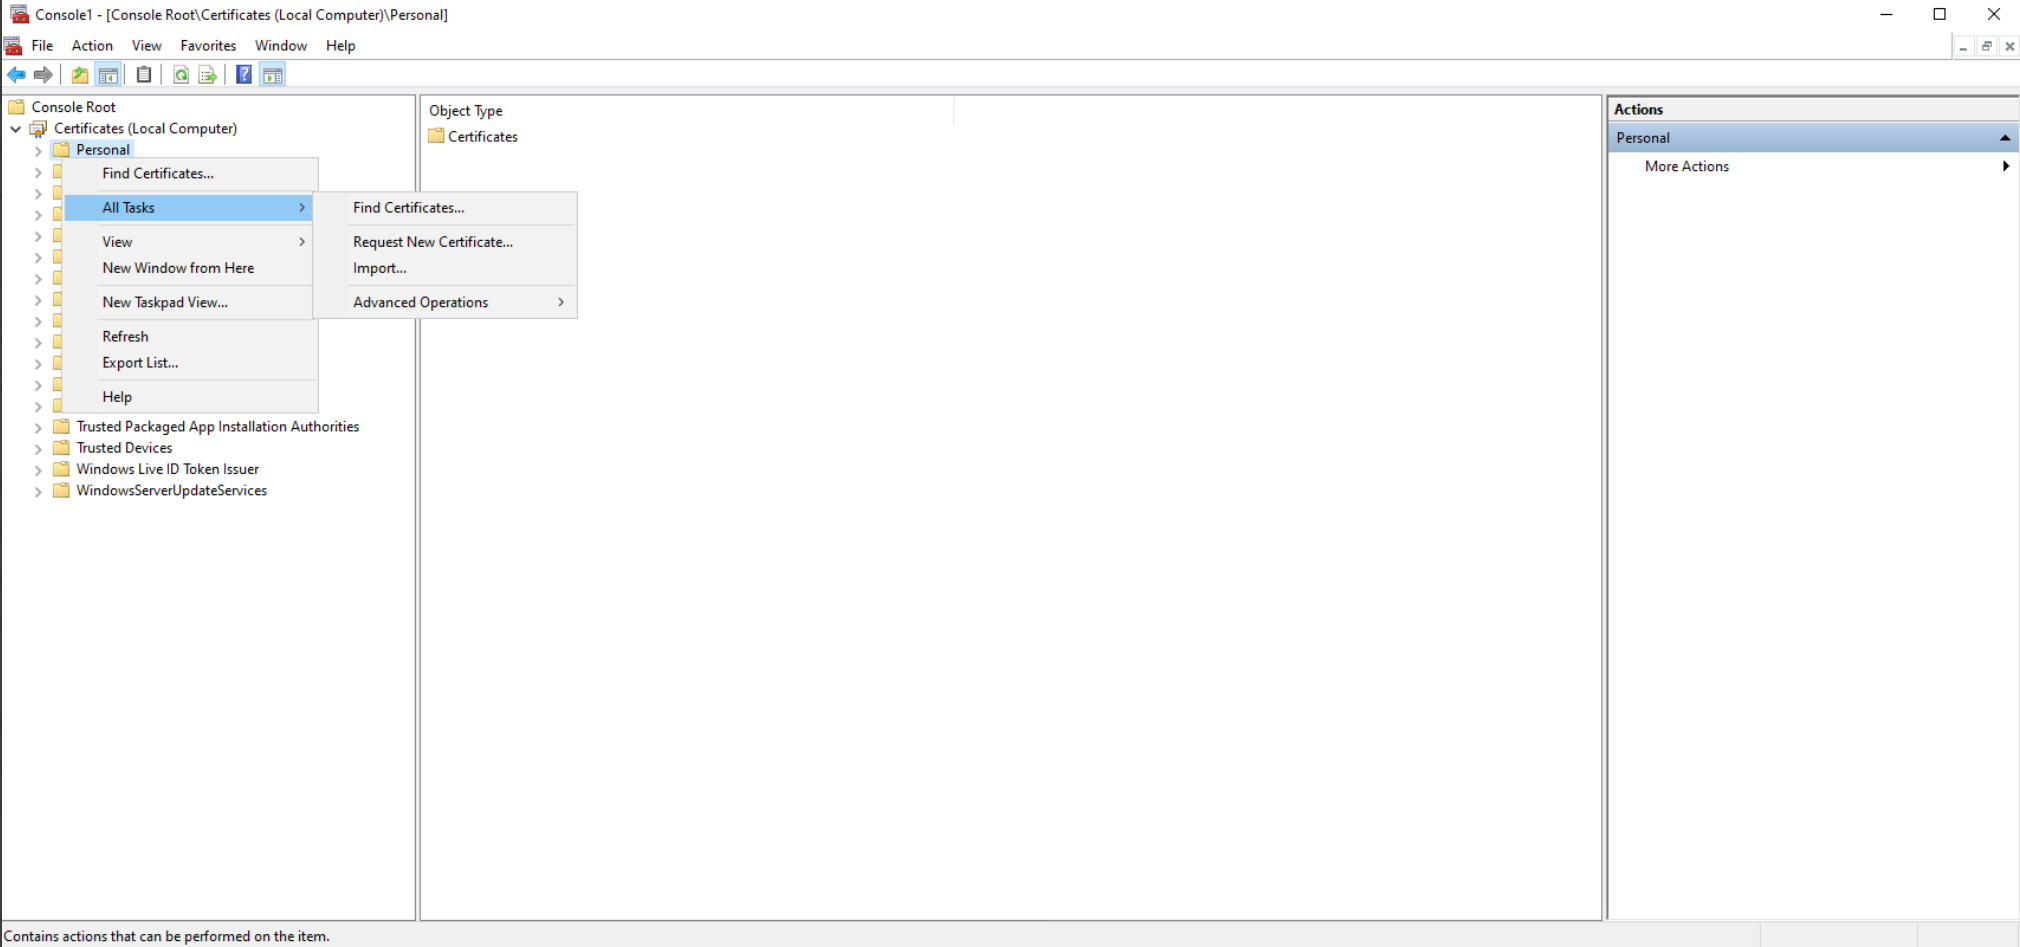
展开证书,右键单击个人 > 所有任务 > 导入。 此时将出现欢迎使用证书导入向导。
-
选择下一步 > 浏览文件。 导航到上载 PFX 文件的位置,将文件类型更改为所有文件,然后选择相应的 PFX 证书。
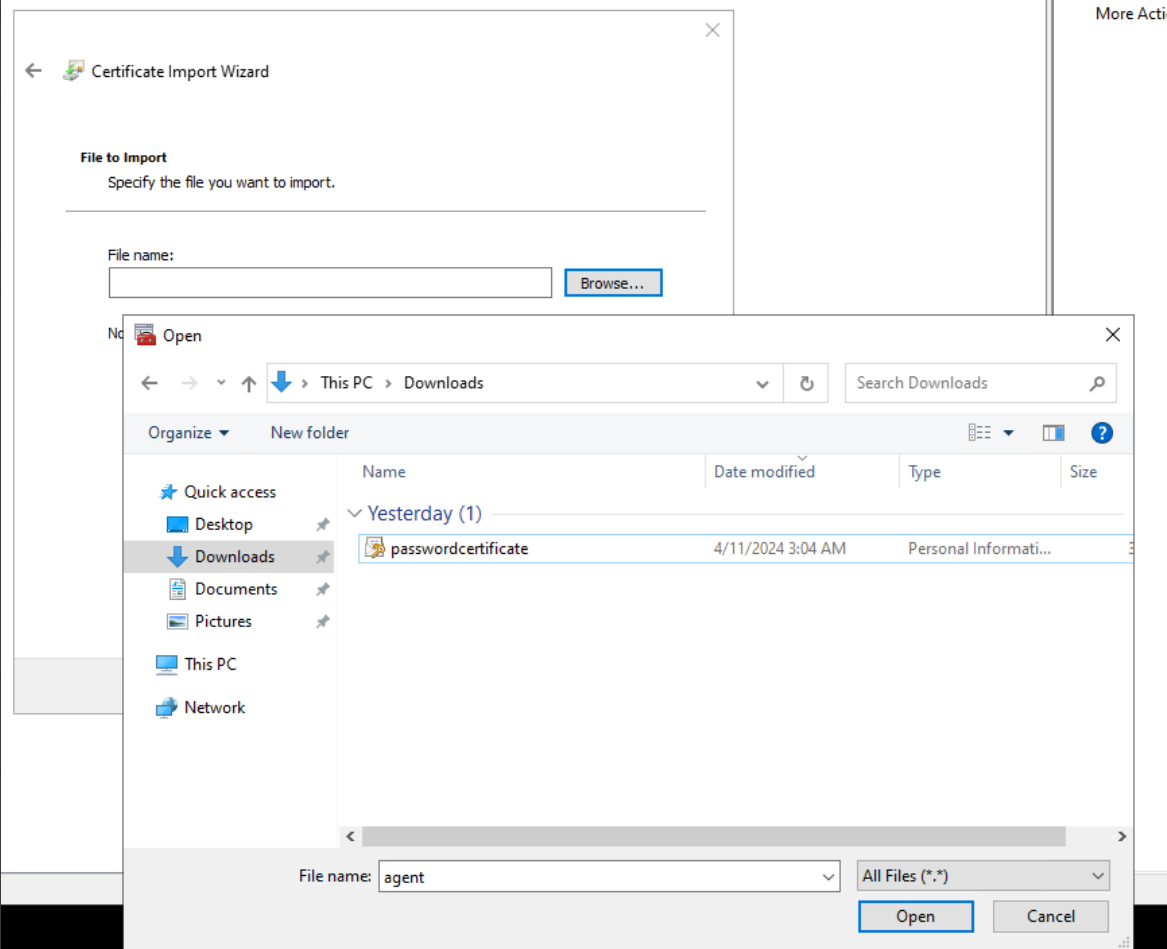
- 输入 PFX 密码。 如果没有密码,可以将其留空。
- (这是可选页面。)单击下一步。
-
对于证书存储,请确保选中 Place all certificates in the following store(将所有证书放置在以下存储中)选项,并选择 Certificate store(证书存储)为 Personal(个人)。
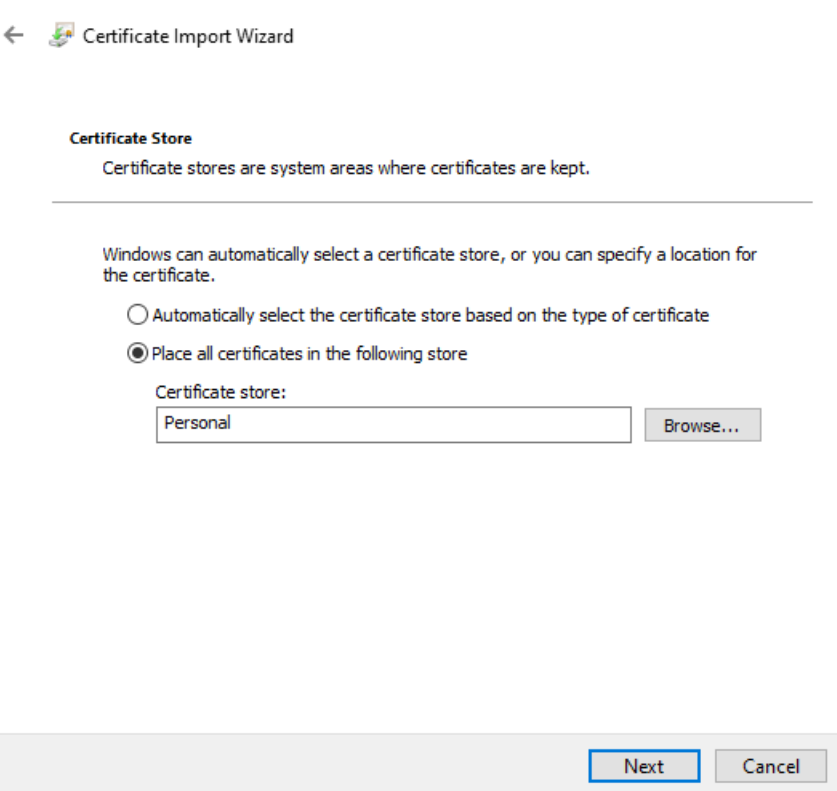
- (这是可选页面。)单击下一步。
- 查看详细信息,然后单击完成。
- 等待确认。 此时将出现导入成功消息。
- 导航到证书 > 个人,并确保证书存在。
- 从计算机中删除 PFX 证书文件。
步骤 3:提供对证书的读取权限
- 右键单击导入的证书 > 所有任务 > 管理私钥。
- 在打开的对话框中,选择添加,然后搜索网络服务。 单击确定。
- 在组或用户名下选择网络服务。
- 在 Permissions for NETWORK SERVICE(网络服务权限)下允许读取权限。
- 单击确定。
步骤 4:获取指纹
- 双击导入的证书。
- 在打开的对话框中,导航到详细信息选项卡并滚动到底部。
-
单击指纹。
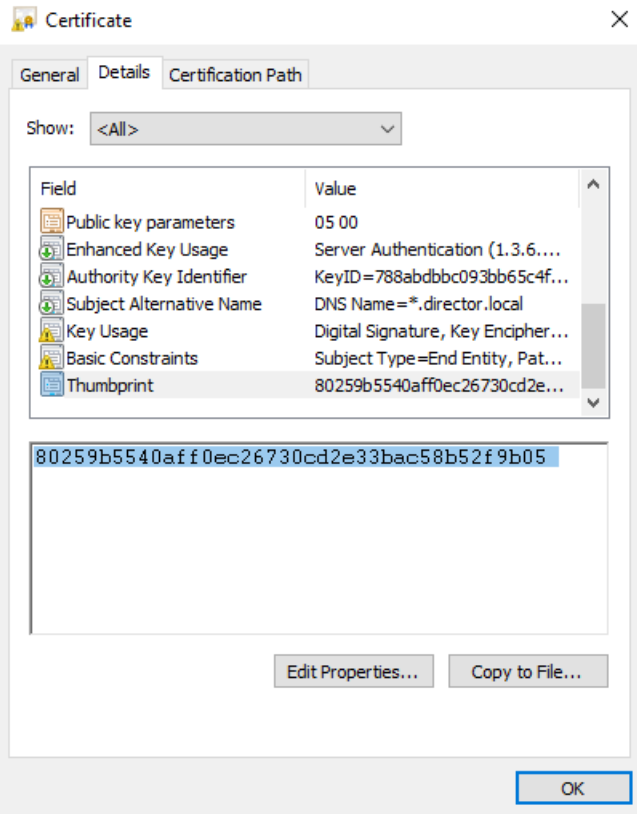
- 复制该值并为下一步做好准备。
步骤 5:设置环境变量
- 打开“控制面板”。
- 搜索环境并选择 Edit the system environment variables(编辑系统环境变量)。
-
在 System Variables (for all users)(系统变量(适用于所有用户))下,单击新建。
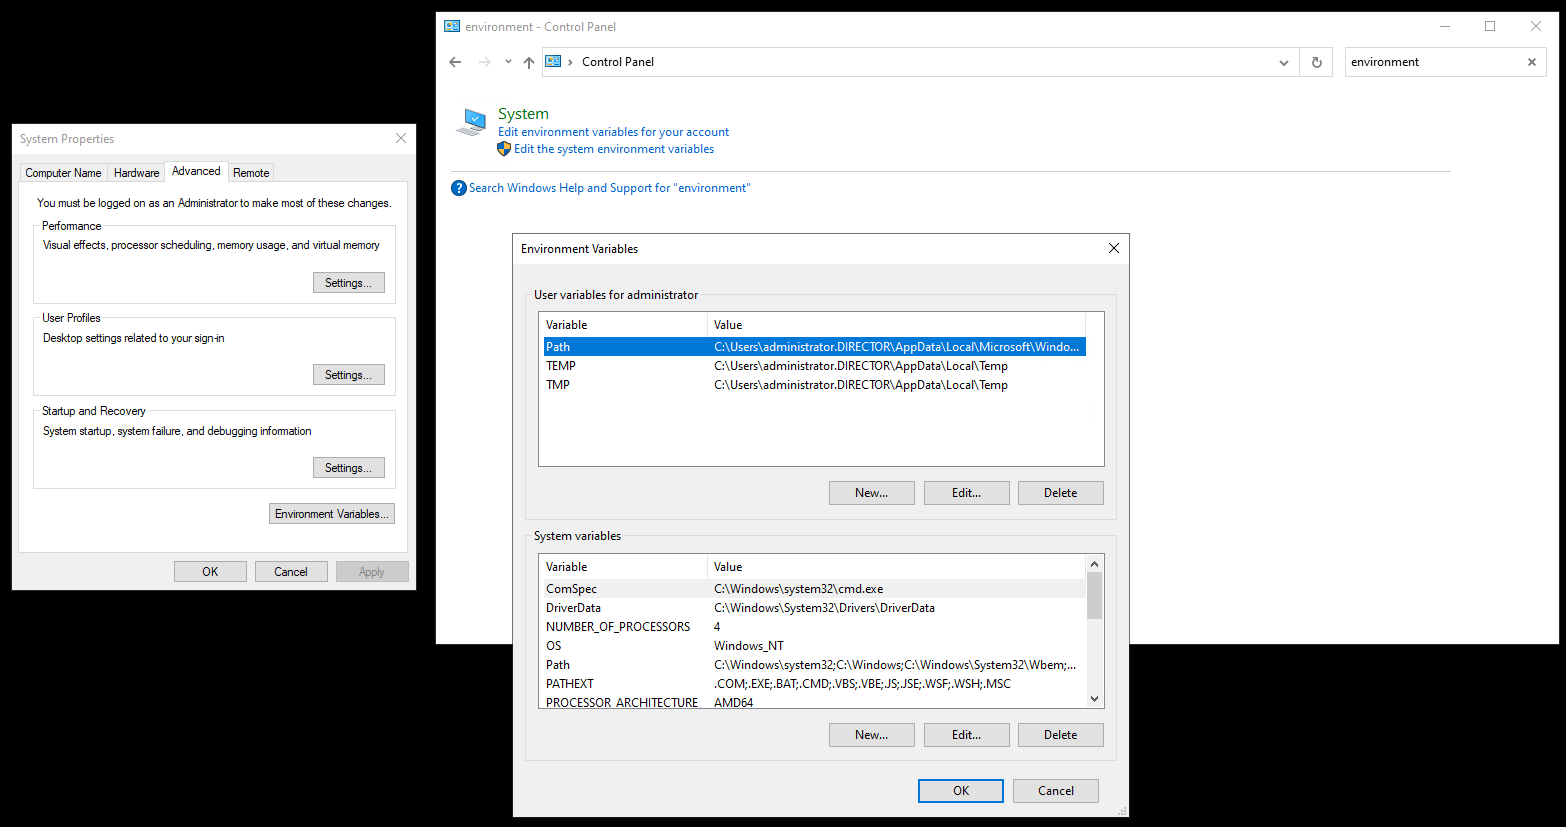
- 将变量名称指定为 DIRECTOR_AGENT_HTTPS_CERTIFICATE_THUMBPRINT。
- 在变量值下指定上一步中的指纹。
- 单击确定。
步骤 6:重新启动 CitrixInfraMonitorService
-
打开 PowerShell 并运行以下命令:
Restart-Service CitrixInfraMonitorService <!--NeedCopy--> -
通过捕获 CitrixInfraMonitorService 模块并查找日志行 Start to listen on HTTPS…(开始侦听 HTTPS…),确保启用 HTTPS。
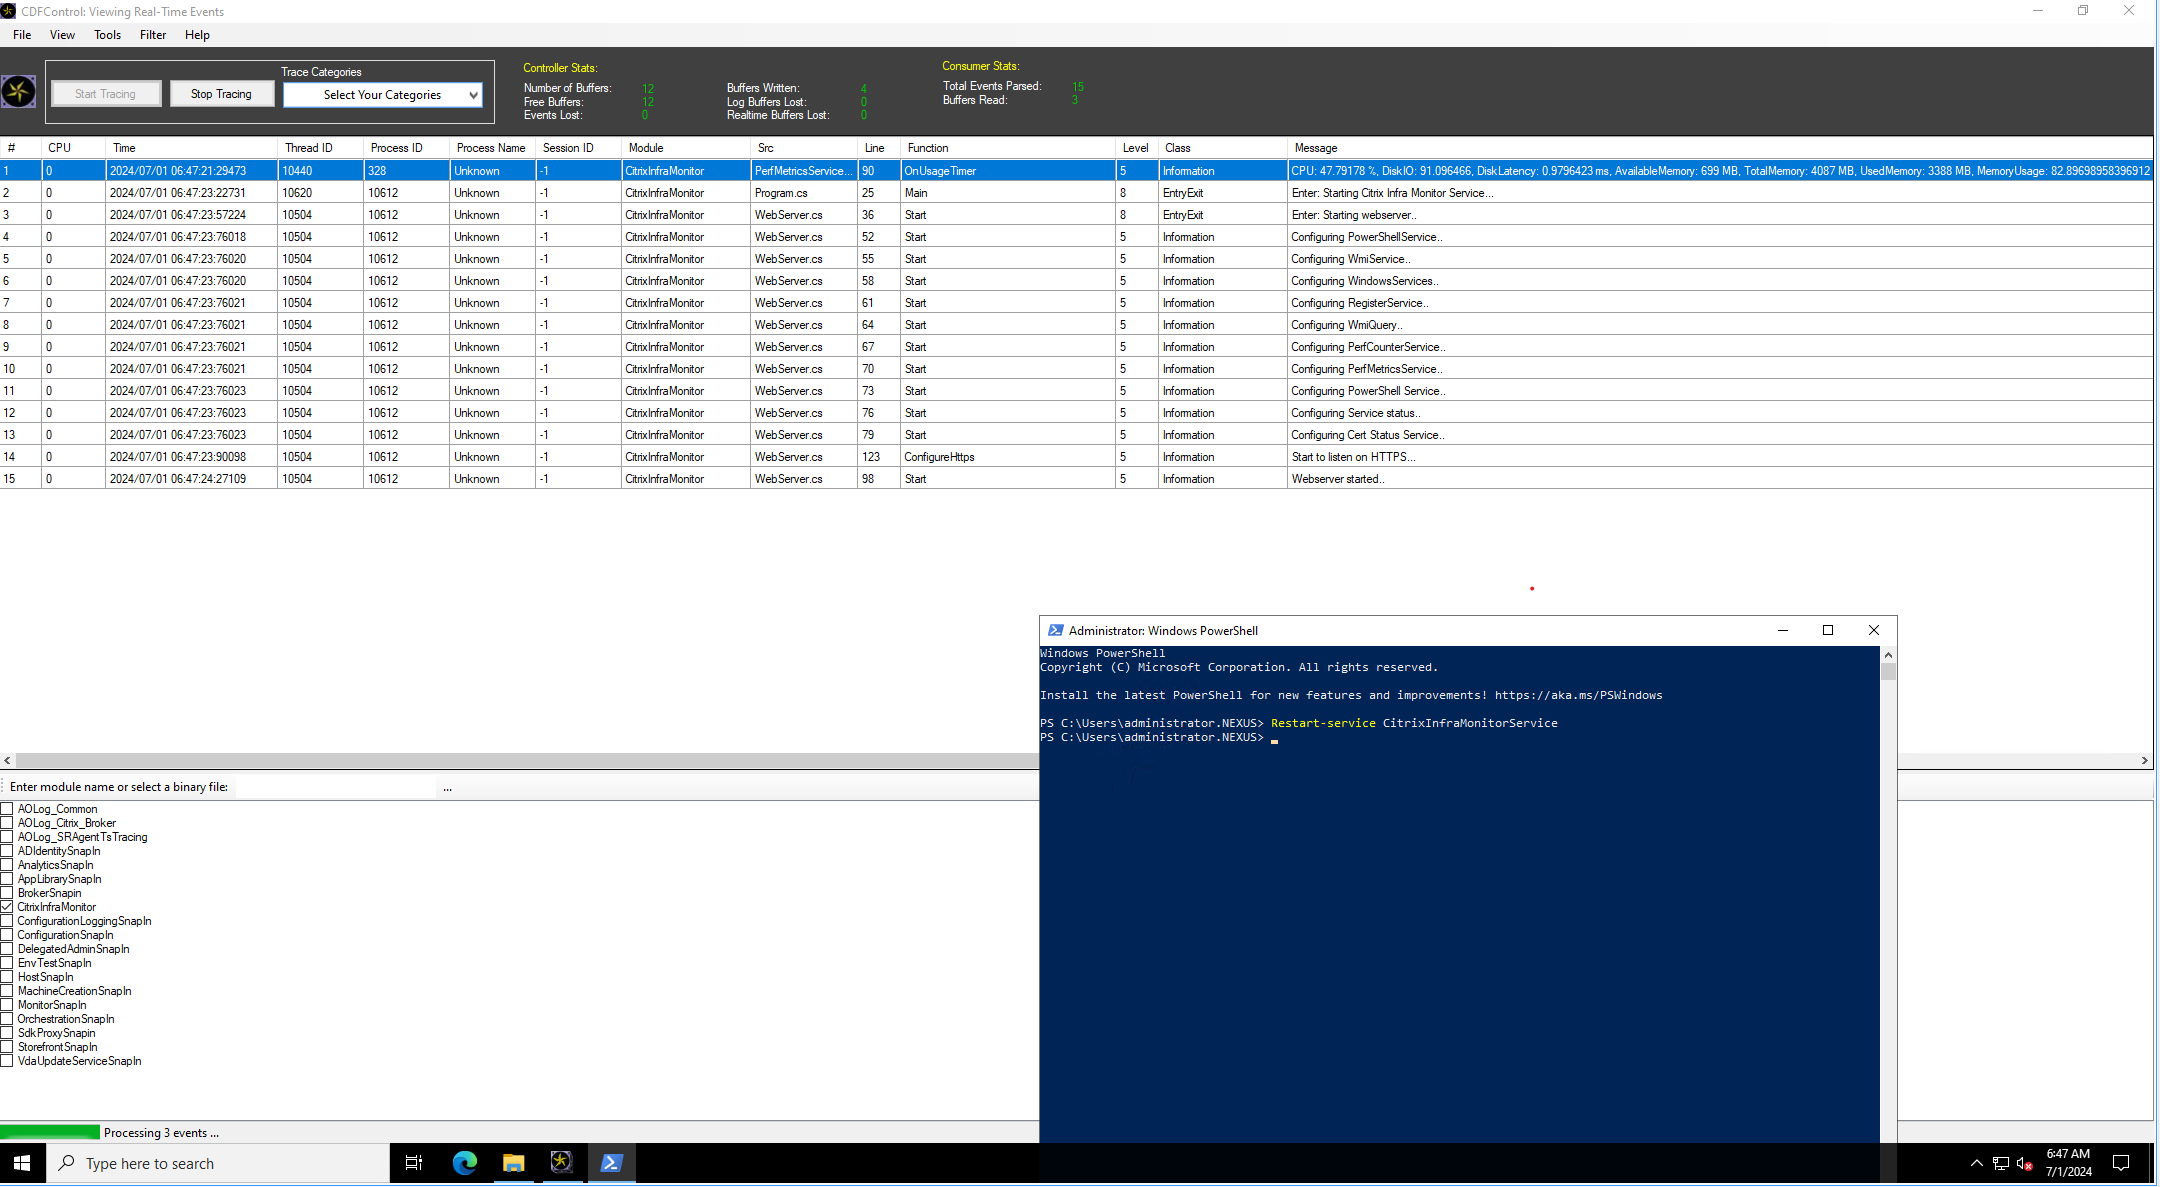
步骤 7:在 Monitor 配置中启用 HTTPS
在 Delivery Controller™ 计算机上运行以下命令:
  Set-MonitorConfiguration -DirectorAgentEnableHttps $true
<!--NeedCopy-->
共享
共享
This Preview product documentation is Citrix Confidential.
You agree to hold this documentation confidential pursuant to the terms of your Citrix Beta/Tech Preview Agreement.
The development, release and timing of any features or functionality described in the Preview documentation remains at our sole discretion and are subject to change without notice or consultation.
The documentation is for informational purposes only and is not a commitment, promise or legal obligation to deliver any material, code or functionality and should not be relied upon in making Citrix product purchase decisions.
If you do not agree, select I DO NOT AGREE to exit.