Connect to a workspace via SSH
An SSH-based connection lets you work in a Citrix Secure Developer Spaces™ (SDS) workspace from a locally installed IDE such as VS Code, Cursor, Windsurf, Kiro, or JetBrains. Your IDE runs on your machine while the code, tools, and compute stay in the cloud workspace.
SDS provides dedicated extensions for these IDEs that simplify workspace power management and one-click SSH connections. For IDEs without an SDS extension, you can connect manually using a standard SSH key pair.
Supported IDEs
| IDE | Connection method |
|---|---|
| VS Code Desktop | SDS extension (one-click from console) |
| Cursor | SDS extension (one-click from console) |
| Windsurf | SDS extension (one-click from console) |
| Kiro | SDS extension (one-click from console) |
| JetBrains Gateway | SSH configuration via Gateway UI |
| Other SSH-capable editors | Manual SSH key pair setup |
Prerequisites
Before you can connect to a workspace via SSH, verify the following:
- Remote Development Over SSH is enabled. A platform administrator, organization owner, or project owner must enable this setting under Workspace Settings > Security Settings > Remote Development Over SSH. This setting is available at the platform, organization, and project levels.
- SSH is enabled on the workspace. When creating or editing a workspace, go to Basic Info > Access and drag the SSH icon to Selected. Workspaces without SSH enabled display a “No SSH access” label and cannot accept SSH connections.
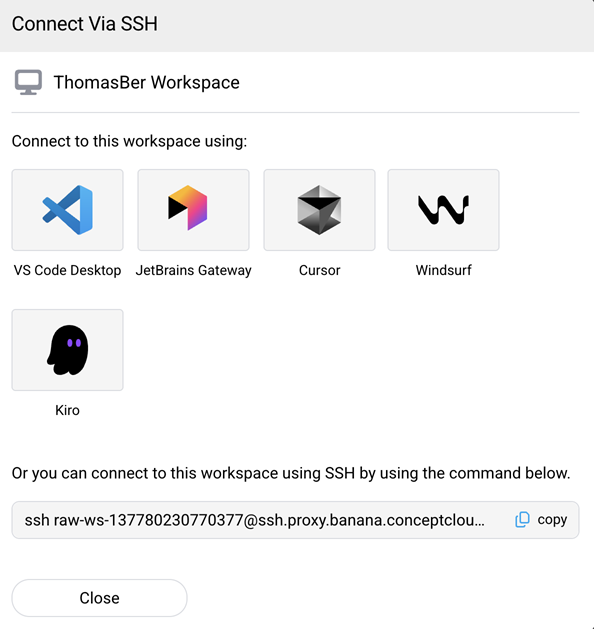
Connect using VS Code, Cursor, Windsurf, or Kiro
SDS provides the Citrix Secure Developer Spaces - Remote SSH extension for VS Code-based IDEs (VS Code, Cursor, Windsurf, and Kiro). Selecting any of these IDEs in the Connect Via SSH dialog uses the IDE’s custom URI scheme to launch the application, install the SDS extension if needed, and automatically establish the SSH connection.
The fastest way to get started is to initiate the connection from the SDS console:
- In the SDS console, navigate to the project Workspaces or Overview page.
- Locate a workspace with the SSH icon visible in the Access column and select it.
-
In the Connect Via SSH dialog, select your IDE (for example, VS Code Desktop).
-
Your local IDE opens. If this is your first connection, you are prompted to install the Citrix Secure Developer Spaces - Remote SSH extension. Select Install Extension and Open URI.
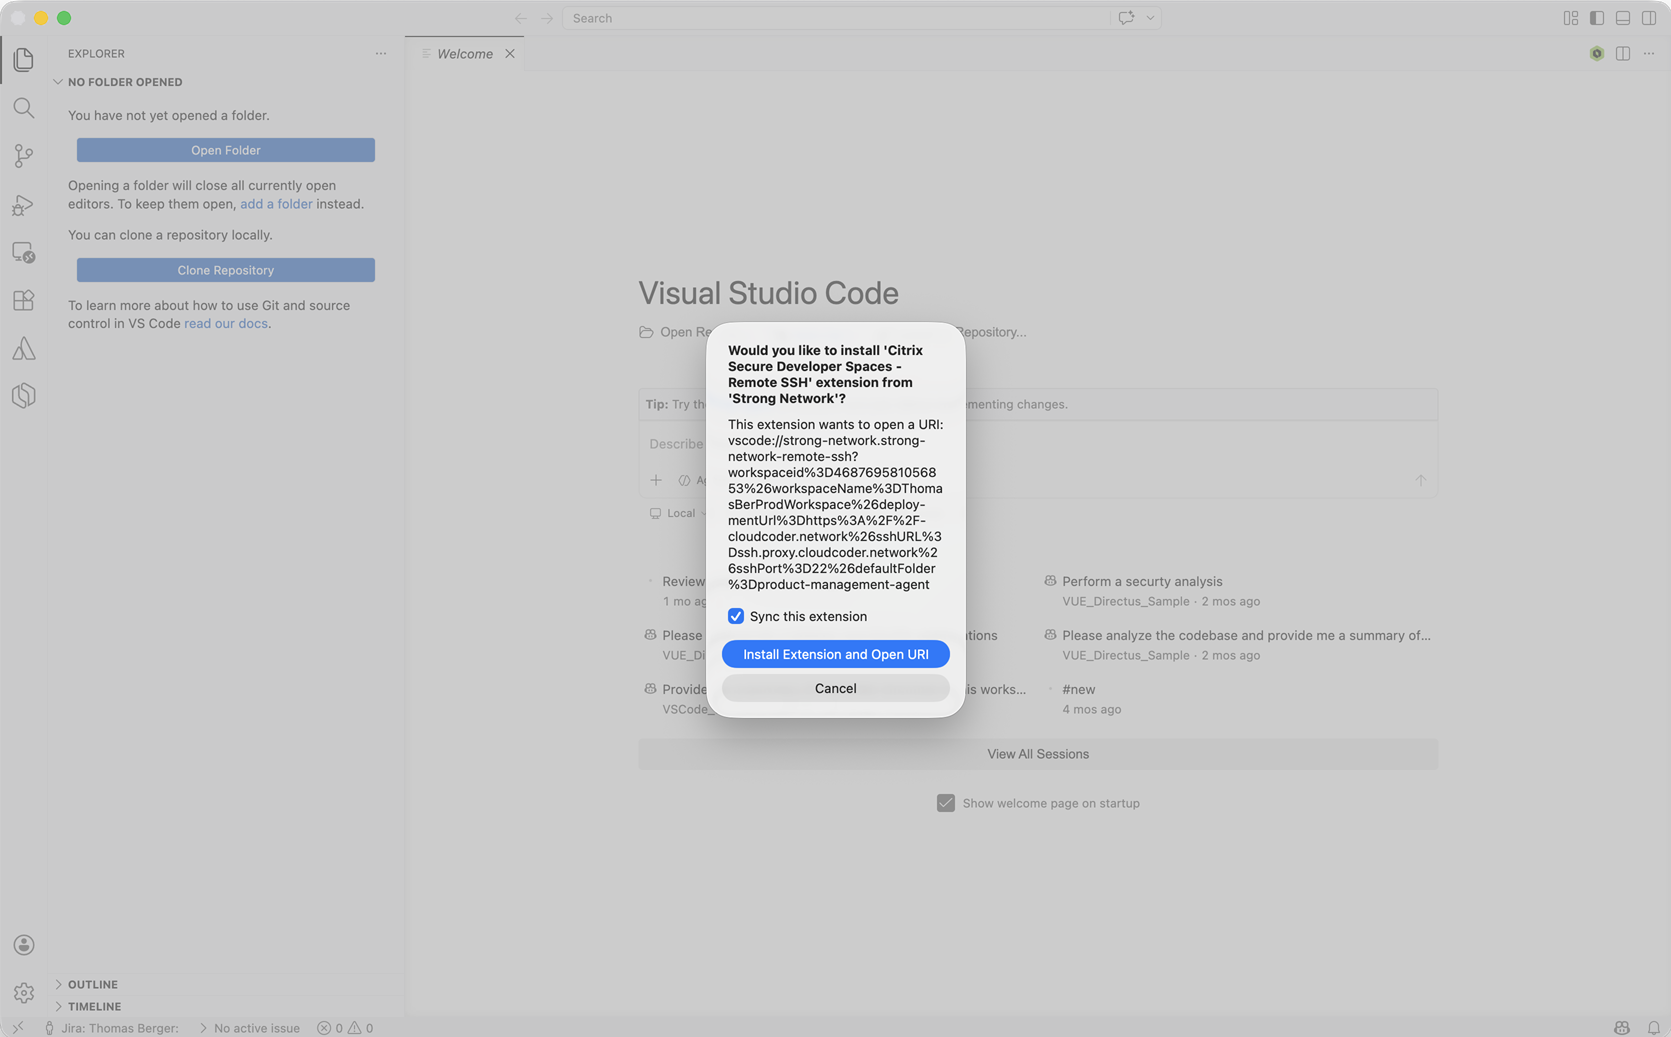
- The extension connects to the workspace automatically.
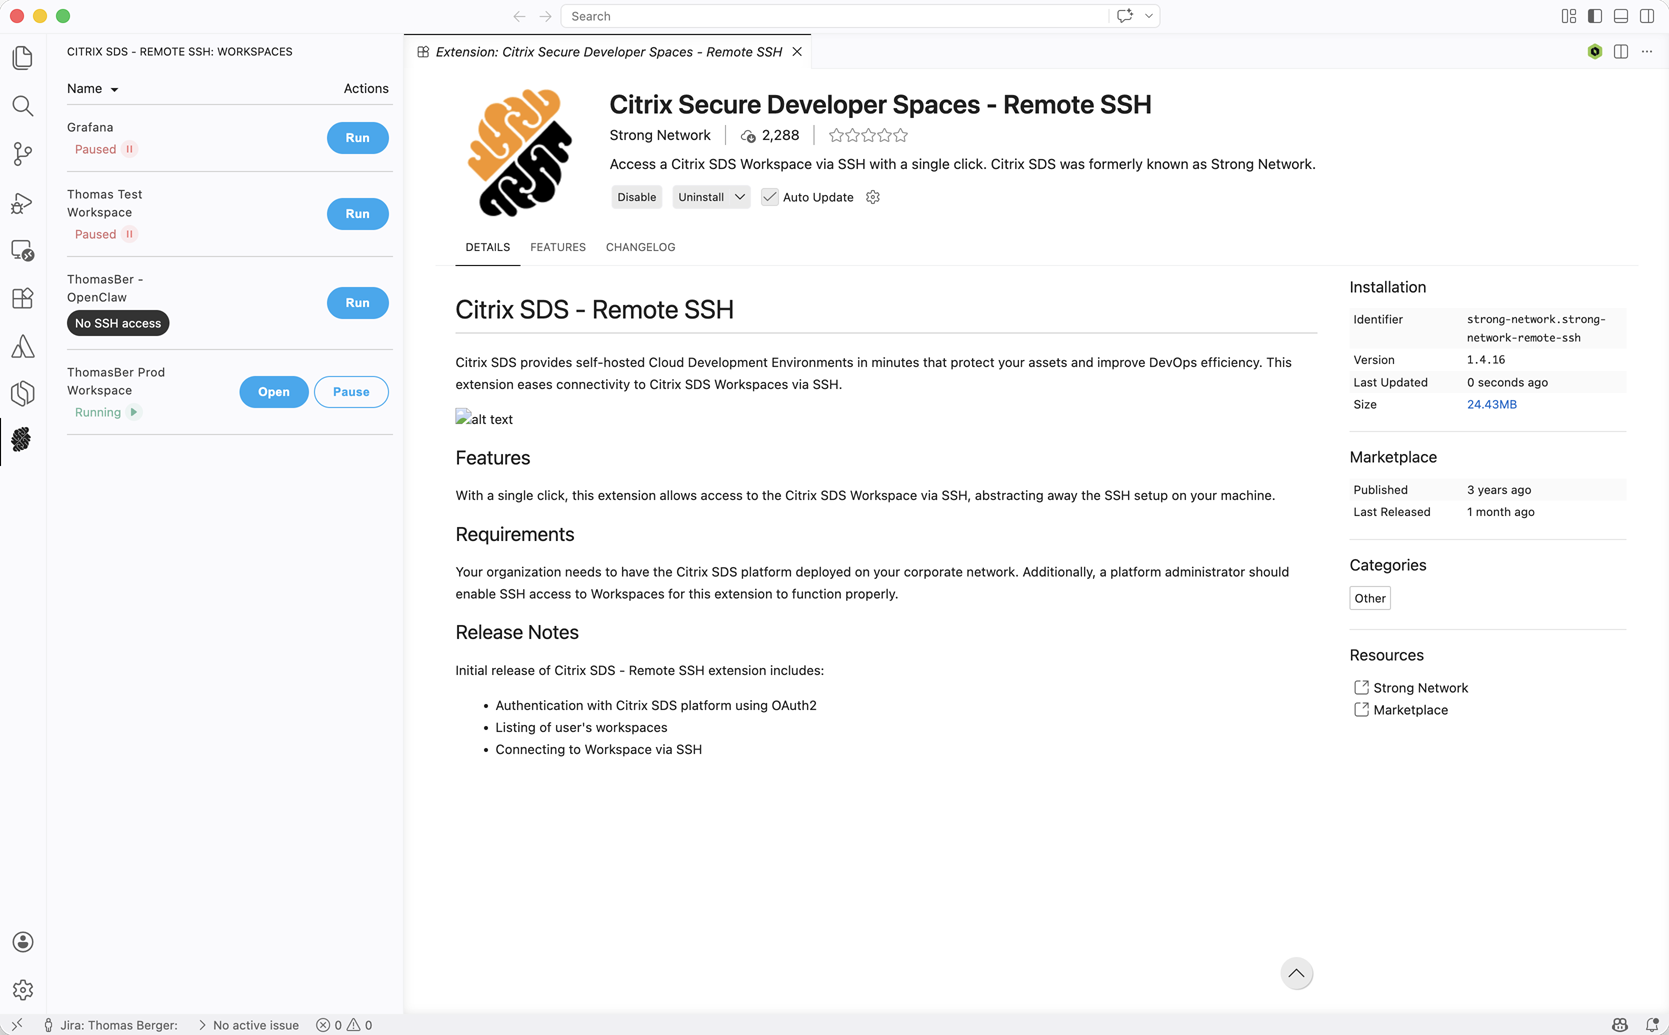
Install the extension manually
If you prefer to set up the extension before initiating a connection from the console:
- Install the Citrix Secure Developer Spaces - Remote SSH extension from the VS Code Marketplace.
- Open the extension sidebar and enter the URL of your SDS environment.
- Sign in to SDS when prompted.
- The extension displays a list of workspaces available to you.
Manage workspaces from the extension
The SDS extension lets you power-manage workspaces directly from your IDE:
- Run — Start a paused workspace.
- Open — Connect to a running workspace that has SSH enabled.
- Pause — Pause a running workspace.
Workspaces that do not have SSH enabled are tagged accordingly and can only be power-managed (Run / Pause) via the extension.
Connect using JetBrains Gateway
JetBrains Gateway enables SSH connections from JetBrains IDEs (IntelliJ IDEA, PyCharm, GoLand, and others).
Install JetBrains Gateway
Download and install JetBrains Gateway.
Create an SSH connection
-
In JetBrains Gateway, select New Connection under SSH Connection.
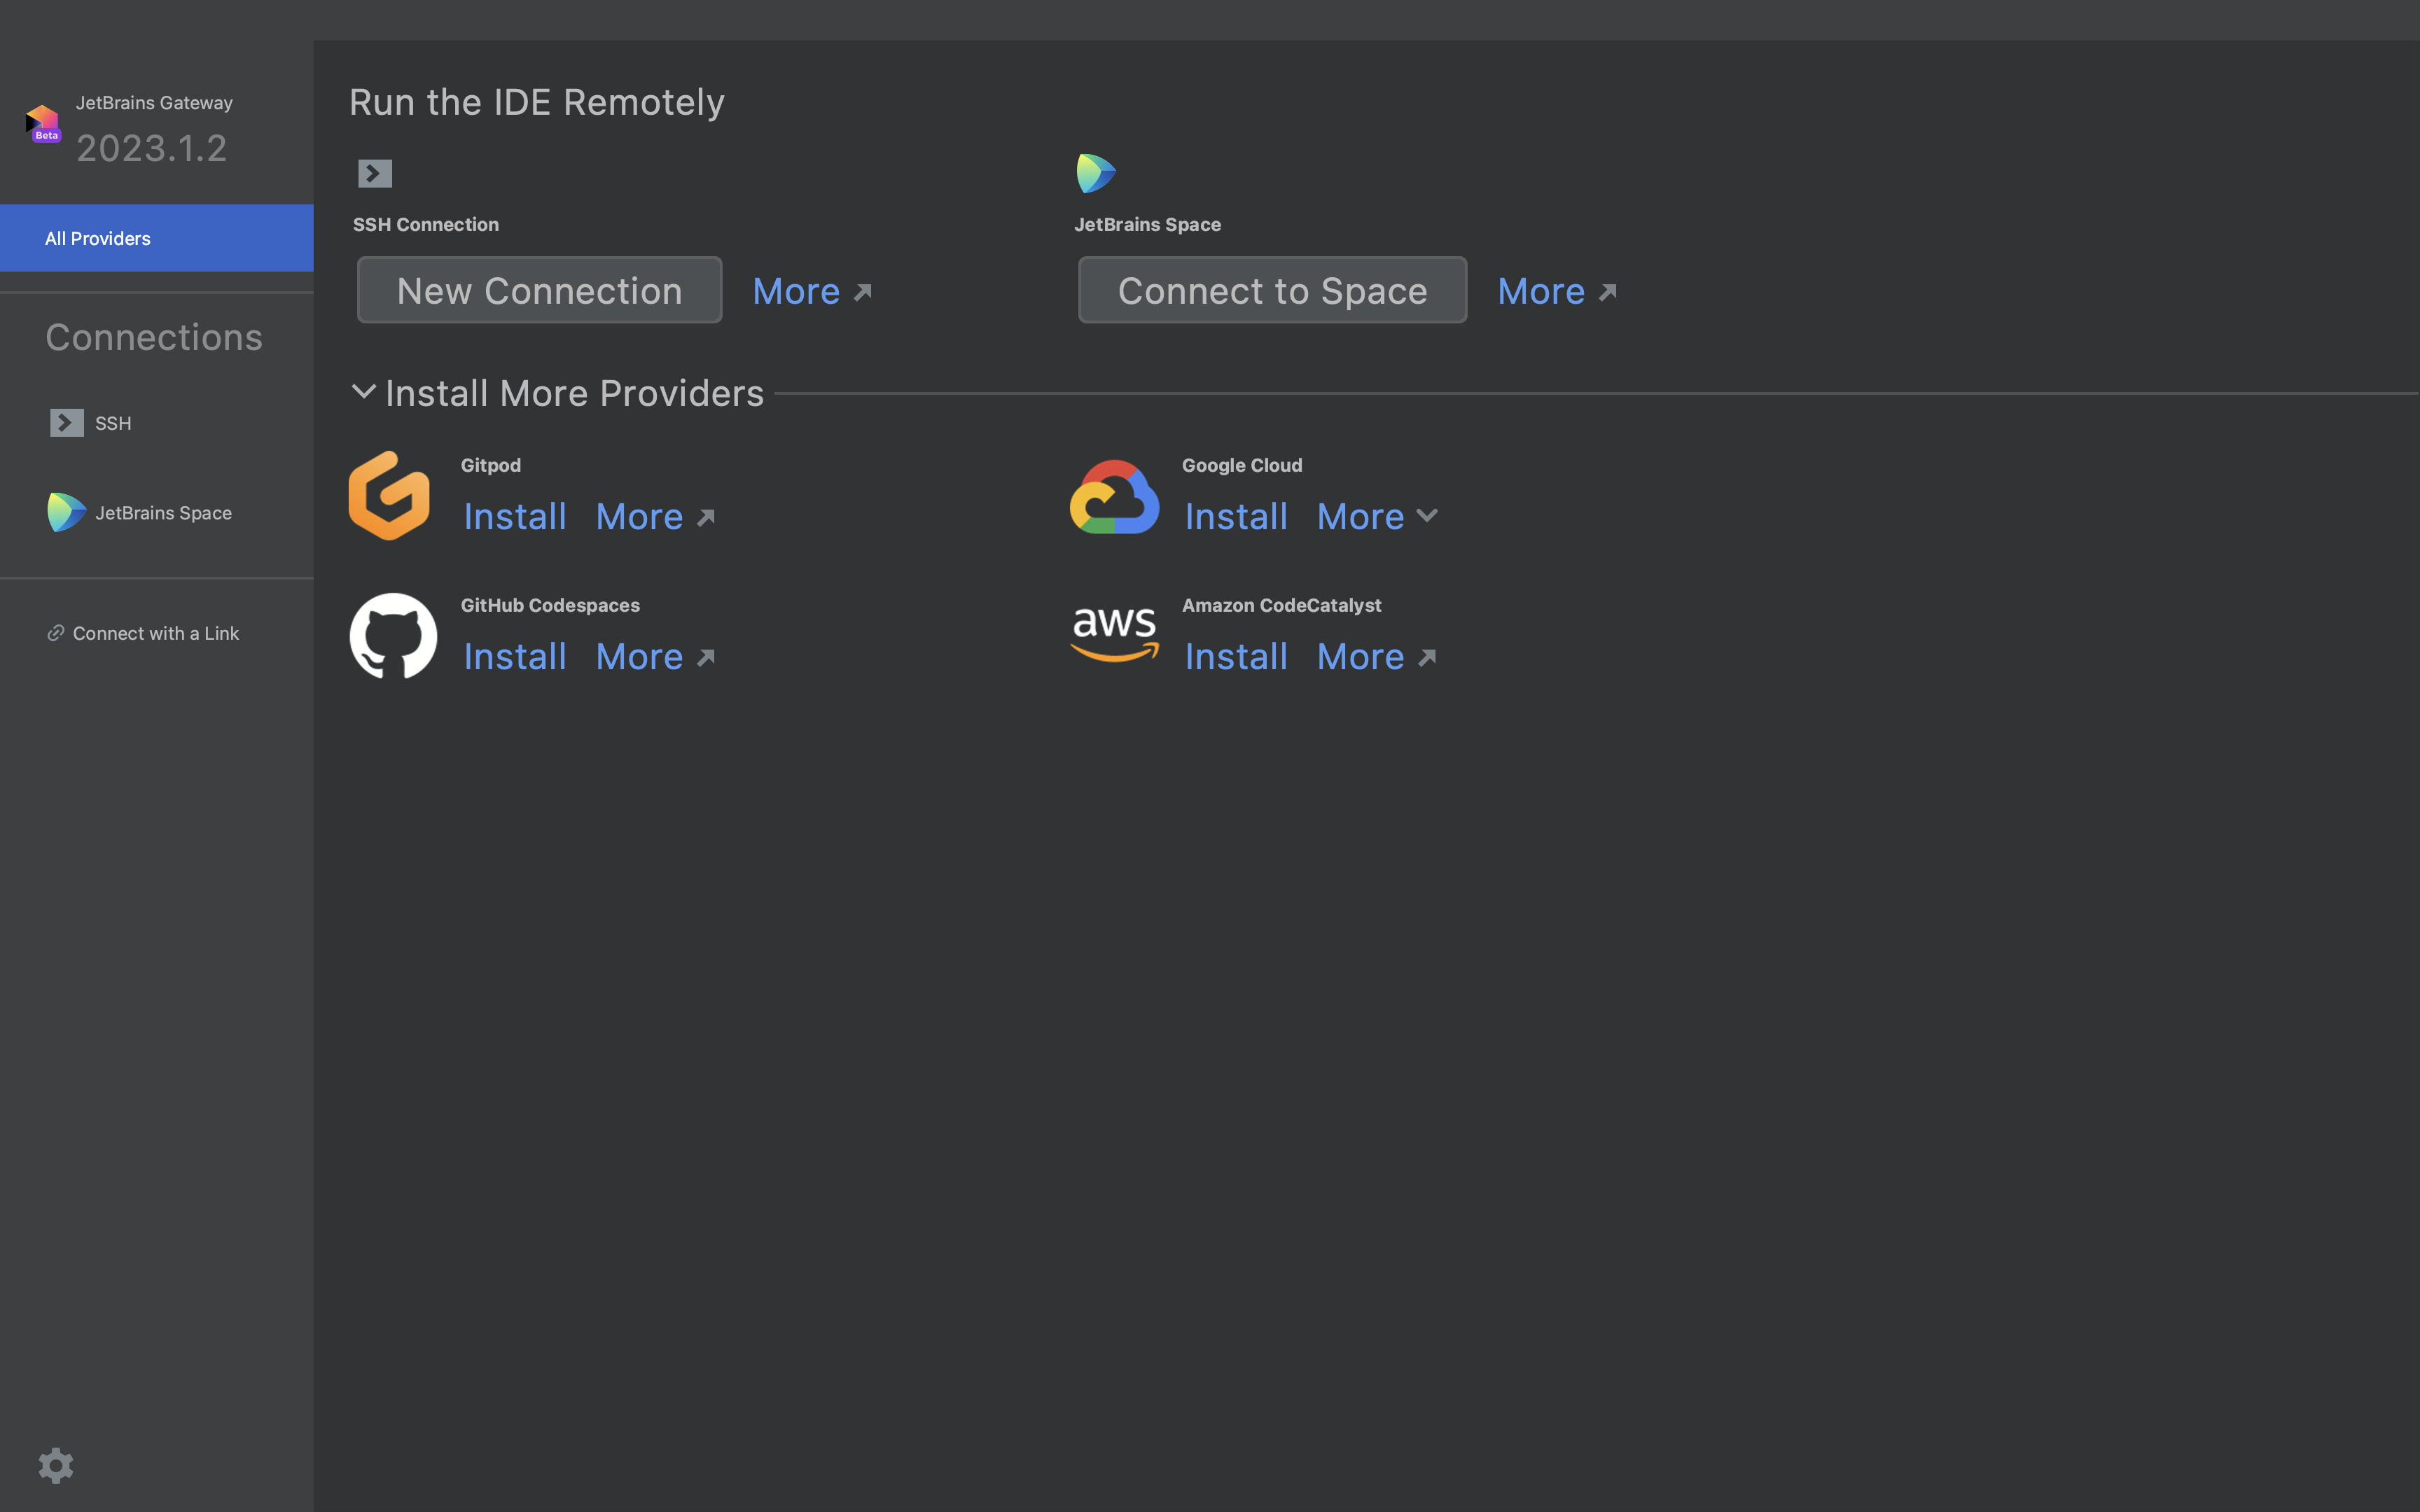
- Click the settings icon next to Connection, then click + to add a new SSH configuration.
- In the SDS console, select the SSH icon on your workspace, then select JetBrains Gateway in the dialog. The SSH command is displayed at the bottom of the dialog.
- Enter the connection details from the SSH command:
-
Host — The part after
@(for example,ssh.proxy.cloudcoder.network). -
Username — The part before
@(for example,raw-ws-468769581056853). - Authentication type — Select Key Pair and provide the path to your private key.
Tip:
Disregard the
sshprefix and the@character when splitting the command into Host and Username. -
Host — The part after
-
Click Test Connection to verify the configuration, then click OK.
- Select your new configuration as the Connection and click Check Connection and Continue.
-
Choose the JetBrains IDE you want to use and the project folder to open, then click Download IDE and Connect.
Tip:
The IDE is downloaded to your workspace, not to your local machine.
- After the IDE installation completes, you are connected to your workspace.
Manual SSH connection
If your IDE lacks a dedicated SDS extension or a JetBrains Gateway integration, you can connect using a standard SSH key pair. This approach works with any terminal or SSH-capable editor.
Generate an SSH key pair
On UNIX and UNIX-like systems, run ssh-keygen in your terminal:
ssh-keygen
<!--NeedCopy-->
- Press Enter to accept the default path and file name, or specify a custom location.
- Enter a passphrase when prompted (recommended for additional security), or press Enter to skip.
- The command generates a key pair: a private key (for example,
id_rsa) and a public key (for example,id_rsa.pub).
Upload your public key
Upload the public key to the SSH Keys section in your Profile > Security page.
Supported key types: ssh-rsa, ecdsa-sha2-nistp256, ecdsa-sha2-nistp384, ecdsa-sha2-nistp521, ssh-ed25519, sk-ecdsa-sha2-nistp256@openssh.com, sk-ssh-ed25519@openssh.com.
Authorize your workspace
After uploading your key, authorize the workspace(s) that should accept connections using this key.
Connect from a terminal
- In the SDS console, select the SSH icon on your workspace to open the Connect Via SSH dialog.
- Copy the SSH command displayed at the bottom of the dialog.
-
Run the command in your terminal:
ssh raw-ws-468769581056853@ssh.proxy.cloudcoder.network
<!--NeedCopy-->
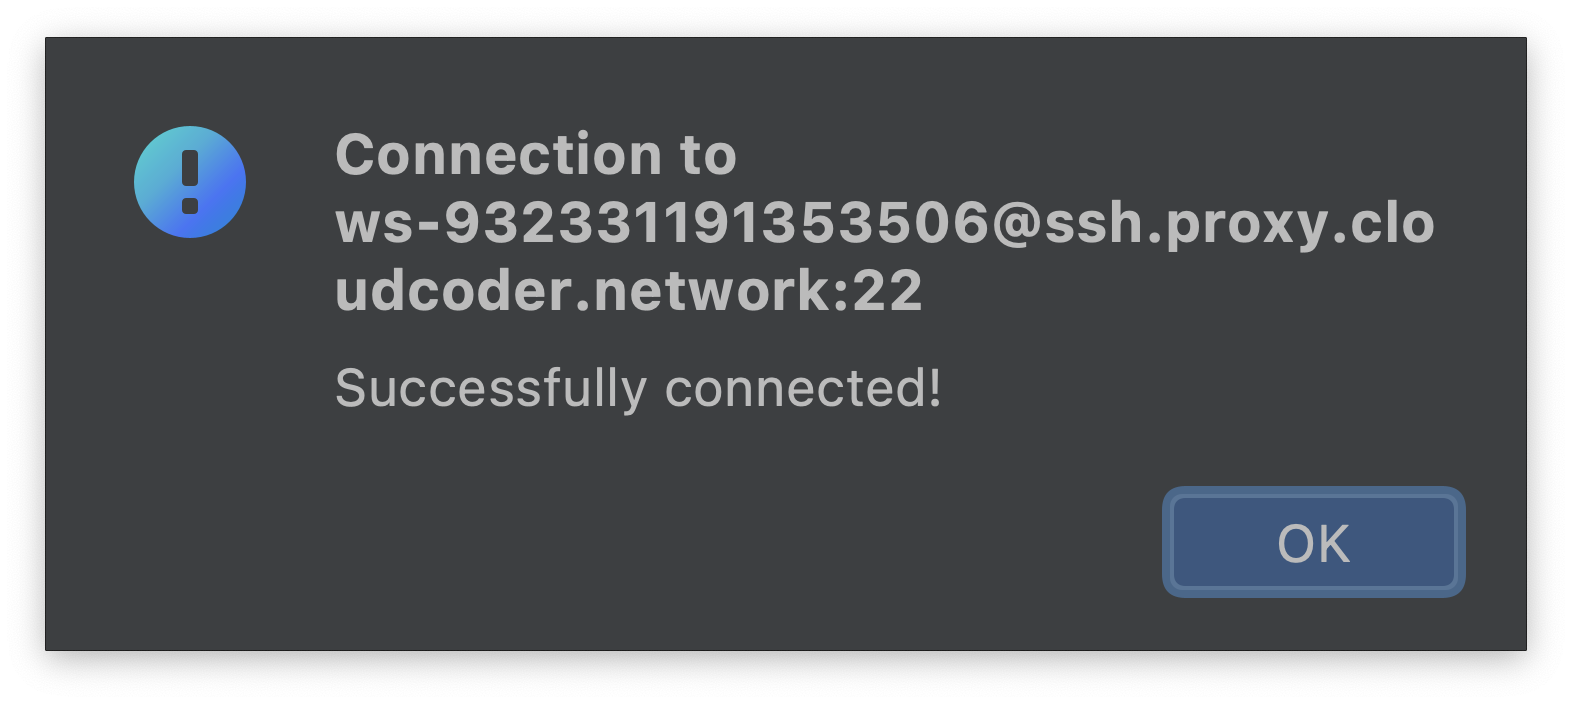
You are now connected to your workspace via SSH.