Authentication
Starting from Citrix Workspace app 2012, you can view the authentication dialog inside Citrix Workspace app and store details on the sign-in screen. This enhancement provides a better user experience.
Authentication tokens are encrypted and stored so that you don’t need to reenter credentials when your system or session restarts.
Note:
This authentication enhancement is available only in cloud deployments.
Prerequisite:
Install the libsecret library.
This feature is enabled by default.
Authentication enhancement for Storebrowse
Starting with version 2205, the authentication dialog is present inside Citrix Workspace app and the store details are displayed on the logon screen for a better user experience. The authentication tokens are encrypted and stored so that you don’t need to reenter credentials when your system or session restarts.
The authentication enhancement supports storebrowse for the following operations:
-
Storebrowse -E: Lists the available resources. -
Storebrowse -L: Launches a connection to a published resource. -
Storebrowse -S: Lists the subscribed resources. -
Storebrowse -T: Terminates all sessions of the specified store. -
Storebrowse -Wr: Reconnects the disconnected yet active sessions of the specified store. The [r] option reconnects all the disconnected sessions. -
storebrowse -WR: Reconnects the disconnected yet active sessions of the specified store. The [R] option reconnects all the active and disconnected sessions. -
Storebrowse -s: Subscribes the specified resource from a given store. -
Storebrowse -u: Unsubscribes the specified resource from a given store. -
Storebrowse -q: Launches an application using the direct URL. This command works only for StoreFront stores.
Note:
- You can continue to use the remaining
storebrowsecommands as used earlier (using AuthMangerDaemon).- The authentication enhancement is applicable for cloud deployments only.
- With this enhancement, the persistent login feature is supported.
Support for more than 200 groups in Azure AD
Starting with the 2305 release, an Azure AD user who is part of more than 200 groups can view apps and desktops assigned to the user. Previously, the same user wasn’t able to view these apps and desktops.
To enable this feature, do the following:
-
Navigate to $ICAROOT/config/AuthManConfig.xml and add the following entries:
<compressedGroupsEnabled>true</compressedGroupsEnabled>
<!--NeedCopy-->
Note:
Users must sign out from Citrix Workspace app and sign in back to enable this feature.
Authentication enhancement for Storebrowse configuration
By default, the authentication enhancement feature is disabled.
If the gnome-keyring isn’t available, the token is stored in the selfservice process memory.
To enforce storage of the token in memory, disable the gnome-keyring, using the following steps:
- Navigate to
/opt/Citrix/ICAClient/config/AuthmanConfig.xml. -
Add the following entry:
<GnomeKeyringDisabled>true</GnomeKeyringDisabled>
<!--NeedCopy-->
Smart card
To configure smart card support in Citrix Workspace app for Linux, you must configure the StoreFront server through the StoreFront console.
Citrix Workspace app supports smart card readers that are compatible with PCSC-Lite and PKCS#11 drivers appropriately. By default, Citrix Workspace app now locates opensc-pkcs11.so in one of the standard locations. To add customized PKCS#11 drivers, see Add customized PKCS#11 drivers.
Citrix Workspace app can find opensc-pkcs11.so in a non-standard location or another PKCS\#11 driver. You can store the respective location using the following procedure:
- Locate the configuration file:
$ICAROOT/config/AuthManConfig.xml. -
Locate the line <key>PKCS11module</key> and add the driver location to the <value> element immediately following the line.
Note:
If you enter a file name for the driver location, Citrix Workspace app navigates to that file in the
$ICAROOT/PKCS\ #11directory. You can also use an absolute path beginning with “/”.
After you remove a smart card, configure the behavior of Citrix Workspace app by updating the SmartCardRemovalAction using the following steps:
- Locate the configuration file:
$ICAROOT/config/AuthManConfig.xml - Locate the line <key>SmartCardRemovalAction</key> and add
noactionorforcelogoffto the <value> element immediately following the line.
The default behavior is noaction. No action is taken to clear stored credentials and generated tokens on removal of the smart card.
The forcelogoff action clears all credentials and tokens within StoreFront on removal of the smart card.
Limitation:
- Attempts to start a server VDA session using smart card authentication might fail for the smart card with multiple users. [HDX-44255]
Add customized PKCS#11 drivers
If your smartcard requires a custom PKCS#11 driver, do the following steps to add the driver path:
- Navigate to the
$ICAROOT/config/AuthManConfig.xmlconfiguration file. -
Locate the line
<key>PKCS11module</key>and add the driver location to the<value>element immediately following the line. For example:/usr/lib/pkcs11/libIDPrimePKCS11.so. - Locate the configuration file:
$ICAROOT/config/scardConfig.json. -
Locate
DefaultPKCS11Liband change the default value to the customized driver path without/usr. For example:/lib/pkcs11/libIDPrimePKCS11.so
Enabling smart card support
Citrix Workspace app supports various smart card readers if smart card is enabled on both server and Citrix Workspace app.
You can use smart cards for the following purposes:
- Smart card logon authentication - Authenticates you to Citrix Virtual Apps and Desktops™ or Citrix DaaS (formerly Citrix Virtual Apps and Desktops service) servers.
- Smart card application support - Enables smart card-aware published applications to access the local smart card devices.
Smart card data is security sensitive and must be transmitted over a secure authenticated channel, such as TLS.
Smart card support has the following prerequisites:
- Your smart card readers and published applications must be PC/SC industry standard compliant.
- Install the appropriate driver for your smart card.
- Install the PC/SC Lite package.
- Install and run the
pcscdDaemon, which provides middleware to access the smart card using PC/SC. - On a 64-bit system, both 64-bit and 32-bit versions of the “libpcsclite1” package must be present.
For more information about configuring smart card support on servers, see Smart cards in the Citrix Virtual Apps and Desktops documentation.
Enhancement on smart card support
Starting with Version 2112, Citrix Workspace app supports the Plug and Play functionality for the smart card reader.
When you insert a smart card, the smart card reader detects the smart card in the server and client.
You can plug-and-play different cards at the same time, and all of these cards are detected.
Prerequisites:
Install the libpcscd library on the Linux client.
Note:
This library might be installed by default in the recent versions of most Linux distributions. However, you might need to install the
libpcscdlibrary in earlier versions of some Linux distributions, such as Ubuntu 1604.
To disable this enhancement:
- Navigate to the
<ICAROOT>/config/module.inifolder. - Go to the
SmartCardsection. - Set the
DriverName=VDSCARD.DLL.
Support for new PIV cards
Starting with version 2303, Citrix Workspace app supports the following new Personal Identification Verification (PIV) cards:
- IDEMIA next-generation smartcard
- DELL TicTok Smartcard
Performance optimization for smartcard driver
Citrix Workspace app 2303 version includes performance related fixes and optimizations for the VDSCARDV2.DLL smartcard driver. These enhancements help to outperform version 1 VDSCARD.DLL.
Fast smart card
Fast smart card is an improvement over the existing HDX PC/SC‑based smart card redirection. It improves performance when smart cards are used in high‑latency WAN environments.
Fast smart cards are supported on Windows VDA only.
To enable fast smart card sign in on Citrix Workspace app:
Starting with the 2408 version, Fast smart card sign-in is enabled by default on the VDA and disabled by default on Citrix Workspace app. To enable the fast smart card feature, do the following:
- Navigate to the [SmartCard] section in the
/opt/Citrix/ICAClient/config/module.iniconfiguration file. -
Add the following entry:
SmartCardCryptographicRedirection=On
<!--NeedCopy-->
To disable fast smart card sign in on Citrix Workspace app:
To disable fast smart card sign-in on Citrix Workspace app, remove the SmartCardCryptographicRedirection parameter from the [SmartCard] section in the /opt/Citrix/ICAClient/config/module.ini configuration file.
Support for Cryptography Next Generation smartcards
Staring with 2408 version, Citrix Workspace app supports the new Personal Identification Verification (PIV) smartcard that uses Elliptic Curve Cryptography (ECC) algorithm. This type of smartcard works based on Cryptography Next Generation.
Support for multi-factor (nFactor) authentication
Multifactor authentication enhances the security of an application by requiring users to provide extra proofs of identification to gain access.
Multifactor authentication makes authentication steps and the associated credential collection forms configurable by the administrator.
Native Citrix Workspace app supports this protocol by building on the Forms sign in support already implemented for StoreFront. The web sign-in pages for Citrix Gateway and Traffic Manager virtual servers also consume this protocol.
Note:
Multi-factor (nFactor) authentication supports only form-based authentication.
For more information, see SAML authentication and Multi-Factor (nFactor) authentication in the Citrix ADC documentation.
Endpoint Analysis support for multi-factor (nFactor) authentication
Starting with this release, Citrix Workspace app supports Endpoint Analysis (EPA) for multi-factor authentication, enhancing compliance and security. For example, if EPA and LDAP are configured as part of multi-factor authentication, Citrix Workspace app detects and runs the EPA app for authentication along with the LDAP authentication.
Previously, Citrix Workspace app did not support invoking the EPA app, resulting in an “Access Denied” error. This release supports EPA invocation, allowing the authentication process to proceed smoothly.
The new feature ensures comprehensive endpoint security checks, compliance with organizational policies, and regulatory requirements. It reduces the risk of unauthorized access and improves overall network integrity.
Prerequisites:
Ensure that the Endpoint Analysis app is installed on your system.
Supported Operating Systems:
- IGEL OS: EPA is already available.
- Ubuntu 18, 20, and 22: EPA is not pre-installed; you need to download and install EPA before proceeding with authentication. Download EPA for Ubuntu from the Citrix downloads page.
This feature is enabled by default and is used in conjunction with multi-factor authentication. For more information, see the multi-factor (nFactor) authentication documentation.
Support for authentication using FIDO2 in HDX session
Starting with the 2303 version, you can authenticate within an HDX session using password-less FIDO2 security keys. FIDO2 security keys provide a seamless way for enterprise employees to authenticate to apps or desktops that support FIDO2 without entering a user name or password. For more information about FIDO2, see FIDO2 Authentication.
Note:
If you’re using the FIDO2 device through USB redirection, remove the USB redirection rule of your FIDO2 device. You can access this rule from the
usb.conffile in the$ICAROOT/folder. This update helps you to switch to the FIDO2 virtual channel.
By default, FIDO2 authentication is disabled. To enable FIDO2 authentication, do the following:
- Navigate to the
<ICAROOT>/config/module.inifile. - Go to the
ICA 3.0section. - Set
FIDO2= On.
This feature currently supports roaming authenticators (USB only) with PIN code and touch capabilities. You can configure FIDO2 Security Keys based authentication. For information about the prerequisites and using this feature, see Local authorization and virtual authentication using FIDO2.
When you access an app or a website that supports FIDO2, a prompt appears, requesting access to the security key. If you’ve previously registered your security key with a PIN, you must enter the PIN while signing in. The PIN can be a minimum of 4 and a maximum of 64 characters.
If you’ve registered your security key previously without a PIN, simply touch the security key to sign in.
Limitation:
You might fail to register the second device to a same account using FIDO2 authentication.
Support for multiple passkeys in HDX session
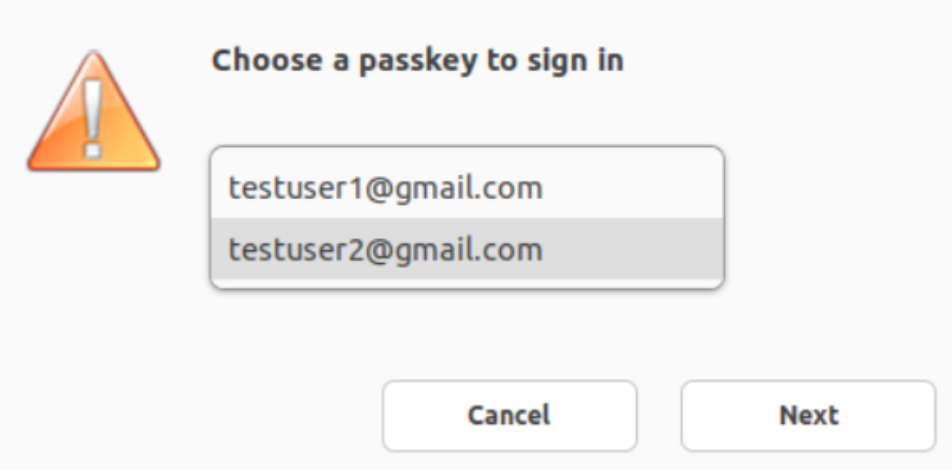
Previously, when there were multiple passkeys associated with a security key or FIDO2 device, you were not having an option to select an appropriate passkey. By default, the first passkey was used for authentication.
Starting with the 2405 version, you can select an appropriate passkey from the Citrix Workspace app UI. This feature is enabled by default. When there are multiple passkeys, the first one is selected as default. However, you can select the appropriate passkey as follows:
Support for authentication using FIDO2 when connecting to on-premises stores
Starting with Citrix Workspace app for Linux version 2309, users can authenticate using passwordless FIDO2 security keys when signing in to on-premises stores. The security keys support different types of security inputs such as security pins, biometrics, card swipe, smart card, Public Key Certificates, and so on. For more information about FIDO2, see FIDO2 Authentication.
Administrators can configure the type of browser to authenticate to Citrix Workspace app. To enable the feature, navigate to $ICAROOT/config/AuthManConfig.xml and add the following entries:
    <key>FIDO2Enabled</key>
    <value>true</value>
<!--NeedCopy-->
To modify the default browser, navigate to $ICAROOT/config/AuthManConfig.xml and modify the browser settings as required. The possible values are chromium, firefox, and chromium-browser.
    <FIDO2AuthBrowser>firefox</FIDO2AuthBrowser>
<!--NeedCopy-->
Support for authentication using FIDO2 when connecting to cloud stores
Starting with Citrix Workspace app for Linux version 2405, users can authenticate using passwordless FIDO2 security keys when signing in to cloud stores. The security keys support different types of security inputs such as security pins, biometrics, card swipe, smart card, Public Key Certificates, and so on. For more information, see FIDO2 Authentication.
Administrators can configure the type of browser to authenticate to Citrix Workspace app.
To enable the feature, navigate to $ICAROOT/config/AuthManConfig.xml and add the following entries:
    <key>FIDO2Enabled</key>
    <value>true</value>
<!--NeedCopy-->
To modify the default browser, navigate to $ICAROOT/config/AuthManConfig.xml and modify the browser settings as required. The possible values are chromium, firefox, and chromium-browser.
    <FIDO2AuthBrowser>firefox</FIDO2AuthBrowser>
<!--NeedCopy-->
Using GACS configure FIDO2 authentication
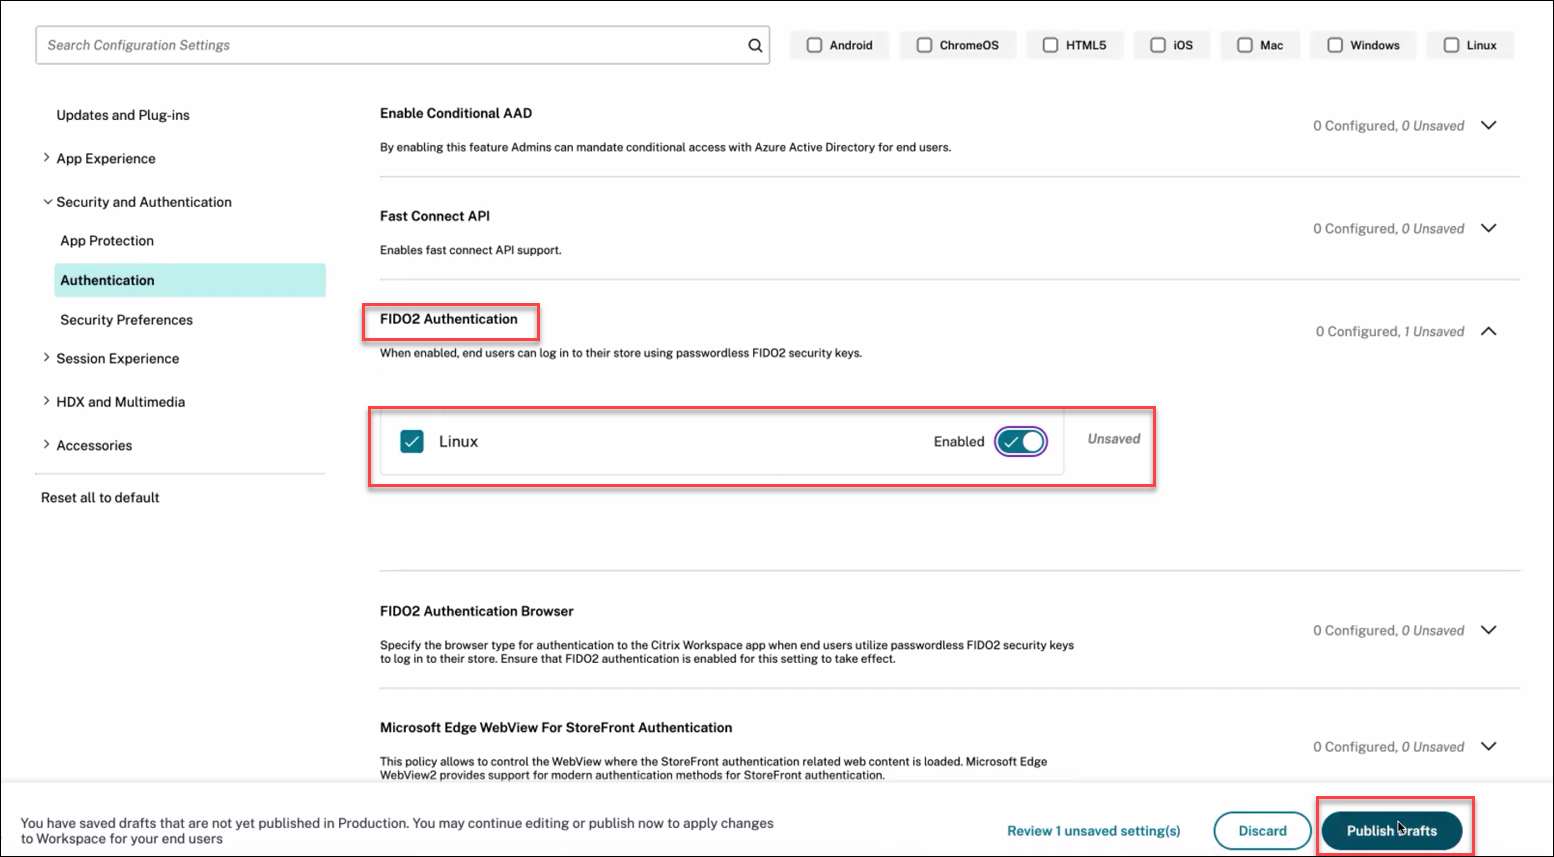
To enable the FIDO2 authentication for the store URL using GACS, perform the following steps:
-
Sign into Citrix Cloud™.
-
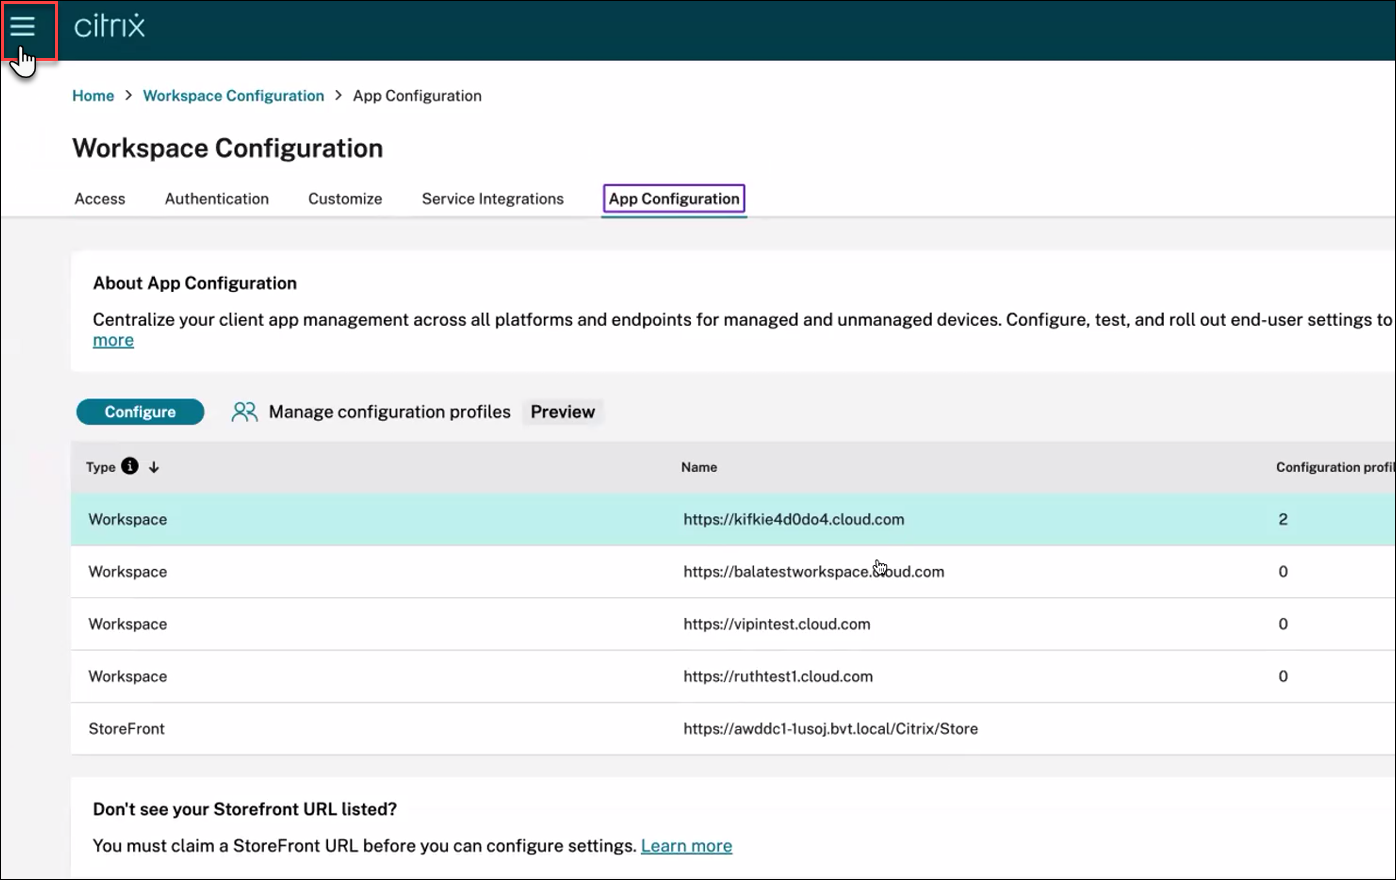
On the upper-left corner, click the hamburger icon, click Workspace Configuration, and then click App Configuration.
-
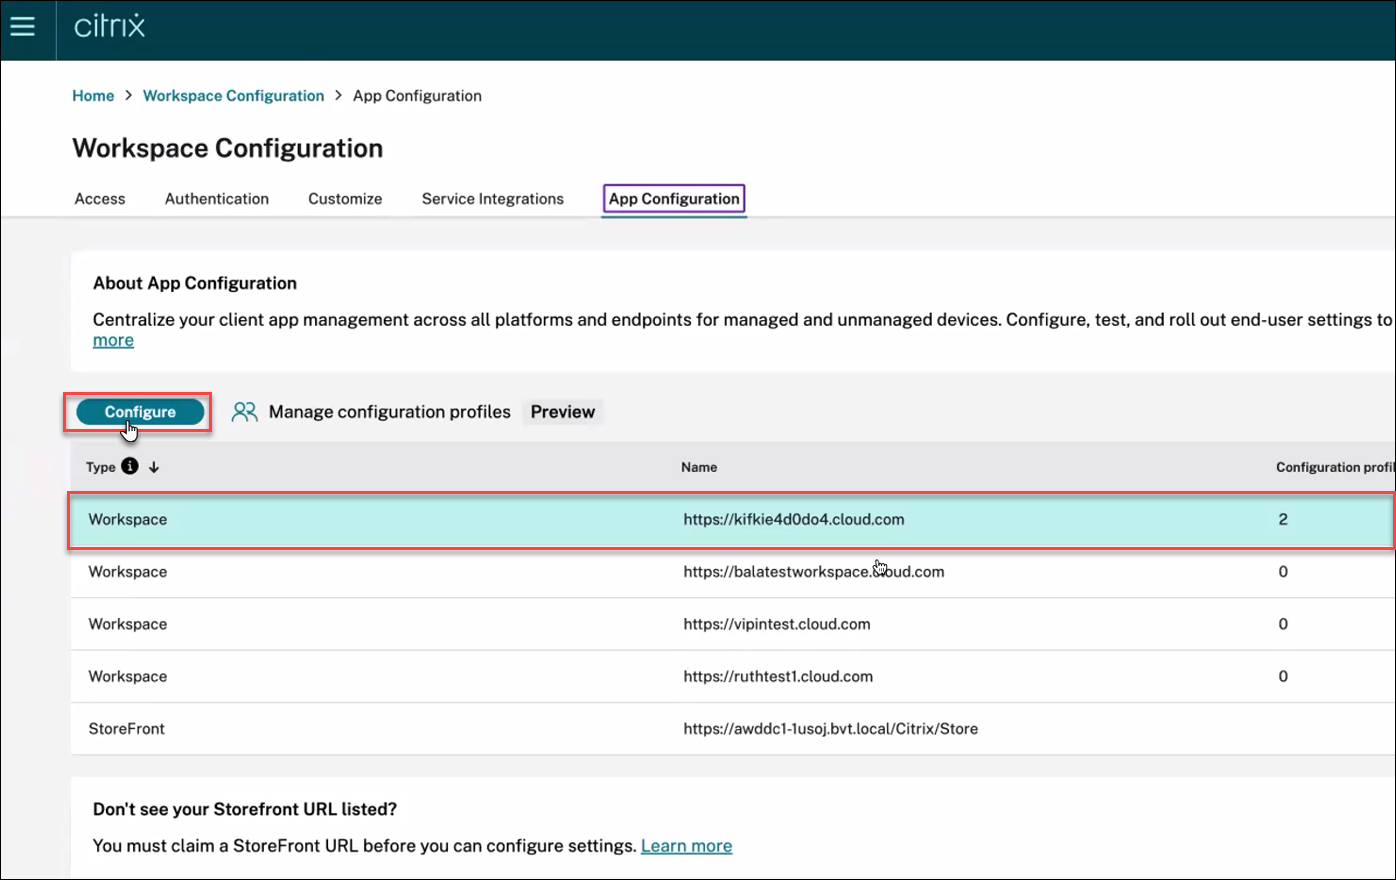
Click Workspace, and then click the Configure button.
-
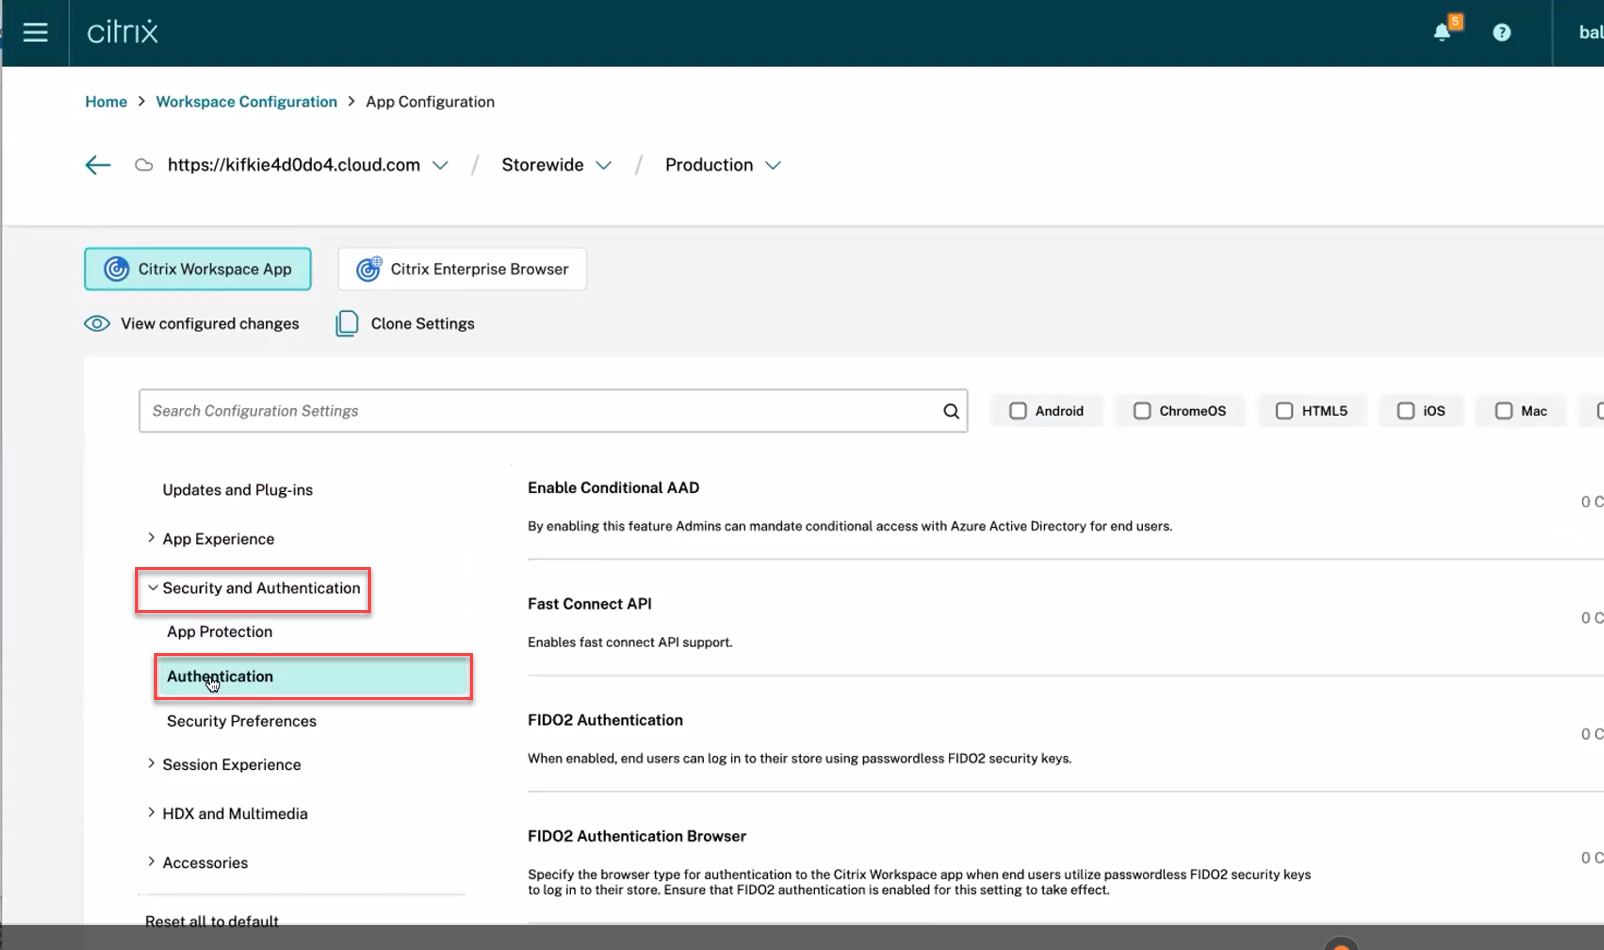
Click Security and Authentication, and then click Authentication.
-
Click FIDO2 Authentication, select the Linux checkbox, and then switch the Enabled toggle.
-
Click Publish Draft.
Customized authentication
The following table provides a reference to the available customized authentication for Citrix Workspace app:
| Utility | SDK | Authentication type | Libraries used | Binaries | Authentication type detection |
|---|---|---|---|---|---|
| Fast Connect | Credential insertion SDK | Username/password/smartcard/Domain passthrough | libCredInject.so | cis |
Parameters-Used by third party authenticator integrations |
| Custom Dialog | Platform Optimization SDK | Username/password/smartcard | UIDialogLib.so and UIDialogLibWebKit3.so | No | Auto detection - Used by thin clients partners |
Storebrowse |
Citrix Workspace app | Username/password | No | Storebrowse |
Parameters |
NFC support for FIDO2 Authentication
Starting with the 2411 version, you can use the FIDO2‑supported NFC card for a Tap-and-Go experience, which is an end-to-end single sign-on (SSO) solution. This means that you can use an NFC card to authenticate to a Citrix® store and then a pre-configured virtual desktop or virtual app will automatically open using SSO.
For more information on configuring this feature, see the following sections:
Prerequisites
Hardware requirements:
- NFC-supported FIDO2 keys. For example, Yubikey5.
- NFC-supported FIDO2 readers that are compatible with Linux clients. For example, ACR1252U-M.
Software requirements:
The following software packages are required for this feature:
- swig
- libpcsclite-devel and pcsc-lite for CentOS or RHEL
- libpcsclite-dev and pcscd for Ubuntu
- python3 and python3-pip
- Python packages:
pyscard,uhid, andfido2 - Chromium browser (if Citrix Enterprise Browser is not preferred). The preferred installer for the Chromium browser is the Debian package, which can be downloaded from the Chromium downloads page. It is not recommended to install Chromium as a snap.
Note:
- Administrators can install the above packages by running the
setupFIDO2Service.shscript that is located at<ICAROOT>/util/Fido2HIDBridgeas a sudo user. ThissetupFIDO2Service.shscript is an example for Ubuntu and RHEL OS. Admins can modify this script as required for their OS configuration.- This feature is not supported on the Ubuntu x86-64, RHEL x86-64, and ARM64 architectures.
How to enable this feature
-
Ensure that the
fido2-hid-bridge.serviceis running, as it’s usually installed with the Citrix Workspace app. If it isn’t running, you can start it manually.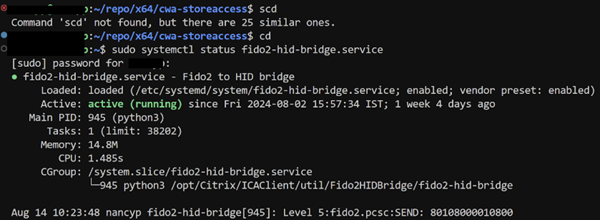
-
Navigate to
$ICAROOT/config/AuthManConfig.xmland add the following entries:<key>FIDO2Enabled</key><value>true</value>Disable Long Lived Token as well:
<longLivedTokenSupport>false</longLivedTokenSupport> -
If required, modify the default browser by navigating to
$ICAROOT/config/AuthManConfig.xmland updating the browser settings as required. The possible values areCEBandchromium. The default value isCEB.<FIDO2AuthBrowser>CEB</FIDO2AuthBrowser> -
To display the App Authenticator in full screen, add the following entry:
<Fido2FullScreenMode>true</Fido2FullScreenMode>By default, the App Authenticator is displayed in the window mode.
How to use this feature
-
Add
StoreURLandResourceNamein$ICAROOT/config/AuthManConfig.xml:<StoreURL>test.cloud.com</StoreURL><ResourceName>Notepad</ResourceName> -
Navigate to
$ICAROOT/utiland runnfcui.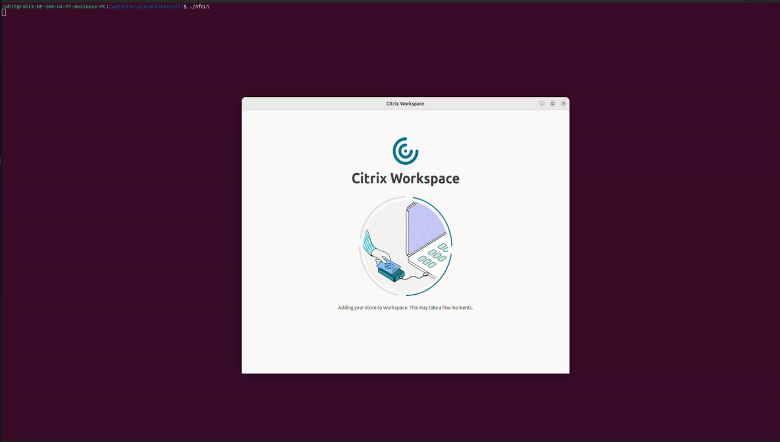
-
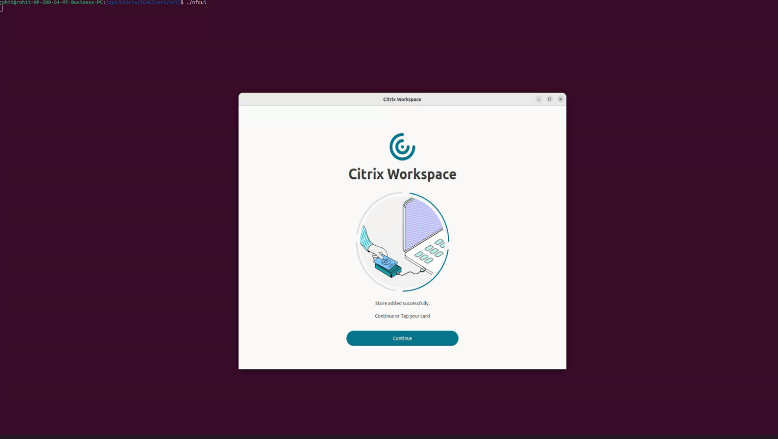
Once the store is added, either tap or click Continue for authentication.
-
On the authentication page, enter the user credentials and click Face, Fingerprint, PIN, or Security key as the sign-in option.
-
Tap the NFC-supported FIDO2 key on the reader.
-
Enter the PIN for your security key, and click Next.
-
After successful authentication, click Yes on the Stay signed in? window.
-
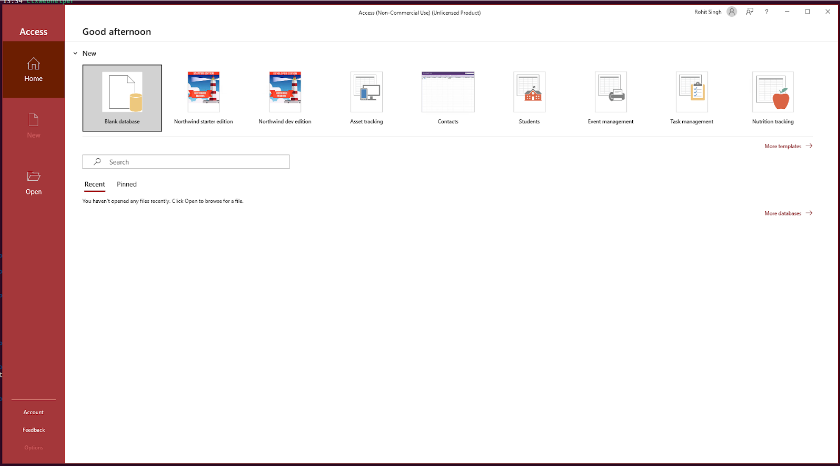
Once authentication is completed, the configured VDA or the app is launched.
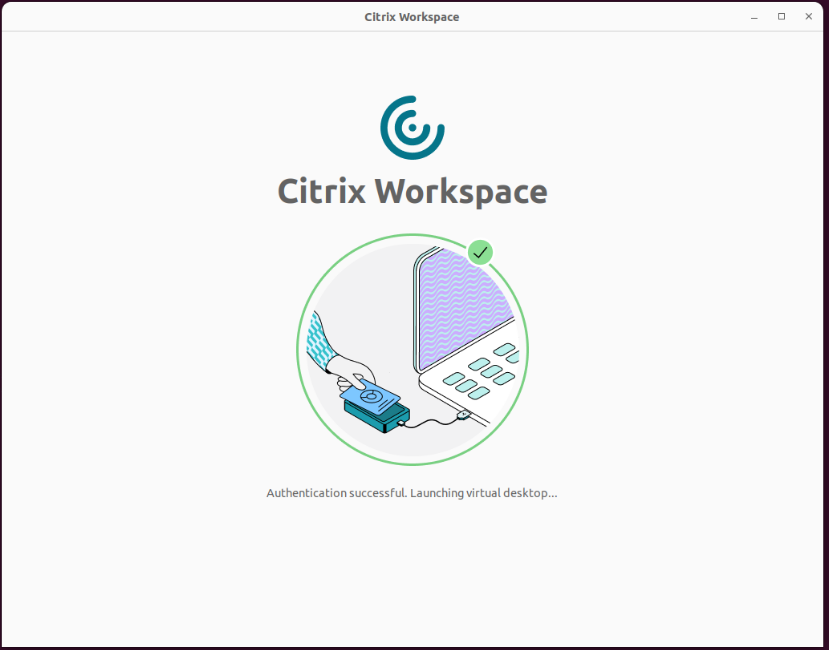
The application is successfully launched.
Mandate end users to authenticate and access apps and desktops through native app
Starting with version 2508, admins can require Linux users to access Citrix Workspace exclusively through the native app. When enabled, users who try to access the store URL or use third-party browsers are automatically redirected to the Citrix Workspace app. This ensures users benefit from all native app features and enjoy a seamless experience.
If users attempt to connect using a browser and launch the HDX™ engine, they are prompted to add the store to the native client for future use. This feature gives admins greater control, enhances security by keeping authentication within the native app. Also, removes the need to download ICA files.
Admins can enable this feature in Citrix Cloud. Currently, it is supported only for Cloud stores.
For more information, see Mandate end users to authenticate and access apps and desktops through native app.
Entra ID SSO support for cloud
Starting with version 2508.10, Citrix Workspace app for Linux supports Microsoft Entra ID single sign-on (SSO) on endpoint devices running Ubuntu 22.04 and Ubuntu 24.04. Use Microsoft Entra ID credentials to sign in to Citrix cloud stores and access Citrix Virtual Apps and Desktops with SSO, without repeated credential prompts.
Single sign-on with Microsoft Entra ID
Use SSO with Microsoft Entra ID credentials to access virtual apps and desktops on Entra joined or Entra hybrid joined session hosts.
Prerequisites
Install the following packages on the endpoint device:
-
gnome-keyring(version 3.18.3 or later)For Ubuntu and Ubuntu-based distributions, run the following command:
sudo apt-get install gnome-keyring <!--NeedCopy--> -
libsecretFor Ubuntu and Ubuntu-based distributions, run the following command:
sudo apt-get install libsecret-1-0
<!--NeedCopy-->
Note:
When Citrix Long Lived Token (LLT) is enabled, Microsoft Entra ID SSO cookies must persist to maintain seamless authentication. To enable cookie persistence, configure the following setting in
AuthManConfig.xmllocated at/opt/Citrix/ICAClient:<key>SharedAuthContextEnabled</key> <value>true</value> <!--NeedCopy-->
Entra ID SSO using the system browser
To enable Entra ID SSO with the system browser, set the following keys in AuthManConfig.xml located at /opt/Citrix/ICAClient:
<key>AADSSOWithFido2AuthenticationEnabled</key>
<value>true</value>

<key>FIDO2Enabled</key>
<value>true</value>

<!-- FIDO2AuthBrowser options: CEB, chromium, firefox, chromium-browser -->
<FIDO2AuthBrowser>chromium</FIDO2AuthBrowser>
<!--NeedCopy-->
Note:
Entra ID SSO is supported with Firefox and Chromium.
Entra ID SSO using Storebrowse
To enable Entra ID SSO with Storebrowse:
-
Navigate to the utility directory:
cd /opt/Citrix/ICAClient/util <!--NeedCopy--> -
Add the store:
./storebrowse -a <store_URL> <!--NeedCopy--> -
Enumerate and authenticate the store:
./storebrowse -E <full_store_URL> <!--NeedCopy--> -
Launch the resource:
./storebrowse -L <resourceID> <full_store_URL>
<!--NeedCopy-->
In this article
- Authentication enhancement for Storebrowse
- Support for more than 200 groups in Azure AD
- Smart card
- Support for multi-factor (nFactor) authentication
- Support for authentication using FIDO2 in HDX session
- Customized authentication
- NFC support for FIDO2 Authentication
- Mandate end users to authenticate and access apps and desktops through native app
- Entra ID SSO support for cloud