Install on Citrix Connector Appliance
- No Docker management — the Log Server container is built into the appliance
- Automatic updates — Log Server version tracks Connector Appliance upgrades
- Recommended for most environments
Warning:
Mutual TLS (mTLS) is not supported on the Connector Appliance. If your security requirements mandate mTLS, use the Linux or Windows installation instead. Note:
Cloud Monitor retrieves AOT logs through the Monitor Connector service on a supported Windows Cloud Connector in the same Resource Location. A Windows Cloud Connector running version 6.141.0.13739 or later must also be present.
Prerequisites
- Connector Appliance version 11.4.1.444 or later
- Appliance registered with Citrix Cloud™
- At least 4 vCPUs and 16 GB RAM (default is 2 vCPUs / 4 GB — you must increase this)
- A valid TLS certificate signed by your organization (the appliance self-signed cert must be replaced). Certificate and private key should be in .PEM format.
- An additional virtual disk sized for your log storage needs
- A DNS A record pointing the Connector Appliance’s FQDN to its IP address
- Joining the Connector Appliance to the domain is not mandatory — it can operate without domain membership
- Cloud Monitor retrieves AOT logs through the Monitor Connector service running on a supported Windows Cloud Connector in the Resource Location
- If the Log Server is deployed on the Citrix Connector Appliance, a supported Windows Cloud Connector must also be present in the same Resource Location — the Connector Appliance alone is not sufficient for Cloud Monitor to retrieve AOT traces
- The Cloud Connector must be running version 6.141.0.13739 (or 4.420.0.13739) or later — earlier versions will cause the GetAotTraces API call to fail, resulting in an HTTP 500 error in Monitor
- The Connector Appliance provides a self-signed certificate to browsers connecting to its administration page — to connect to the Log Server via HTTPS, you must replace this with a certificate signed by your organization or generated by using your organization’s chain of trust. For more details refer to Replace Server Certificate
Step 1 — Deploy or Upgrade the Connector Appliance
If you do not have a Connector Appliance, download the appliance image from Citrix Cloud, import it into your hypervisor, and register it with Citrix Cloud. If you already have one, upgrade it to version 11.4.1.444 or later. The Log Server is onboarded automatically during the upgrade.
Step 2 — Increase Appliance Resources
- Shut down the appliance VM.
- In your hypervisor/hyperscaler, increase resources to at least 4 vCPUs and 16 GB RAM.
- Power the appliance back on.
- Install all pending updates before proceeding to the next section.
Step 3 — Replace the TLS Certificate
The Connector Appliance ships with a self-signed certificate. Replace it with a certificate signed by your organization’s CA using the Citrix documentation for Replace Server Certificate on the Connector Appliance.
Step 4 — Access the Log Server UI
- Open a browser and navigate to:
   https://<connector-appliance-FQDN>/?enable=logserver
   <!--NeedCopy-->
The ?enable=logserver query parameter is required to show the Log Server tab.
- Sign in to the Connector Appliance admin UI.
- Select the Log Server tab. You will see two sections: Log server and Authentication keys.
Step 5 — Add Storage
The appliance boot disk is only 20 GB — not sufficient for log storage. You must attach an additional virtual disk dedicated for log storage.
- In your hypervisor/hyperscaler, add a new virtual disk to the Connector Appliance VM.
Warning:
VMware ESXi requirement: Attach the additional data disk to a different SCSI controller than the one used by the root disk.
- Return to the Log Server tab in the Connector Appliance UI.
- Click + Add storage location. The new disk appears in the list.
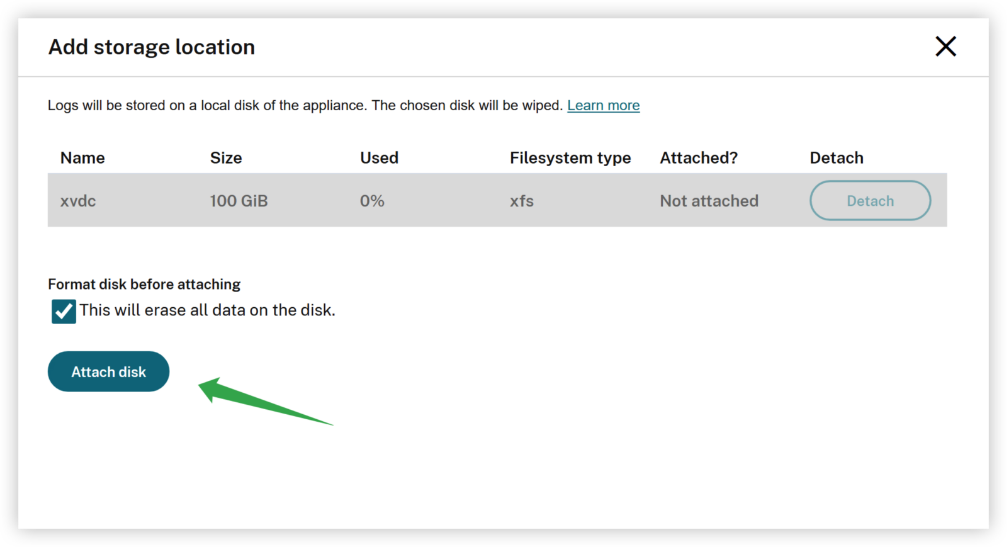
- Check Format disk before attaching (ensures it is a new, empty disk).
- Click Attach disk.
- Wait for the confirmation: Storage location successfully attached.
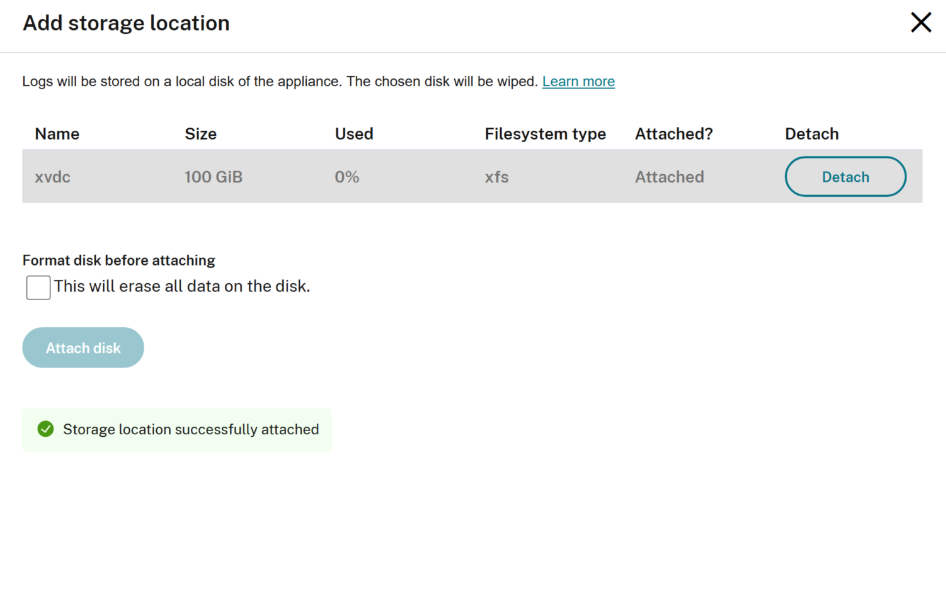
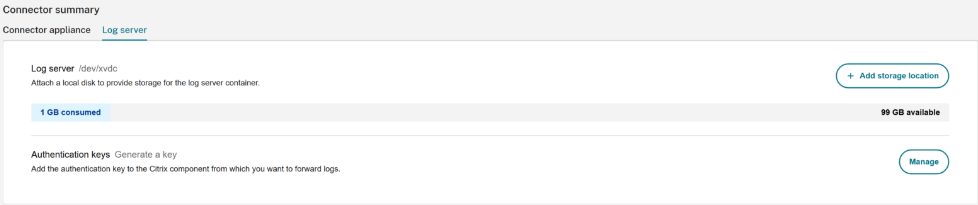

The Log Server main page displays disk size, space used, and space remaining after storage is attached.
Step 6 — Verify the Log Server is Running
https://<connector-appliance-FQDN>/ctxlogserver/Ping
<!--NeedCopy-->
A Pong response confirms the Log Server started successfully.
Step 7 — Generate an Authentication Key
- On the Log Server tab, click Manage in the Authentication keys section.
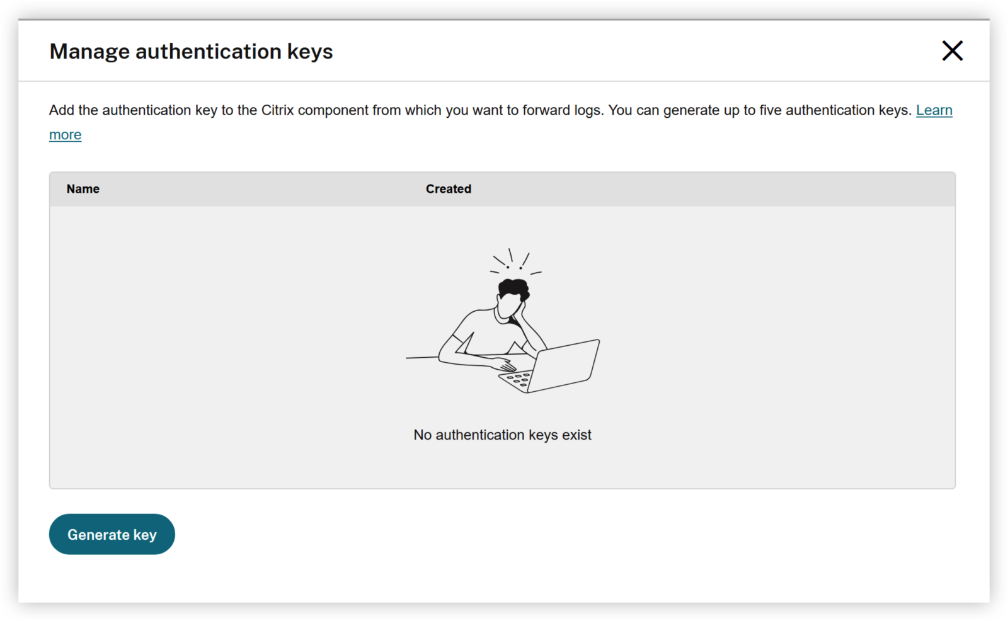
- Click Generate key.
- Enter a name for the key (for example:
admin). - Copy or download the generated key.
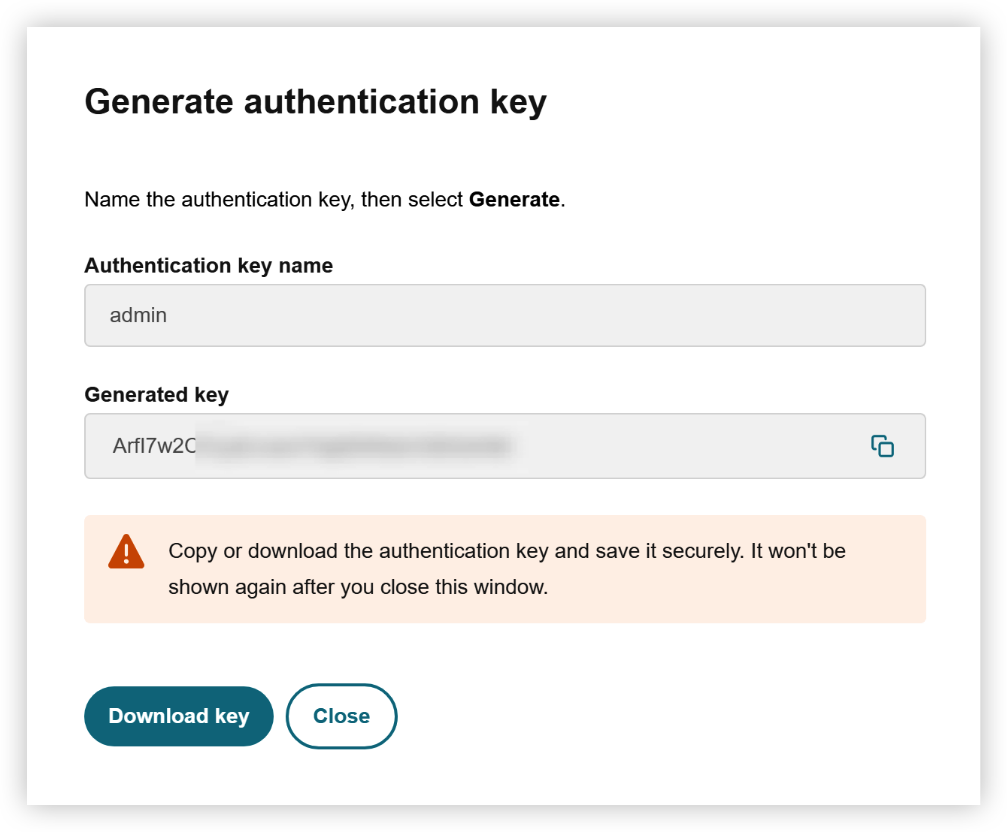
Warning:
The key is shown only once. Copy or download it before closing the window. If you lose it, you must generate a new one.
Store the key securely — you will need it when configuring Web Studio in Configure Components.
Managing Advanced Settings via API
The Connector Appliance does not expose Log Server advanced settings through the UI. Use the local API instead. Settings can be configured via Postman, Curl, or PowerShell.
1. Authentication: Generating a JWT
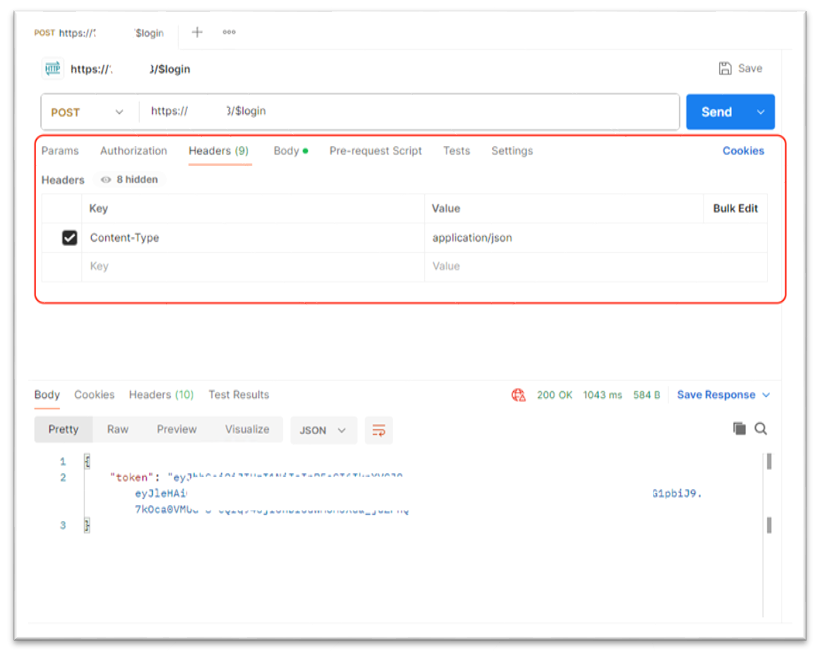
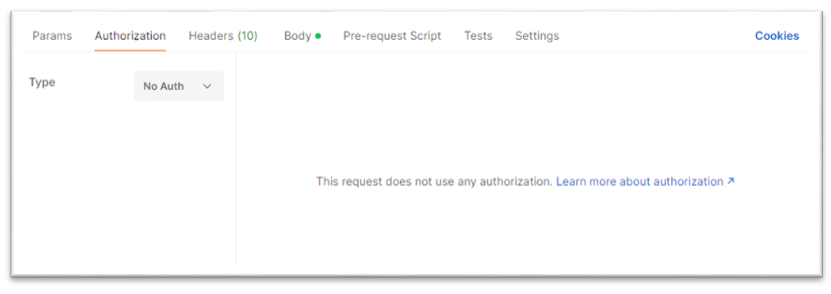
All API calls must be authenticated using a JSON Web Token (JWT). You must first generate a token which is then included in the header of subsequent requests.
Step 1.1 — Generate a Token
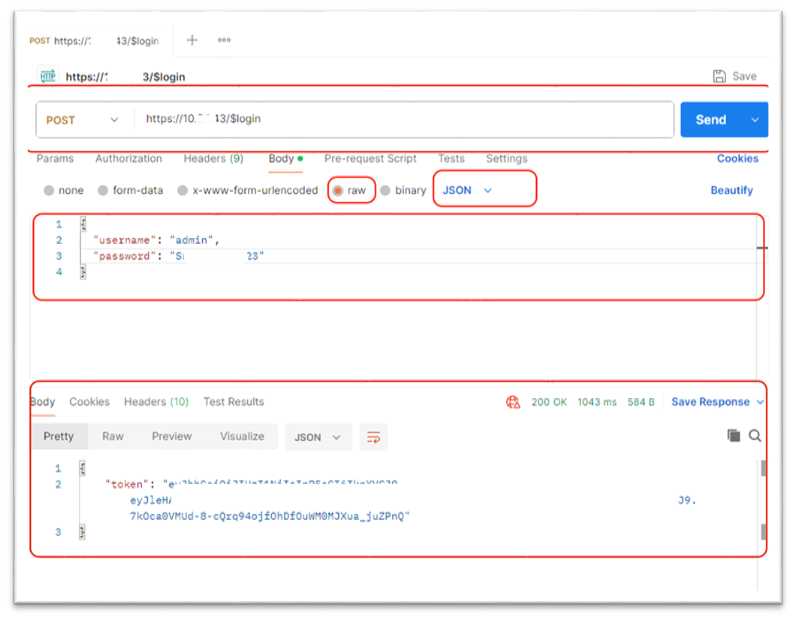
To generate a token, submit a POST request to the login endpoint:
- Endpoint:
POST https://<appliance-IP>/$login - Body: You’ll need to include the necessary JSON payload for authentication (e.g., username and password).
- On success, the API returns a token value
Step 1.2 — Authorize API Calls
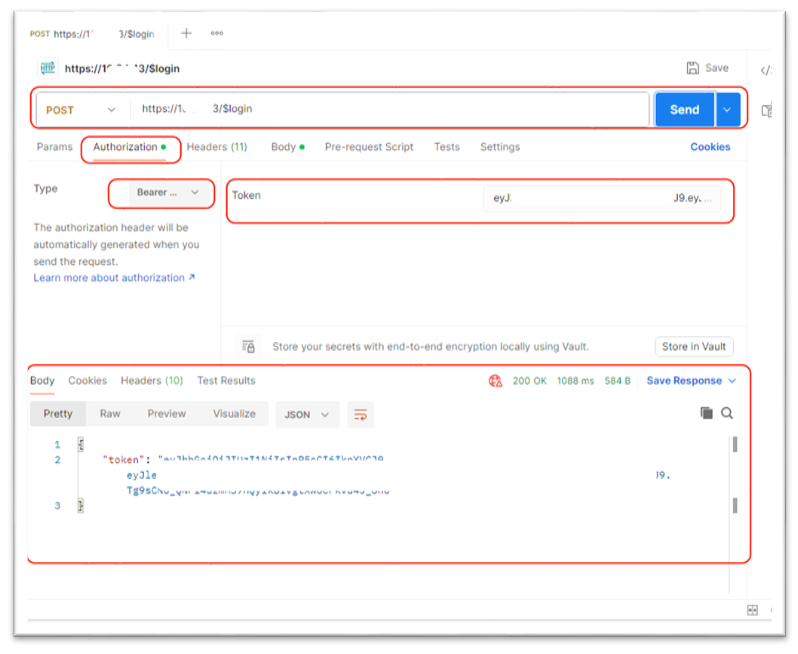
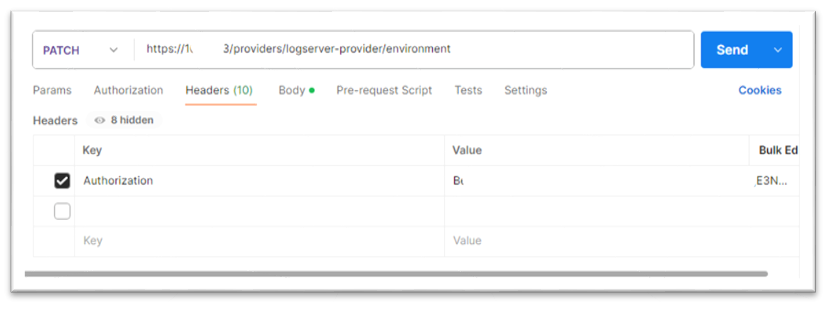
The token must be included in the Authorization header, prefixed with “Bearer”:
Authorization: Bearer abCD.efGH.ijKL
<!--NeedCopy-->
A valid token will allow the API call to proceed. An invalid or expired token will be rejected with an error message.
Set Maximum Retention Days
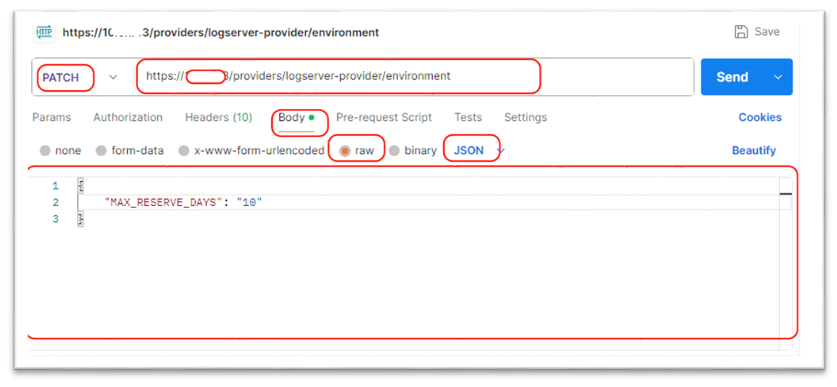
This action configures the MAX_RESERVE_DAYS for the logserver.
- Endpoint:
https://<appliance-IP>/providers/logserver-provider/environment - Method:
PATCH - Request Body:
{ "MAX_RESERVE_DAYS": "7" }
Fields
-
MAX_RESERVE_DAYS(string, required): Default value is 7 days. Log Server stores log entries max days based on the TimeStamp field. Logs that were inserted 7 days ago will be deleted. Check every 10 minutes.
Response
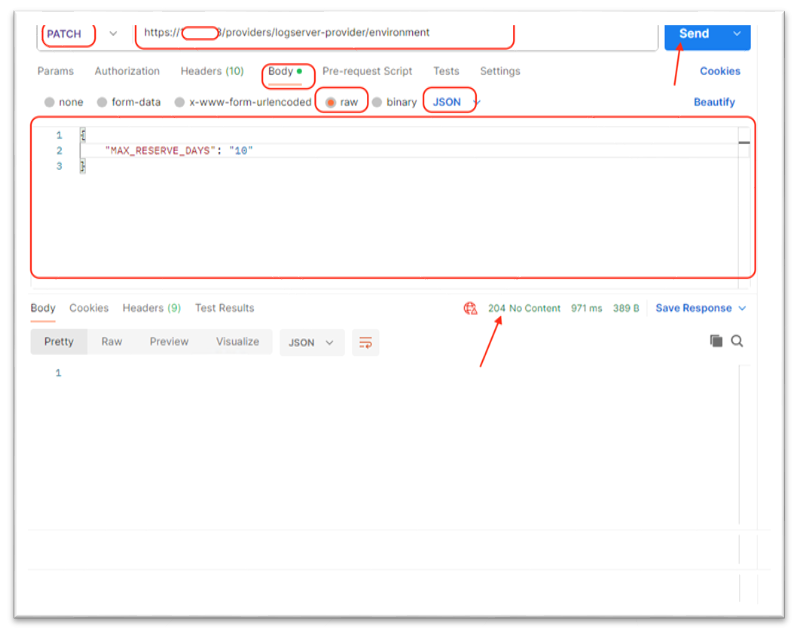
A 204 No Content response confirms the setting was applied.
Set Maximum Disk Usage Percentage
Using the same endpoint and method, adjust MAX_DISK_USAGE_PERCENTAGE from its default of 85. When disk usage hits the threshold, older logs are purged to make room for new ones.
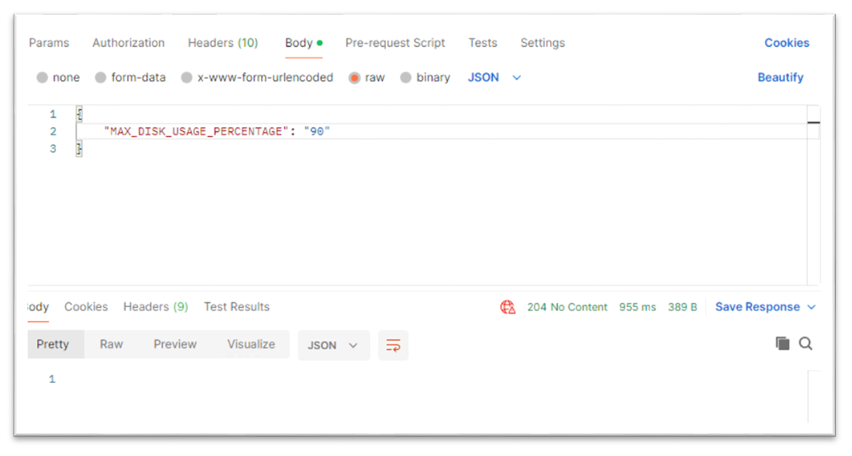
A 204 No Content response confirms the setting was applied.
Upgrade and Maintenance
Log Server updates on the Connector Appliance are fully automatic — delivered as part of Connector Appliance upgrades. No manual steps are required.
In this article
- Prerequisites
- Step 1 — Deploy or Upgrade the Connector Appliance
- Step 2 — Increase Appliance Resources
- Step 3 — Replace the TLS Certificate
- Step 4 — Access the Log Server UI
- Step 5 — Add Storage
- Step 6 — Verify the Log Server is Running
- Step 7 — Generate an Authentication Key
- Managing Advanced Settings via API
- Upgrade and Maintenance