This content has been machine translated dynamically.
Dieser Inhalt ist eine maschinelle Übersetzung, die dynamisch erstellt wurde. (Haftungsausschluss)
Cet article a été traduit automatiquement de manière dynamique. (Clause de non responsabilité)
Este artículo lo ha traducido una máquina de forma dinámica. (Aviso legal)
此内容已经过机器动态翻译。 放弃
このコンテンツは動的に機械翻訳されています。免責事項
이 콘텐츠는 동적으로 기계 번역되었습니다. 책임 부인
Este texto foi traduzido automaticamente. (Aviso legal)
Questo contenuto è stato tradotto dinamicamente con traduzione automatica.(Esclusione di responsabilità))
This article has been machine translated.
Dieser Artikel wurde maschinell übersetzt. (Haftungsausschluss)
Ce article a été traduit automatiquement. (Clause de non responsabilité)
Este artículo ha sido traducido automáticamente. (Aviso legal)
この記事は機械翻訳されています.免責事項
이 기사는 기계 번역되었습니다.책임 부인
Este artigo foi traduzido automaticamente.(Aviso legal)
这篇文章已经过机器翻译.放弃
Questo articolo è stato tradotto automaticamente.(Esclusione di responsabilità))
Translation failed!
Theming guide for eLux 7
The look and feel of eLux 7 can be modified to realize corporate identity requirements to some extent.
This guide shows,
- How to create themes for eLux 7,
- Where to place the required files and configurations,
- How to activate a theme
Components of a theme
A theme consists of a couple of predefined components. The configuration and the naming of the files follow predefined conventions.
Creating a custom theme
To create a custom theme, follow the following steps:
Create the theme configuration file
Each theme requires a configuration file for the theme, called config.json.
{
  "name": "my-theme",
  "accentColor": "#CD5767",
  "desktopBackgroundImage": {"type": "jpg", "scaling": "crop"},
  "productImage": {"type": "png", "scaling": "contain"},
  "brandImage": {"type": "png", "scaling": "contain"},
  "welcomeBackgroundImage": {"type": "png", "scaling": "crop"},
  "welcomeBackgroundLayout": "leftImage"
}
<!--NeedCopy-->
Note:
The name of the theme and the accent color need to be defined by the theme requirements. The config file must be named
config.jsonby convention.
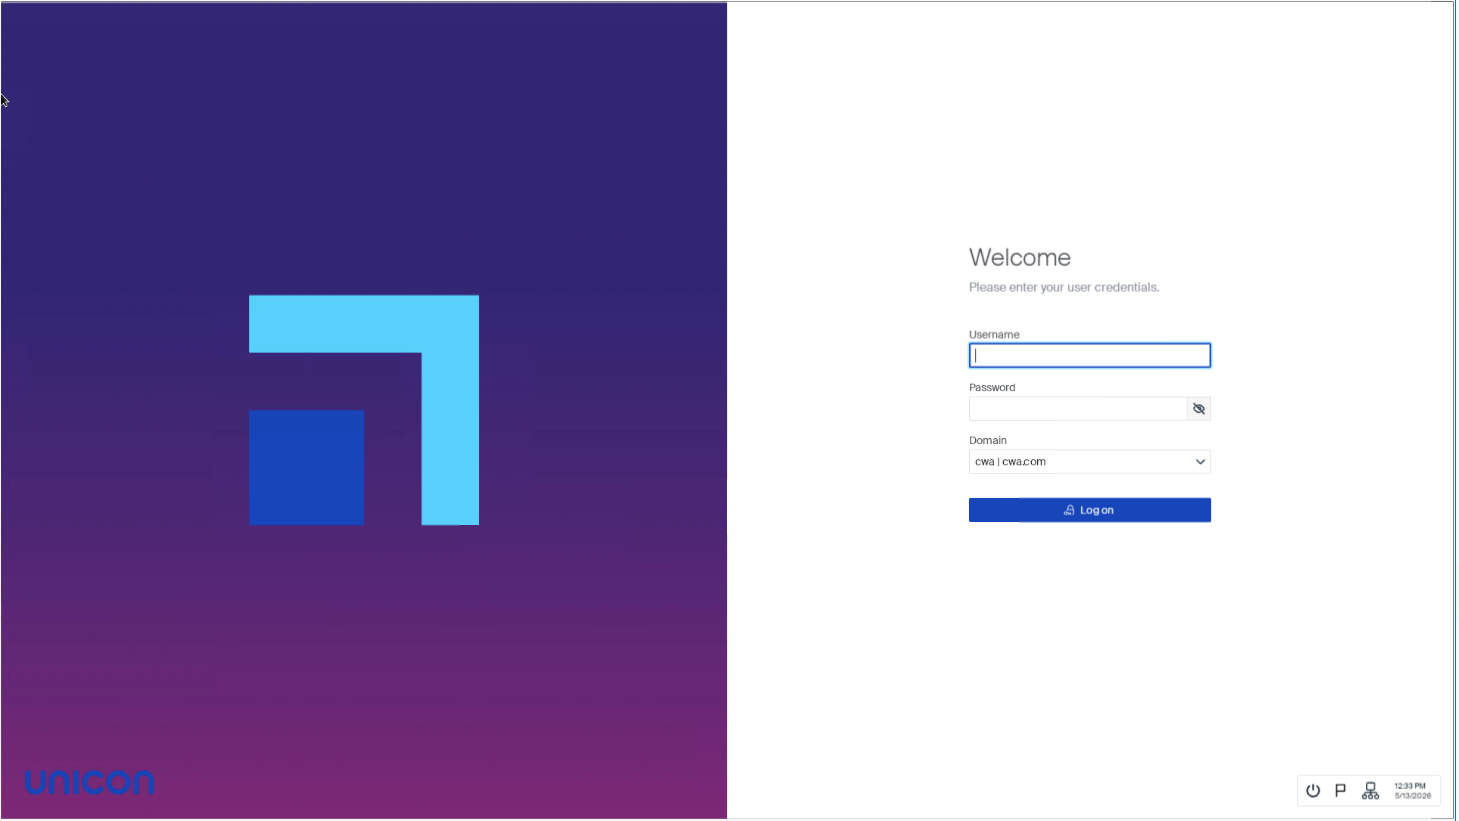
The welcomeBackgroundLayout field controls how the welcome background image is displayed on the login screen, lock screen, and welcome screen. The following modes are available:
-
"none"(default) — Standard layout. No background image on the login screen. -
"leftImage"— The welcome background image covers the left half of the screen. The login form remains on the right side.
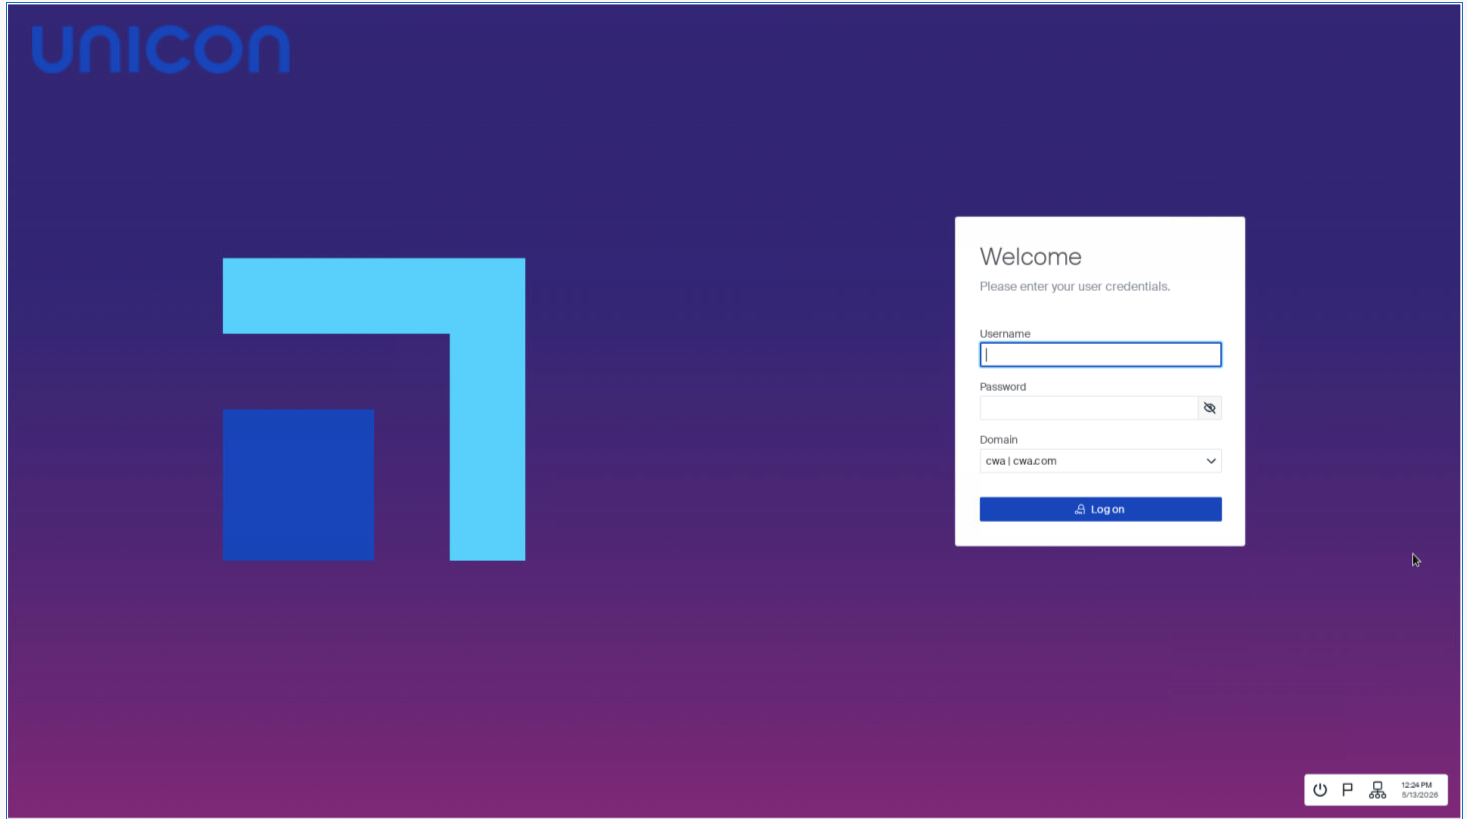
-
"fullImage"— The welcome background image covers the entire screen. The login form appears in a floating card on the right half.
Prepare the theme files
Prepare the image files for the desktop background, product image, brand image, and optionally the welcome background image, according to the requirements.
Note:
The file names for the images must be named
desktopBackgroundImage.jpg,productImage.png,brandImage.png, andwelcomeBackgroundImage.pngby convention.
Transfer the theme files to eLux 7
Transfer all the theme related files to eLux 7 in Scout Board, using the advanced file entries. The theme files will all go into this theme folder.
| Source file | Destination |
|---|---|
config.json |
/setup/elux/themes/my-theme/config.json |
desktopBackgroundImage.jpg |
/setup/elux/themes/my-theme/desktopBackgroundImage.jpg |
productImage.png |
/setup/elux/themes/my-theme/productImage.png |
brandImage.png |
/setup/elux/themes/my-theme/brandImage.png |
welcomeBackgroundImage.png |
/setup/elux/themes/my-theme/welcomeBackgroundImage.png |
Note:
After applying the configuration, reboot the endpoint, so that all the configuration and theme files are being transferred. The
welcomeBackgroundImagefile is only required ifwelcomeBackgroundLayoutis set to"leftImage"or"fullImage".The eLux default theme with all its files is located at
/setup/elux/themes/unicon_defaultin case a template is needed. Also, when a device factory reset is performed, eLux will reverte to the default theme.
Set the theme
Once you have transferred all the required files to eLux 7, the theme needs to be activated.
The theme can be set via the terminal.ini configuration file. To do so, use the Scout feature Advanced file entries:
| Field | Value |
|---|---|
| File | /setup/terminal.ini |
| Section | Layout |
| Entry | CurrentTheme |
| Value | my-theme |
After applying the configuration, reboot the endpoint for the theme to take effect.
Share
Share
In this article
This Preview product documentation is Citrix Confidential.
You agree to hold this documentation confidential pursuant to the terms of your Citrix Beta/Tech Preview Agreement.
The development, release and timing of any features or functionality described in the Preview documentation remains at our sole discretion and are subject to change without notice or consultation.
The documentation is for informational purposes only and is not a commitment, promise or legal obligation to deliver any material, code or functionality and should not be relied upon in making Citrix product purchase decisions.
If you do not agree, select I DO NOT AGREE to exit.