Upgrading to later versions
Note:
We recommend that you make a backup before you upgrade.
Via installation file
(for Debian and .ova installations)
Note:
ACG supports an in-palce update of the SCG components, if the update only involves the SCG components.
With the SCG Version 1 2605, the underlying system has been updated; including OS (Ubuntu version 24.04, MongoDB 8, and all other system components). This is a big system-wide change. As an in-place update of system components is not possible, a migration is needed by creating new VM instances and migrating the data. To achieve this, SCG version 1 2605 provides scripts and UI based elements to export and import the data. If you are updating to SCG version 1 2605, please continue with the Migration Guide below.
In-place update, for updated SCG components
-
From our Citrix Downloads portal, download the current SCG Debian package
scg_< version>_amd64.deb. -
Copy the file to your SCG instance and connect to it via SSH.
-
Enter the following command:
dpkg -i scg_< Version>_amd64.deb
<!--NeedCopy-->
Note:
During installation, the package manager checks for configuration changes. This is the case for the NGINX web server configuration. Apply the maintainer version and add any custom changes manually.
-
Only Debian: Check the web server configuration and restart the web server. For further information, see Installing the Debian package and configuring the web server.
-
If you have multiple instances, update all instances one by one using the above procedure.
-
Connect to an instance via WebAdmin interface and check whether the gateway configuration has been correctly applied.
-
Also, reset the browser cache to update outdated data. For example, use the key combination CTRL+F5 (Firefox).
Migration guide to SCG version 1 2605 from SCG version 1 2409
This guide describes the update process from a SCG version 1.2409 to 1.2605.
The new version has the most up-to-date system components and the upgrade needs to be done by creating a new SCG instance (or cluster) and migrating the data from the previous instance (or cluster).
Scripts are being provided for the migration, which will export the data from the previous version and import it to the new version.
Note:
In the SCG administration application, on the top-right burger menu, you can import the data from an SCG instance with the previous version (1 2409) directly. Alternatively, or if the UI based import does not work, you can use data export and import scripts.
The new version provides this script in /opt/unicon/scg/scripts/dataExport.sh
This script needs to be copied to the old instance (must be the primary instance) and made executable
chmod +x dataExport.sh
./dataExport.sh
Running the script will export the data to /tmp/ as a JSON file.
Note:
This JSON file can be imported in the new SCG version using the import dialog, which can be accessed via the burger menu on the top-right of the SCG administration application. You can also use the dataImport.sh script in the new SCG intance.
Via cluster process
Important:
The SCG version 1 2605 comes with an updated system and new MongoDB version. A direct clustering approach for updating from a pre 2605 version needs to be performed using export (from the previous version) and import (to the new version 2605) of the data!
If you are updating to SCG version 1 2605, please continue with the Migration Guide above.
Initial situation: You have an existing Scout Cloud Gateway installation with minimum one instance in use. The registered devices are connected to the SCG server via a DNS entry. When updating to a later SCG version, you want the devices to remain on-boarded and configured as they were before.
To upgrade the version of an SCG installation (A) to a later version (B), create a new instance with version B and then transfer the configuration from A to B using the cluster function. To do so, perform the following steps.
-
Install an additional virtual machine (.ova) with the new Scout Cloud Gateway version B, see Installing the VM.
-
On the machine, configure the hostname and networks, see Setting first configuration settings on VM.
-
Log on to the WebAdmin interface of the new instance B via a browser, see Connecting and logging on to the SCG instance.
Note:
Please do not perform any configuration of instance B. The configuration is automatically applied through the synchronization of the cluster. Instance-specific configuration is done after clustering.
-
From instance B, add the old instance to the cluster:
-
Wait, until the new instance initializes
-
Configure the gateway settings for instance B. To do so, select instance B from the list box under Configuration > Gateways and configure the VPN connections. For further information, see Gateways.
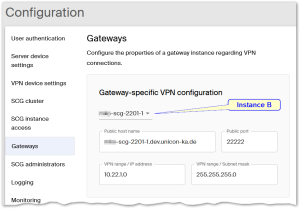
Both gateway instances are now shown with their properties in the Gateways view.
-
In the Gateways view, deactivate instance A, see Gateways view.
-
Shut down the virtual machine A.
-
Set your DNS entry to the IP/host name of instance B.
-
Verify whether instance B allows for the client connections. To do so, you may use the following options:
-
The Gateways view must show the public host name and port of instance B.
-
In the WebAdmin interface of instance B, perform a health check. All components must be up and running.
-
On-board a new device or restart a connected device. The device must be assigned to gateway B Gateways view.
-
-
In the Gateways view, delete instance A.
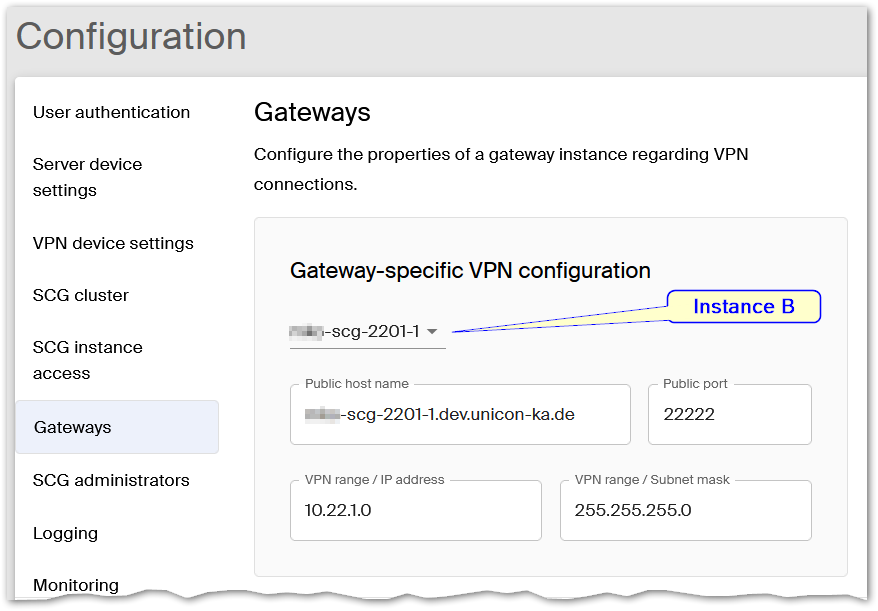
Instance B has now adopted the entire configuration of instance A, including the devices. As soon as a device restarts, it connects to the new instance B.
Note:
Also use this procedure if you want to change the host name of a gateway instance (without updating to a later version).