CIS Problem Reporting
Citrix Provisioning™ allows you to report problems you encounter with servers and sites. The support team uses the information to troubleshoot and diagnose the problem to improve Citrix Provisioning.
How problem reporting works
Problem reporting works by sharing diagnostic information resulting from an event within Citrix Provisioning. It can be performed for a specific Citrix Provisioning server, or for a site:
- If you have an environment with multiple provisioning servers, each has a different SOAP Service user. In such environments, the SOAP Service user must have read\write permissions to the network share when generating the diagnostic bundle.
- If you are reporting a problem for a specific provisioning server, only that server generates a diagnostic bundle that captures the event.
- If you are reporting a problem for a site, each provisioning server in the site generates a diagnostic bundle.
- Save the diagnostic bundle to a shared network drive.
Note:
Citrix® customer support provides instructions on making the diagnostic bundle available to them.
Report a problem
You can generate diagnostic information locally to a ZIP file. Select an empty folder on a shared network drive accessible to all servers included in the problem report.
To report a problem
-
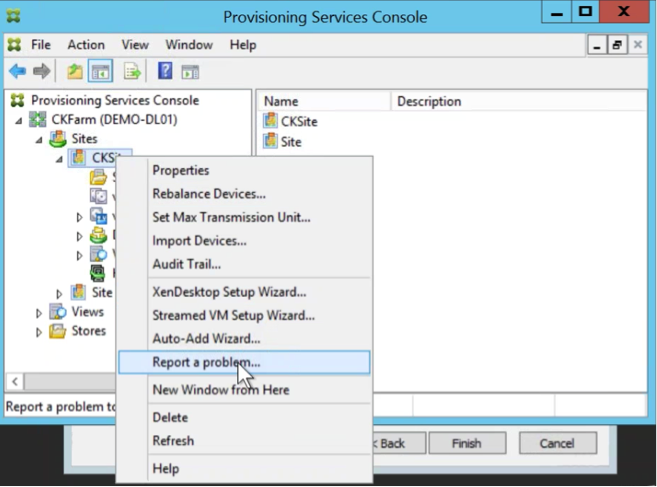
In the Citrix Provisioning Console, expand the Sites node to display the server on which you want to report a problem.
-
Right-click a server to display a contextual menu.
-
Click Report a problem.
-
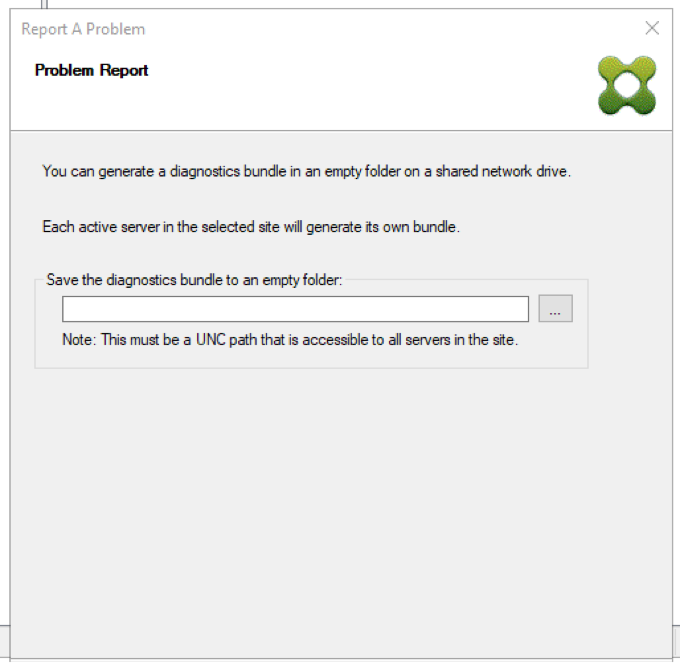
In the Problem Report screen, save the diagnostic bundle to an empty folder. This must be a Universal Naming Convention (UNC) path that is accessible to all servers in the site.
-
Click Next.
Note:
Each server in the selected site generates its own diagnostic bundle.
-
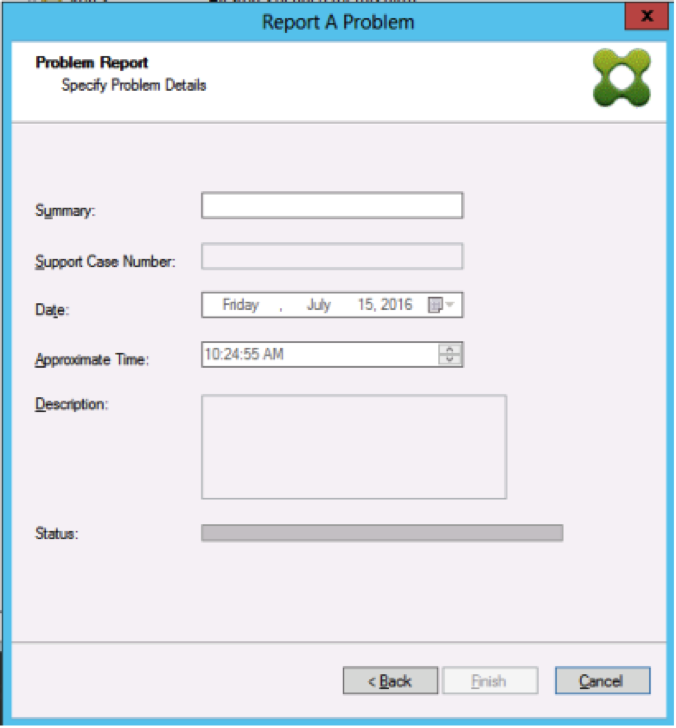
Specify information to help describe the issue. In the Specify Problem Details screen:
- Enter a brief description that summarizes the problem. Once you enter the information for this mandatory field the remaining fields become editable.
- Enter a support case number (optional).
- Select the date when the problem occurred.
- Enter an approximate time when the problem occurred.
- Enter a description that characterizes the problem.
-
Click Finish.
Tip:
After finishing the diagnostic report, the bundle is created on the server. You can view the status of the most recent problem report from Server>Property>Problem Report.
After clicking Finish, the problem reporting function reports the issue for either a single server, or for each server in a site. Each server generates the problem report as a background task and saves the file to a shared network drive.
The Status field displays information about the state of the reporting progress. After the process starts, click Done to dismiss the dialog, and allow the process to continue in the background:
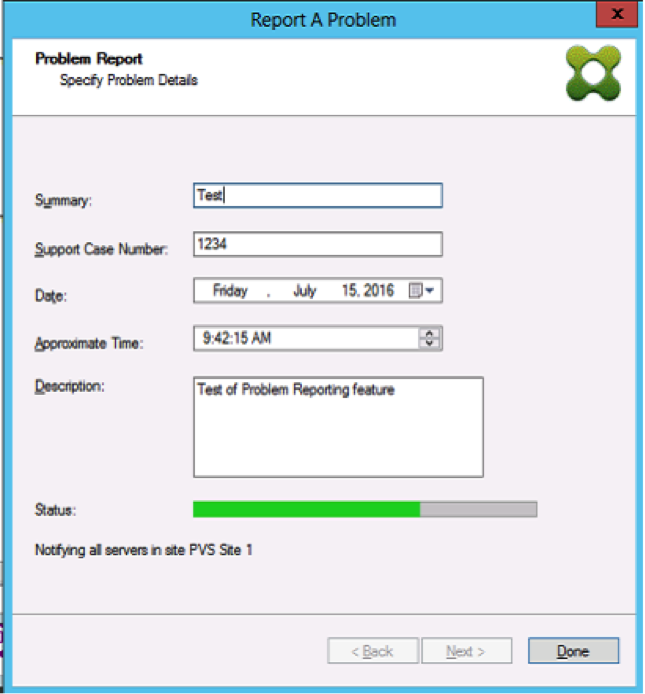
If you choose not to dismiss the dialog, the process continues in the foreground. After the report completes, the Problem Report screen provides additional information Check each Server’s Properties for results. This message indicates that each server has completed its problem report and saves the results.
.png)
After the problem report is generated, you can view the results on the Properties screen. To view the report, select Server>Properties.
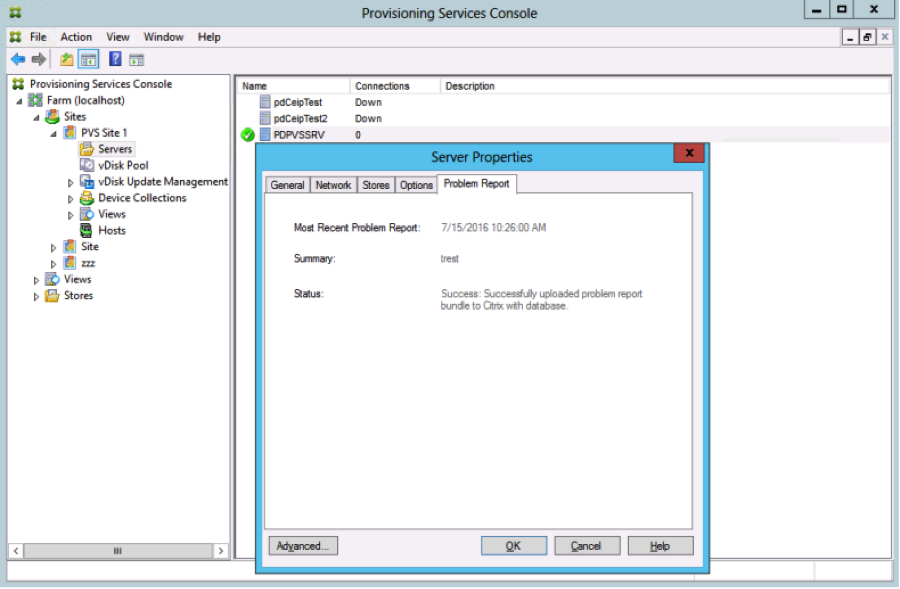
The Problem Report tab displays:
- Most recent problem report. This field displays the date and time of the most recent problem reporting attempt.
- Summary. This field describes the problem. The information is generated from the mandatory summary field specified when the administrator first created the report.
-
Status. Describes the status of the most recent report. It indicates:
- Success or failure
- Whether the report was saved to a shared network drive. If so, the full path to the file is displayed.