File transfer
File transfer is supported between the Linux VDA and the client device. This feature is available when the client device runs a web browser that supports the HTML5 sandbox attribute. The HTML5 sandbox attribute allows users to access virtual desktops and apps using Citrix Workspace™ app for HTML5 and for Chrome.
Note:
File transfer is available for Citrix Workspace app for HTML5 and for Chrome.
Within published app and desktop sessions, file transfer allows file uploads and downloads between the Linux VDA and the client device. To upload files from the client device to the Linux VDA, click the Upload icon on the toolbar of Citrix Workspace app and select the file you want from the file dialogs. To download files from the Linux VDA to the client device, click the Download icon. You can add files during uploading or downloading. You can transfer up to 100 files at any one time.
![]()
Note:
To upload and download files between the Linux VDA and the client device, ensure that the toolbar of Citrix Workspace app is enabled.
You can use a version of Citrix Workspace app that lets you drag and drop files.
Auto-download is an enhancement for file transfer. Files you download or move to the Save to My Device directory on the VDA are transferred to the client device automatically.
Note:
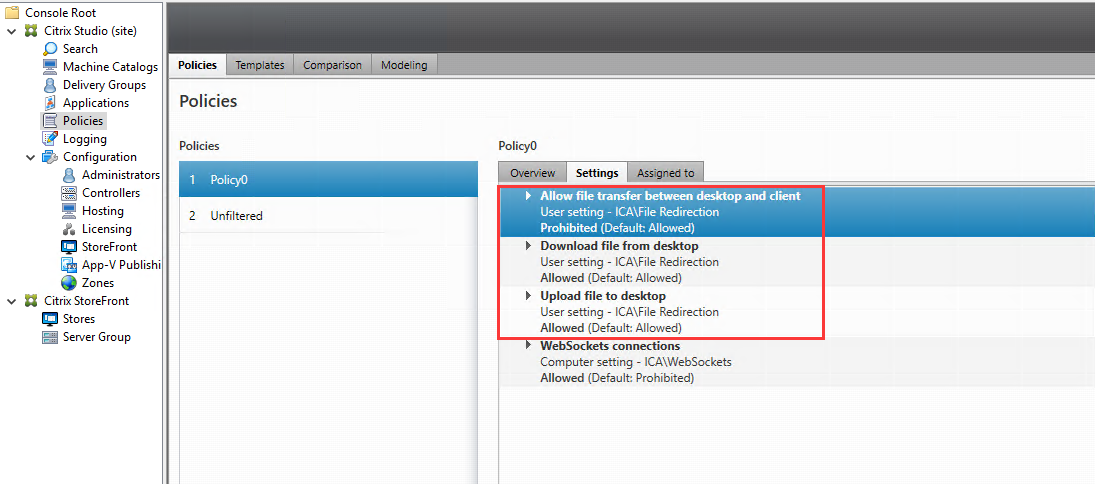
Auto-download requires the Allow file transfer between desktop and client and Download file from desktop policies to be set to Allowed.
Here are some use cases for auto-download:
-
Download files to Save to My Device
Within published desktop and web browser app sessions, files you download from websites can be saved to the Save to My Device directory on the VDA for automatic transfer to the client device. To achieve auto-download, set the default download directory of the in-session web browser to Save to My Device and set a local download directory in the web browser that runs your Citrix Workspace app for HTML5 or for Chrome.
-
Move or copy files to Save to My Device
Within published desktop sessions, choose the target files and move or copy them to the Save to My Device directory for availability on the client device.
File transfer policies
You can use Citrix Studio to set the file transfer policies. By default, file transfer is enabled.

Policy descriptions:
-
Allow file transfer between desktop and client. Allows or prevents users from transferring files between a Citrix Virtual Apps and Desktops™ session and their devices.
-
Download file from desktop. Allows or prevents users from downloading files from a Citrix Virtual Apps™ and Desktops session to their device.
-
Upload file to desktop. Allows or prevents users from uploading files from their device to a Citrix Virtual Apps and Desktops session.
Note:
To ensure that the Download file from desktop and Upload file to desktop policies take effect, set the Allow file transfer between desktop and client policy to Allowed.
Usage
To use the file transfer feature through Citrix Workspace app for HTML5:
-
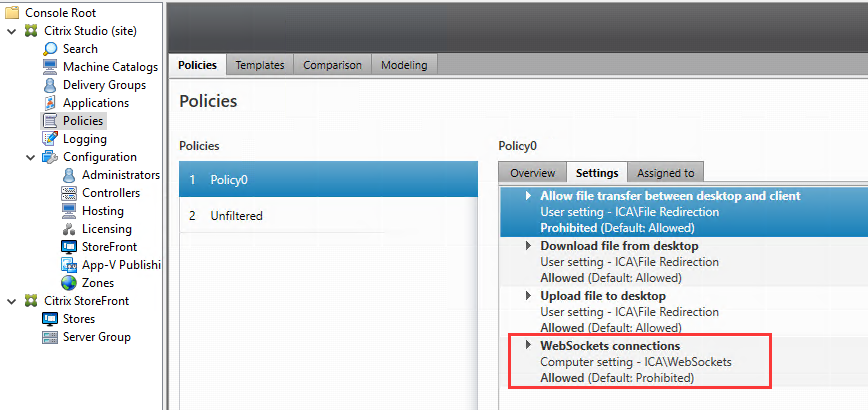
In Citrix Studio, set the WebSockets connections policy to Allowed.

-
In Citrix Studio, enable file transfer through the file transfer policies described earlier.
-
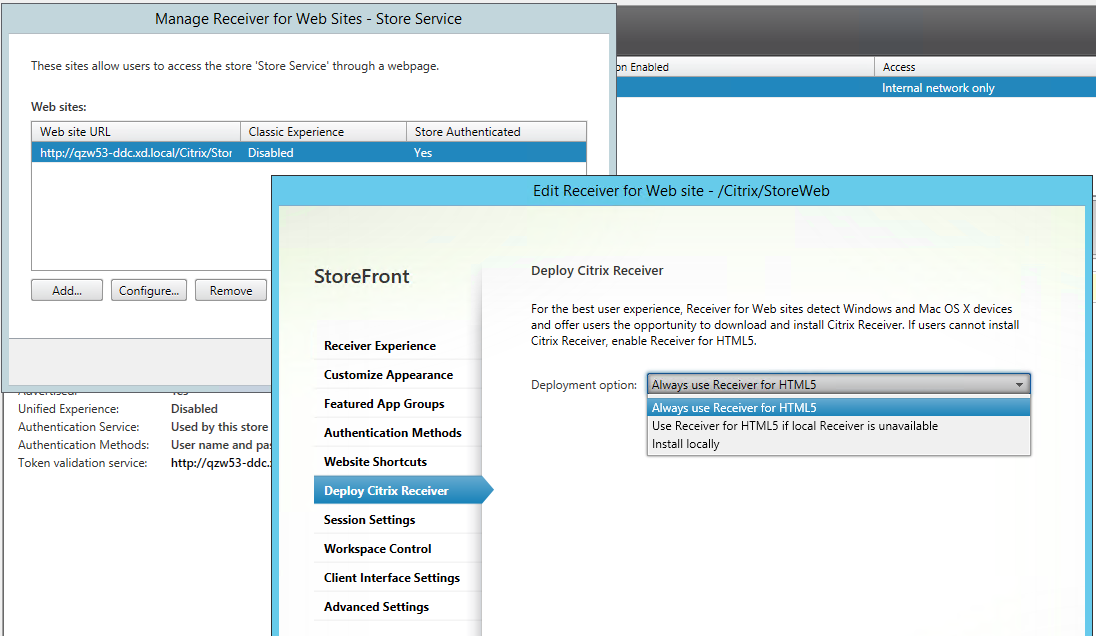
In the Citrix StoreFront management console, click Stores, select the Manage Receiver for Web Sites node, and enable Citrix Receiver™ for HTML5 by selecting the Always use Receiver for HTML5 option.

-
Launch a virtual desktop or web browser app session. Perform one or more file transfers between the Linux VDA and your client device.
To use the file transfer feature through Citrix Workspace app for Chrome:
-
Enable file transfer through the file transfer policies described earlier.
-
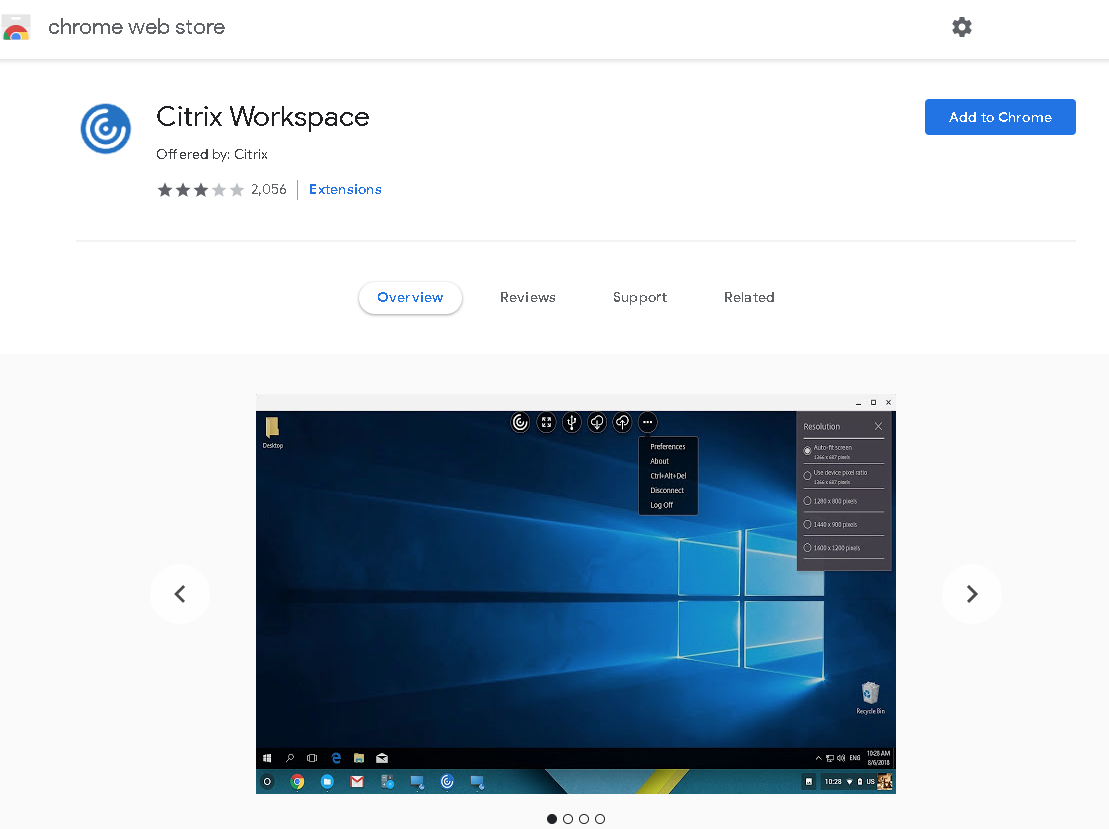
Obtain Citrix Workspace app from the Chrome Web Store.
Skip this step if you already added Citrix Workspace app for Chrome to the Chrome Apps page.
-
Type Citrix Workspace for Chrome in the search box of Google Chrome. Click the search icon.
-
Among the search results, click the URL to the Chrome Web Store where Citrix Workspace app is available.

-
Click Add to Chrome to add Citrix Workspace app to Google Chrome.
-
-
Click Citrix Workspace app for Chrome on the Chrome Apps page.
-
Type the URL of your StoreFront™ store to connect.
Skip this step if you typed the URL before.
-
Launch a virtual desktop or app session. Perform one or more file transfers between the Linux VDA and your client device.